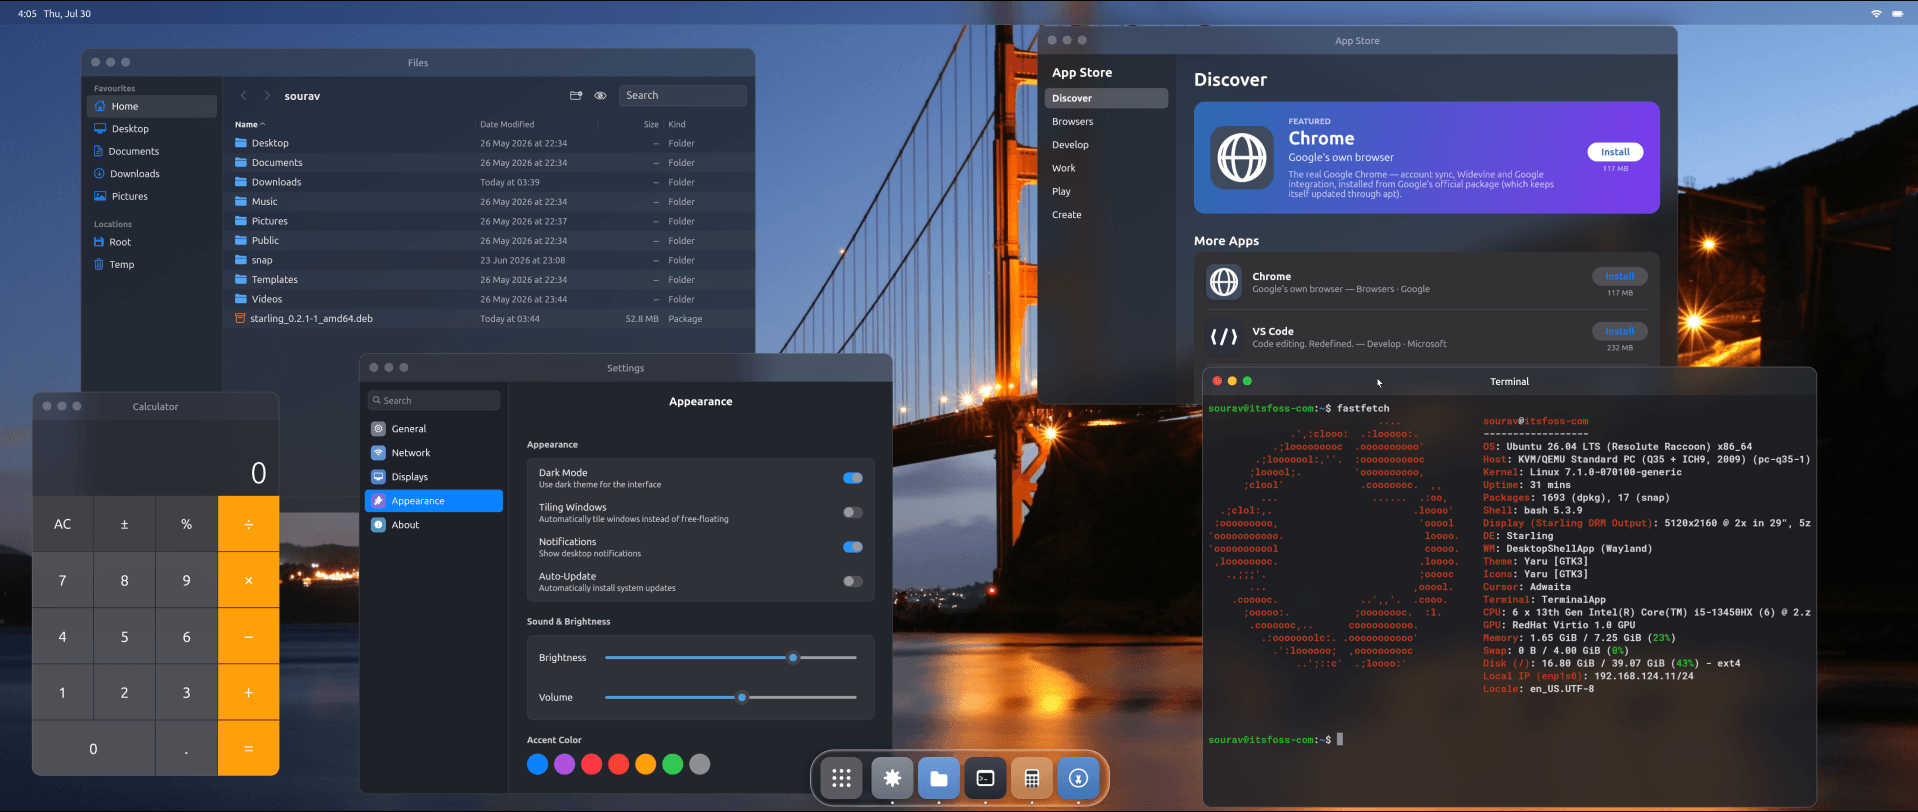
Michael Catanzaro is stepping away from managing GNOME's security issue tracking, a role he has held largely by himself since November 2020, with support from Red Hat. He calls the work mostly administrative, following each report from the moment it lands to whenever it gets fixed or the clock runs out, and requesting a CVE once that happens.
Come November 1, 2026, Michael will stop tracking newly reported security issues, only focusing on issues that were already in the pipeline before that date. By December 1, he anticipates that every disclosure deadline tied to that remaining batch will have passed, and his part in handling issues will be done.
Alongside that, he is also changing how GNOME handles vulnerability reports overall. Pointing to the rise of AI-generated security submissions, he says that for issues reported on or after August 1, 2026, the disclosure deadline is now just 30 days, a 60-day drop from 90.
And projects that ban AI-generated contributions have to take note. Any security issues submitted to GNOME Security won't be forwarded to such projects, given how much of what comes in today carries AI involvement. Michael will instead close the report in GNOME Security's own tracker and reach out to the project's maintainers directly to flag that it exists.
Someone needs to step up
Michael is currently looking for someone to take the role over, but not just anyone. He wants an experienced member of the GNOME community, someone who already knows their way around the project, to step in.
He's offered to help whoever takes it on get started, but is clear that this isn't a good task for newcomers.
Whoever takes over would inherit the workflow that runs through a form on security.gnome.org, which funnels submissions to a security team that aims to acknowledge new reports within two business days.
Whatever gets submitted through that form is used to open a confidential issue on GitLab, which is then assigned to the relevant project maintainer as the primary handler.
They would also need to take over the archaic way of keeping track of all the security issues for GNOME, which is a basic wiki page on GNOME's GitLab instance. It has to be updated manually, with every new report, fix, and disclosure going into separate tables split by year and project.
Other Linux projects already run something closer to that. Ubuntu publishes searchable, filterable security notices tied to CVE IDs. Fedora and Red Hat route tracking through Bugzilla instead, where a parent bug logs the underlying flaw, with separate tracking bugs filed against each affected package.
You can go through Michael's announcement for more information.
It's been nearly five years since Alacritty made its debut and became a favorite of many power terminal users.
By power users, I mean people who configure Vi mode everywhere, even in graphical IDE.
Personally, I prefer Kitty and I have written some tutorials on Kitty. But whenever we share our Kitty articles, someone would mention Alacritty. And that kind of forced me to try Alacritty.
But this article is not about comparing Kitty and Alacritty. It's merely me sharing my experience and exploration of Alacritty.
What is Alacritty?
Alacritty is a modern terminal emulator designed with a strong focus on performance. It is a GPU-accelerated terminal that uses OpenGL technology to offload rendering tasks entirely to your graphics processor rather than relying heavily on the CPU. Out of the box, Alacritty comes with a decent set of defaults. Which seems to be true as you really don't need to do much to make this terminal work right away.
Exploring Alacritty
Alacritty comes with several 'cool features' that will elevate your terminal workflow. These are Vi mode, scrollback buffer search, regex hints and multi-window approach.
📋
The Alacritty interface you see in the videos and screenshots here are slightly modified by me. I have shared my tweaking and configuration changes in the later section of this article.
Scrollback navigation with keyboard
Alacritty features a built-in Vi mode, which you can easily access using the keyboard shortcut Ctrl + Shift + Space.
Vi Mode in Alacritty
Once you are in this mode, you can move around your scrollback buffer using standard Vi navigation keys. This means you don't need to reach for your mouse at all just to scroll through your text, keeping your hands exactly where they belong on the keyboard.
Text selection
The Vi mode can do several types of selection and copy text entirely with keyboard shortcuts.
When you are in Vi mode, pressing Alt + v enables semantic selection, which is the one I use most often. Semantic selection is a smart feature that lets you select distinct words or semantic blocks of text based on specific characters acting as boundaries.
0:00
/0:21
Semantic Select
If you want to perform a standard manual selection, simply press v to start selecting from the cursor, then move the cursor in any direction to select your text.
0:00
/0:11
Normal Select
Now, instead of lowercase v, if you press Shift + v, a line selection mode is enabled, allowing you to quickly select entire lines of text at once.
0:00
/0:11
Line Select
Searching inside terminal
When you have a lot of output in your terminal scrollback and need to track something down, Alacritty has built-in search functions. You can press Ctrl + Shift + F to start a forward search.
0:00
/0:12
Forward Search
Or Ctrl + Shift + B to initiate a backward search.
0:00
/0:11
Backward Search
Once you type your query, you can press Enter to jump between the matches sequentially.
Alternatively, if you are already inside the Vi mode, you can simply press / and type your search term directly.
0:00
/0:25
Search inside Vi Mode
I personally use the Vi mode search because it gives me extra flexibility. It allows me to semantic-select/line-select the entire matched term even when only a partial match is found.
☠️
Don't judge me for using light themed terminal 😸
Moving between brackets
A feature I love while reading configuration files is bracket matching. I usually print the file to the terminal and jump straight into Vi mode.
Once there, you can place your cursor on top of any bracket and press %. This will instantly jump your cursor to the matching opening or closing bracket.
0:00
/0:25
Matching brackets
At times, this is much more handy than opening the file up in a separate text editor. Especially when I am using it with the Zellij terminal multiplexer.
Configuring Alacritty
Alacritty does not need any user configuration to work properly and access its important features, as it comes right out of the box with some highly sensible defaults.
Still, there are plenty of areas that we can customize to tweak it to perfection. Here, I will take you through some of the options that I personally changed in my Alacritty setup.
Creating a single configuration file for all your features seems easy at first. However, if a tool supports multiple configuration files and imports, it is always a better practice to divide the config into relevant, modular parts.
Doing this will give you a much easier editing experience later when you need to tweak specific behaviors.
For Alacritty, all configuration files should be located in the ~/.config/alacritty/ directory. The directory structure in my system looks like this:
You can see that I have split the configuration files into separate items for:
Main config: alacritty.toml
Keybindings: keybindings/keybindings.toml
Themes: themes <name>.toml
Now, once you have all your configuration files split up, you need to import the other configs into your main file alacritty.toml so that Alacritty can actually read them.
Open up your alacritty.toml file in a text editor and add the import lines to the top of your file using the import array under the [general] section:
To change font in Alacritty, in the config file, add the following lines:
[font]
size = 12
[font.normal]
family = "JetBrains Mono"
style = "Regular"
[font.bold]
family = "JetBrains Mono"
style = "Bold"
[font.italic]
family = "JetBrains Mono"
style = "Italic"
[font.bold_italic]
family = "JetBrains Mono"
style = "Bold Italic"
The above configuration is self-explanatory. Of course, any font you want to appear in your terminal must actually be installed on your system first.
To find the exact name of the font you want to use, you can either open up a font-manager GUI application, or query your system via the command line using fc-list and filtering for your desired font family:
fc-list | grep "jetbrains"
List fonts in the system
Set scrollback history
We have already seen some great features relating to scrollback navigation, selection, and searching. To make these features truly efficient, you need a comparatively large scrollback buffer so you don't lose your terminal history too quickly.
In your main Alacritty configuration file, you can set this by adding the following lines:
[scrolling]
history = 10000
I would suggest caution when increasing this value much beyond 10000. Because this scrollback history is stored directly in your RAM, a massive scrollback buffer can negatively affect your system performance.
Especially when you accidentally dump a massive log file or print exceptionally long files directly to the terminal.
Change the shell
Most Linux distributions come with Bash as the default shell, and sometimes you may want to use an alternative shell like Zsh.
You don't actually need to change your entire system-wide default shell just for this. You can simply change the shell executed inside Alacritty itself.
To do this, add the following lines to your main alacritty.toml file:
[terminal]
shell = "/usr/bin/zsh"
To know the shell location, use:
which zsh
Opacity and blur
Alacritty allows you to change the terminal window opacity across all desktop environments, and it even lets you add a native blur effect if you are running a KDE Plasma Wayland session.
To configure this, add the following lines under the [window] section of your configuration:
opacity = 1.0
blur = true # enable this for KDE Plasma to get blur
Keybindings
The best way to manage custom shortcuts is by adding them via a separate keybindings.toml file and importing it into your main configuration, as we looked at earlier.
In this file, you can define keybindings using the following syntax:
Here, [[keyboard.bindings]] defines the section. For every new keybinding you want to map, a separate [[keyboard.bindings]] section must be used.
Inside this section, you have a few core parameters to customize:
key: The main key used to perform the action (e.g., A, B, 2, 3, |, /).
mods: The modifier keys required for the shortcut. You can use keys like Control, Shift, Alt, or Super. To combine multiple modifiers, separate them with a pipe symbol (|)—for example, Control|Shift triggers on a Ctrl + Shift action.
mode: Defines a specific terminal state (such as Vi mode) that must actively be running for this shortcut to take effect.
action: The actual command or event you want to perform. You can find a complete action reference list directly in the official documentation.
Just like keyboard configurations, the [[mouse.bindings]] headers must be separate sections for each distinct mouse shortcut. Inside each section, you define:
mouse: The specific mouse button you want to map. Options include Right, Left, Middle, Forward, Back, WheelUp, and WheelDown.
action: The command you want to perform. This uses the exact same action references as the keyboard bindings.
For instance, I have an 8-button mouse, so I added the Forward button to quickly toggle into Vi mode, and the Back button to instantaneously open a fresh Alacritty window.
Color schemes
Alacritty allows you to completely alter the appearance of your terminal using custom color configurations.
Out of the box, it expects you to modify the hex color values for various display elements manually. If you don't want to build a palette from scratch, you can visit our GitHub repository to grab several preset color schemes for Alacritty.
Alacritty color schemes
Once you find a theme you like, you can drop it into your ~/.config/alacritty/themes/ directory, import it into your main config, or tweak the individual color blocks within that file to customize the look entirely to your liking.
Alacritty is available in the default repositories of most popular distributions. If you are using Ubuntu, install it using the apt package manager:
sudo apt install alacritty
Fedora users can install it using the DNF package manager:
sudo dnf install alacritty
For Arch Linux users, install Alacritty from the extra repository using the command:
sudo pacman -S alacritty
Wrapping Up
One thing to note is that, as far as I know, Alacritty does not support viewing images natively from the terminal, though there is some Sixel image support development floating around.
Personally, I don't care much about image support because I am not working on images from the terminal anyway. But if that is an absolute requirement for your workflow, you may feel a bit disappointed.
There are exciting new terminal emulators like Ghostty and Ptyxis these days, and I have given them a try for a while. Now, I have been using Alacritty for the past couple of months as my main terminal, paired with Zellij multiplexer. I like this setup. It may make me forget Kitty, who knows.
What's your take on Alacritty? Do you use it as your main terminal emulator? If not, which one is your favorite? Do mention it in the comments below!
Our brains are not meant to be locked in for eight straight hours during a work/school day. That's not how these little pink sponges work, no matter what hack productivity gurus on YouTube might try to sell you.
What works is cutting the friction around your workflow, and staying on top of the mental nerfs you already carry, plus the ones that pile up over the day. There's a whole ecosystem built around fixing that, ranging from break reminder apps, Kanban boards, to Pomodoro timers and phone-to-desktop bridges.
On GNOME, you don't need to leave your desktop to get most of this. The extension ecosystem already covers timers, notes, clipboard history, and phone syncing, without asking you to juggle five different subscriptions.
Here are eight extensions worth having, plus a native GNOME feature that handles some of this for free.
📋
This is a productivity-focused list. If you want a quick overview of extensions that add to your experience, we have a separate list for that.
1. GSConnect
Every time your phone buzzes, and you have to pick it up just to check what it was, that's a small amount of time taken away from whatever you were doing. GSConnect gets rid of that by putting your phone's notifications right on your desktop, so you can glance, decide it's not urgent, and stay exactly where you were.
Of course, this could also go the other way, making you waste more of your time, but that's on you. ☠️
It's a full implementation of KDE Connect built specifically for GNOME Shell. Beyond notifications, you get SMS from your keyboard, a synced clipboard between your phone and your Linux machine, and file sharing that goes both directions.
2. Caffeine
Caffeine does one thing. It stops your screen from dimming, locking, or suspending while it's switched on. Click the coffee cup icon in the top bar, and GNOME leaves your screen alone until you turn it back off.
It sounds minor until you're three slides into a presentation and the screen goes black, or you're deep into a long article and the lock screen interrupts you mid paragraph. You can also scroll on the panel icon to toggle it, and there's command line support if you'd rather script it.
Alternatively, you could fully disable system suspend via the Settings menu under the Power page (inside Power Saving), but that's not a good idea if you are running a laptop that needs to be functional during long sessions without AC power.
3. ddterm
Hit a keyboard shortcut, and a terminal slides down from the top of the screen. Hit it again, and it slides back up. With ddterm, you don't need to switch through workspaces or hunt for a terminal window buried under everything else.
Restart your session and every tab comes right back, and resizing is just a matter of dragging on the outer edge. The preferences panel covers the rest if you go looking for it.
It also runs natively on Wayland, which isn't something every drop-down terminal extension can claim, and its development has stayed consistent for years now, with a steady flow of releases rather than long stretches of silence between updates.
4. Clipboard Indicator
Clipboard Indicator keeps a searchable history of everything you copy, text and images both, so you're not relying on memory or copying the same thing twice.
The feature list goes further than most clipboard managers bother with. Pin entries to keep them at the top, tag them to stay organized, search with regex if you need precision, and edit an entry directly from the menu instead of copying it out, fixing it, and copying it back in.
For anyone handling sensitive information, a private mode pauses history tracking on demand, and specific apps like password managers can be excluded from tracking entirely.
5. Advanced Alt-Tab Window Switcher
GNOME's default Alt+Tab is fine until you have a dozen windows open and no way to tell them apart at a glance.
Advanced Alt-Tab Window Switcher or AATWS replaces all three of GNOME's built-in switchers with one that actually helps you find what you're looking for. This includes filtering, sorting, and a type-to-search mode that matches by title, app name, or even the executable behind it.
It's not limited to switching either. Close windows, move them between workspaces or monitors, pin one always on top, or launch a new instance of an app, all without leaving the switcher.
For anyone whose workflow is spread across multiple monitors with a lot of windows open at once, this cuts out most of the clicking and squinting that the stock switcher makes you do.
6. Tiling Shell
Tiling Shell brings proper tiling window management to GNOME, going well past the basic two column split GNOME ships with by default. Drag a window and a snap assistant shows you where it'll land, with a built in editor for building your own layouts from scratch.
Layouts aren't rigid either. Span a window across multiple tiles, resize adjacent tiled windows together, and set a different layout for each workspace on each monitor.
Keyboard shortcuts handle the tiling too, so dragging windows around with the mouse is optional rather than being a neccessity.
7. Cronomix
Most productivity extensions do one job. Cronomix does several. Timer, stopwatch, Pomodoro tool, alarm, to-do list, time tracker, and even flashcards, all bundled into a single dropdown instead of five separate tools competing for your attention.
The Pomodoro and timer functions cover the classic work-then-break rhythm, while the to-do list and time tracker give you somewhere to actually log what you did with the time instead of making guesses at the end of the day.
It follows a very different approach compared to the single-purpose extensions elsewhere on this list.
8. Notes With History
A lot of the sticky note extensions on GNOME haven't been touched in years, and installing one on a modern system usually means finding out the hard way. Notes With History puts a menu of notes in your panel instead of scattering note windows across your screen.
Click the icon, pick a note, and it's all there. 📝
Notes can be reordered to keep the most relevant ones near the top, and the panel icon itself is customizable so it's easy to spot at a glance.
9. Freon
A sluggish system without an obvious cause can be very annoying, especially when you are in the middle of a time-sensitive task with your manager breathing down your neck.
Freon puts important system stats like CPU, disk, and GPU temperature, alongside fan RPM and voltage info, right in the top bar for you to quickly figure out if there's a system-wide slowdown or an app that's misbehaving.
You can pick which sensors to show, switch between Celsius and Fahrenheit, and set the refresh rate for the metrics display. Though you will need your GPU manufacturer's driver installed to get GPU readings.
Bonus Tip ✨
If you don't want to install anything at all, GNOME has a few tricks up its sleeve, tucked inside Settings. Since GNOME 48, there's a Digital Wellbeing section that handles screen time and break reminders natively.
It tracks how much time you spend on screen each day and compares it against previous days and weeks.
You can set a daily screen time limit that triggers a notification once you hit it, with an option to turn the screen grayscale afterward as a nudge to step away. There are also built-in eyesight and movement break reminders.
It's not as configurable as something like Cronomix or a dedicated break reminder extension, but if you're already on GNOME 48 or later, the most basic productivity features are sitting right there waiting to be turned on.
Humble Bundle and O'Reilly have put together a pay-what-you-want Linux collection called Linux: All the Things (partner link), and it's built to take you from basic command-line comfort to container orchestration across fifteen eBooks.
O'Reilly doesn't really need an introduction. They are one of the most trusted technical book publishers. This bundle leans on some of their strongest Linux titles, including Learning Git, Linux Pocket Guide, and Practical Linux System Administration, alongside a handful of more specialized picks for security testing and Kubernetes.
All fifteen eBooks come as DRM-free PDF and ePUB files. Which means they're yours to keep forever once you buy them. Whatever amount you pay goes toward the publisher, Humble, and Code for America, a nonprofit working on making government services simpler and more accessible. If you use our link, a tiny fraction will come to us as well (read our affiliate policy). Just wanted to be clear about that.
Bundle is divided into two tiers with different pricing and sets of books.
Tier 1: Pay $5.90 or More for 5 Books
The entry tier costs $5.90 and gets you five books, leaning more toward Linux internals than beginner material.
Linux Observability with BPF covers using BPF for performance analysis and network monitoring, the kind of thing you refer to when you're troubleshooting a production system rather than just running one. Linux System Programming and Understanding the Linux Kernel go a level deeper still, covering system calls, process management, and how the kernel itself is put together.
The other two books in this tier are Git references. Git for Teams focuses on building efficient, user-centered Git workflows across a team, and Git Pocket Guide is a quick-reference companion for common git commands.
Tier 2: Pay $29.50 or More for All 15 Books
Paying $29.50 or more unlocks the full fifteen-book set. Do note that the tiers above that, $34.50 up to $49.50, don't add any more books. That extra money just routes to O'Reilly, Humble, and Code for America.
This tier adds two more Git titles to round out what Tier 1 started. Learning Git is a from-scratch introduction for anyone still fuzzy on branches and commits, and Version Control with Git goes deeper into collaborative workflows and tooling.
A cluster of books here cover core Linux skills. Linux Pocket Guide, now in its fourth edition for its 20th anniversary, is a command reference built for the terminal. Learning Modern Linux and Efficient Linux at the Command Line build on that with cloud-native context and practical shell efficiency, while Linux Cookbook and Practical Linux System Administration round things out with recipes and day-to-day sysadmin practice.
Learning Kali Linux covers security testing, penetration testing, and ethical hacking basics, useful if you want to poke at your own systems before someone else does.
The last two books look are more advanced and geared towards DevOps. Kubernetes: Up and Running is a solid on-ramp into container orchestration, and Network Programmability and Automation covers automating network devices instead of clicking through them one by one.
📋
Do checkout for the edition of those books, though. Sometimes, these bundles may include older editions.
🛒 Get the Bundle
All fifteen books are DRM-free PDF and ePUB, so they're yours to keep and move to whatever device you actually read on.
If even a couple of these titles are already on your reading list, $29.50 for all is still a good deal. And part of your payment supports Code for America, which is similar to doing charity yourself.
No! It will take quite some time, and you will perish before that happens. Elon Musk has announced that X's entire codebase will go open source once xAI wraps up an internal review for security vulnerabilities. He says they will publish the whole thing without holding anything back.
Further stating that they are inviting third-party reviewers to confirm that what gets published actually matches what's running in production.
Once we have completed our review for security vulnerabilities, we will make the entire codebase of 𝕏 open source, with no exceptions.
Moreover, we will invite third party reviewers to examine the system that is running to confirm that the open source code is what is running.…
The onboarding of reviewers could be a move to tackle a common complaint against corporate open source releases where the published code is different from what's actually deployed.
Of course, skepticism around the announced move has shown up as expected.
JerryRigEverything, a man known for his knack for taking smartphones to their breaking point, replied to the original tweet (xeet?) saying that:
Don't you say this every few months? That tracks.
And he's not wrong. Elon has made open source promises like this before, for X's codebase and for Grok's models alike, and not all of them have held up.
A pattern to take note of
X's transparency push goes back further than Grok. In March 2023, not long after taking over the platform, Elon had X (called Twitter back then) publish a partial version of its recommendation algorithm on GitHub, the platform's first real step toward opening up its codebase.
Then there's Grok 1. He tweeted back in March 2024 that xAI would open source Grok. Six days later, the company delivered, publishing the base model's weights and architecture under Apache 2.0.
In August 2025, xAI put the weights for Grok 2.5, its 2024 flagship, up on Hugging Face (listed there as "Grok 2"). Elon said at the time that Grok 3 "will be made open source in about 6 months."
That puts it somewhere in February 2026, a window that's now been closed for months with no sign of Grok 3 on Hugging Face.
Following that, in January 2026, the code behind the "For You" feed's ranking algorithm went open source too, landing in a separate repository built on a Grok-based transformer model.
This is the one that actually got the update it was promised, picking up a substantial refresh in May 2026. And more recently, Grok Build followed on July 15, the same day as the X open-sourcing announcement, with xAI publishing the coding agent's Rust source and terminal interface on GitHub under Apache 2.0.
The record, overall, is mixed rather than uniformly bad. The "For You" algorithm got the update it was promised, the 2023 algorithm release didn't (you can check the repo linked above), and Grok 3's six-month window closed back in February 2026 with nothing to show for it.
An open source, speech-to-text tool for Linux called Vocalinux has just introduced its 0.14 beta release, bringing about a mix of refinements that touch keyboard shortcuts, remote transcription, and Wayland reliability.
We kick things off with the most important usability addition. Earlier, users were stuck with the default toggle or push-to-talk bindings for recording audio during transcriptions.
Now, it is possible to set keyboard shortcuts via the Settings menu, allowing you to create a diverse range of keybind combinations using the Ctrl, Alt, Shift, and Super keys paired with any letter or number key.
Likewise, on GNOME's Wayland session, text injection is possible again when a bare XKB engine is configured, and whisper.cpp no longer defaults to using every CPU core on hybrid Intel and AMD laptops.
Remote API users get something too, where the Remote API engine now supports FunASR and SenseVoice models through OpenAI-compatible endpoints.
What is Vocalinux?
The about dialog and settings menu of Vocalinux.
I talked about the new Vocalinux release, but I never fully explained what it was.
It is a free and open source voice dictation app for Linux, released under the GPL-3.0 license. It lives in your system tray and lets you dictate into almost any text field on your desktop, terminals, browsers, IDEs, office apps, wherever your cursor happens to be.
And everything runs locally, so your voice data stays on your machine the whole time.
The choice of speech recognition engine isn't locked either, as you get whisper.cpp as the default choice, followed by Whisper for PyTorch and NVIDIA configs, VOSK for lightweight setups, and Remote API for offloading to a network server.
I tried testing this beta release to see what it offered. I tried running it on two separate distros, Fedora Workstation and Ubuntu; the result for both runs was an app refusing to launch via the app launcher or the terminal.
It eventually did launch on Ubuntu after I followed some troubleshooting steps, but the app was unresponsive and had to be terminated. Even so, I am not too bummed out by this, as such are the risks associated with pre-release software.
Get started
You can get a quick start by trying out the demo on the Vocalinux website, which runs SpeechRecognition on your web browser. Naturally, that's for testing purposes only.
If you want to locally run speech-to-text on your Linux computer, then you can install Vocalinux by running this script:
🚧
Always verify such scripts before running them on your computer.
After the installation finishes, either run vocalinux or find the app icon in the application launcher. If you get caught up choosing between the engines, there's a comparo that should make your decision easier.
If you were looking for it, the source code for Vocalinux lives on GitHub.
Also, running the installer on a non-Debian-based distro like Fedora, will make it throw a warning or two about needing to install dependencies manually, take a note of that before proceeding.
My thanks to Phoronix for bringing this tool to my attention. 😄
Linux Mint has taken the slow road to Wayland while everyone else rushed ahead, and it looks like that paid off. Cinnamon's Wayland session is dropping the experimental label with Mint 23 this Christmas, shipping alongside X11 as a fully supported option.
Most microcontroller boards support Lua as an afterthought. The ELM11-Feather from BrisbaneSilicon builds around it. A GOWIN FPGA runs the whole show with no separate CPU, giving you Lua at the application layer, C for drivers, and VHDL/SystemVerilog for the hardware itself.
Joey Castillo's Open Book started as a DIY soldering project back in 2020. Six years later it's back as Open Book Touch, a proper ready-to-use e-reader with a 4.26-inch touchscreen, ESP32-S3, microSD, user-replaceable battery, and no DRM.
One developer, a few months of work, and Chatto is now open source under AGPL-3.0. It's a self-hosted team chat built to be light and simple enough to run by just launching an executable.
GNOME is working on an app called Test Center that would make trying experimental features less of a gamble.
📚 Linux Learning Offers
There are a few offers I came across that will help you improve your Linux skills, personally or professionally.
First is Linux Foundation offering upto 40% off on its training courses and certification exams. For people looking to make a career in the field of Linux and IT, a certification on Linux, Kubernetes and other related technologies can be of help.
Even if you don't want to go for certifications, you should always thrive for learning more. Humble Bundle O'Reilly collection is packed with Linux and Unix books, covering everything from shell scripting to system administration and kernel internals. This should be of interest to most Linux users, professional or not.
And part of the money gets donated to Code for America.
Third and last, my friend has created an "AI Engineer Bootcamp" course because AI is now a useful tool, even Linus Torvalds thinks so. If this is something that interest you, you can get it an additional discount with custom link.
🧠 What We’re Thinking About
Like a zombie back from the grave, the SCO vs. IBM lawsuit, one of the longest-running legal sagas in open source history, isn't dead yet.
Cursor has an unpatched zero-day on Windows where dropping a file named git.exe at the root of any repository causes it to execute automatically when the project opens. This was known to them for months and has not been patched yet.
🧮 Linux Tips, Tutorials, and Learnings
I have been using Trello since 2013, watching it slowly turn into something else after new ownership stepped in. I set out to find what Trello used to be, across seven open source tools.
Seven Gentoo-based distros for people who want what Portage offers without starting completely from scratch. We have covered desktop use, penetration testing, security hardening, and audio production.
The compose key has been in Linux desktops for years, and most people have never touched it. Once you assign a key in GNOME settings, short two-character sequences let you type accented letters, copyright symbols, degree signs, and more.
The ORICO 8848U4 is a 4-bay USB4 NVMe enclosure that connects over Thunderbolt and shows up as native NVMe devices on Linux without requiring any driver installation.
The indie Linux handheld space is getting interesting, with many tinkerers and small companies trying their hand at crowdfunding to fund their creations.
Why should you opt for It's FOSS Plus membership:
✅ Ad-free reading experience ✅ Badges in the comment section and forum ✅ Supporting creation of educational Linux materials ✅ Free Linux eBook
🗓️ Tech Trivia: On July 15, 1928, the ENIGMA cipher machine entered service with the German Army, encrypting messages via rotor wheels and swappable patch cables. Polish cryptographers first cracked it in 1932, sharing their methods with Britain in 1939, which let Bletchley Park read German traffic throughout WWII.
🧑🤝🧑 From the Community: Pro FOSSer Ernest has kicked off a rather interesting thread, asking other FOSSers what they understand of AI.