Have you ever heard of do it all software? If not, then the VS Code will be the perfect example for it.
You can find support for almost every programming language possible to plug-ins that will let you extend its features more than you can imagine.
One of which is using the VS Code as a markdown text editor.
The easiest way to get the preview pane for markdown is to press the Ctrl + K and then V.
Want more details? Here you have it.
How to preview markdown in VS Code
There are two ways to preview markdown in VS Code:
Using the side panel (recommended)
Open preview in the new tab
Before we get into details, make sure the file you are working on has the .md extension (indicates markdown file).
Preview markdown on the side panel
There are two ways you can get the preview panel in markdown:
Using shortcut
By pressing the preview button
Using shortcut
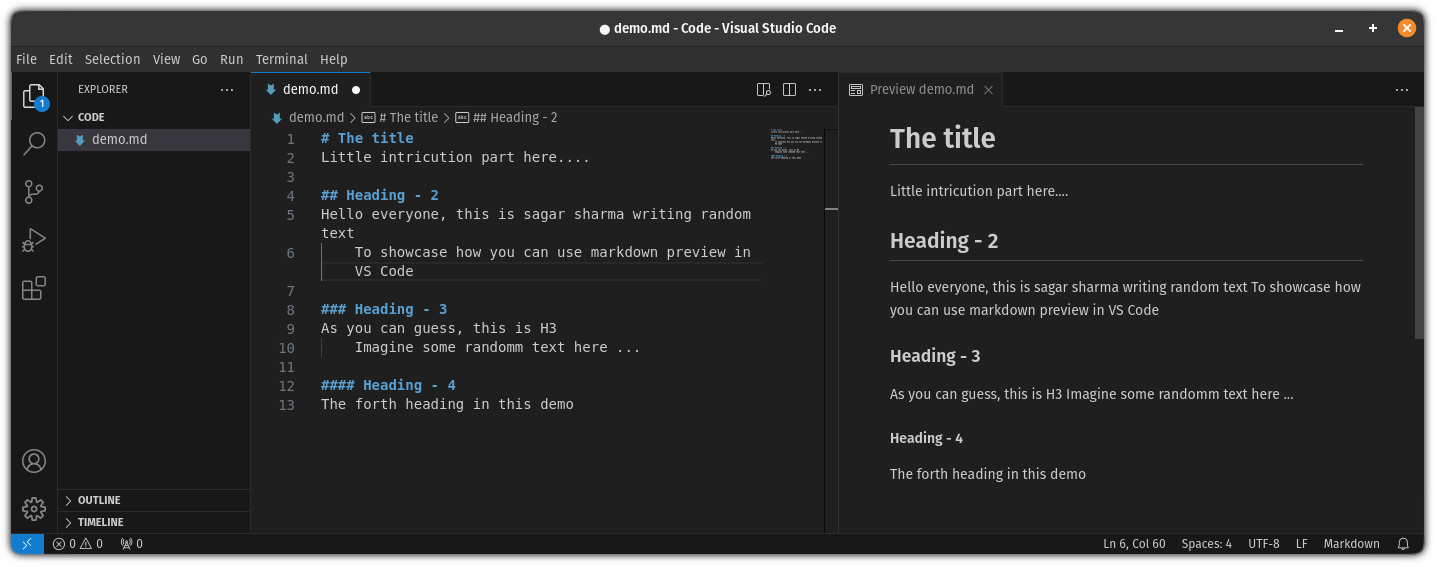
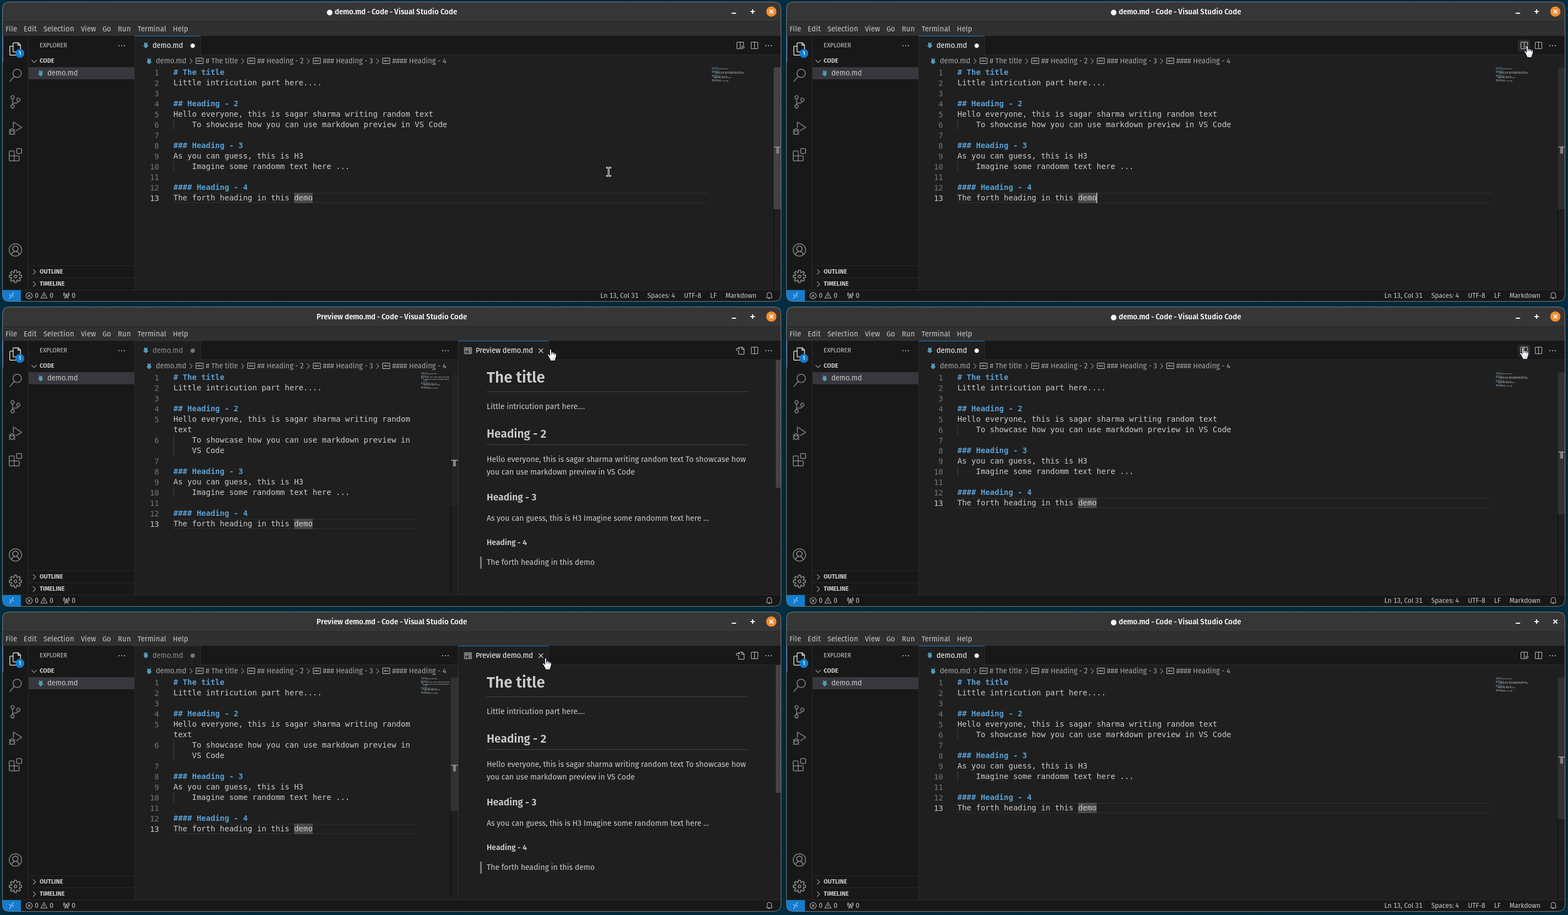
If you want to use the shortcut, all you have to do is press the Ctrl + K and then press the V key and it will bring the preview panel:
As you can see, it brings a preview panel to the right side of the current file.
Using the preview button
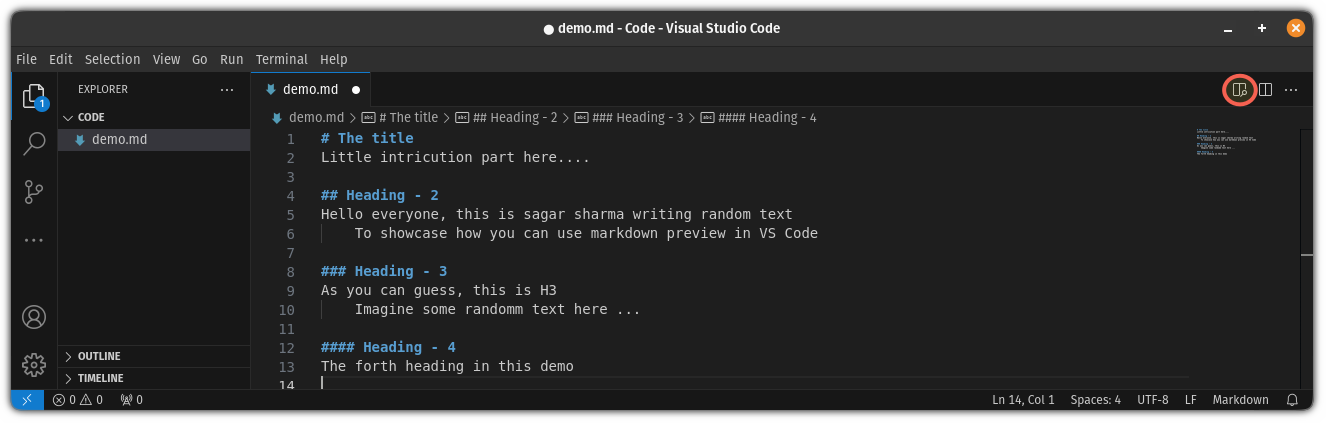
If you don't like the idea of using shortcuts for everything, there's a preview button available in VS Code by which you can bring the preview panel easily.
Here's where it is located at:
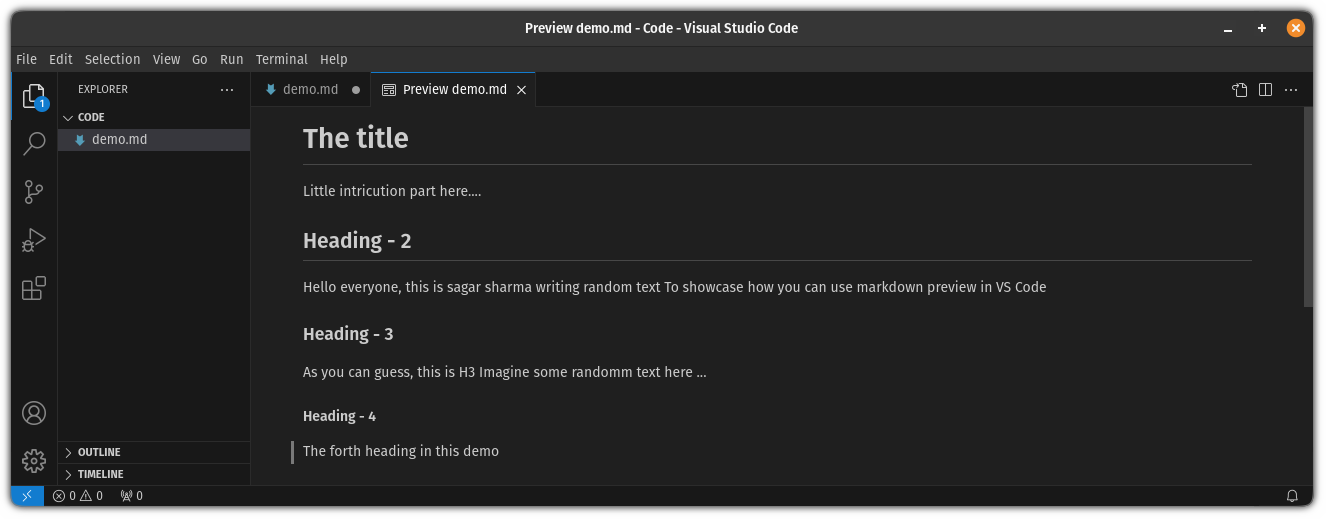
When pressed, here's how it gets you a preview:
Pretty easy way in my opinion, especially if you are just getting started with VS Code and you are not comfortable using the shortcuts yet.
Preview markdown in a different tab
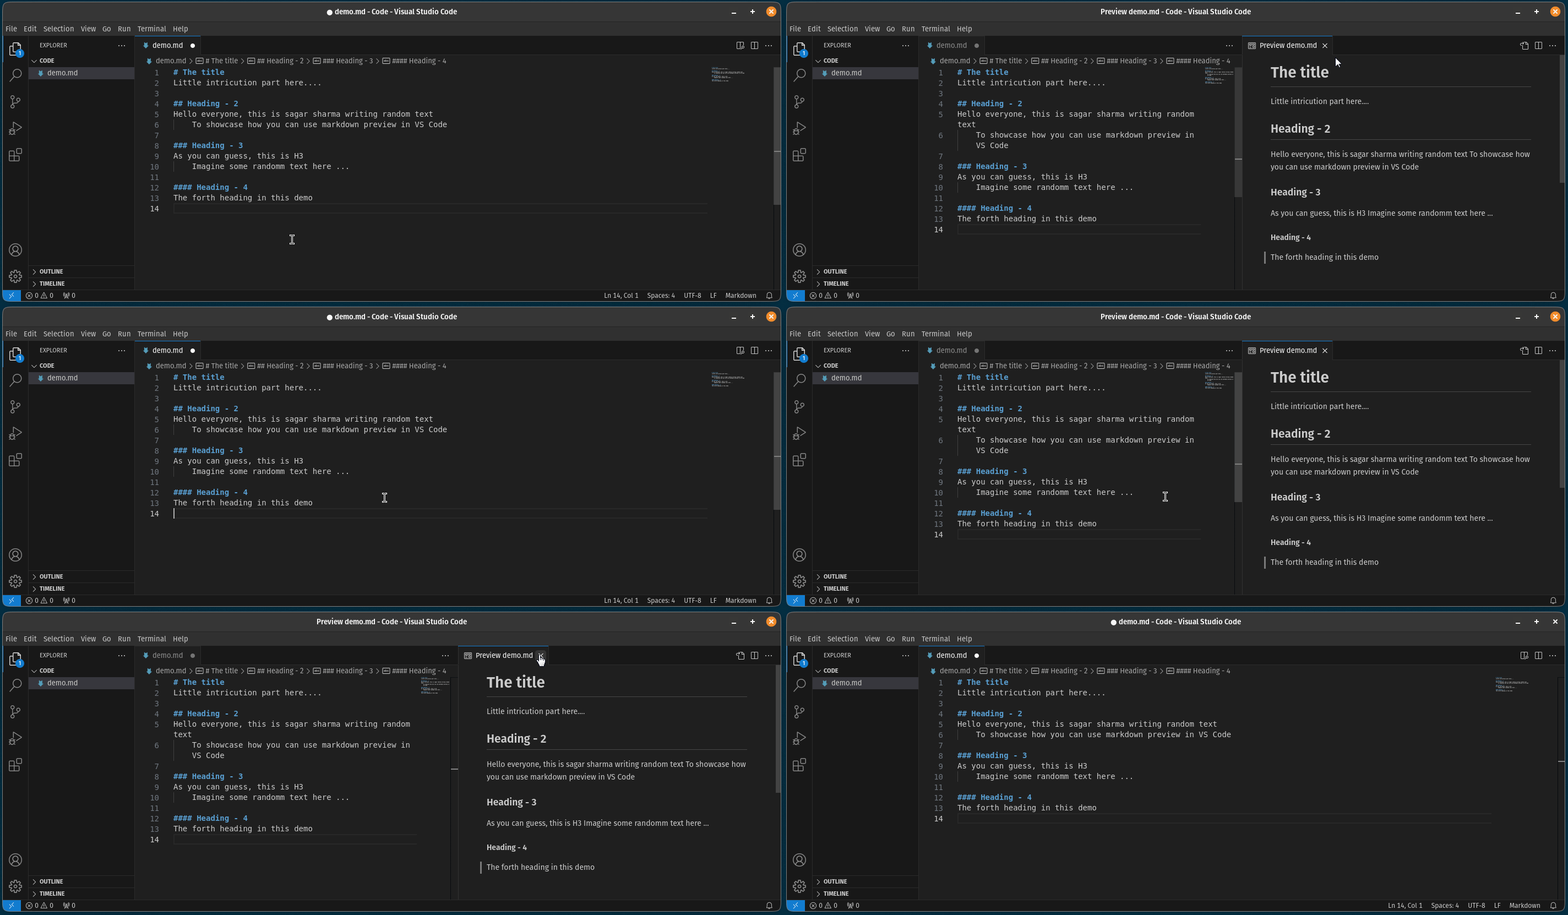
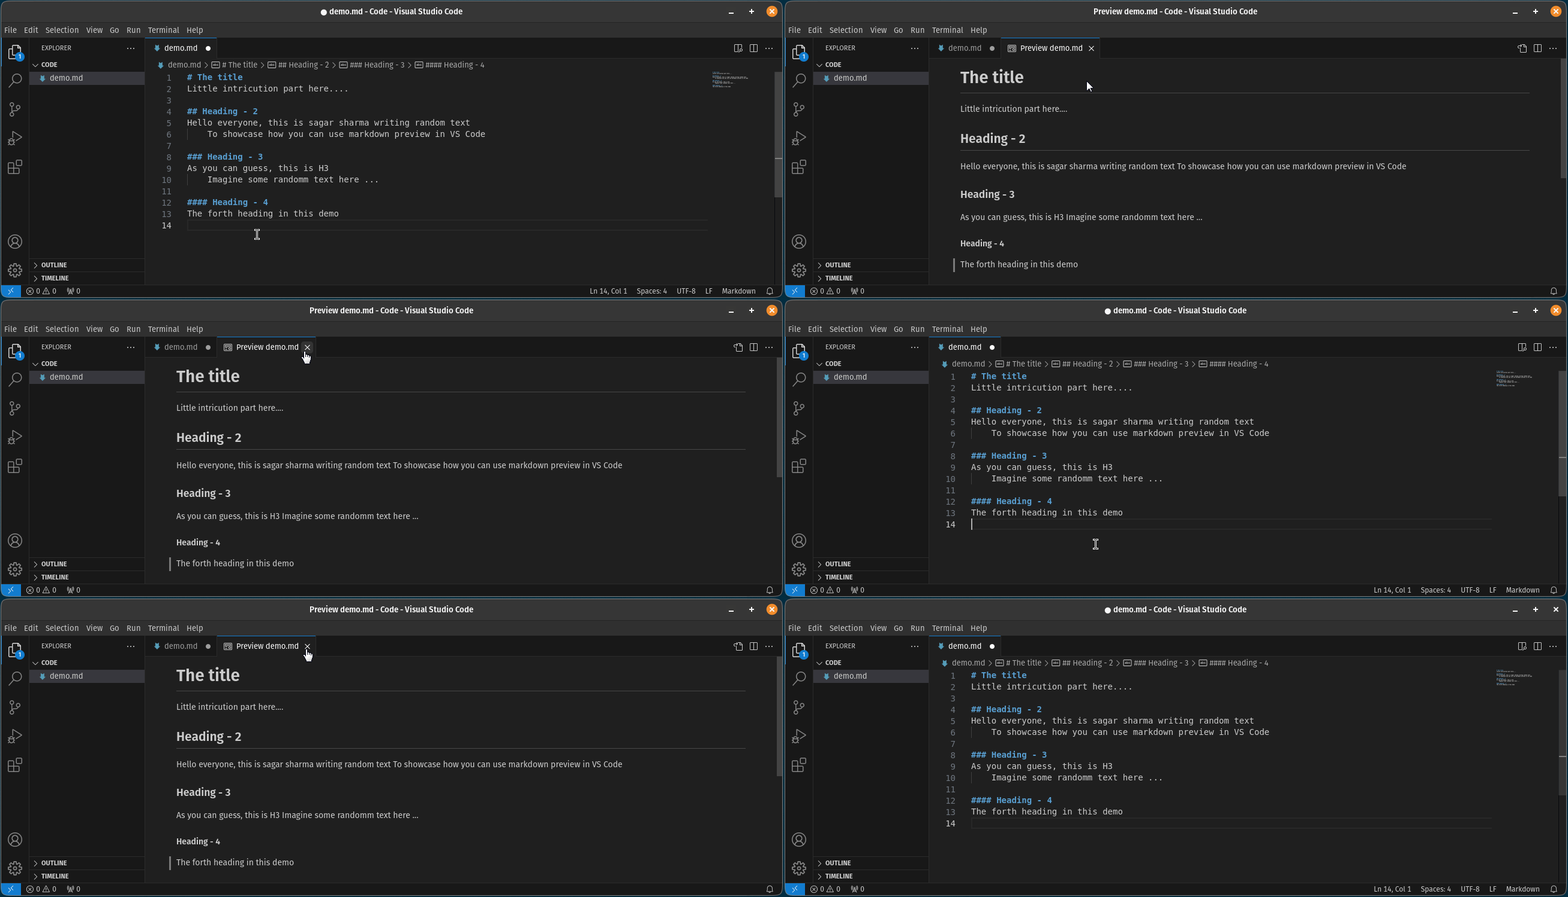
Unlike the previous method, this will open the preview in a different tab which can be useful if you're working on multiple projects and don't want to spare the half screen just for the preview.
Firefox and Brave are my daily drivers for web browsing.
When I installed Arch Linux with GNOME, it had GNOME Web browser. It's a decent browser but not something I can live with it as I need my saved passwords, browsing history and plugins.
So, I started out to install my favorite web browsers and hence this tutorial on getting Brave in Arch Linux.
If you have Yay (or any other AUR helper) installed, installing Brave is as simple as using this command:
yay -S brave-bin
Yeah! That simple. Let's see it in detail.
💡
Manjaro comes with AUR support baked in. You can install Brave in Manjaro using Pamac software center or pamac/pacman commands.
Installing Brave browser on Arch Linux
Brave is not available in the official Arch repositories. However, it is available in the AUR (Arch User Repository) and can be easily installed using an AUR helper like Yay.
If you don't have Yay or any other AUR helper, use these commands one by one to install Yay:
sudo pacman -S --needed base-devel git
git clone https://aur.archlinux.org/yay.git
cd yay
makepkg -si
Once you have got Yay, use it to install Brave:
yay -S brave-bin
Don't worry. It will ask for your password eventually.
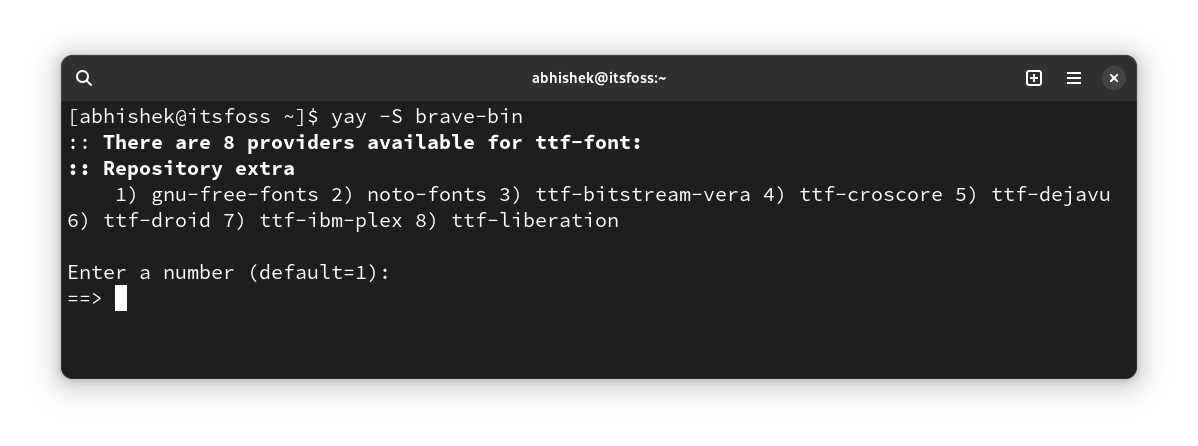
If this is your first time installing a browser, you kay be asled to choose a font provider. Go with the default choice or choose any of the other.
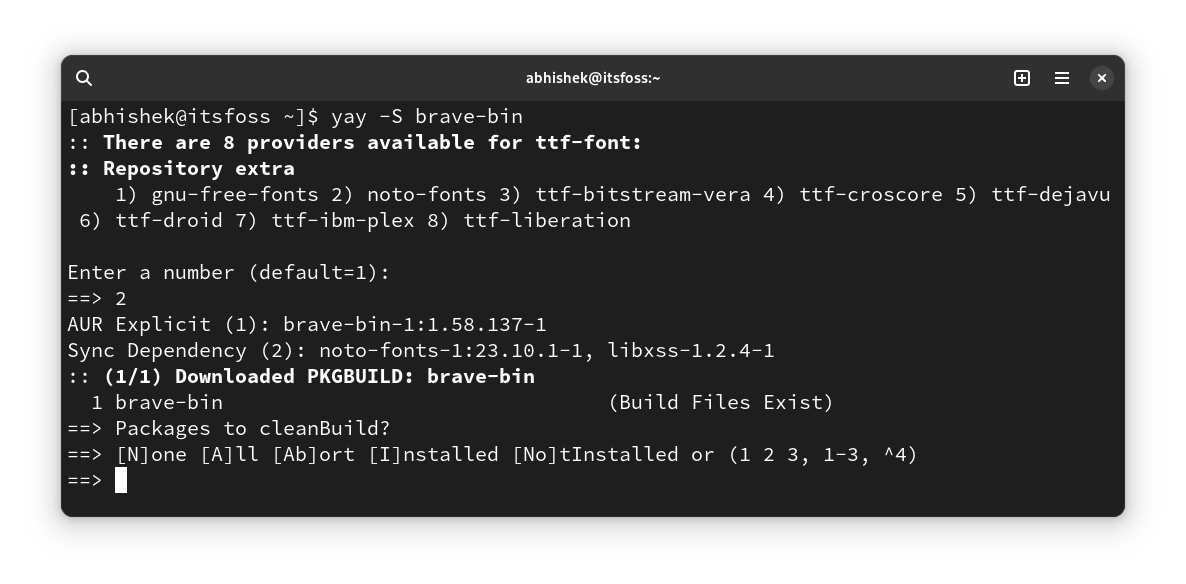
Next, it will ask you about clean build. Yay asks you if it should redownload the packages (and dependencies) and build it again or use the cache from an earlier build (if there is any).
You can go on with it by pressing enter, which should mean No to clean build.
In fact, you can just keep on pressing enter when you are presented with choices to with the default one.
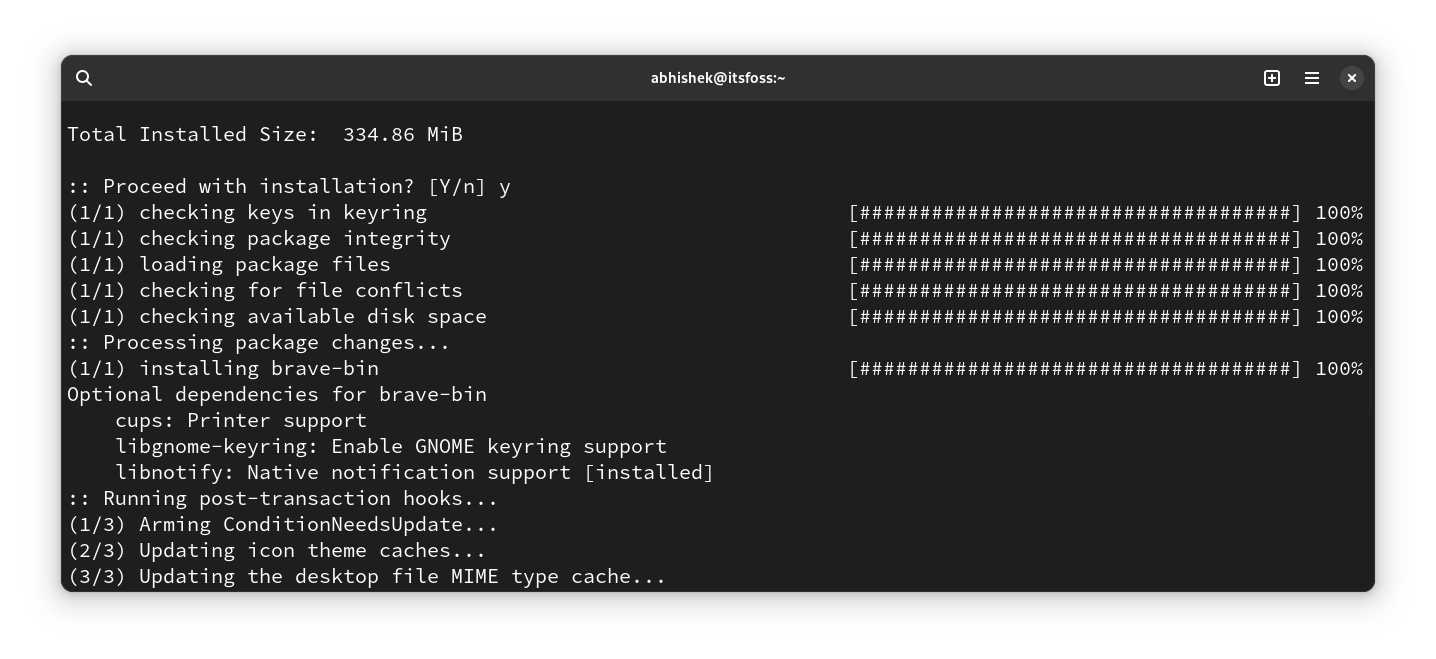
Just before the actual installation, you'll be asked to enter your account password. Enter your password and go on with the process. It will download files of around 350 MB in size:
Once installed, look for Brave browser in the system menu and run it from there.
Keeping Brave updated
You can keep the Brave browser updated by updating the AUR packages installed with yay using this command:
yay -Sua
Removing Brave from Arch
Don't like Brave? No worries. You can easily remove it.
Like any other software, remove Brave from Arch using pacman command:
sudo pacman -Rs brave-bin
Conclusion
AUR comes to the rescue, once again! Installing Brave becomes an easy task with it.
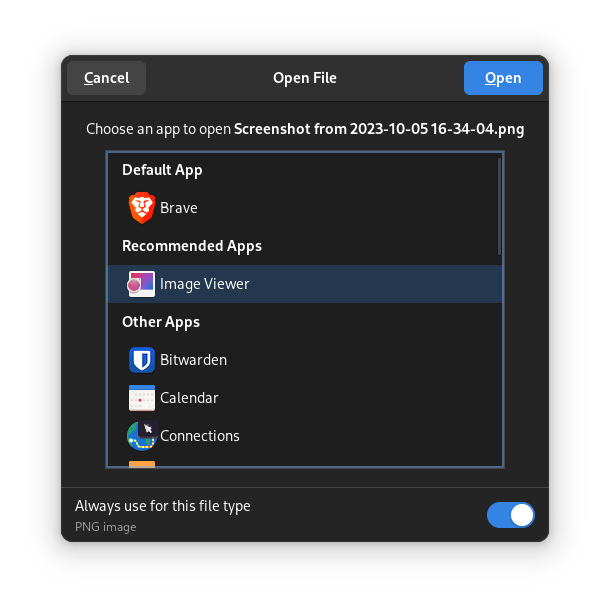
By the way, I noticed that somehow Brave became the default application for opening images. Which means, double clicking on images were opening them in a new Brave window.
I had to make Image Viewer default again by right clicking an image, and going to "open with" option.
Somehow Brave becomes the default image viewer. You should change it
I'll be sharing more of my Arch experience in the coming days. Stay tuned!
No, I am not joking. I have (re)installed Arch on my TUXEDO InfinityBook and using it as my daily driver these days. My main system still has Ubuntu 23.04, though.
The thing is that I had stopped 'exploring'. Blame it on my age, mid-thirties now👴🏽
Since I stopped exploring other distros, I did not encounter issues with them and hence no tutorials and tips on them. That's why some readers complained that there is too much Ubuntu on It's FOSS.
Out of my comfort zone now, I plan to use Arch Linux for at least a month. Expect plenty of Arch tutorials :)
Fedora, SUSE, Gentoo and Slackware are also on my list. But that's for the future.
💡User tip:By the way, to ensure that you are getting genuine Linux advice and tutorials, add 'itsfoss' to your query on Google and other search engines. This way, you'll get articles from It's FOSS first (if we have covered the topic).
And if you get a topic which is not covered by us yet, do let us know. We shall try covering it.
💬 Let's see what else you get in this edition of FOSS Weekly:
A new Linux Mint release.
Upsetting news regarding Richard Stallman.
Introduction of a new digital audio workstation (DAW) for Linux.
And other Linux news, videos, Puzzles and, of course, memes!
📰 Linux news
Linux Mint 21.2 Edge has arrived with a newer kernel.
An in-depth hands-on guide on compiling the Linux kernel manually from the source code. This is not for everyone, though. Only if you are keen to explore things on a deeper level.
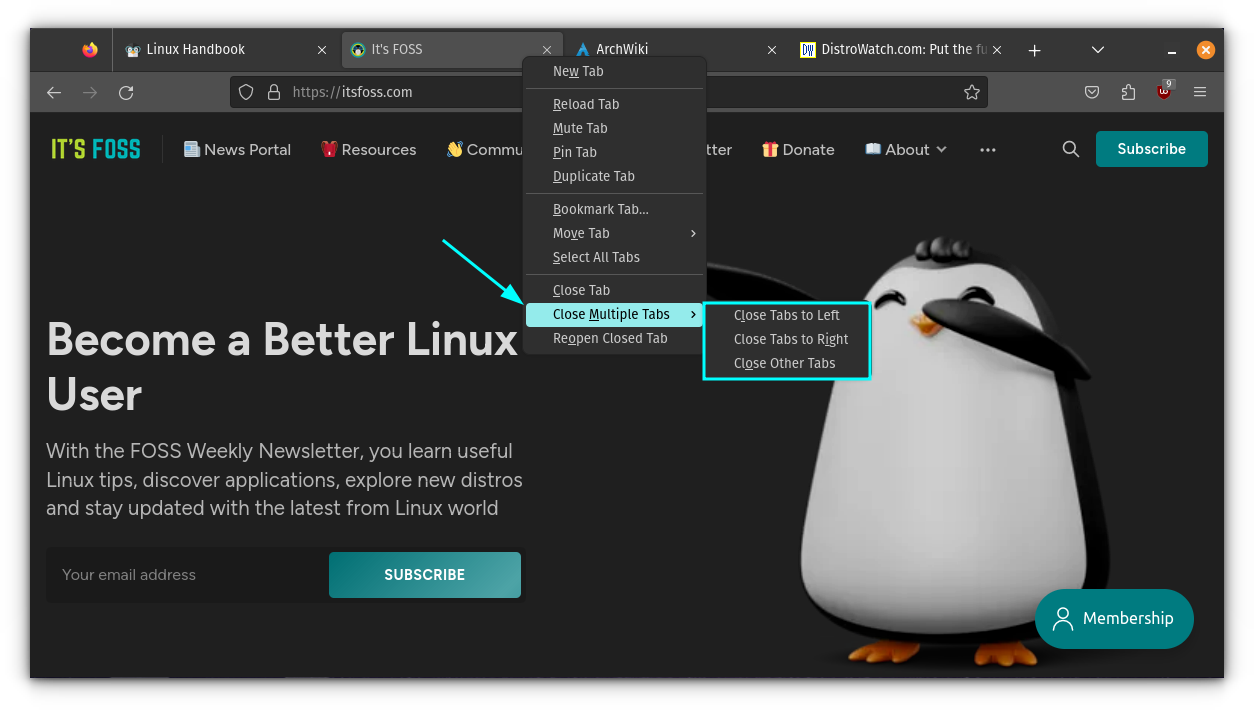
Close Multiple Tabs in Firefox by right-clicking on any Tab.
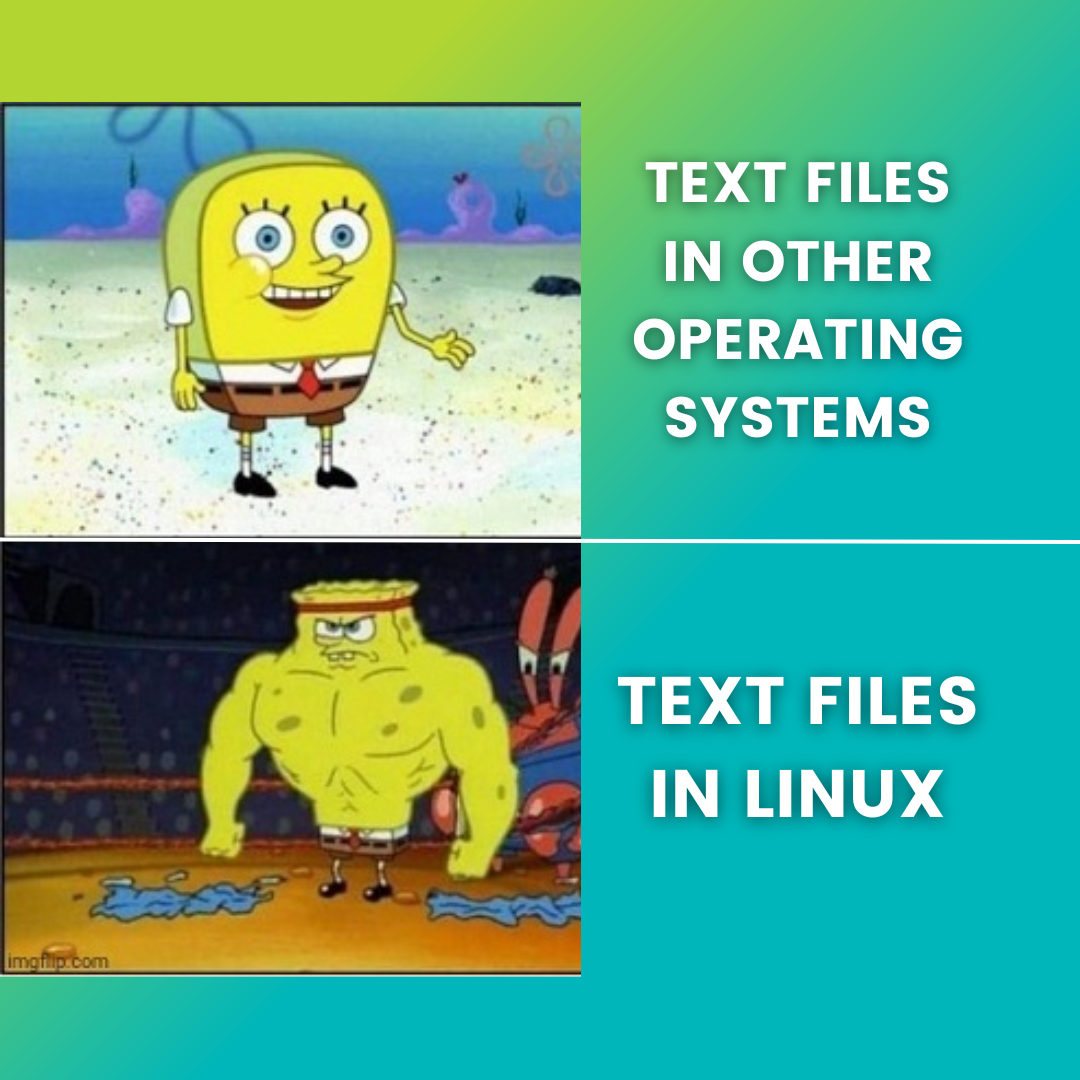
🤣 Meme of the week
Text files are quite powerful on Linux!
🗓️ Tech Trivia
Gentoo was founded on 4th October 1999. That was 24 years ago. 24 years of compiling the heck out of it ;)
🧑🤝🧑 FOSSverse corner
You don't always get the answers from search engines. This is why community forums are important. You can share your doubts and ask questions that have not been clearly answered in tutorials on the web.
You'll find a huge number of software packaged by the community members in Arch User Repository (AUR).
Since it is coming from third parties, purists suggest downloading and building each desired package from AUR manually.
But that's a tedious task and that's why AUR helpers were created to save the trouble.
Yay is one of the most popular AUR helpers and in this tutorial, I'll share how you can install Yay on Arch Linux. I'll also share a few tips on managing packages from AUR with Yay.
💡
Yay is available in Manjaro's repository. So, Manjaro users can simply use pacman -S yay to install
Installing Yay on Arch Linux
Before you go on with Yay installation, you need some packages required to build it.
Let me divide it into steps.
Step 1: Install the prerequisite packages
It is always a good idea to refresh the package cache and update the system first:
sudo pacman -Syu
Install the rerquired base-devel (contains tools such as makepkg etc) and git (required for cloning the yay git repository).
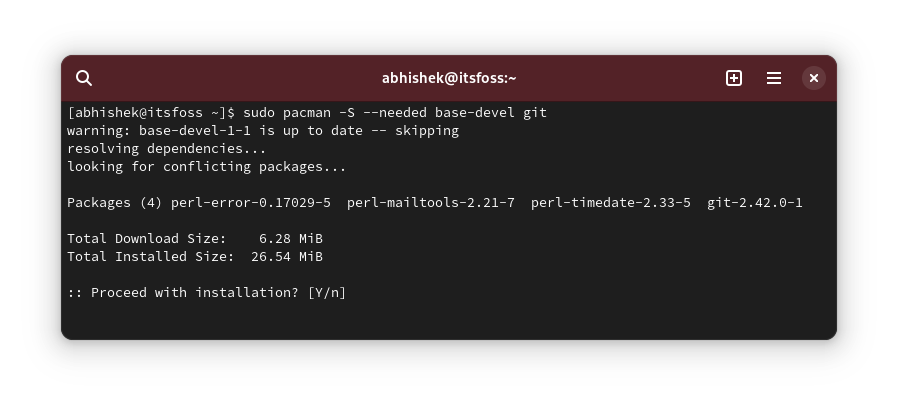
sudo pacman -S --needed base-devel git
With the --needed flag, it will NOT reinstall the already installed packages.
Here's what it looks like:
Now that you have the required packages, it's time to get Yay on your system.
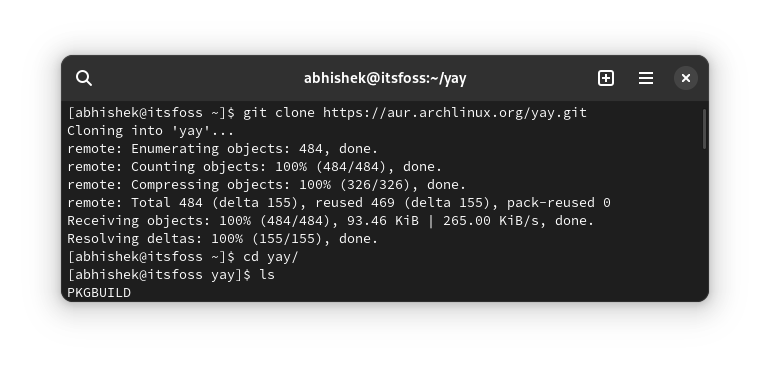
Step 2: Clone the Yay git repo and switch to it
Use the git command to 'clone' the Yay repo. You can do it anywhere in the system, be it your home directory or otherwise.
git clone https://aur.archlinux.org/yay.git
Once done, switch to the cloned directory:
cd yay
It's time to install yay (finally).
Step 3: Install yay
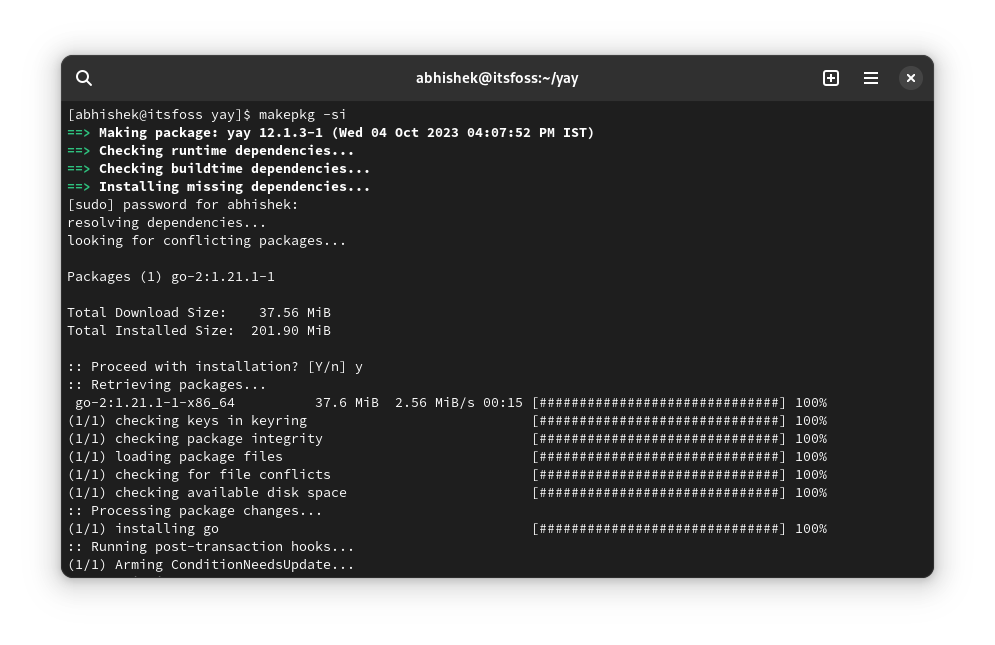
Actually, you are building it. You'll see a PKGBUILD file here. Use the following command to build the package from here:
makepkg -si
Follow the on-screen instructions. Press Y when you are asked to confirm.
Once the process finishes, verify that yay has been installed successfully by checking its version.
yay --version
Now that you have successfully installed it, you may remove the cloned Yay git repository. It is not needed anymore.
Using Yay for package management
The yay follows similar (but not identical) command structure as pacman. So it should not be difficult for you to manage AUR packages with Yay.
Search for packages with:
yay search_term
Install the packages with:
yay -S package_name
Remove packages with:
yay -R package_name
To delete a package with its dependencies:
yay -Rns package_name
Upgrading (only) the AUR packages:
yay -Sua
Yay is also capable of upgrading non-AUR packages. The a flag above restricts it to AUR.
Upgrading Yay to a new version
Now, you may wonder how you can upgrade Yay to a newer version when it's available.
The answer is that you don't have to do anything special. Yay can update itself when you run the command:
yay -Sua
Removing Yay from your Arch system
If you don't like Yay or no longer need it anymore, you can remove it like any other package with the pacman command:
sudo pacman -Rs yay
Conclusion
That was a quick introduction to Yay AUR helper. You can visit its GitHub repository for more details on its working.
While purists Arch users scoff at AUR in general and AUR helpers in particular, they remain popular for the ease of use they provide.
I hope you find this quick tutorial helpful in getting Yay on Arch Linux. Please let me know if you still have questions or if you notice any technical inaccuracies.
After years, I have been experimenting with Arch Linux again. I had forgotten the usage of the pacman command so I tried accessing its man page.
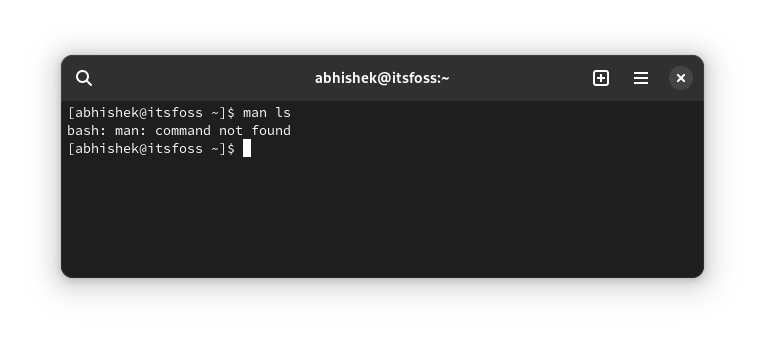
What happened next shocked me (yeah! I have been reading BuzzFeed 😜). It showed me this error:
bash: man: command not found
And it was not just for pacman but for all commands, of course.
It baffled me because I have never been in a situation before where man command was not available to use.
If you find yourself in a similar situation where man command is not found, let me assure you that the fix is easy:
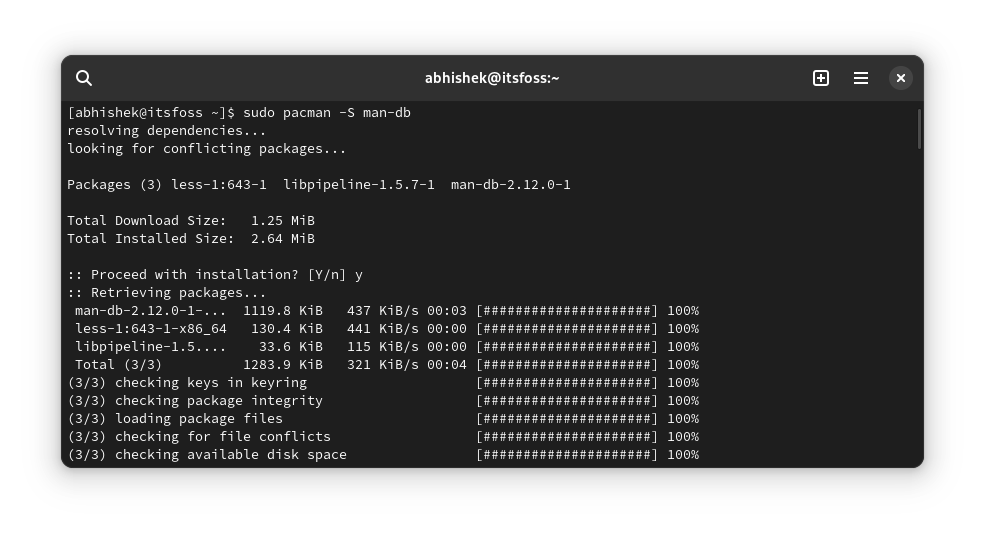
Install man-db package (to install man pages)
Update mandb cache (for indexing the man pages for all commands)
Let's see it in a bit more deatil.
Install man pages in Linux
I never imagined that I would have to install man pages explictely. But Arch Linux puts you in uncharted territory. Which is good in a way, as you discover things you never encountered before.
The key here is that the package that installs the man pages is named man-db. That was also a discovery for me.
You can use your distribution's package manager to install it.
You get the gist. It is also a wise step to build the cache for manpages.
Build man page cache
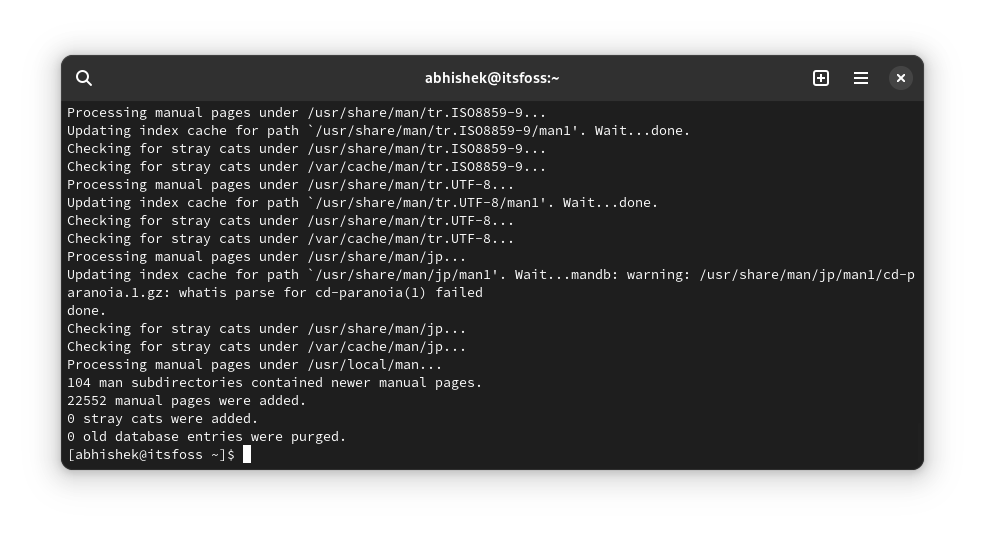
To refresh or build the man page cache, run the mandb command:
sudo mandb
It will look for the manual pages at different locations and build the cache so that you can access the man pages quickly.
Once that is done, I was able to use the man command as usual.
Conclusion
This did come as shock to me because I always thought that manpages were a core part of Linux. Never imagined that I would have to install them explicitely.
Perhaps I am one of the rare few users who encountered this missing man command issue in Arch. Perhaps not. Do let me know in the comments if you ever encounted such an 'unexepected error'.
You may be interested in compiling the Linux kernel yourself, for many reasons. It might be, but not limited to, one of the following:
Trying out a newer kernel than what your Linux distribution provides
Building the kernel with a different set of configuration options and/or drivers
A learner's curiosity :)
This guide will show you how you can compile the Linux kernel yourself, with the commands that you should run, why run these commands and explain what it does. This is a long one, so brace yourself!
🚧
Distributions like Ubuntu have easier ways of installing mainline Linux kernel. But this tutorial is about doing things manually from the source code. You'll need time, patience and good experience with the Linux command line for this tutorial. This is more about experiencing things first hand. However, I advise trying this adventure in a VM or on your spare system instead of doing it on your main system.
Pre-requisites
There are two prerequisites to building anything (in context to software).
Source code
Build dependencies
So, as the prerequisites, we will be downloading the Linux kernel's source as a tarball and install a few dependencies that will allow us to build the Linux kernel.
Primer on Linux versions
At a given moment, there are 4 "versions" of the Freax Linux kernel.
These "versions" of Linux, in the order of the development flow are:
The linux-next tree: Any code to be merged in the Linux codebase is first merged in the linux-next tree. This is the newest but also the "least stable" state of the Linux kernel. Most Linux kernel developers and testers use this to refine the code quality for Linus to pull from, later on. Tread carefully!
RC/Mainline releases: Linus pulls from the linux-next tree and creates an initial release. The beta version of this release is called an RC release (Release Candidate). Once an RC is released, Linus accepts only bug-fixes and performance regression related patches. Linus keeps releasing an RC kernel every week until he is satisfied with the code (with feedback from users). The -rc suffix, followed by a number, is added to indicate the RC release version.
Stable releases: Once Linus feels that the last RC was stable, he releases the final, "public" release. A stable release is maintained for a few more weeks. This is what bleeding edge Linux distributions like Arch Linux and Fedora Linux use. I recommend you try this first before linux-next or any RC releases.
LTS releases: The last stable release of a given year is maintained for a few more years. This is usually an older release but it is actively maintained with security fixes. A stable release of Debian uses the LTS release of the Linux kernel.
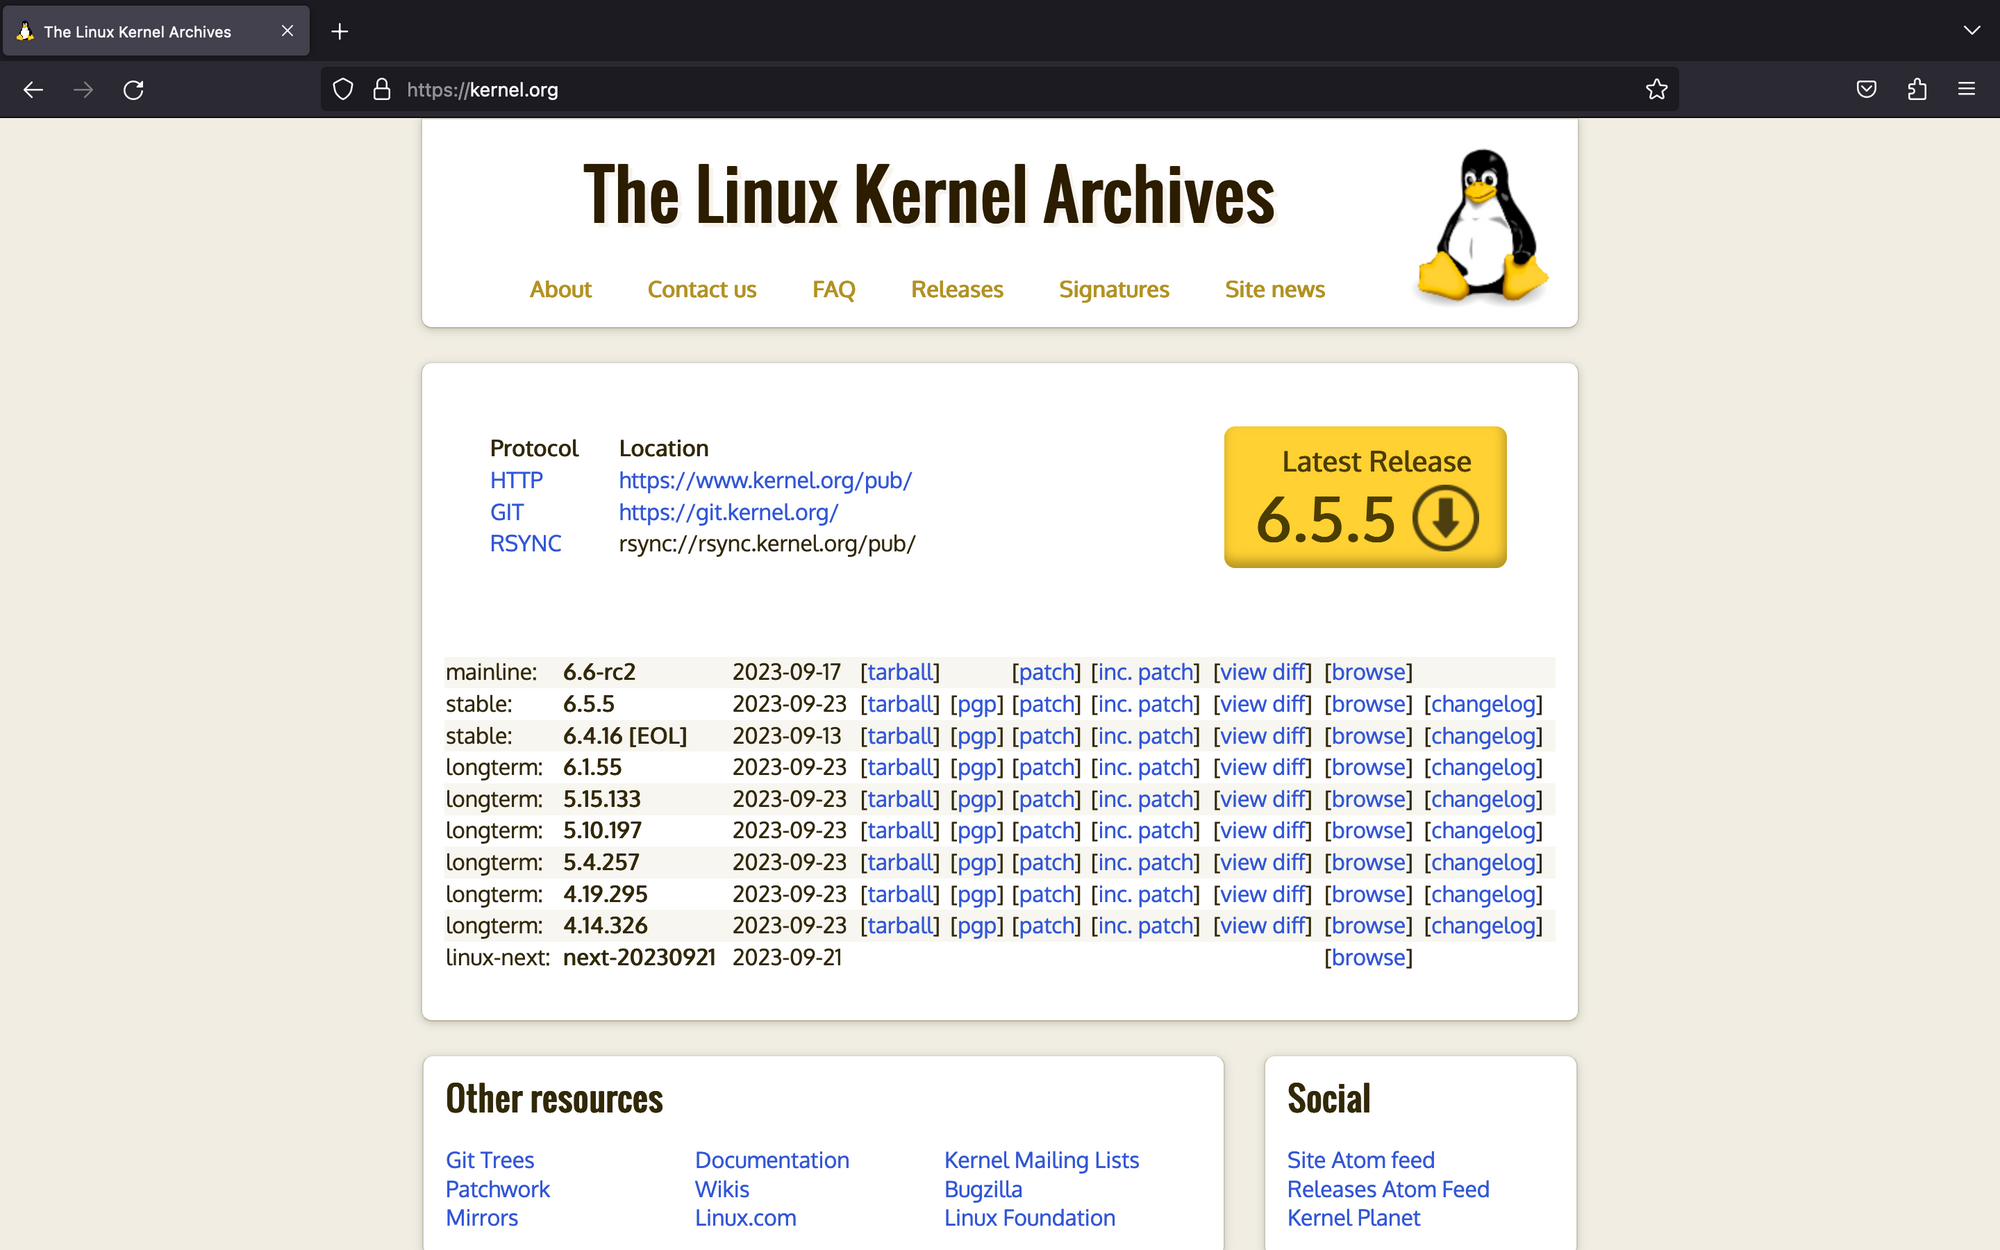
For the purposes of this article, I will be using the latest stable release that is available. Which, at the time of writing this is at v6.5.5.
Getting the system ready
Since the Linux kernel is written in the C programming language, you need at least a C compiler to compile the Linux kernel. There are other such dependencies that might or might not be present on your computer. Time to install those.
💡
This guide will focus on compiling the Linux kernel using the GNU C Compiler (GCC). But maybe in a future article (diving into Rust support), I will cover using LLVM's Clang compiler as an alternative to GCC.
And no, MSVC does not count. That said, I do expect a Microsoft employee sending in a patchset for this. What have I done?
Install command for users of Arch Linux and its derivatives:
sudo pacman -S base-devel bc coreutils cpio gettext initramfs kmod libelf ncurses pahole perl python rsync tar xz
Install command for users of Debian and its derivatives:
sudo apt install bc binutils bison dwarves flex gcc git gnupg2 gzip libelf-dev libncurses5-dev libssl-dev make openssl pahole perl-base rsync tar xz-utils
You can download the tarball by clicking on the big yellow box. While you are at it, download the matching PGP signature file too. It will be handy when we verify the tarball at a later point in time. It has the extension .tar.sign.
Verifying the tarball's authenticity
How do you know if the tarball you just downloaded is corrupted or not? On an individual level, a corrupted tarball will just waste your precious tinkering hours, but if this is done for an organization, you might be making things easier for an attacker (at which point you have bigger issues to worry about, but let's not give PTSD to everyone!).
To verify the integrity of our tarball, we need the tarball. At the moment, it is compressed using the XZ compression algorithm. Hence, I will use the unxz utility (merely an alias to xz --decompress) to decompress the .tar.xz archive file.
unxz --keep linux-*.tar.xz
Once extracted, we will fetch the public GPG keys that Linus Torvalds and Greg KH use. These keys are used to sign the tarball.
You should get output that is similar to what I got on my machine:
$ gpg2 --locate-keys torvalds@kernel.org gregkh@kernel.org
gpg: /home/pratham/.gnupg/trustdb.gpg: trustdb created
gpg: key 38DBBDC86092693E: public key "Greg Kroah-Hartman <gregkh@kernel.org>" imported
gpg: Total number processed: 1
gpg:               imported: 1
gpg: key 79BE3E4300411886: public key "Linus Torvalds <torvalds@kernel.org>" imported
gpg: Total number processed: 1
gpg:               imported: 1
pub   rsa4096 2011-09-23 [SC]
      647F28654894E3BD457199BE38DBBDC86092693E
uid           [ unknown] Greg Kroah-Hartman <gregkh@kernel.org>
sub   rsa4096 2011-09-23 [E]

pub   rsa2048 2011-09-20 [SC]
      ABAF11C65A2970B130ABE3C479BE3E4300411886
uid           [ unknown] Linus Torvalds <torvalds@kernel.org>
sub   rsa2048 2011-09-20 [E]
Once Greg's and Linus' keys are imported, the integrity of the tarball can be verified using the --verify flag; like so:
gpg2 --verify linux-*.tar.sign
If the verification was successful, you should get output similar to following:
$ gpg2 --verify linux-*.tar.sign
gpg: assuming signed data in 'linux-6.5.5.tar'
gpg: Signature made Saturday 23 September 2023 02:46:13 PM IST
gpg:                using RSA key 647F28654894E3BD457199BE38DBBDC86092693E
gpg: Good signature from "Greg Kroah-Hartman <gregkh@kernel.org>" [unknown]
gpg: WARNING: This key is not certified with a trusted signature!
gpg:          There is no indication that the signature belongs to the owner.
Primary key fingerprint: 647F 2865 4894 E3BD 4571  99BE 38DB BDC8 6092 693E
Please do not proceed unless you see a message that says gpg: Good signature!
💡
You can safely ignore the warning that says: WARNING: This key is not certified with a trusted signature! There is no indication that the signature belongs to the owner.
We fetched the keys from Linus' and Greg's emails and have no need to worry about this warning.
Extracting the tarball
If you are here, it means that your tarball's integrity check completed successfully. Now then, it is time to extract the Linux kernel's source out of it.
This one is quite easy, just do a tar -xf on the tarball, like so:
tar -xf linux-*.tar
The -x option is used to specify extraction, and tar is informed about the tarball filename using the -f option.
The extraction will take a few minutes, adjust and sit straight :)
Configuring the Linux kernel
The Linux kernel's build process looks for a .config file. As the name suggests, it is a configuration file that specifies every possible configuration option for the Linux kernel. It is necessary to have one.
There are two methods of getting this .config file for the Linux kernel:
Using your Linux distribution's configuration as a base (recommended)
Using a default, generic configuration
💡
There is a third method where you can configure each and every option, from scratch, by hand, but mind you, there are 12,000+ options. This is not recommended because it takes a lot of time to configure everything by hand and also enough know-how to know what to enable and disable.
Using the distribution-provided configuration
Using the configuration provided by your Linux distribution is a safe bet. If you are following this guide just to try out a new kernel than what your distribution offers, this is the recommended method.
Your Linux distribution's configuration file for the Linux kernel will be in either of the two places:
Most Linux distributions like Debian and Fedora, and their derivatives will store it as /boot/config-$(uname -r).
Some Linux distributions like Arch Linux have it integrated in the Linux kernel itself. Therefore, it will be available at /proc/config.gz.
💡
If you have both destinations available, prefer using /proc/config.gz as it is on a read-only filesystem and hence untampered.
Enter the directory which contains the extracted tarball.
cd linux-*/
Then, copy your Linux distribution's configuration file:
## Debian and Fedora's derivatives:
$ cp /boot/config-"$(uname -r)" .config

## Arch Linux and its derivatives:
$ zcat /proc/config.gz > .config
Updating the configuration
Once that is done, it is time to "update" the configuration file. You see, there is a high probability that the configuration that your distribution provides is older than the Linux kernel that you are building.
💡
This applies to bleeding edge Linux distributions like Arch Linux and Fedora too. Neither of them release an update just because there is a new version available. They do some QA, which is bound to take time. And hence, even the latest kernel offered by your distribution will be a few minor releases behind, compared to what you will get from kernel.org.
To update an existing .config file, the make command is used with the target olddefconfig. Broken down, this is olddefault configuration.
This will take the "old configuration file" (which is currently saved as .config as a literal copy of your distribution's configuration) and check for any new configuration options that were added to the Linux codebase since. If any new, unconfigured options are found, the default configuration value for that option is used and the .config file is updated.
The original .config file is renamed to .config.old as the backup and new changes are written to .config.
make olddefconfig
Following is the output from my machine:
$ file .config
.config: Linux make config build file, ASCII text

$ make olddefconfig
  HOSTCC  scripts/basic/fixdep
  HOSTCC  scripts/kconfig/conf.o
  HOSTCC  scripts/kconfig/confdata.o
  HOSTCC  scripts/kconfig/expr.o
  LEX     scripts/kconfig/lexer.lex.c
  YACC    scripts/kconfig/parser.tab.[ch]
  HOSTCC  scripts/kconfig/lexer.lex.o
  HOSTCC  scripts/kconfig/menu.o
  HOSTCC  scripts/kconfig/parser.tab.o
  HOSTCC  scripts/kconfig/preprocess.o
  HOSTCC  scripts/kconfig/symbol.o
  HOSTCC  scripts/kconfig/util.o
  HOSTLD  scripts/kconfig/conf
.config:8593:warning: symbol value 'm' invalid for USB_FOTG210_HCD
.config:8859:warning: symbol value 'm' invalid for USB_FOTG210_UDC
#
# configuration written to .config
#
For users of Debian and its derivatives
Debian and its derivatives use a certificate to sign the kernel modules. This certificate, by default, is absent on your computer.
I recommend disabling the option that enables module signing. It can be achieved with the following commands:
Failing to do this will result in a build failure later on, when you build the Linux kernel. You have been warned.
Using a custom configuration
If you are learning about building the Linux kernel for the purposes of learning kernel development, this is the way to follow.
🚧
There are no guarantees that deviating away from your Linux distribution's configuration will work "normally" on yourphysical hardware. The issue may range from a particular piece of hardware not working, to the Linux kernel not booting at all.
Therefore, it is recommended only for use inside a VM.
You can take a look at the output of make help to see all the available options, but we will focus on three make targets:
defconfig: The default configuration.
allmodconfig: Based on the current system state, build items as loadable modules (instead of built-in) when possible.
tinyconfig: A tiny Linux kernel.
Since the tinyconfig target will only build a few items, the build times are naturally faster. I personally use it for the following reasons:
Checking if any changes I made in the code/toolchain is correct and that the code compiles.
Testing only a few select features inside a VM.
🚧
When building the Linux kernel for ARM or RISC-V machines, you most likely will need DTBs (device-tree binaries). Thetinyconfigtarget will not enable the option to build DTBs and your kernel will most likely fail from starting.
Though, you can use QEMU to boot the Linux kernel without any DTB. But this article will not focus on that. Maybe you should comment and let me know to cover it sometime later ;)
You should use the defconfig target unless you know exactly what you're doing. Following is how it looks on my computer:
$ make defconfig
  HOSTCC  scripts/basic/fixdep
  HOSTCC  scripts/kconfig/conf.o
  HOSTCC  scripts/kconfig/confdata.o
  HOSTCC  scripts/kconfig/expr.o
  LEX     scripts/kconfig/lexer.lex.c
  YACC    scripts/kconfig/parser.tab.[ch]
  HOSTCC  scripts/kconfig/lexer.lex.o
  HOSTCC  scripts/kconfig/menu.o
  HOSTCC  scripts/kconfig/parser.tab.o
  HOSTCC  scripts/kconfig/preprocess.o
  HOSTCC  scripts/kconfig/symbol.o
  HOSTCC  scripts/kconfig/util.o
  HOSTLD  scripts/kconfig/conf
*** Default configuration is based on 'defconfig'
#
# configuration written to .config
#
Modifying the configuration
You created a .config file using some method. Either you used the one that your Linux distribution used and updated it, or you created one using the defconfig target.
Either way, you are looking for how to modify it. The most reliable way to do this is via the menuconfig or nconfig target.
Both targets do the same thing but have a different interface for you. That's the only difference between them. I prefer to use the menuconfig target but lately I've been leaning towards nconfig since it is a bit more intuitive in searching for options.
Start with running the make command with the menuconfig target:
Now, in there, modify the configuration options to toogle them based on their type.
There are two types of toggleable options:
Boolean-state options: Options that can only be turned off ([ ]) or on, as built-in ([*]).
Tri-state options: Options that can be off (< >), or built-in (<*>), or built as loadable-module (<M>).
To know more information about an option, navigate to it using the up/down arrow keys and then press the <TAB> key until the < Help > option at the bottom is selected. And then, press the <Enter> key to select it. A help menu about that configuration option item will be displayed.
Please be careful when you modify an option.
Once you have configured it to your heart's content, press the <TAB> key until the < Save > option at the bottom is selected. Then, press the <Enter> key to select it. Press the <Enter> key again (without changing the filename) to save the updated configuration to the .config file.
Building the Linux kernel
Building the Linux kernel is simple. But before we do that, let's tag our custom kernel build. I will use the string -pratham as the tag and make use of the LOCALVERSION variable to do that. This can be configured using the following command:
What this does is, set the CONFIG_LOCALVERSION configuration option in the .config file to the string I specify at the end, which, in my case is -pratham. Don't feel pressured to use my name ;)
The LOCALVERSION option is used to set a "local" version which gets appended to the usual, x.y.z versioning scheme and reported when you run the uname -r command.
Since I am building the kernel 6.5.5 with the LOCALVERSION string set to -pratham, for me, it will be 6.5.5-pratham. This is done to make sure that the custom kernel that I have built does not conflict with the distribution provided kernel.
Now, let's build the kernel itself. Following is the command to do so:
make -j$(nproc) 2>&1 | tee log
This is sufficient for 99% of the users.
The -j option is used to specify how many parallel compilation jobs should be created. And the nproc command returns a number for the amount of processing units that are available (this includes threads). So -j$(nproc) means "use as many parallel compilation jobs as many CPU threads I have".
The 2>&1 will redirect STDOUT and STDIN to the same file descriptor and that gets piped to the tee command, which will store the output a file called log and also print the same text to the console. This is in case you face a build error and want to take a look back at the log to check what went wrong. In that case you can simply do a grep Error log.
Custom 'make' targets
There are a few custom targets that you can use with the make command to perform various operations in the Linux kernel's source directory. These are as a reference to developers. If your sole intention is to install a newer Linux kernel than what your distribution offers, you can skip this part ;)
Build targets
As a developer, there will be times when you want to build only the Linux kernel, or, only the modules, or only the DTBs. In that case, you can specify a build target and make will build only the one(s) specified, and nothing else.
The build targets are as following:
vmlinux: The bare Linux kernel.
modules: The loadable modules.
dtbs: Device-tree binaries (mostly for for ARM and RISC-V architectures).
all: Build everything [that is marked with an asterisk * (from the output of make help)].
Generally speaking, you do not need to specify either build target since they should automatically be build. These are for times when you want to test something only in one build target, and not in others.
Depending on your computer's architecture, the name of the Linux kernel image that gets built (which is stored in /boot) will vary.
For x86_64, the Linux kernel's [default] image name is bzImage. So, if you only want to build the Linux kernel for the purposes of booting it, you can specify bzImage as a target, like so:
## For x86_64
$ make bzImage
"And how do I find the target's name to call make with, on my architecture?"
There are two methods. Either, you can do a make help and look for the first option under "Architecture specific targets" that has an asterisk * before it.
Or, if you want to automate it, you can get the full (relative) path of the image using the image_name target. Optionally, add the -s flag to keep the output useful.
Following is the output from three computers I own, one x86_64, another AArch64 and third one being riscv:
## x86_64
$ make -s image_name
arch/x86/boot/bzImage

## AArch64
$ make -s image_name
arch/arm64/boot/Image.gz

## RISC-V
$ make -s image_name
arch/riscv/boot/Image.gz
And now, to build just the Linux kernel image, you can do this:
make $(make -s image_name | awk -F '/' '{print $4}')
Targets for clean-up
In case you want to clean build artifacts up, you can use either of the following targets to achieve what you want:
clean: Remove almost everything except for the .config file.
mrproper: Everything that make clean does, but also delete the .config file.
distclean: Everything that make mrproper does but also remove any patch files.
Installation
Once the Linux kernel has been compiled, it is time to install a few things. "A few things?" Yes. We build at least 2 different things, 3 if you are on ARM or RISC-V. I will explain as we proceed.
🚧
Though I will inform you about different methods of installing, especially about changing the default installation path, it is not recommended to do it unless you know what you are doing! Please understand that if you go a custom route, you are on your own. These defaults exist for a reason ;)
Install the kernel modules
There are parts of the Linux kernel that are not necessary during booting. These parts are built as loadable modules (i.e. loaded and unloaded when necessary).
So, let's install these modules. This can be achieved with the modules_install target. The use of sudo is necessary since the modules will be installed in /lib/modules/<kernel_release>-<localversion> and that directory is owned by root, not your user.
This will not only install the kernel modules, but also sign them. So it will take some time. The good news is that you can parallelize this using the previously discussed -j$(nproc) option ;)
sudo make modules_install -j$(nproc)
Note for developers: You can specify a different path where the Linux modules are stored (instead of /lib/modules/<kernel_release>-<localversion>) using the INSTALL_MOD_PATH variable like so:
sudo make modules_install INSTALL_MOD_PATH=<path>
Another note for developers: You can use the INSTALL_MOD_STRIP variable to specify if the modules should be stripped of debug symbols or not. The debug symbols are not stripped if it is undefined. When set to 1, they are stripped using the --strip-debug option, which is then passed to the strip (or llvm-strip if Clang is used) utility.
[Optional] Installing the Linux kernel Header files
If you intend to use this kernel with out-of-tree modules, like ZFS or Nvidia DKMS, or try writing your own modules, you will most likely need the header files provided by the Linux kernel.
The Linux kernel headers can be installed using the headers_install target, like so:
sudo make headers_install
The use of sudo is necessary because the headers are installed in the /usr directory. The child directories include/linux are also created inside /usr and the headers are installed inside /usr/include/linux.
Note for developers: The path for installing Linux kernel headers can be overridden by using the INSTALL_HDR_PATH variable.
Installing DTBs (only for ARM and RISC-V)
If you are on x86_64, you can skip this step!
If you built for ARM or RISC-V, it is very likely that running make also built the device-tree binaries. You can check that by checking for .dtb files in arch/<machine_architecture>/boot/dts.
I have a hack to check this:
## For AArch32
$ find arch/arm/boot/dts -name "*.dtb" -type f | head -n 1 > /dev/null && echo "DTBs for ARM32 were built"

## For AArch64
$ find arch/arm64/boot/dts -name "*.dtb" -type f | head -n 1 > /dev/null && echo "DTBs for ARM64 were built"

## For RISC-V
$ find arch/riscv/boot/dts -name "*.dtb" -type f | head -n 1 > /dev/null && echo "DTBs for RISC-V were built"
If you get a message saying "DTBs for <arch> were built", proceed with installing DTBs. That is done with the dtbs_install target.
The use of sudo is necessary since this will be installed in /boot/dtb-<kernel_release>-<localversion> which is owned by root.
sudo make dtbs_install
Note for developers: Just like installing modules, you can specify a custom path for where the device-tree binaries are installed using the INSTALL_DTBS_PATH variable.
Install the Linux kernel
Finally, we are installing the Linux kernel itself! This is done with the install target, like so:
sudo make install
The use of sudo is necessary here because the Linux kernel gets installed in /boot which your normal user does not have permission to write in.
💡
Generally speaking, the install target will also update the bootloader, but if it fails, it means you probably have an unsupported bootloader. If you are not using GRUB as your bootloader, please read the manual of your bootloader ;)
Note for developers: Not surprising this time; The INSTALL_PATH variable is used to specify where the Linux kernel is installed, instead of the default path which is in /boot.
For Arch Linux users
If you tried running the make install command, you might have noticed that you got an error. Like following:
$ sudo make install
  INSTALL /boot
Cannot find LILO.
To actually install the Linux kernel on Arch Linux, we need to copy the Linux kernel image manually. Don't worry, if you are using Arch Linux, you're probably used to doing things manually anyways. ( ͡° ͜ʖ ͡°)
You might have come across a utility called mkinitcpio when you installed Arch Linux. We are going to use it to create the initial ramdisk.
To do that, we need a preset first. Do so by adding the following contents to the /etc/mkinitcpio.d/linux-<localversion>.preset file. Substitute <kernel_release> and <localversion> as necessary.
The initial ramdisk has been generated. It is now time to move onto updating the bootloader!
Update GRUB
Once all the necessary files are in their usual destination, it is now time to update GRUB.
Update the GRUB bootloader using the following command:
sudo grub-mkconfig -o /boot/grub/grub.cfg
💡
If you are using a different bootloader, please refer to its documentation in the Arch Wiki.
Updating GRUB won't make the newer kernel the default. Please select it from the boot menu during boot.
You can select the newer version of the Linux kernel by going into the 'Advanced options for Arch Linux' menu item, and then select the menu item that says 'Arch Linux, with Linux <kernel_release>-<localversion>'.
Reboot
Congratulations! You have completed all the steps to getting the Linux kernel's source, configuring it, building it and installing it. It is time to reap the benefits of your hard work by rebooting and booting into the newly built+installed Linux kernel.
Please be sure to select the correct Linux kernel version from the bootloader. Once booted, run the uname -r command to verify that you booted using the intended Linux kernel.
Below is the output from my computer:
$ uname -r
6.5.5-pratham
Party time! 🎉
Uninstallation
🚧
You should switch to an older kernel first before deleting the current kernel version.
Either your Linux distribution shipped the Linux kernel with the version that you compiled manually, or you compiled another, newer kernel yourself and noticed that you should uninstall the older kernel to make space for the newer one(s).
And now, you are wondering how you can undo that. Well, there is no make uninstall that you can run, but that doesn't mean that all hope is lost!
We know where all the files are installed, so that makes it easier to remove it.
Quite an adventure, ain't it? But finally, it is concluded. We have looked at the entire process of what it takes to manually compile the Linux kernel. It involved installing the dependencies, fetching the source, verifying it, extracting it, configuring the Linux kernel, building the Linux kernel and then installing it.
If you liked this detailed step-by-step guide, please comment and let me know. If you faced any issues, comment and let me know!

 Sagar Sharma