Utilizing a virtual machine can simplify things in many ways, especially, if you are using Linux. Whether you want to test a distro, perform security research, or anything else, a VM always is helpful.
You can read through our article on reasons to run Linux in virtual machines if you are curious.
Assuming you already have a VM setup and know how to configure a VM for your use-case, the next essential thing you need to know is to perform a backup or clone it.
With a backup and clone, you can:
- Ensure quick recovery of your configuration and files after a wrong modification
- Easily migrate the VM to another system
- Setup another instance of your VM without going through the setup process again
Back Up Your Virtual Machine on VirtualBox
You can back up your virtual machine on VirtualBox using three methods:
- Take a complete backup of the file (copy-paste)
- Export the virtual machine: To deploy it in the cloud or migrate it to another virtualization program.
- Take snapshots: Iff you do not want to backup the entire VM, but the current state of it.
1. Copy-Paste Virtual Machine Folder to Back Up
It is pretty straightforward to back up your VM with VirtualBox, but the process will differ if you are using other virtualization software.
Considering you already have a VM setup and listed. Here's what you can do:
- You need to first shut down the VM if it is active.
- Head to VirtualBox and right-click on the VM you want to back up to find an option "Show in Explorer" (Windows) or "Show in File Manager" (Linux).
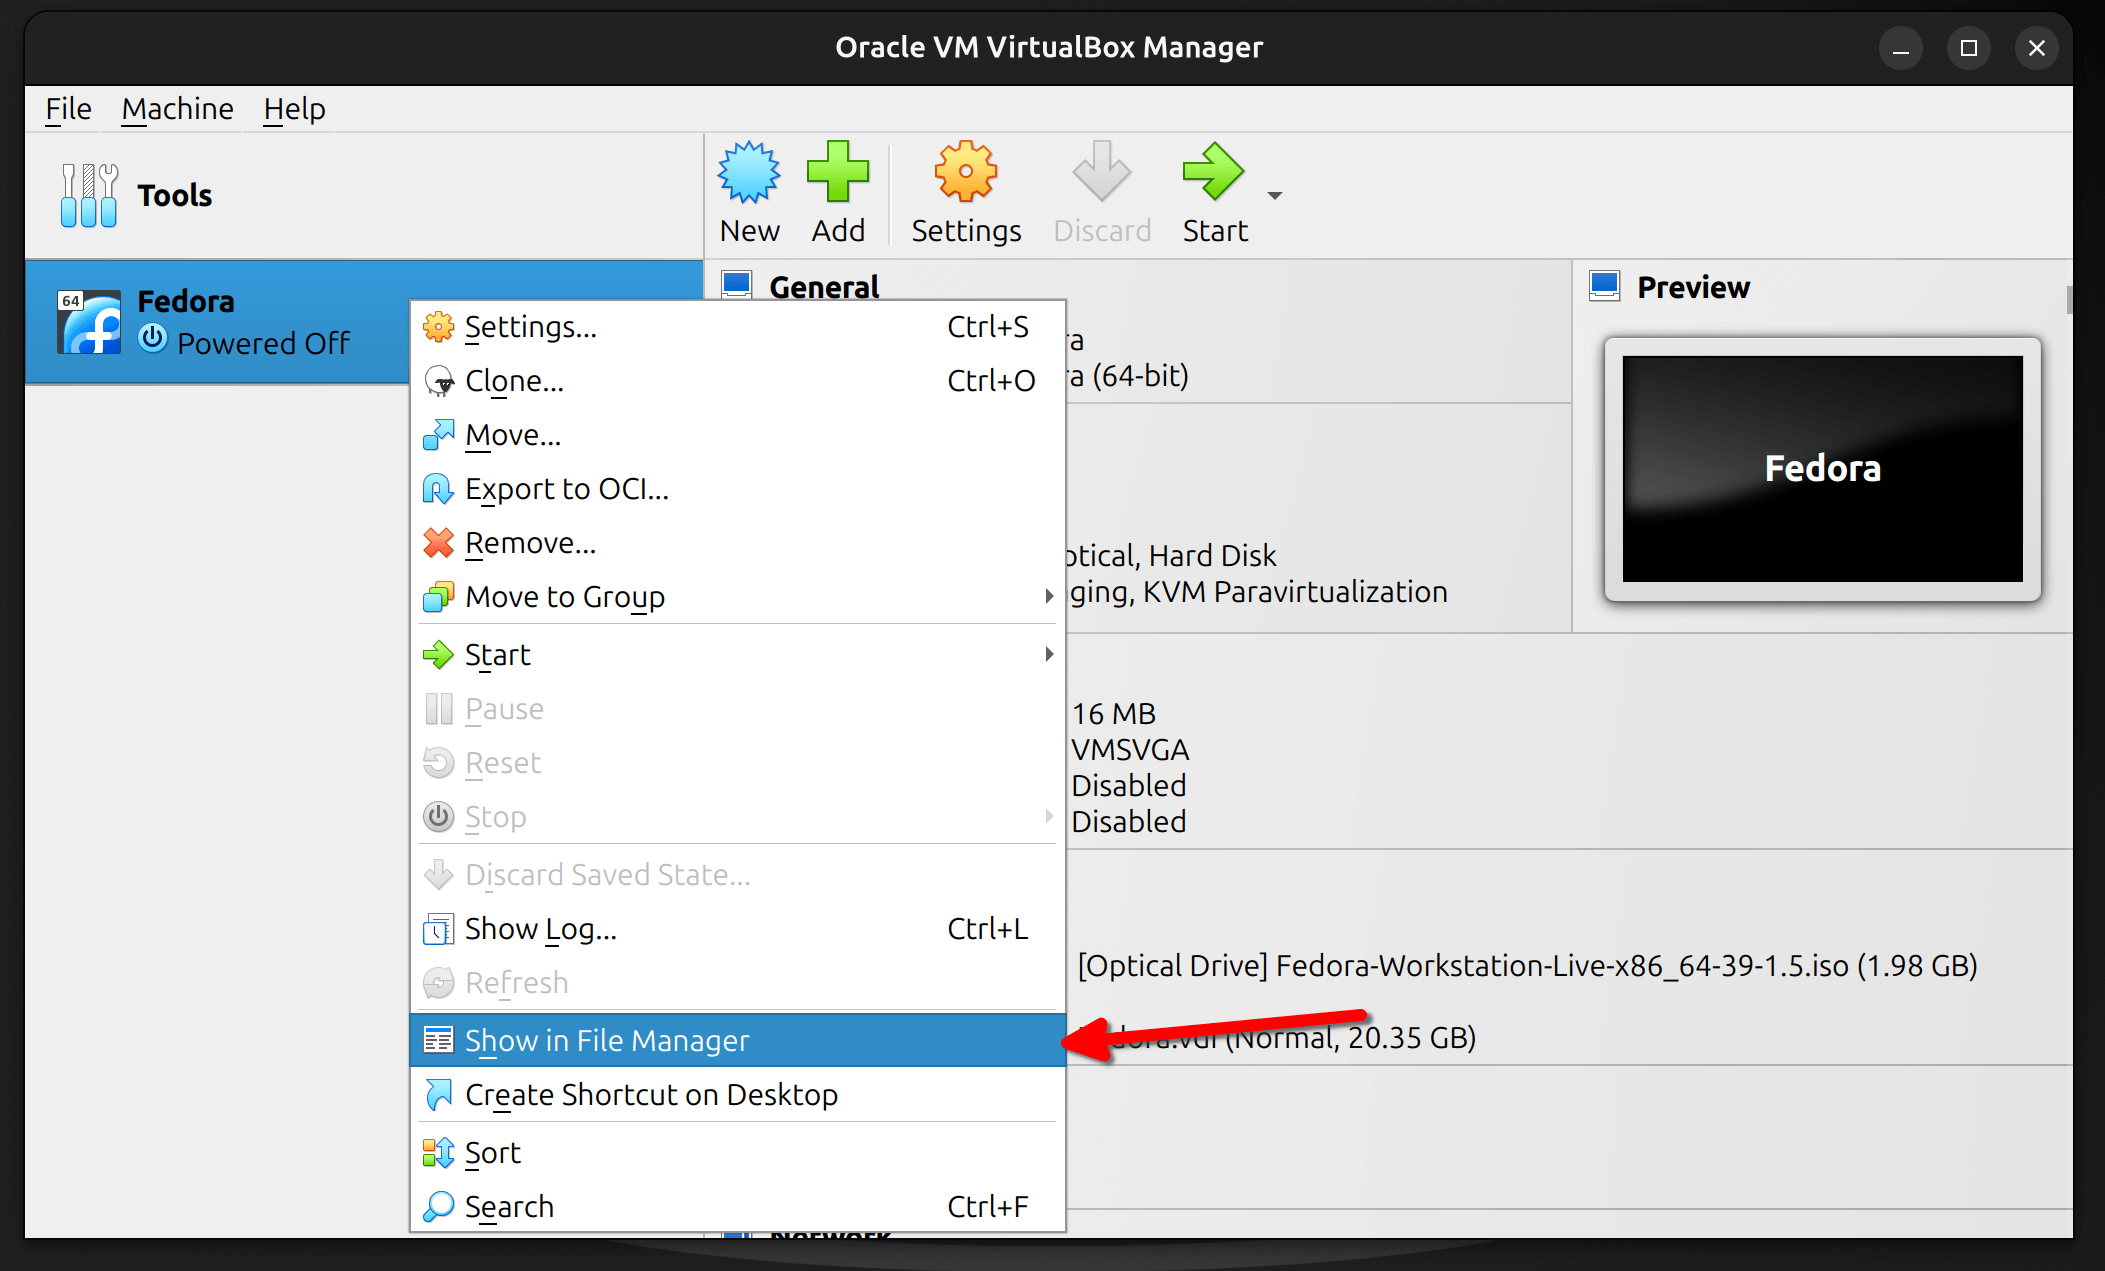
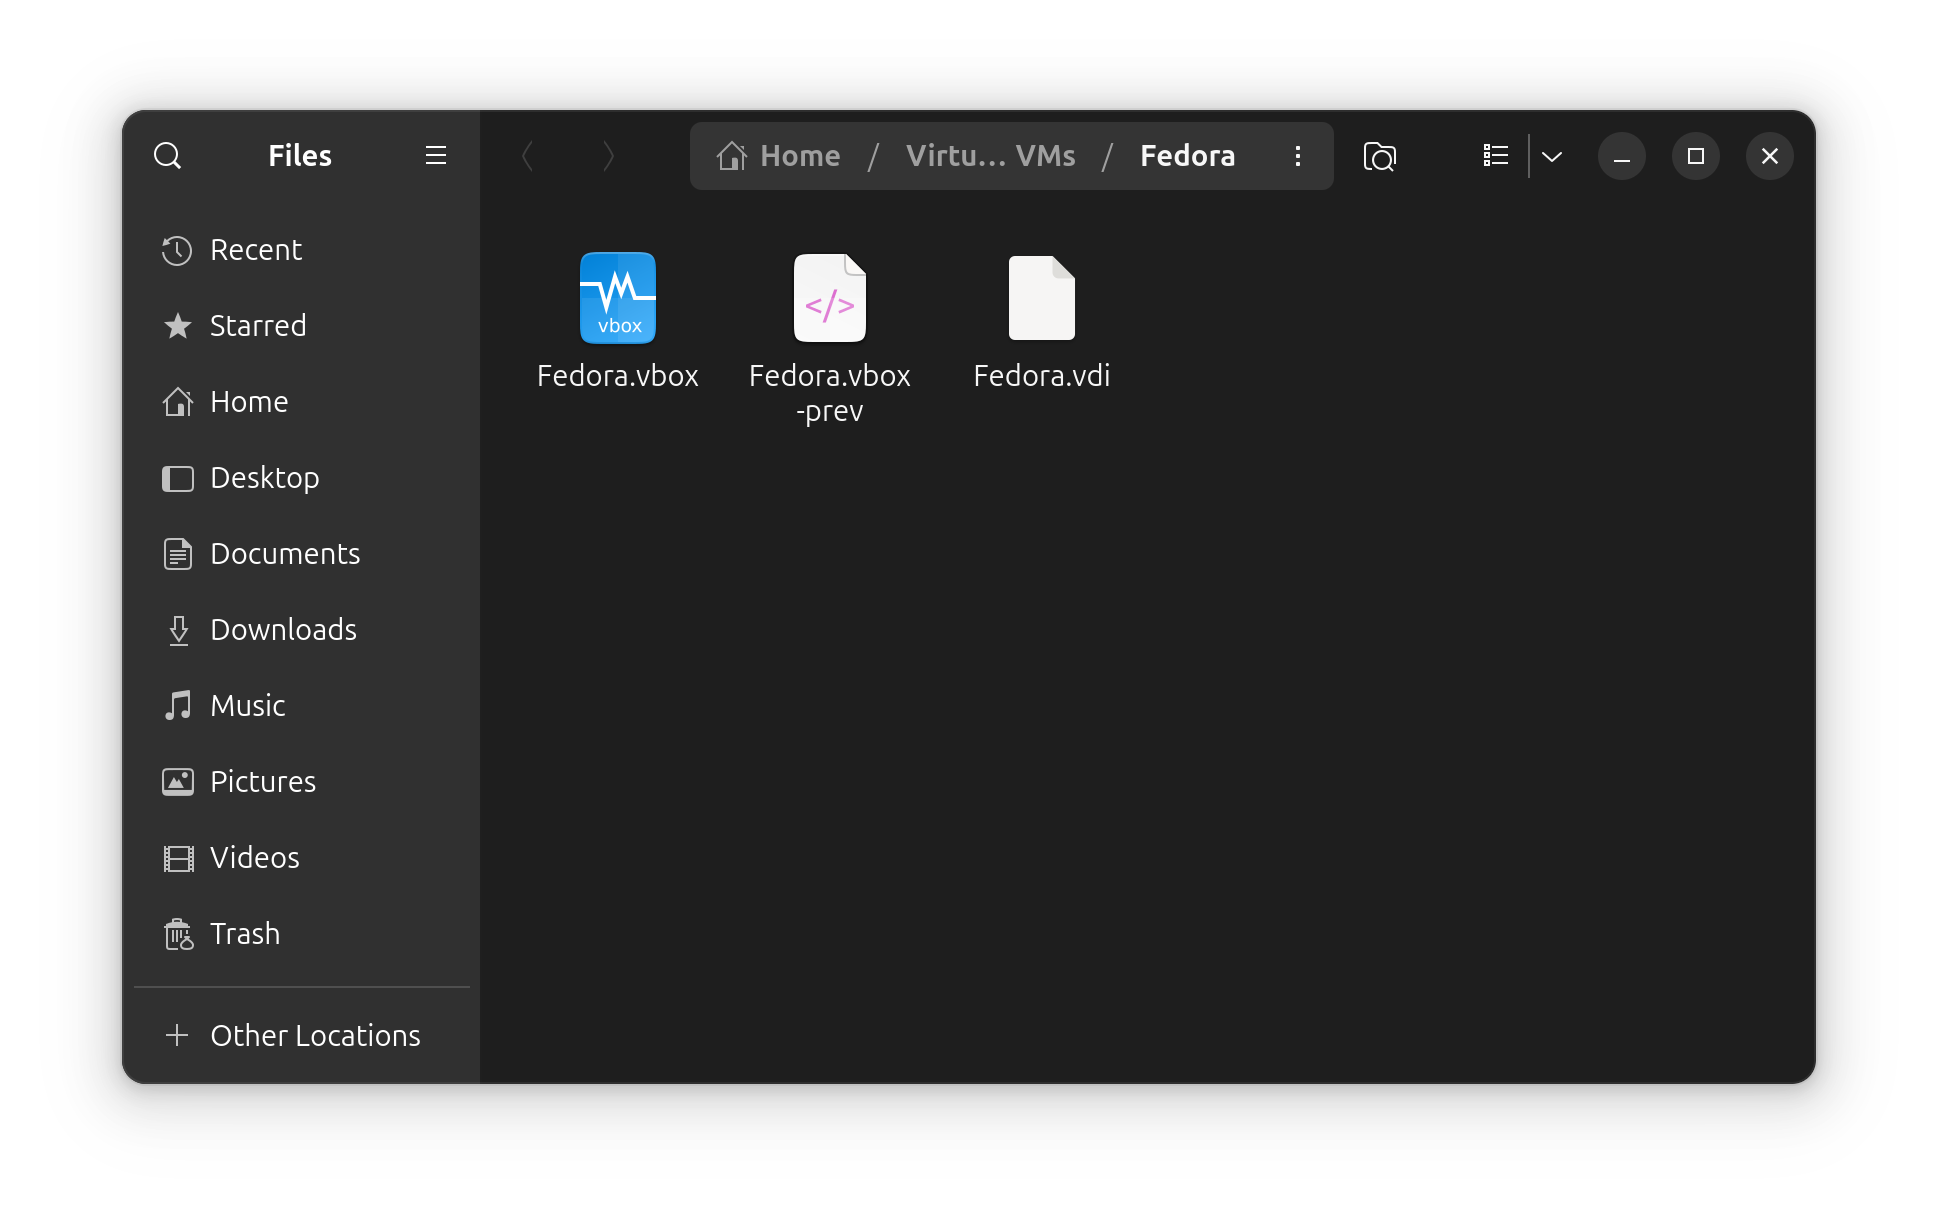
This should display the contents of the VM:
- Next, you need to navigate to its parent folder VirtualBox VMs, and then you can find the folder you would like to back up:
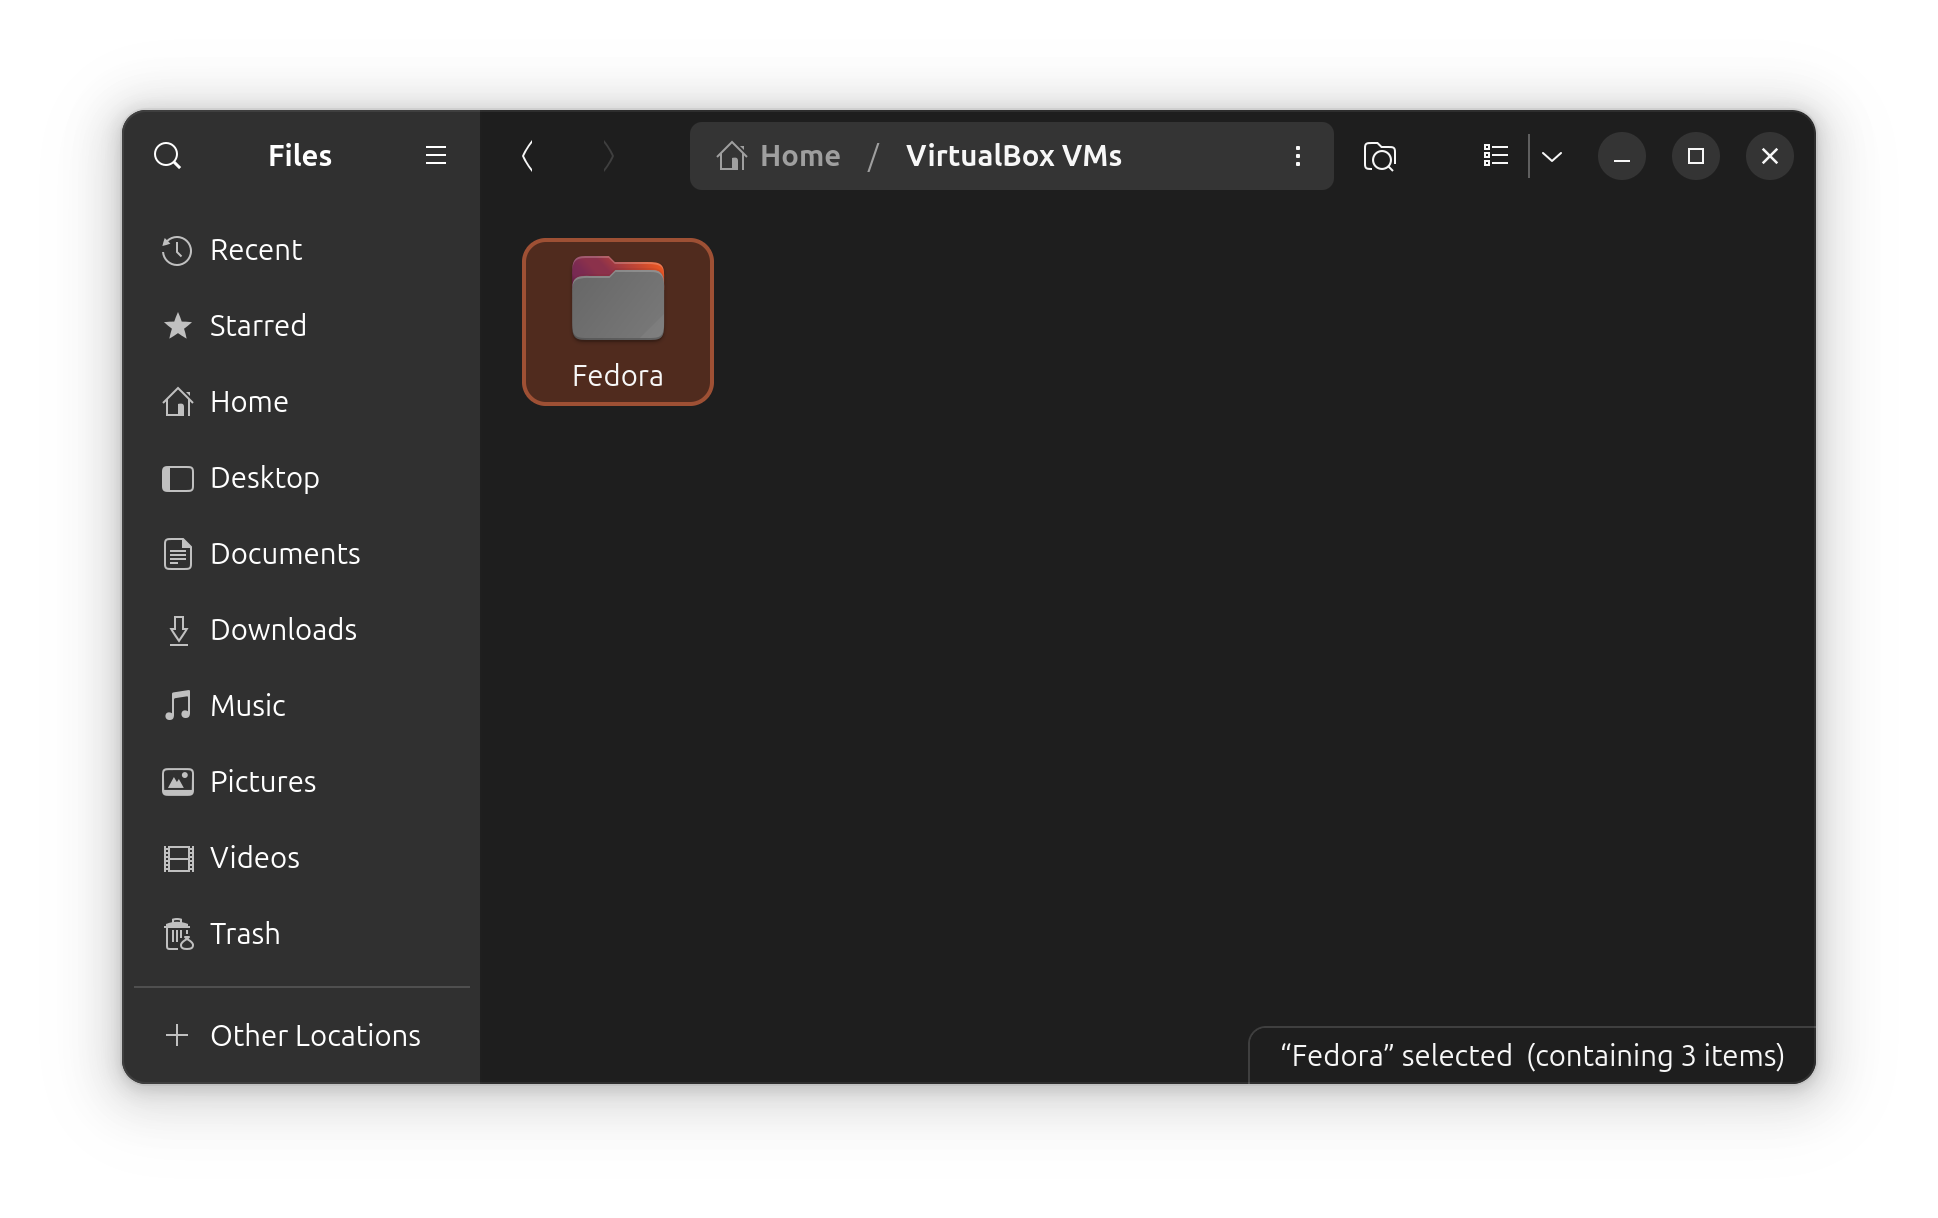
- Now, copy the folder of the VM to the preferred storage space where you would like to keep the backup (cloud/offsite or local).
You can decide to create a hash for the VM folders during backup if you want to check its integrity when restoring it.
2. Export the Virtual Machine
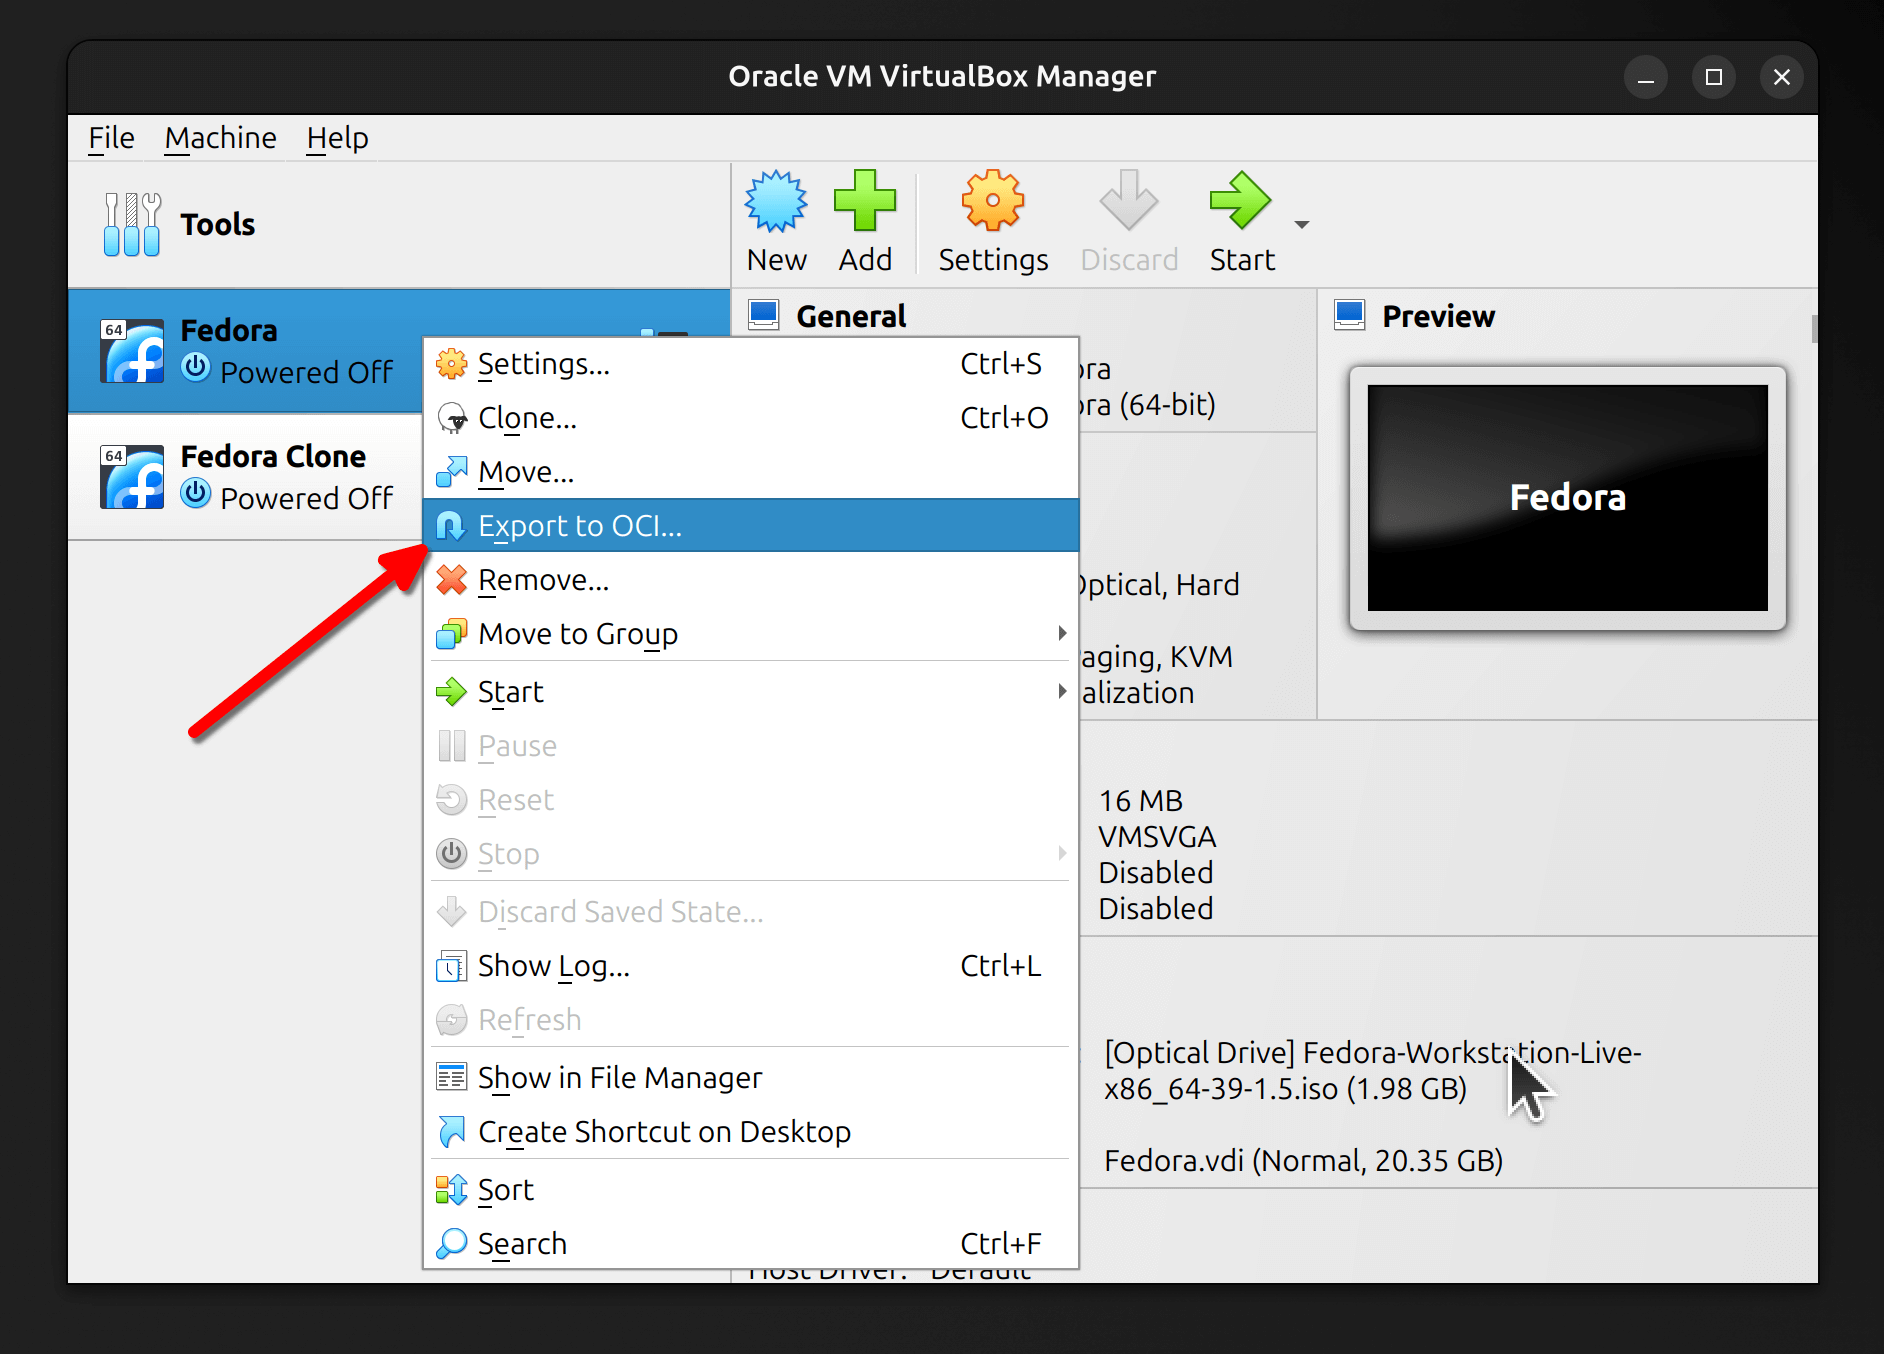
Unless you want to deploy the VM in the cloud, want to migrate it to other virtualization programs like VMware, or use it like a pre-configured VM template, you do not need to export the virtual machine.
So, for most, this could be a redundant option as backing up and cloning (discussed below) should be enough.
Usually, you will be exporting in the OVF (Open Virtualization Format) package, with the file extension as .OVA. It is a cross-platform file format that should help you migrate the VM to another program and machine.
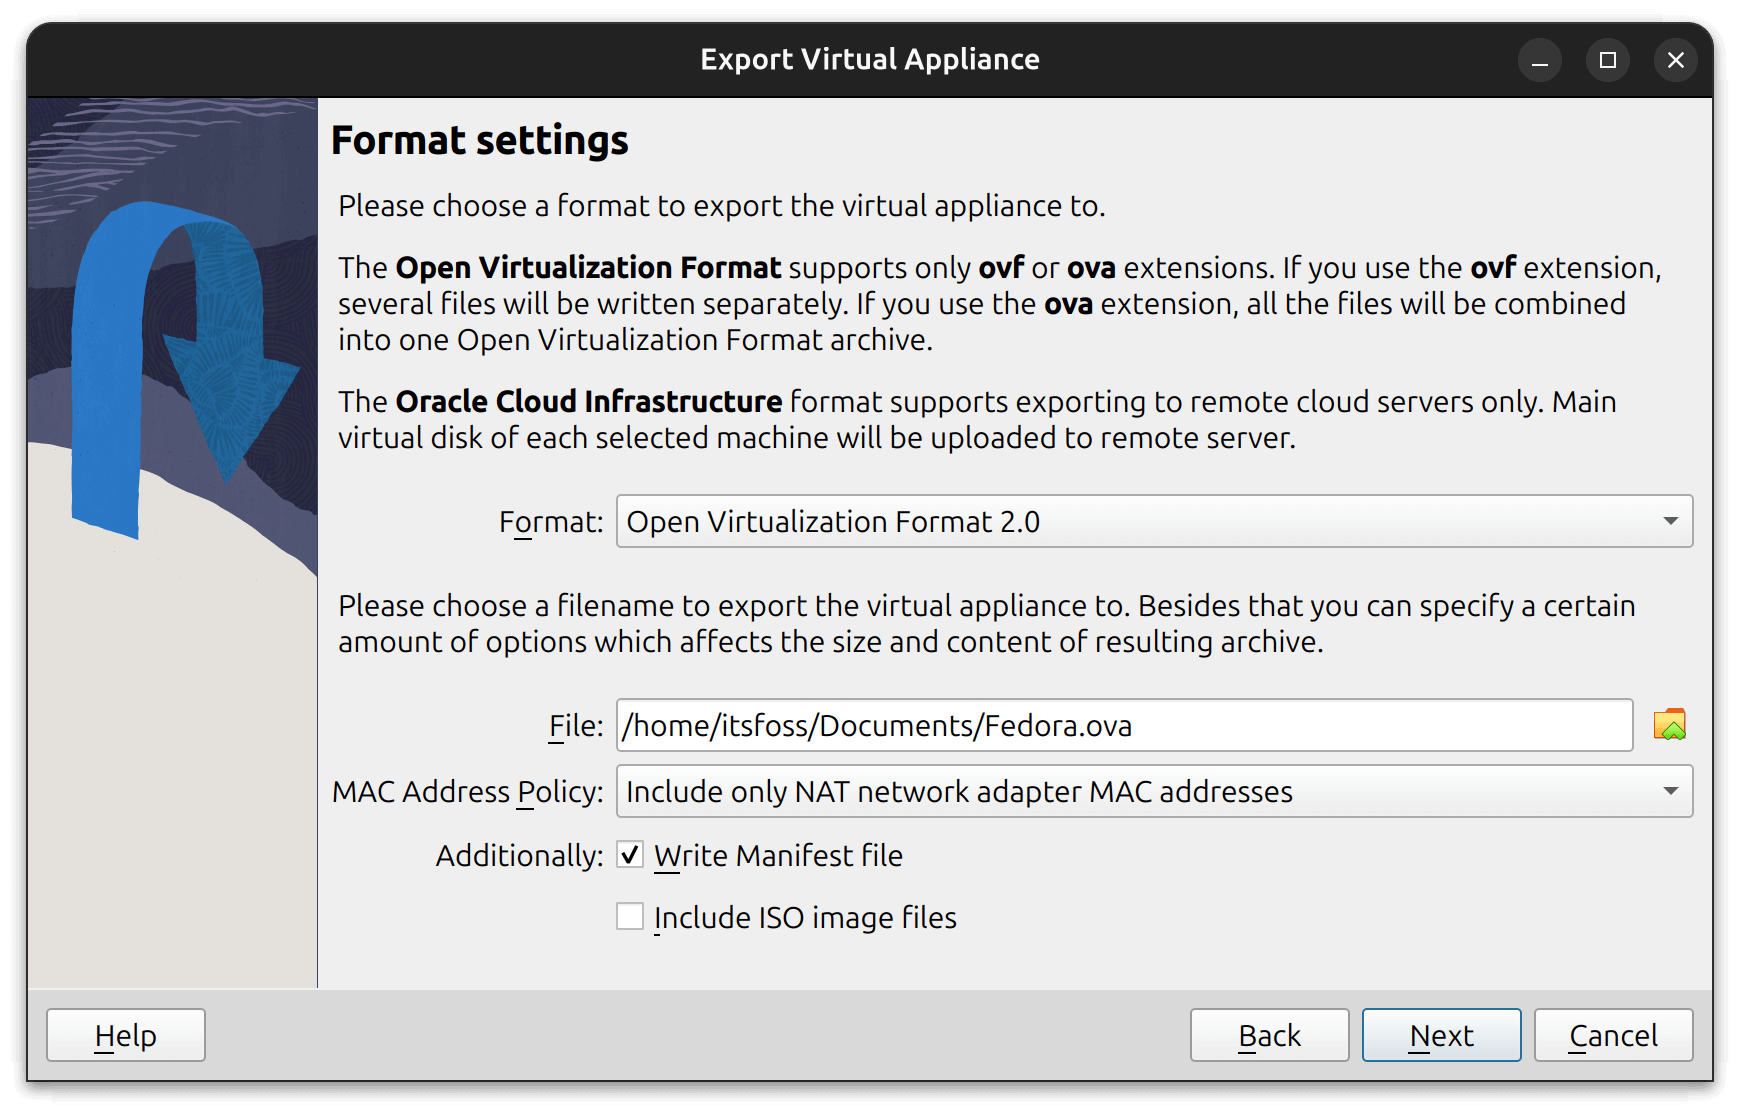
You can choose to just export the manifest file (which just exports the settings of the VM) or include the image along with it to move the guest operating system as well.
Unfortunately, I couldn't make it work on VMware, but I tried using it on VirtualBox on another computer, and it worked fine.
When you proceed with it, you can customize/label the fields as per your requirements.

And, when it comes OCI (Oracle Cloud Infrastructure) format, it is for advanced users who need it for remote cloud servers. Furthermore, it requires a set of requirements to export it as such. You can follow the official documentation if you require that.
3. Taking Snapshots
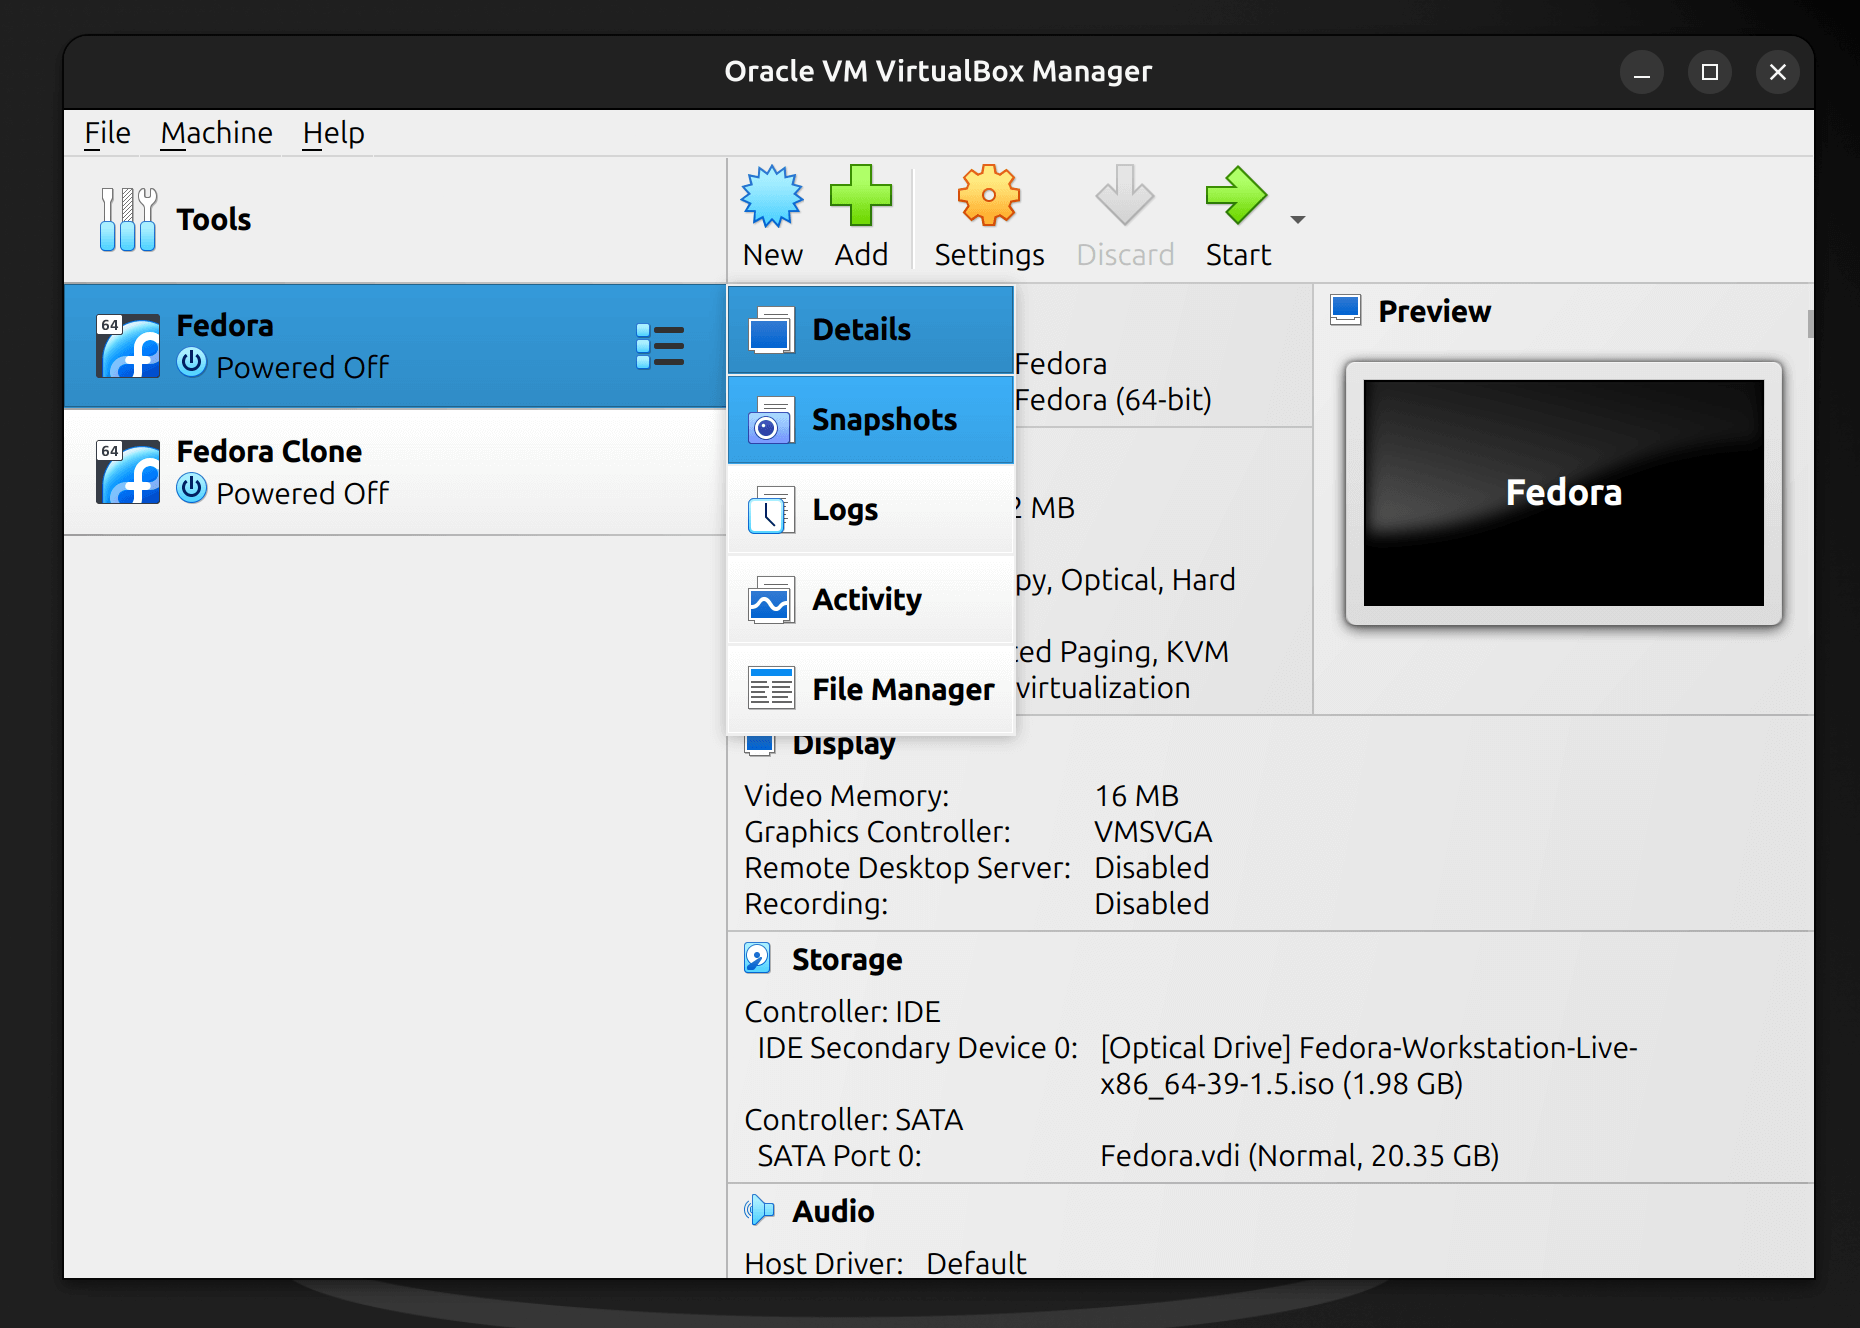
You can access the snapshot option when you click on the menu icon (with three lines) as shown in the screenshot above.
When you take a snapshot of a virtual machine, you are not backing up the entire VM, but only its current state, which includes the VM configuration, the state of files, and settings.
You can consider it to be an incremental backup (but it's not technically the same).
So, if you want to have a restore point (s) in your VM, you can choose to take a snapshot. If you deleted a file, it will be restored in an older snapshot. So, all the changes that you did currently will go away if you go back to a snapshot.
There is no limit to how many snapshots you take, and these do not take as much as space as a complete backup.
Restoring Virtual Machine
Depending on the type of backup you have. You can restore your VM in three different ways:
- Restoring the folder
- Importing the VM (from .ova file)
- Restoring a snapshot
1. Restoring the folder
You need to place the VM folder in the default storage path of your VirtualBox (whatever that is for you — in case you have customized it). A simply copy and paste back to the VM storage path will do the trick.
The default path looks like:
- C:\Users\Ankush Das\VirtualBox VMs → Windows
- /home/itsfoss/VirtualBox VMs → Linux (Ubuntu)
Suggested Read 📖
 Ankush Das
2. Importing the VM
Depending on the type of export, you can import the VM settings, or the VM along with the image.
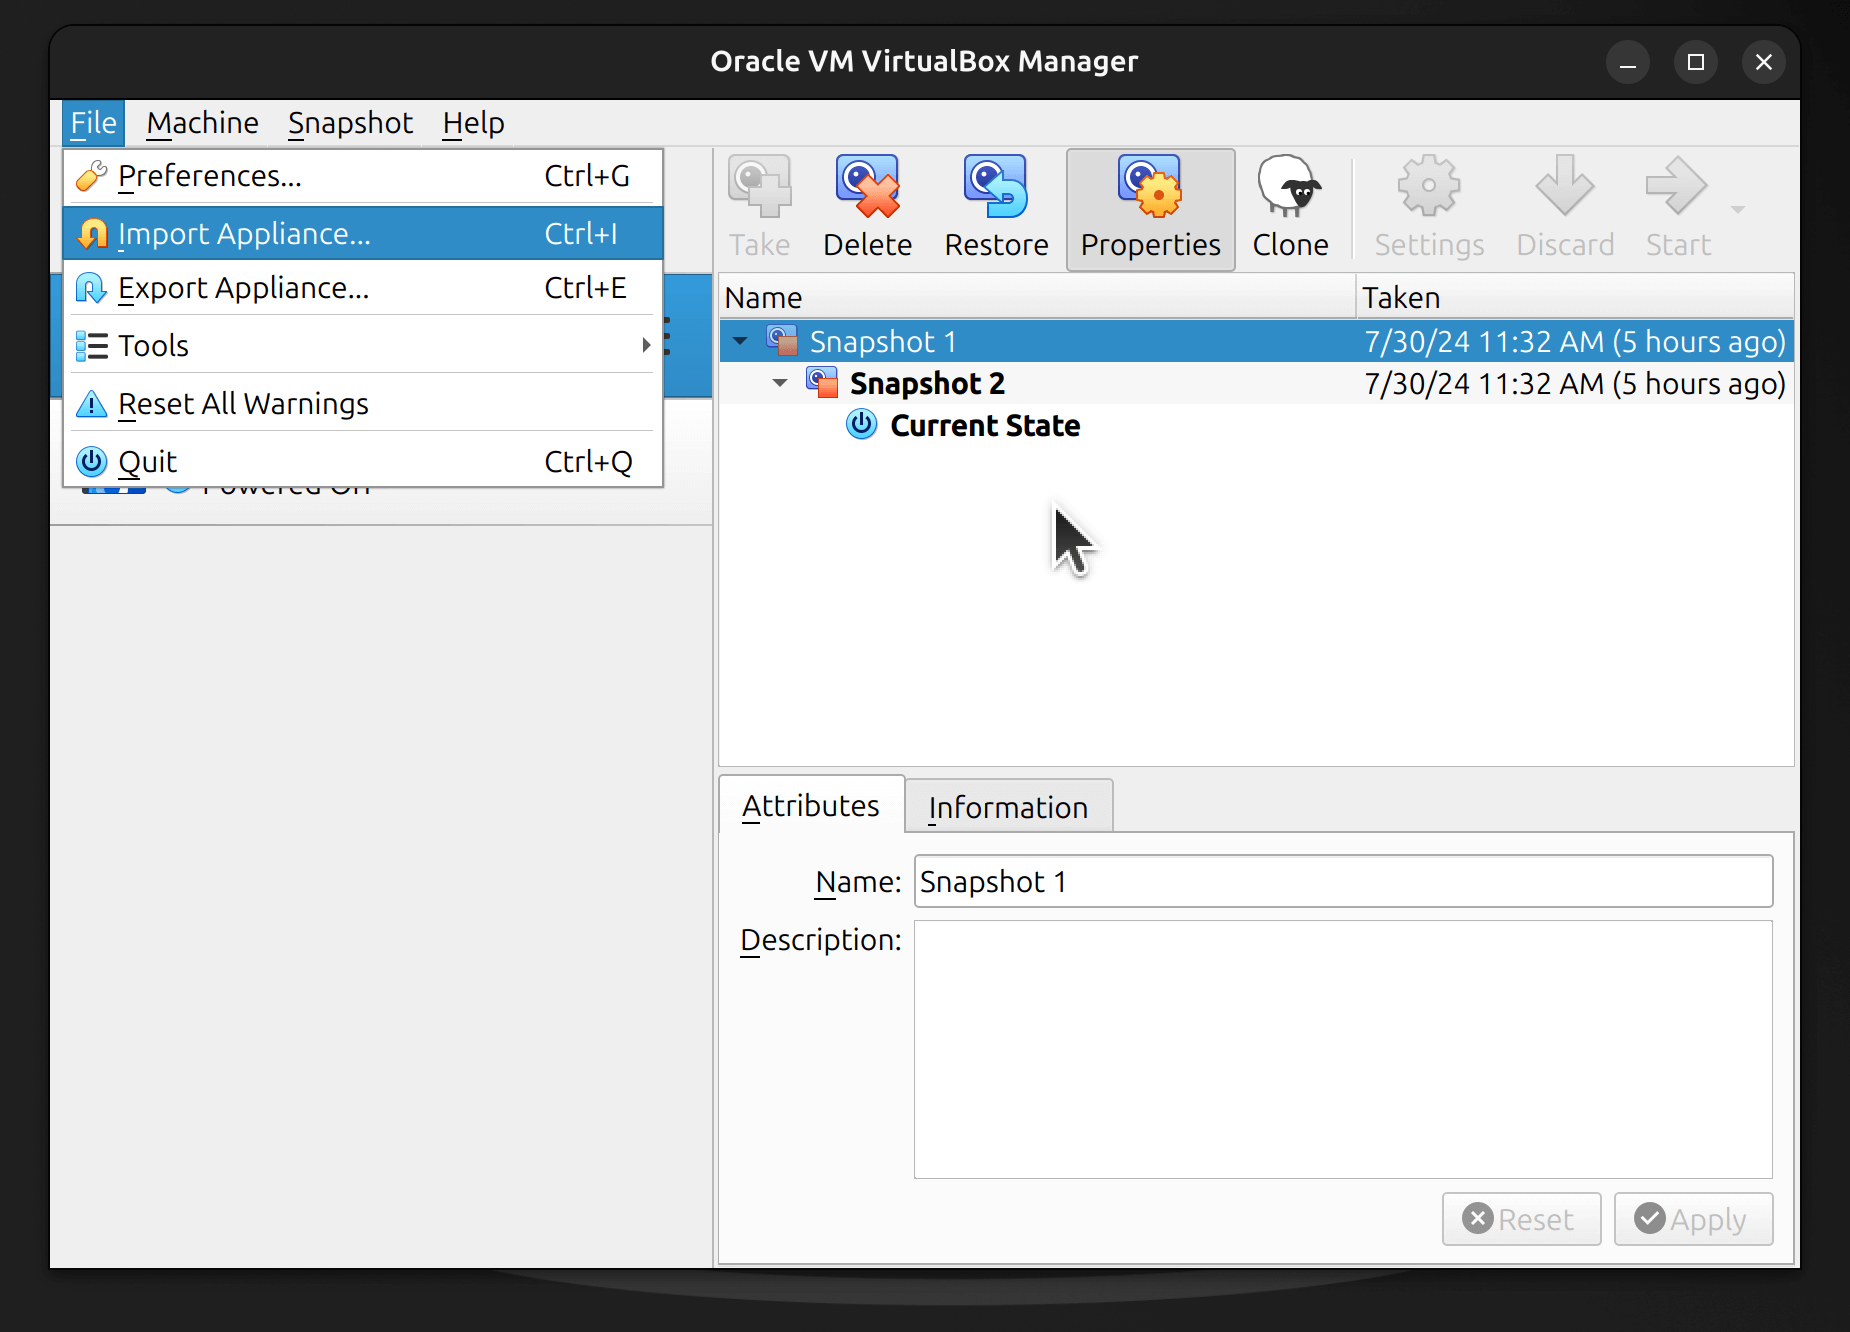
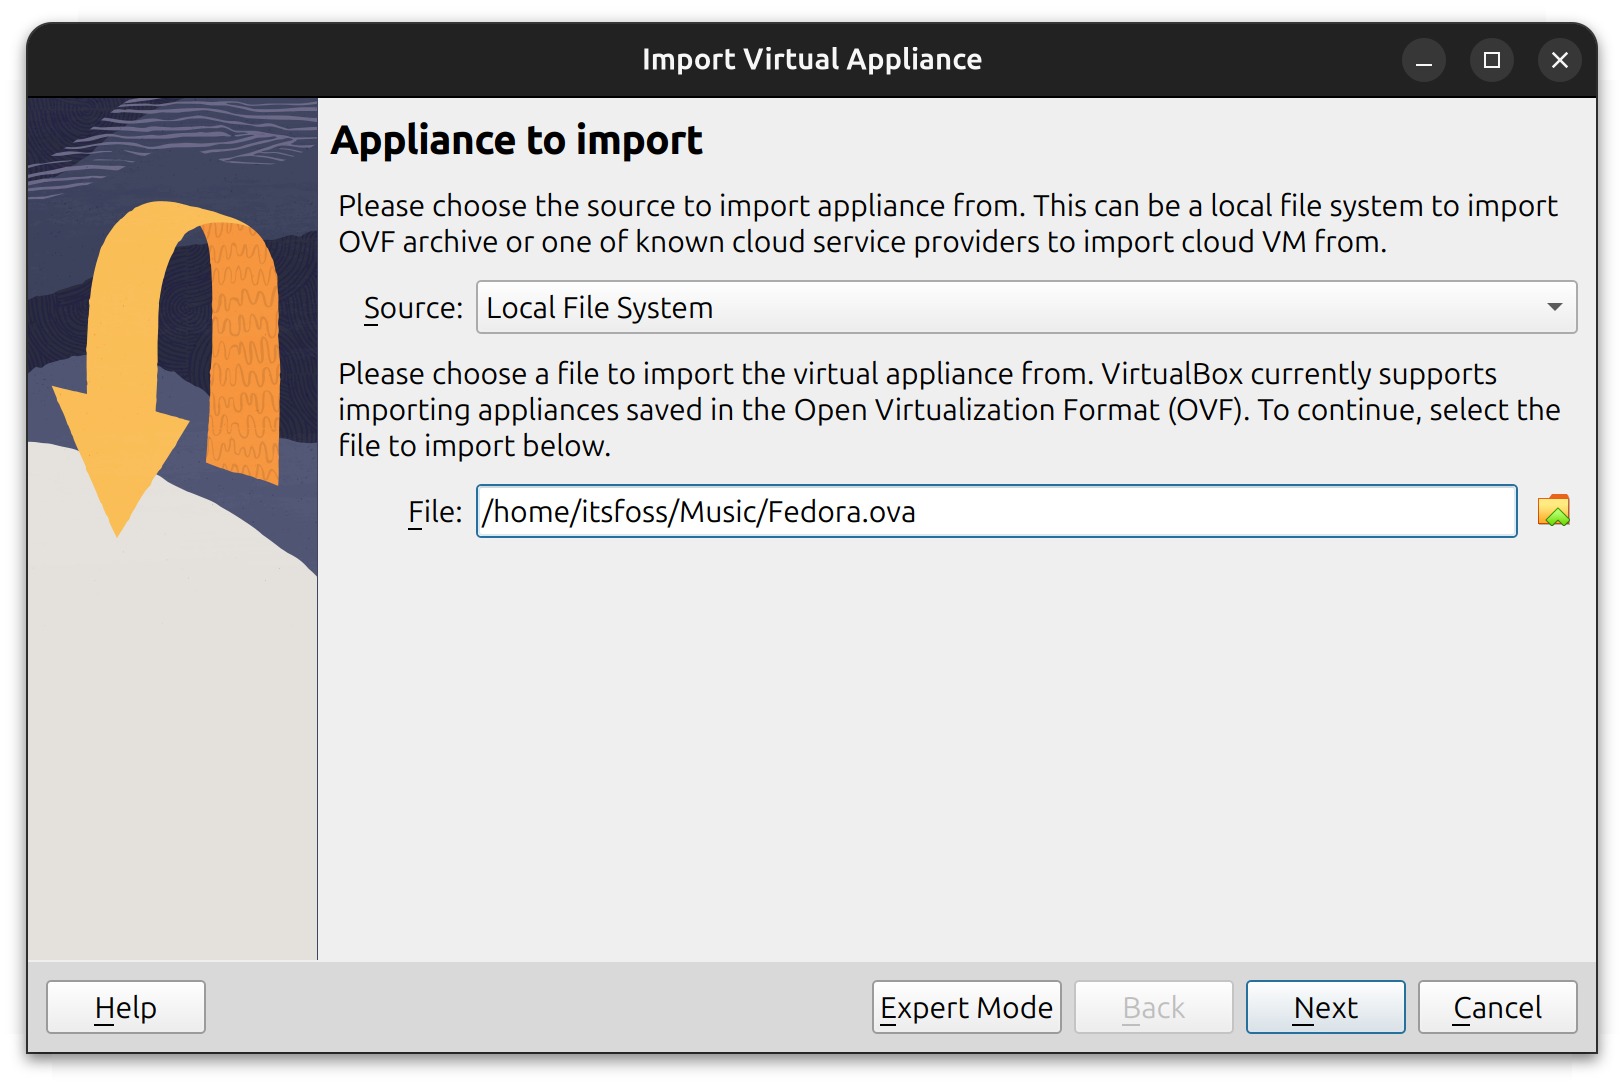
Head to the menu bar, File → Import Appliance, and then select the exported file.
You can try to import it to another virtualization program, but for that, you need to check the documentation for the program you want to import it to and how you can successfully import it.
And, if you are importing it to VirtualBox, it should work without any hassle.
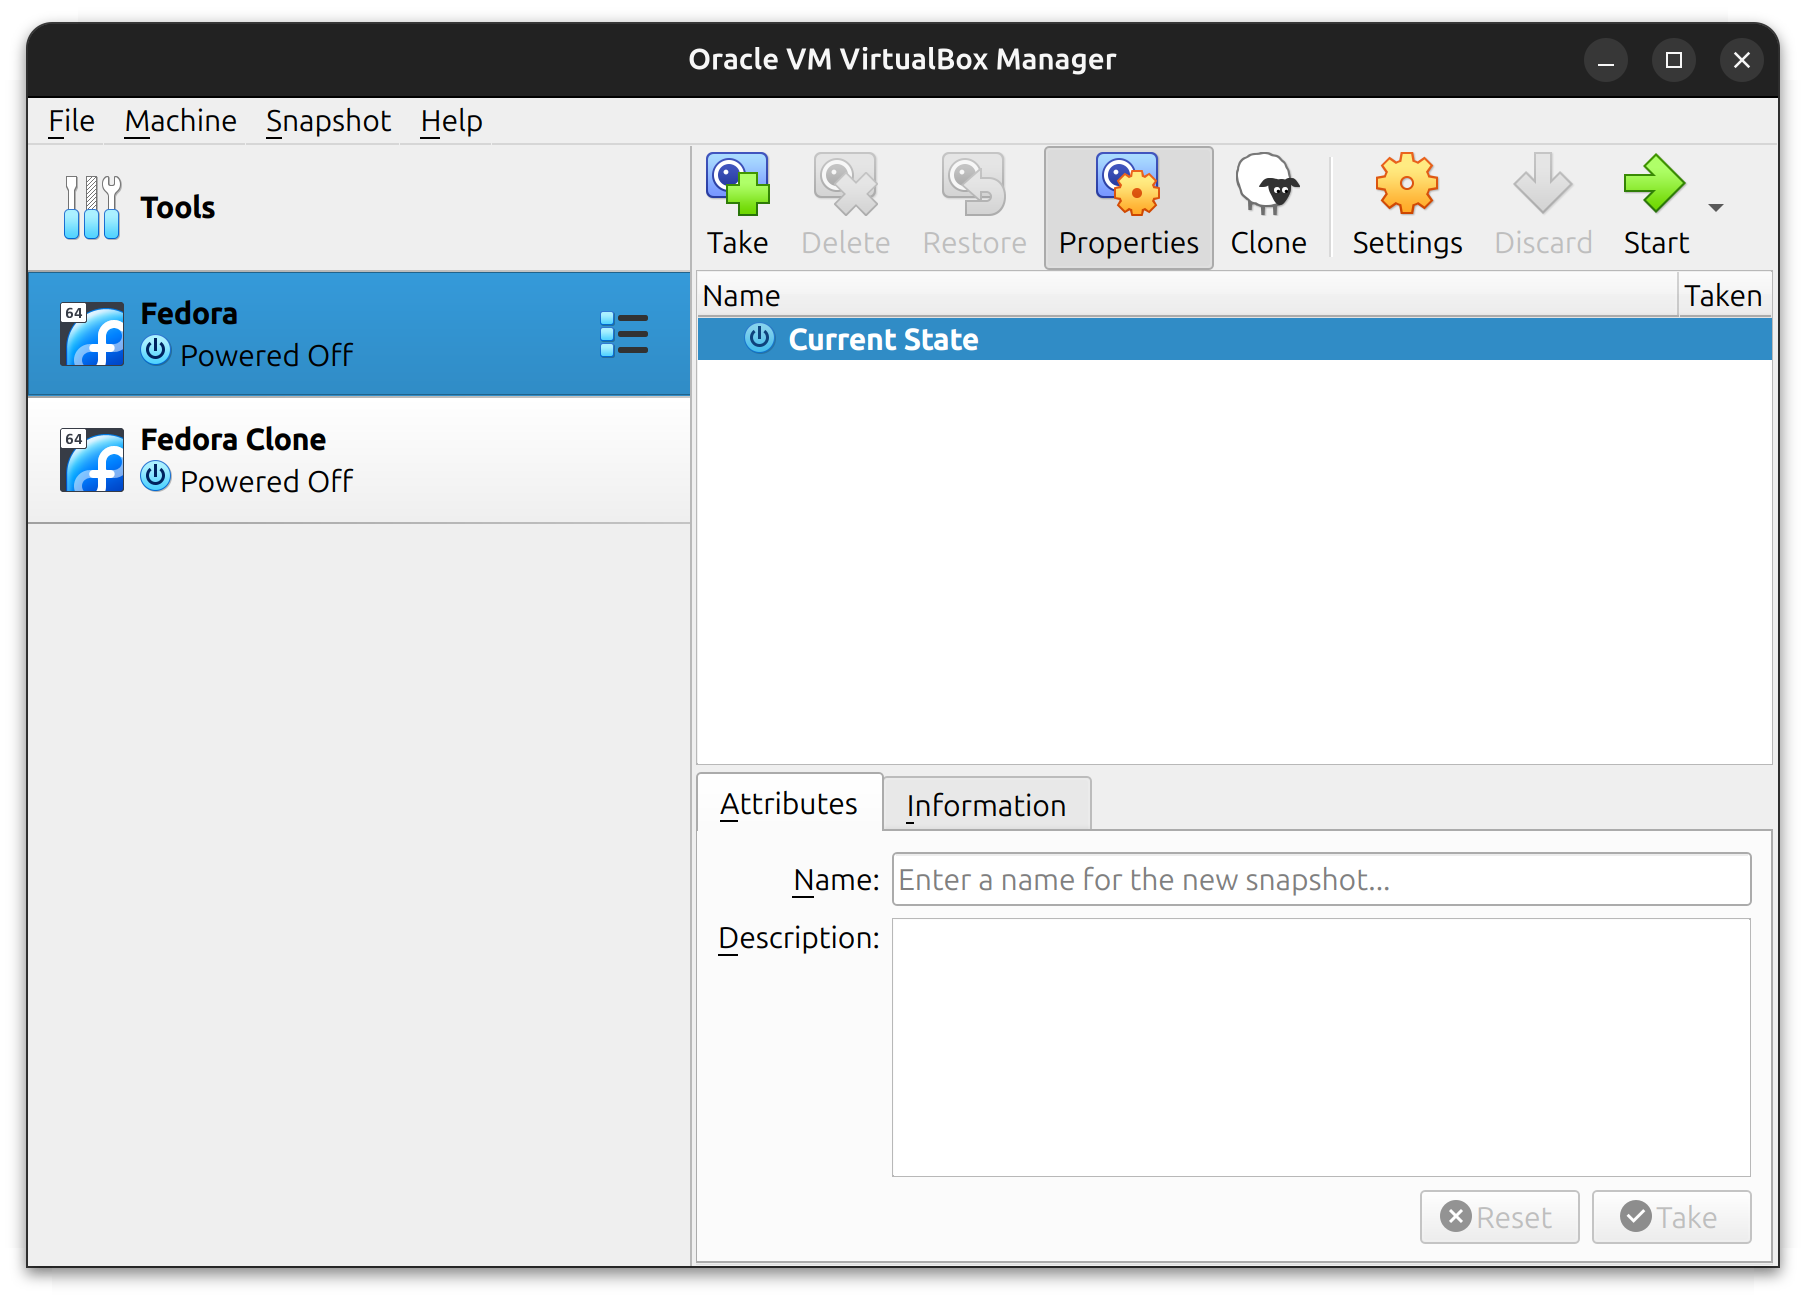
3. Restoring snapshots
You need to head to the same spot where you took a snapshot of your VM. Just select the snapshot you want, and click on it to restore it as shown above.
Clone Virtual Machine on VirtualBox
If you want to make an exact replica of your VM without affecting the original setup, it is best to clone your VM.
Of course, you need to make sure that your system has enough free space to accommodate it. You can always free up space before you do this.
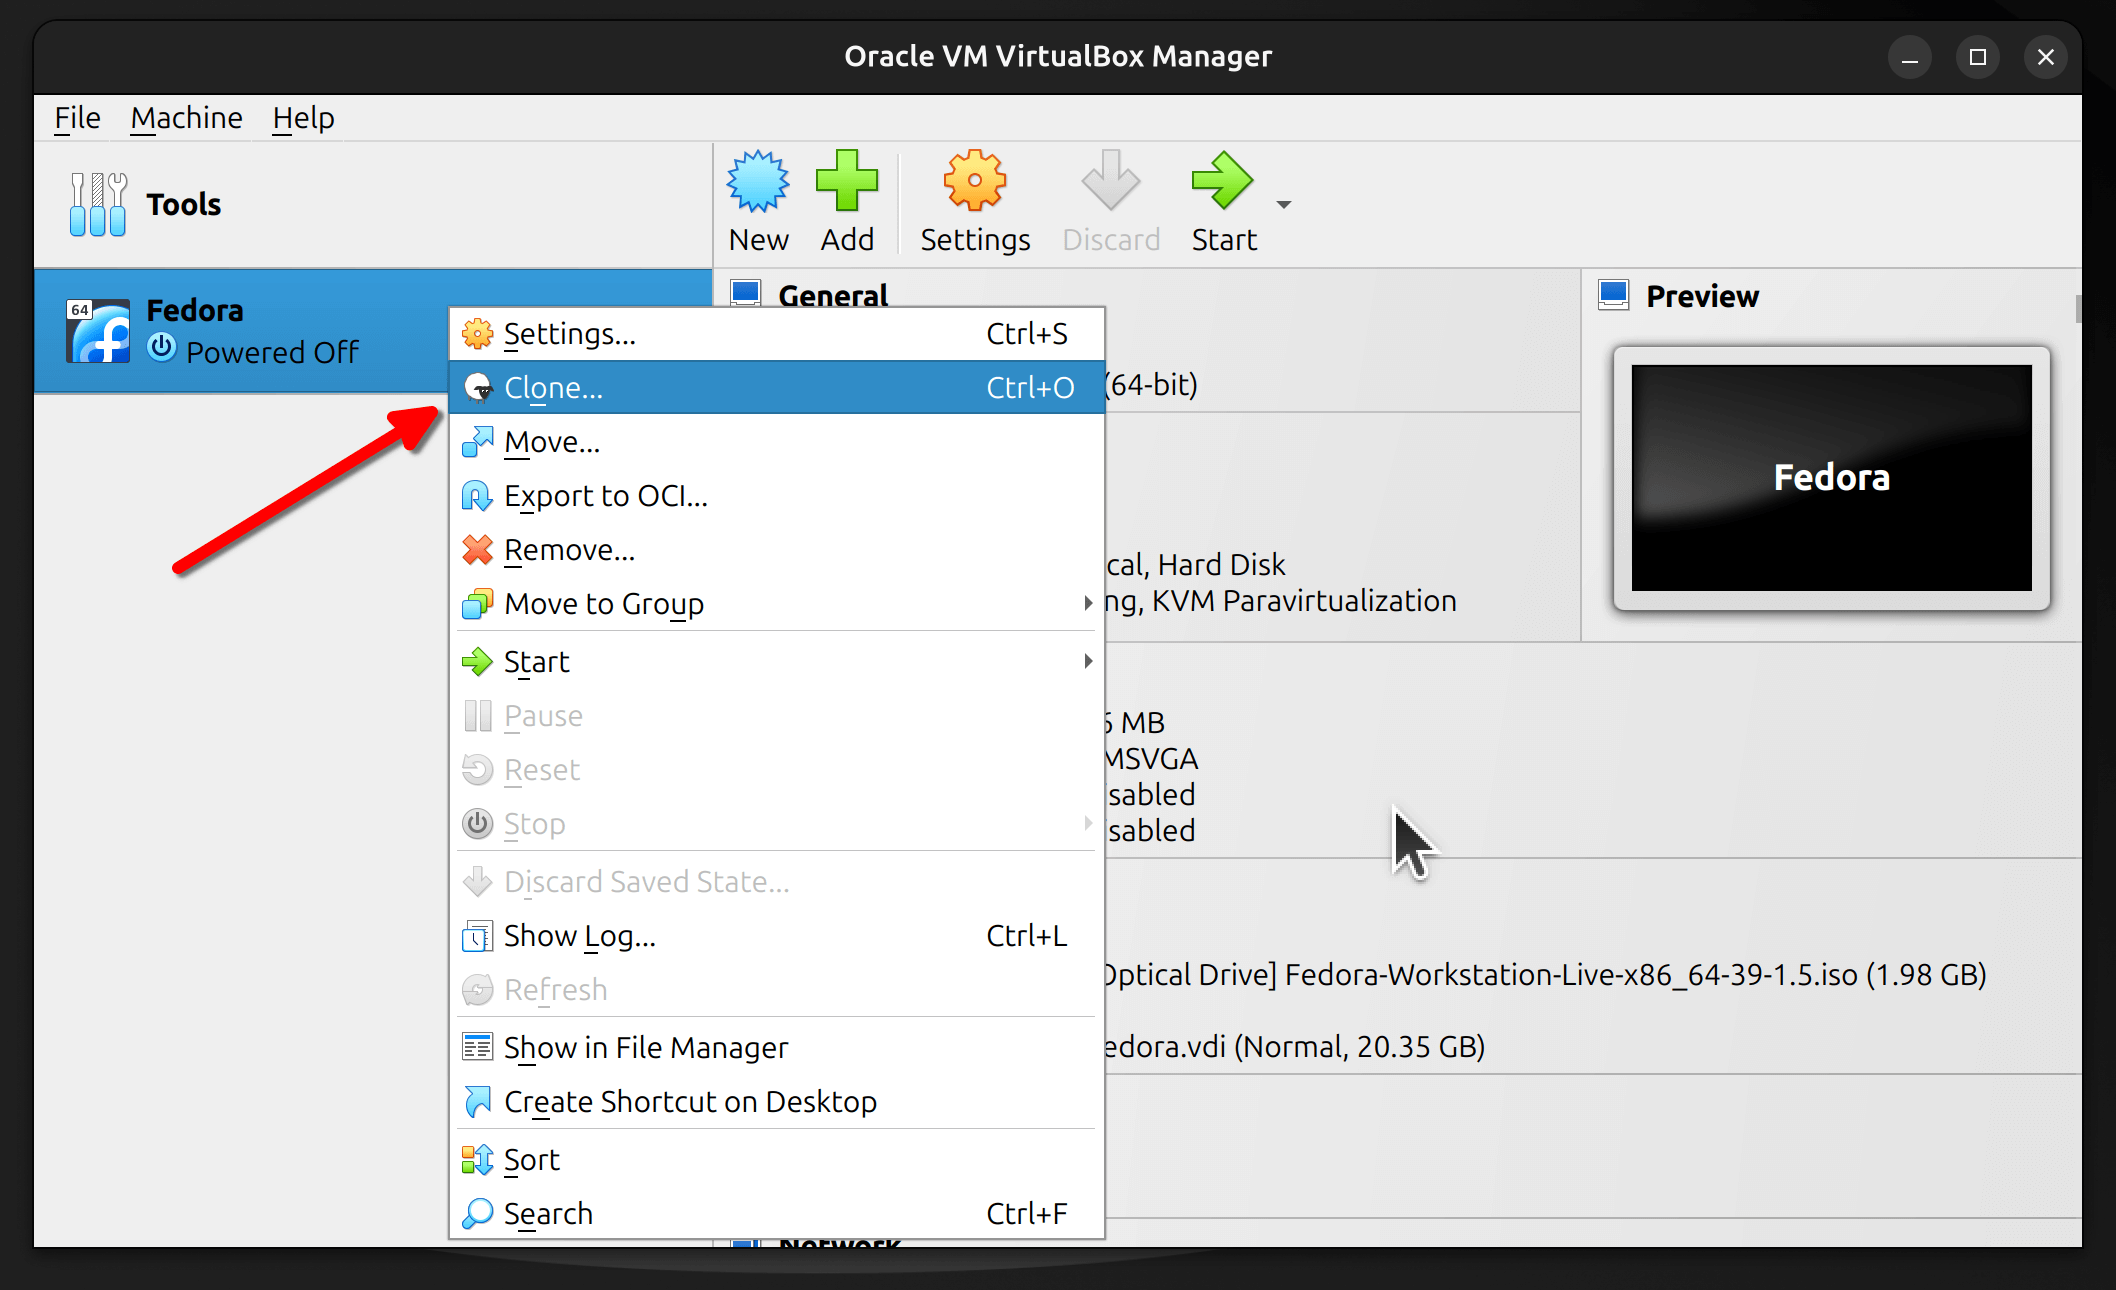
The clone option can be found in the same context-menu when you right-click on the VM listed in your VirtualBox program. Here's how it looks like:
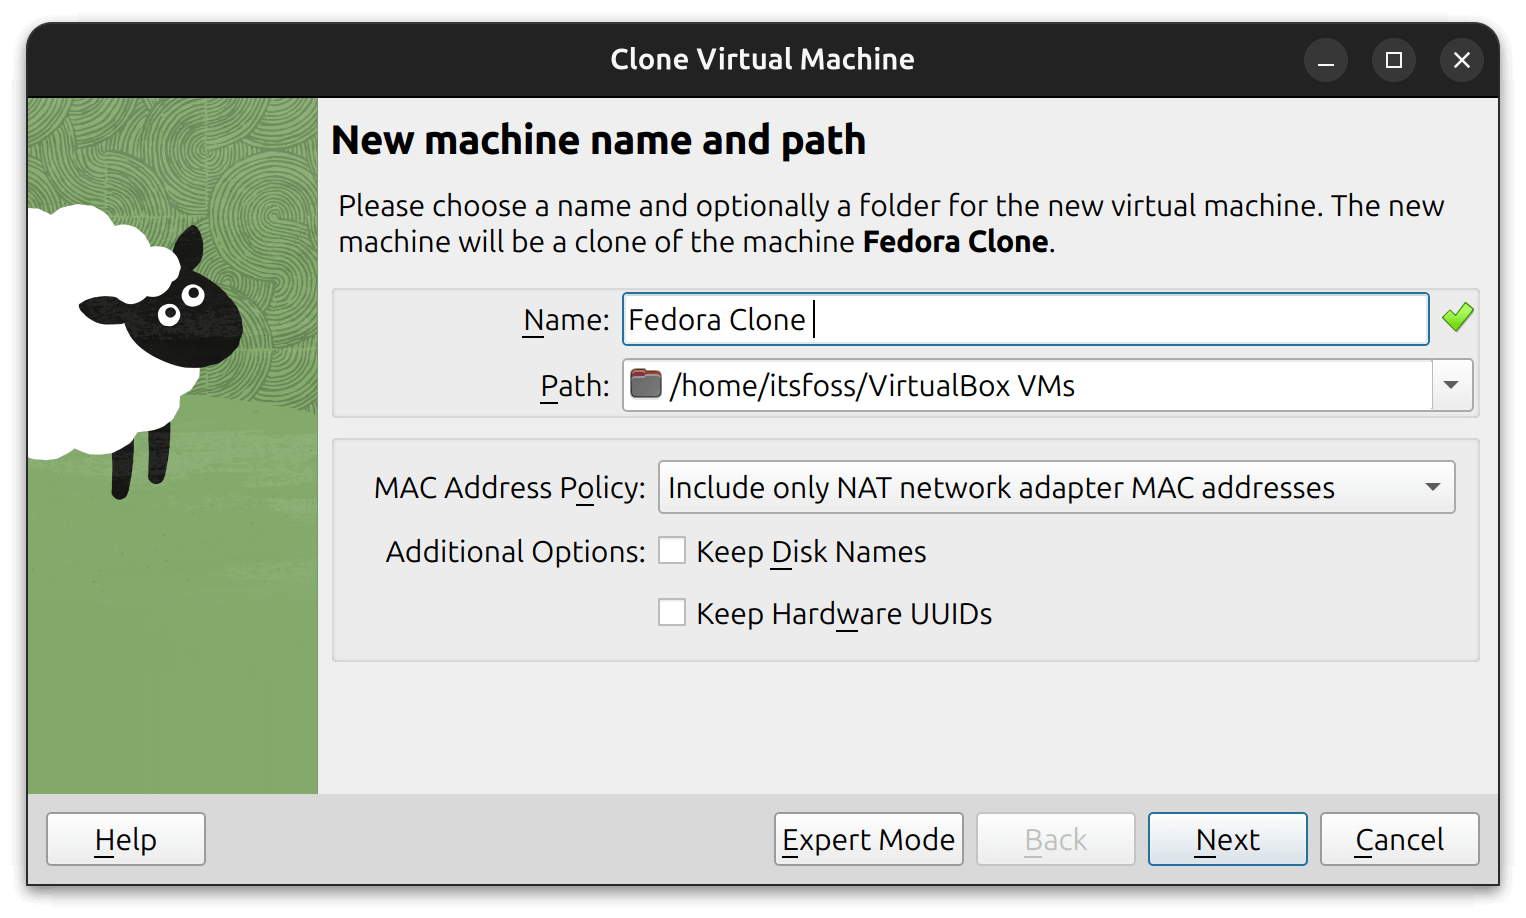
Next, you will be presented with a screen to customize the name of the clone, choose a storage path (same or different), MAC address policy, use the same disk names, and more.
Once you proceed (or hit the expert mode) you will get the option to select the clone as a "Full Clone" or a "Linked Clone". As illustrated by the screenshot below, the linked clone will not be an independent instance, and will create a snapshot of the current virtual machine. So, you need to decide if it is something that you want.
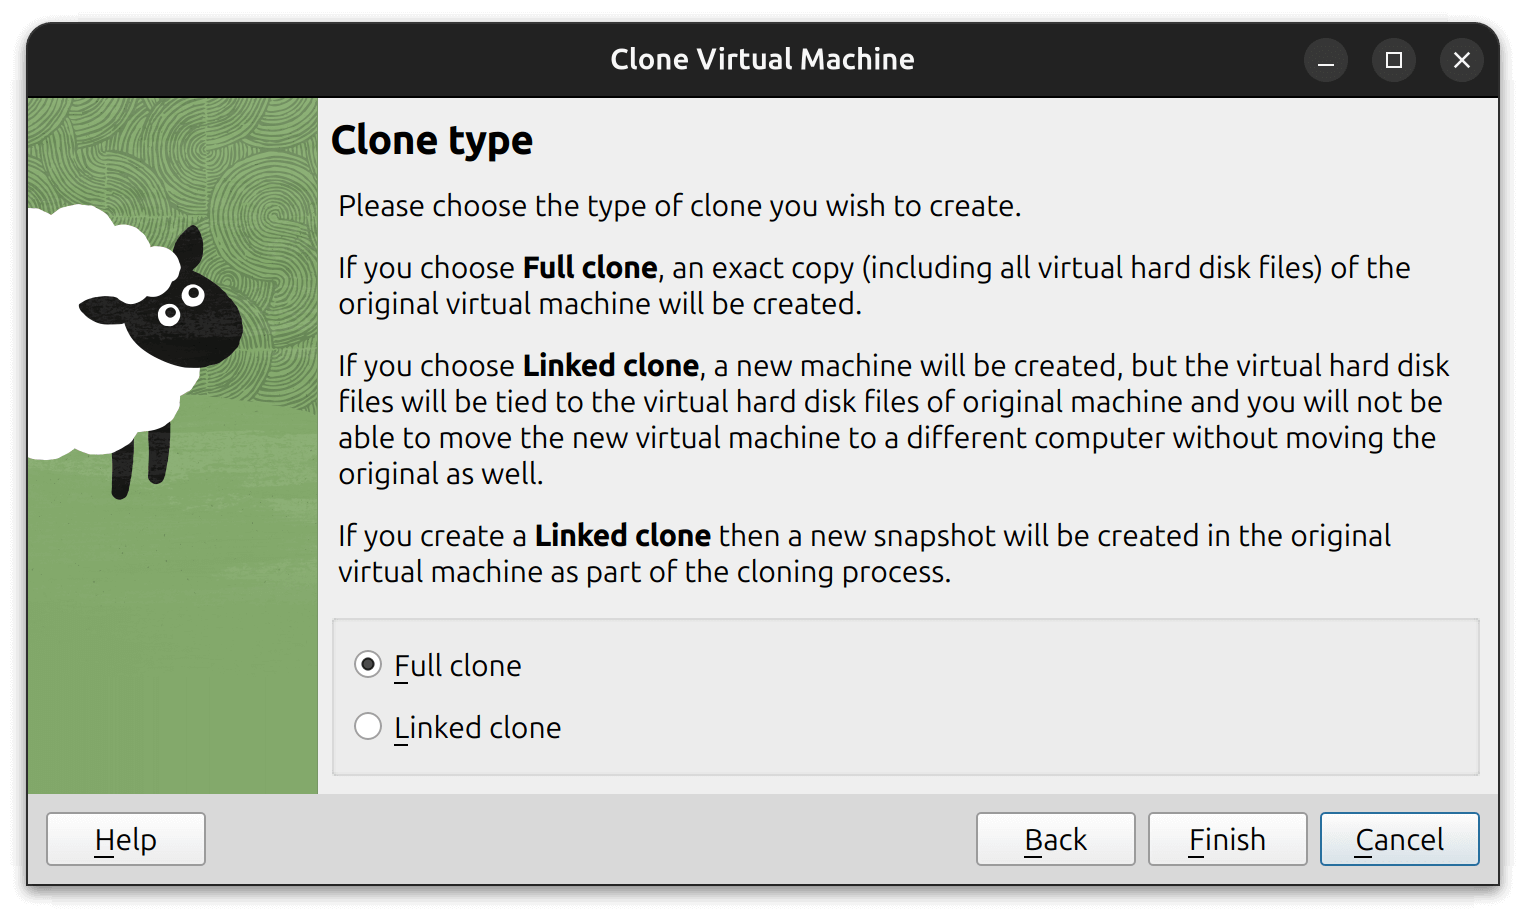
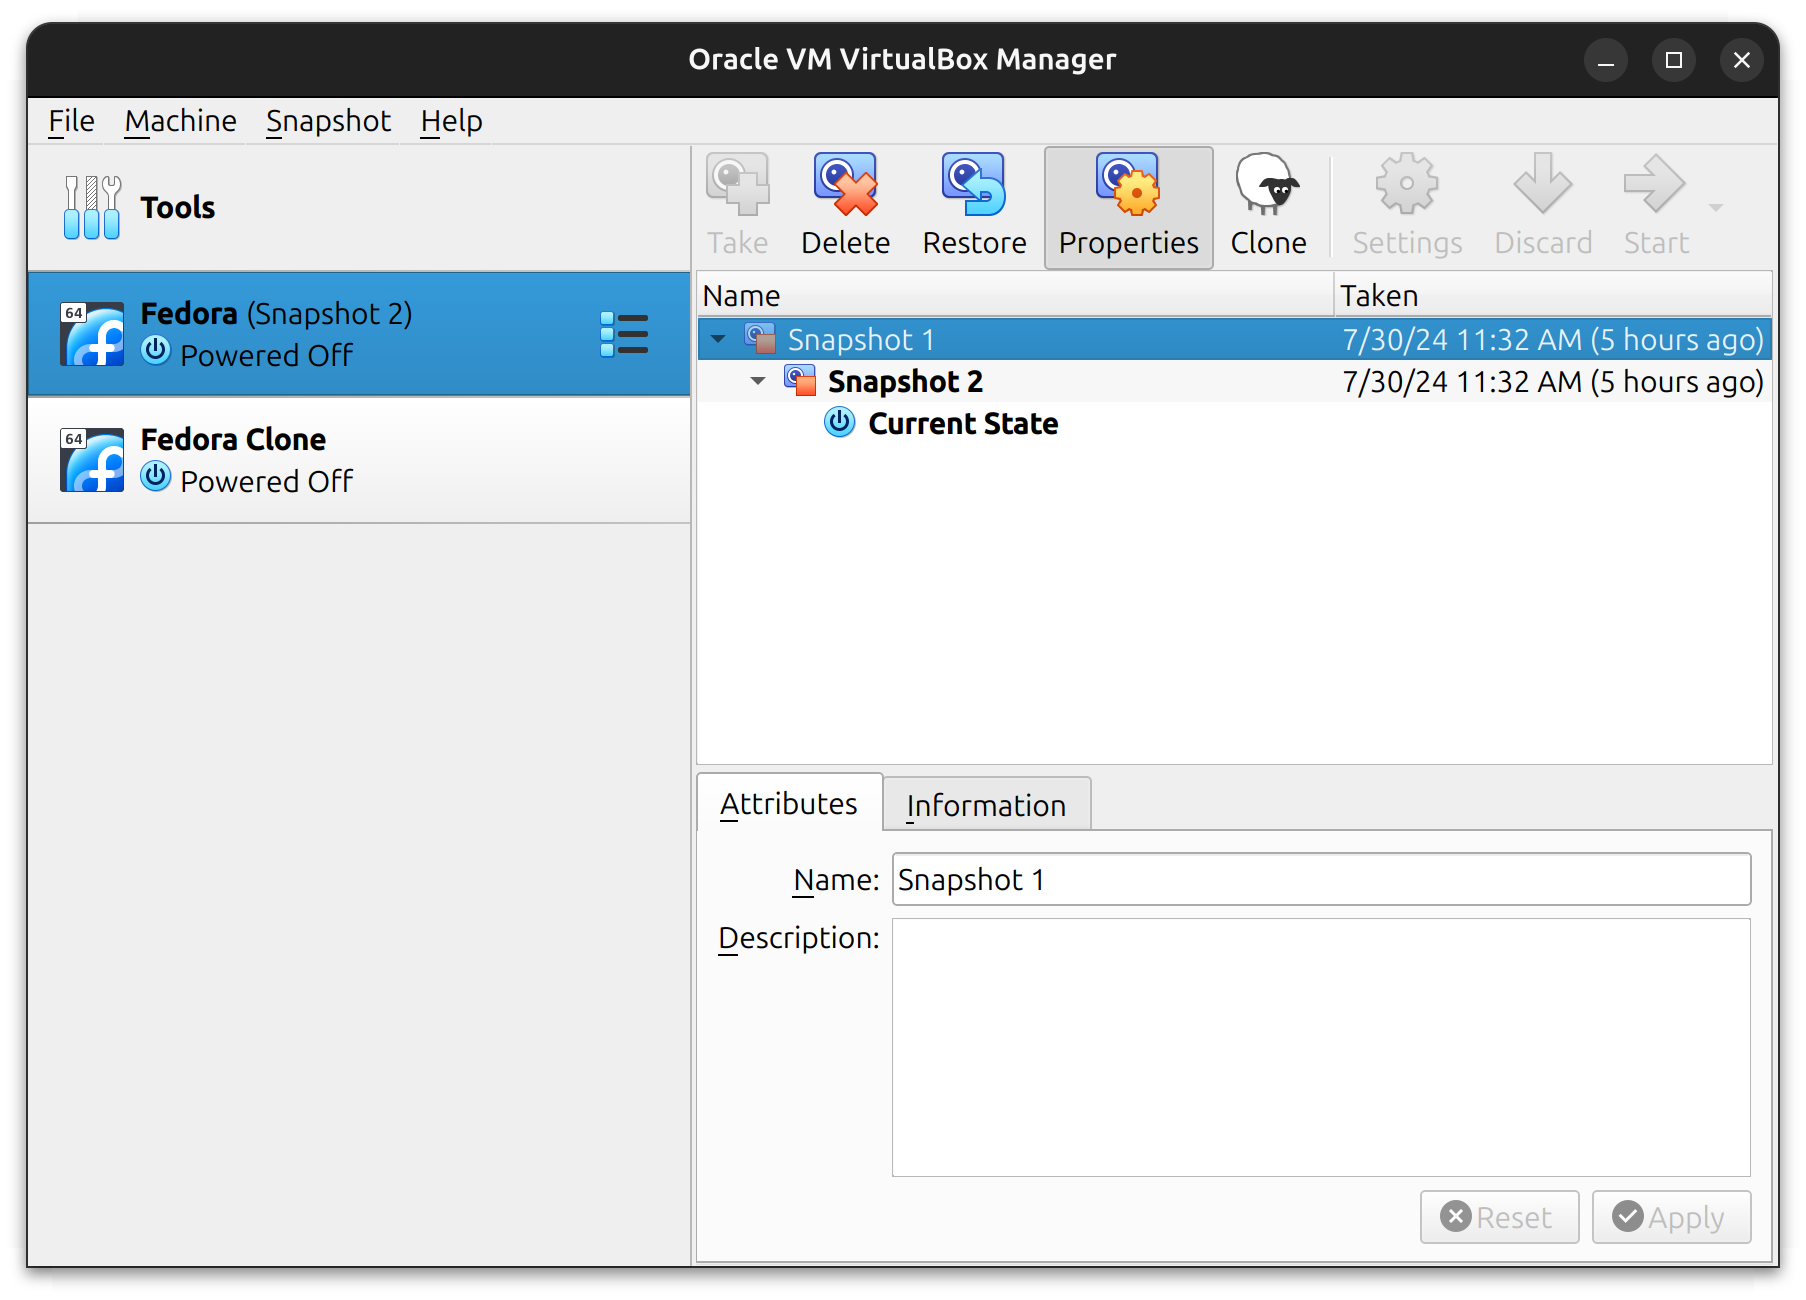
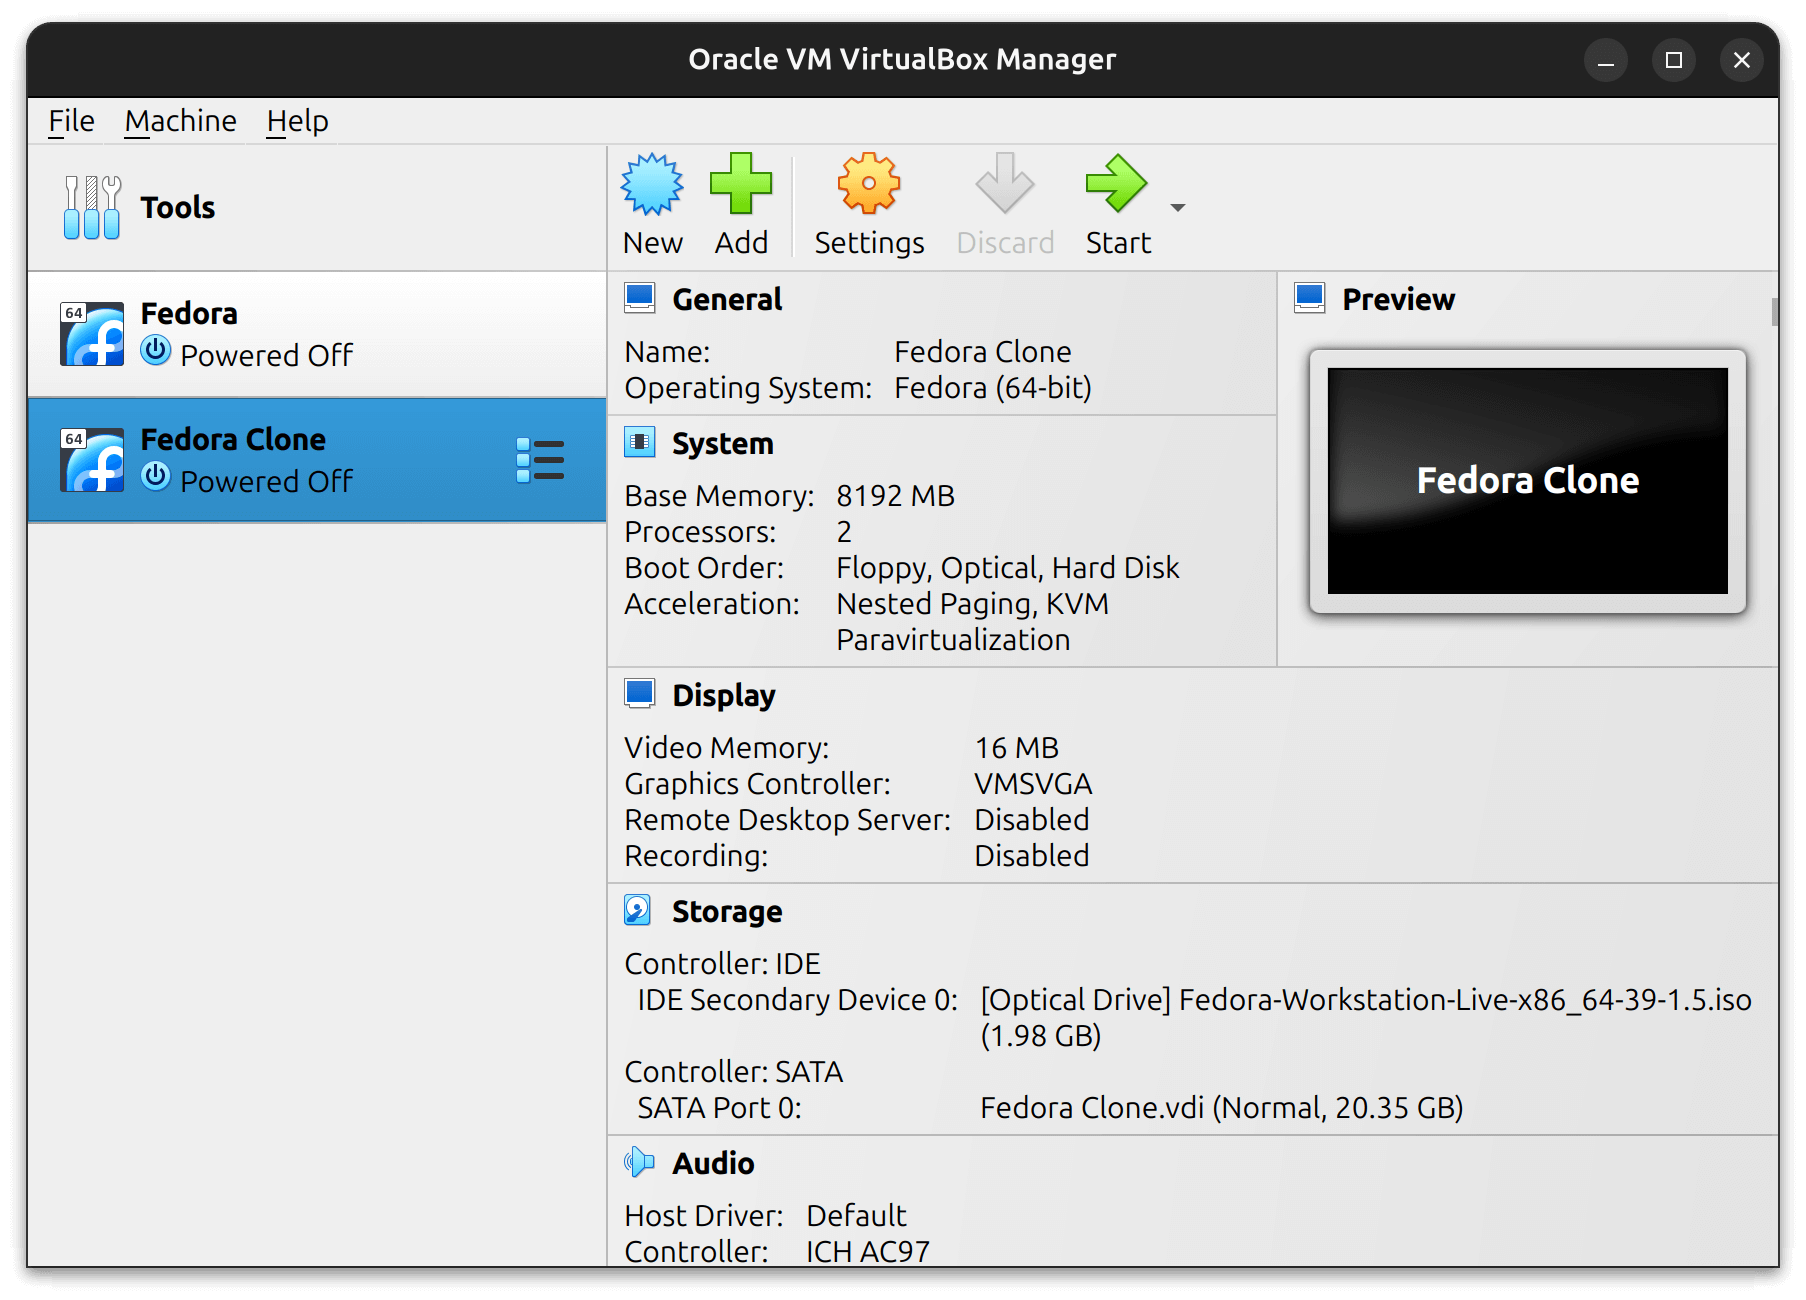
For this example, I went with a "Full Clone", and hit "Finish" to complete the cloning process. You will find another virtual machine listed in the VirtualBox program.
That's it! You can see it listed here:
💬What is your favorite on the list? Or got some other fun stuff for the terminal? Do share your thoughts in the comments below.
from It's FOSS https://ift.tt/KcNxkpV
via IFTTT
Tidak ada komentar:
Posting Komentar