
KDE Plasma is a fantastic desktop environment. It is popular for its feature set that allows a user to customize the experience, add widgets, and multiply the usefulness of the desktop with various elements.
When you get started, you already have certain widgets in place to access things. You can customize/remove them or add some more pre-installed ones. In either case, you can also download widgets from the KDE store and try them out.
Here, I mention some of my favorite picks among the default, pre-installed, and downloadable widgets.
Default Panel Widgets
Let’s see some widgets that you get most of the time, when you log into a KDE Plasma desktop.
1. Application Launcher
The Application Launcher is the default App Menu in KDE Plasma.
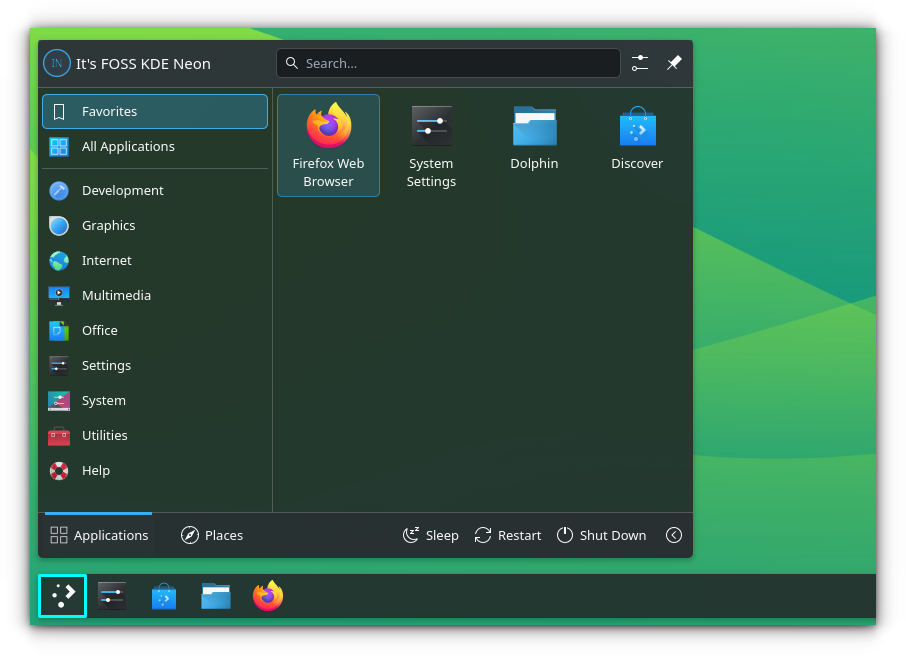
Here, you can find the apps installed on your system, available neatly under different sections. To configure the functioning of the Application Launcher, right-click on top of it and select “Configure Application Launcher”.
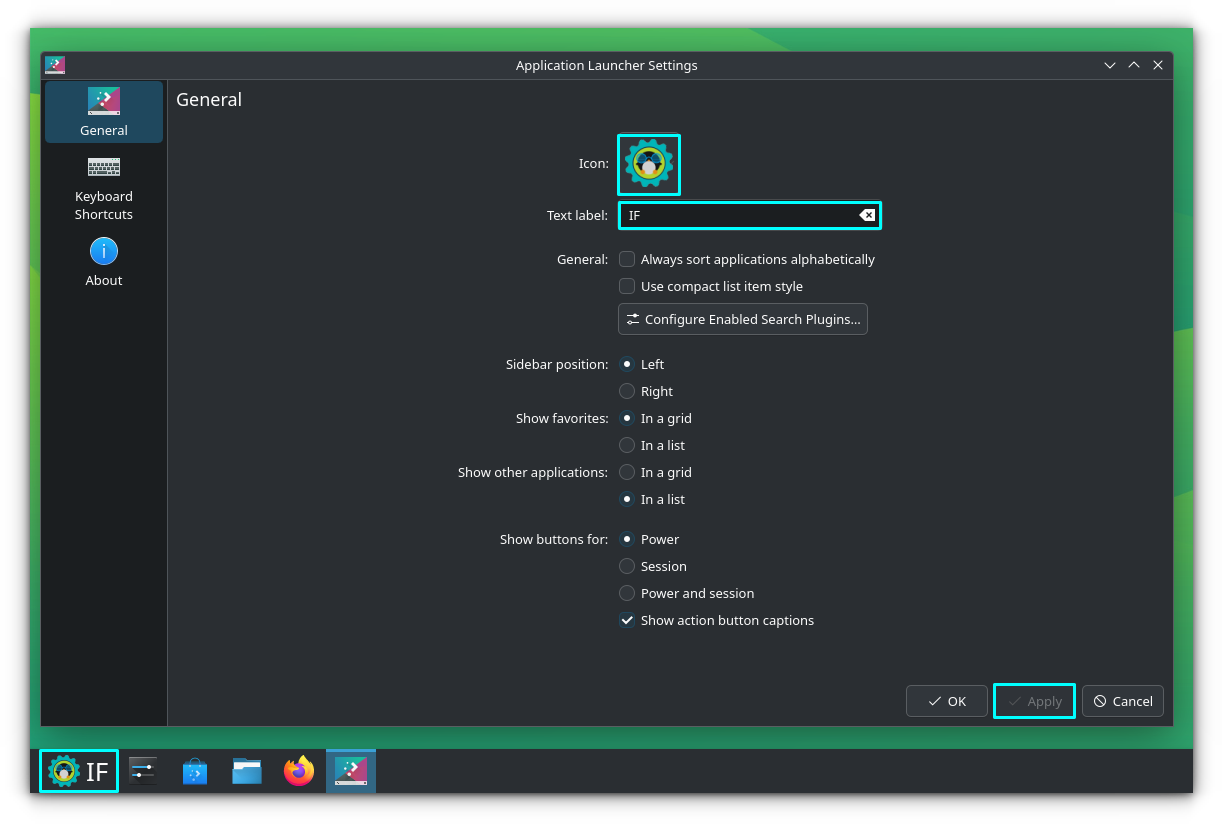
It’s possible to make changes that include a custom icon, custom label, etc. as shown in the screenshot above.
2. Icons only Task Manager
The next useful and default widget is the Icons only Task Manager. You will see the favorite apps pinned to it. As you open other windows, their icons will also appear here. Of course, this is the expected behavior, but you can make changes to it.

In the configuration window, you can make visual and behavioral changes to the widget. For instance, let me shrink the spacing between icons:
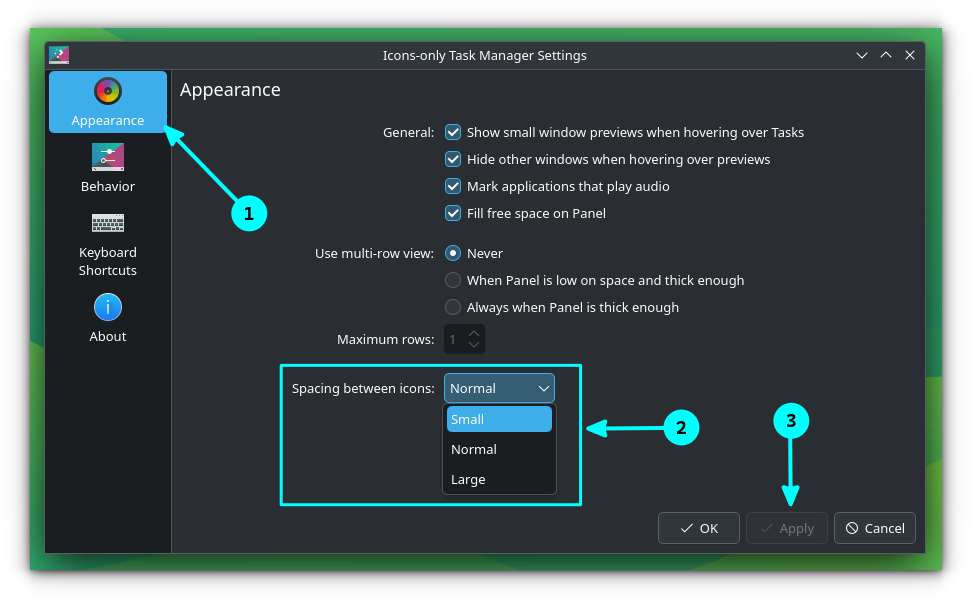
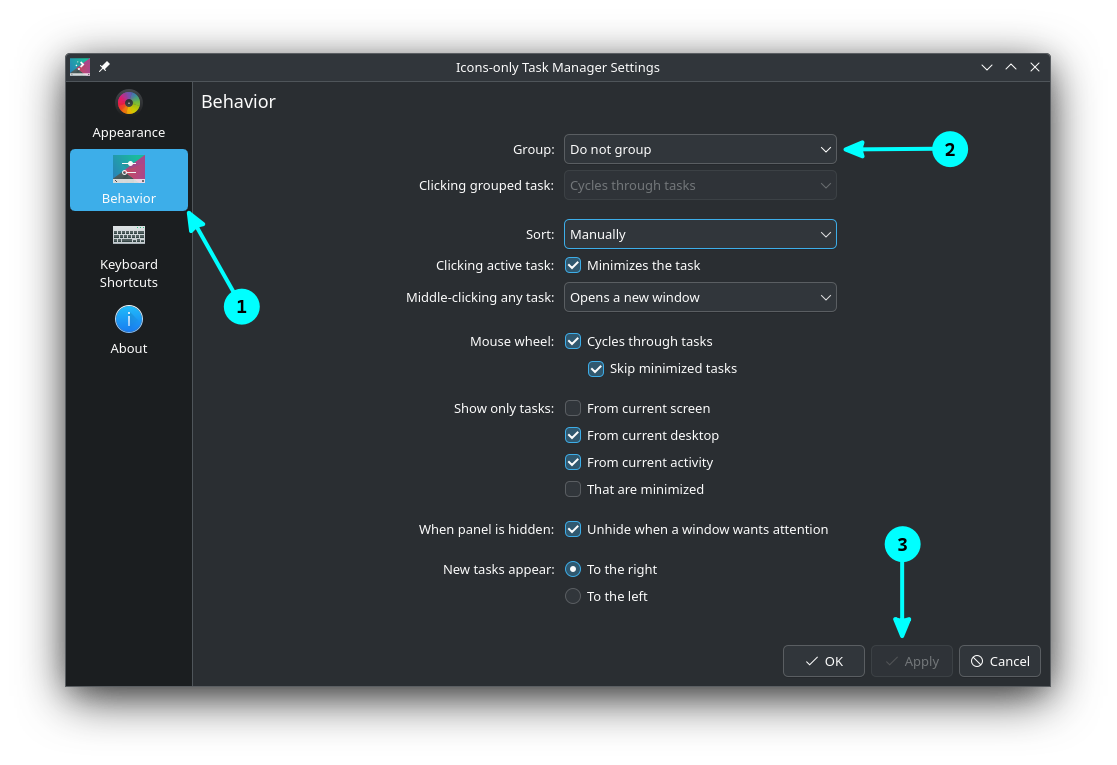
Similarly, in the behavior setting, I turn off the task grouping.
3. Klipboard
KDE Plasma offers a very handy clipboard, accessible through the panel and also via the Super + V keyboard shortcut.
Compared to other clipboard managers, it offers some cool advantages. In most system, Plasma clipboard can also store the images you've copied. If an image or file or URL is copied, you can open it using the Application that can handle those MIME types directly from the clipboard.
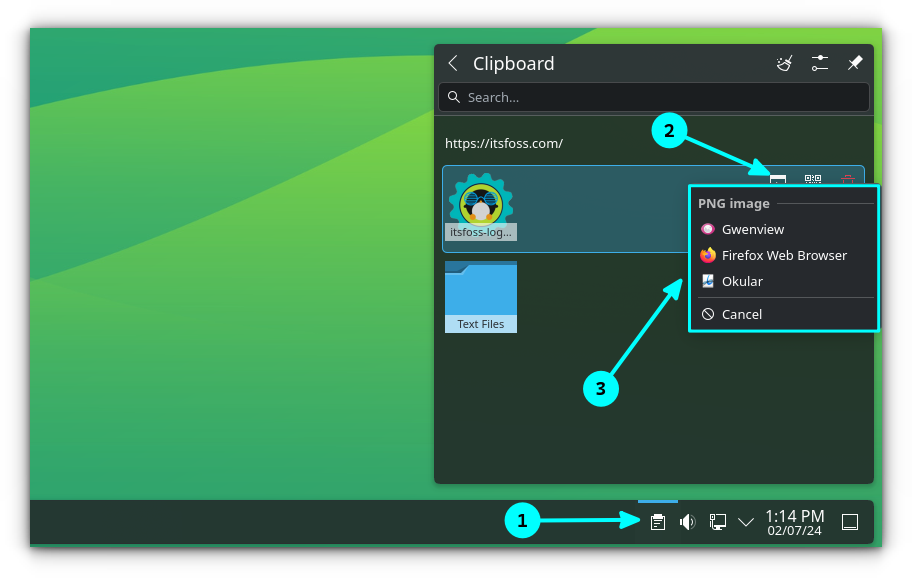
If you are not getting these options by default, it is easily toggle-able through the widget configuration.
Pre-installed Widgets
Now, let's see some widgets, that are pre-installed on most systems, but not placed on the default panel.
To place a widget, first right-click on the desktop and then select “Enter Edit mode”.
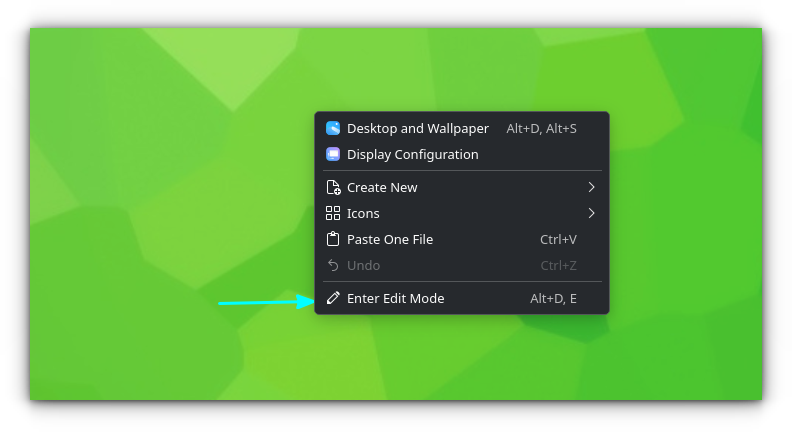
Now, click on the “Add Widgets” button.

The widget collection will slide in from the left side of the screen.
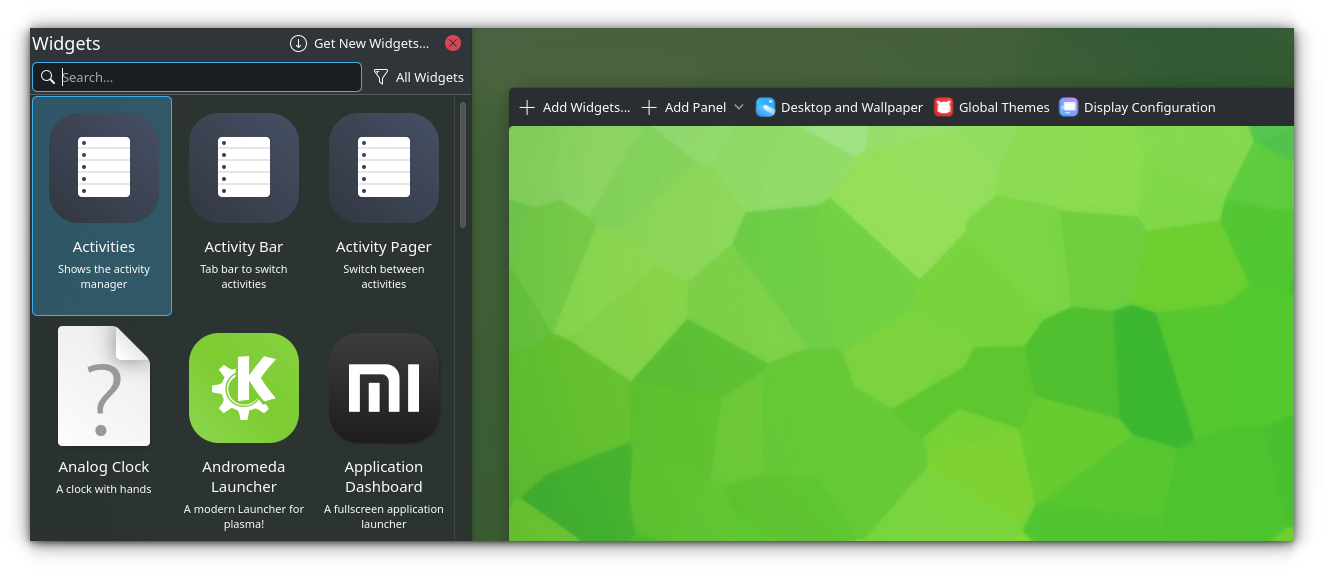
You can drag and drop a widget from this panel either to the desktop or to the panel. Below are some cool and useful widgets from this list.
4. Global Menu
If you use/used macOS, you may be aware of the Global Menu. It puts a neat global menu bar, which releases the menu bar of the current active window and places it as global menu.
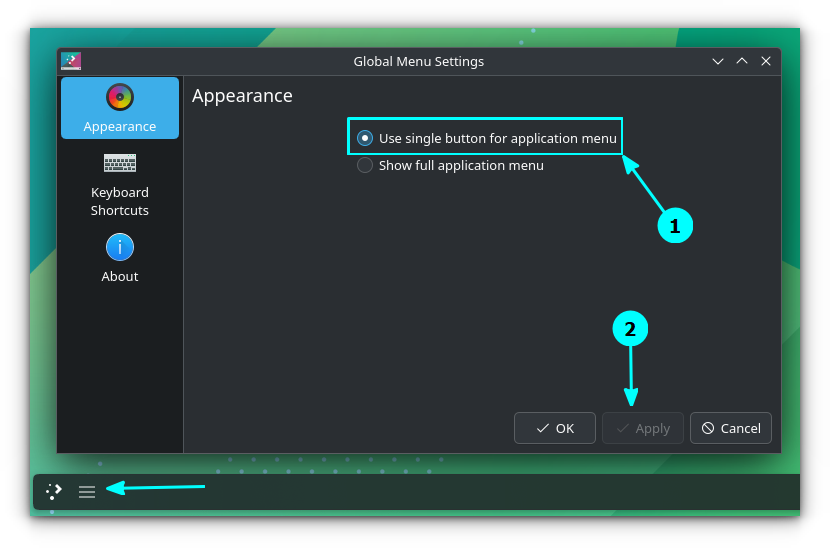
You can drag and drop the widget to the panel, or anywhere on the desktop. In the screenshot below, you can see that, I have placed it on the panel.
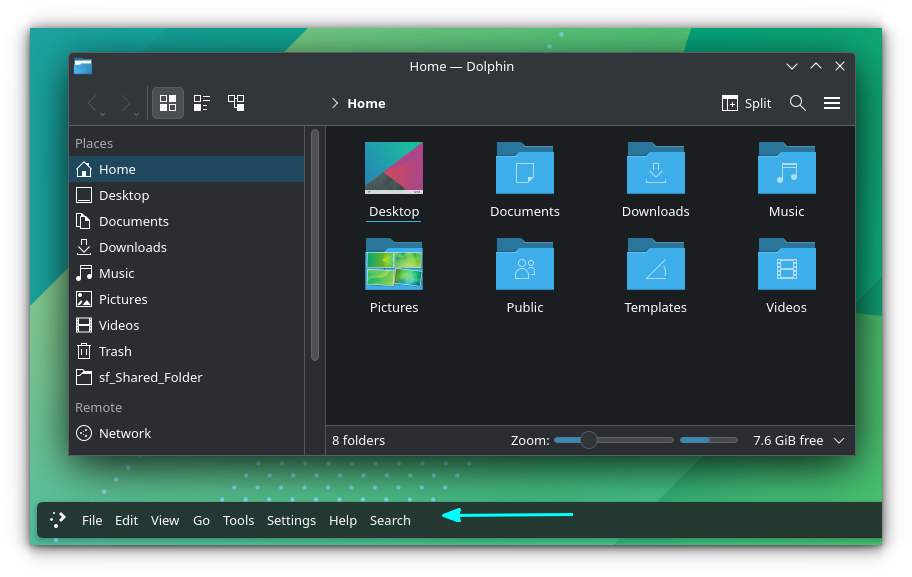
If you are facing congested space in Panel, you can make it a simple Global Menu button, by going into the configuration.
5. Sticky Note
There is no need to open a dedicated note window all the time for scribbling random texts. Use Sticky Notes instead.
You can place this much-needed widget in the Plasma Panel, and click on it to open a quick note.
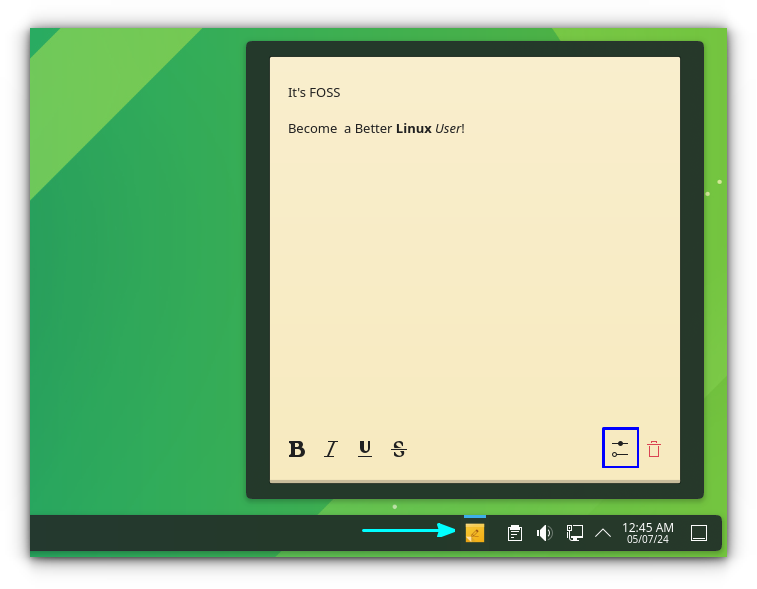
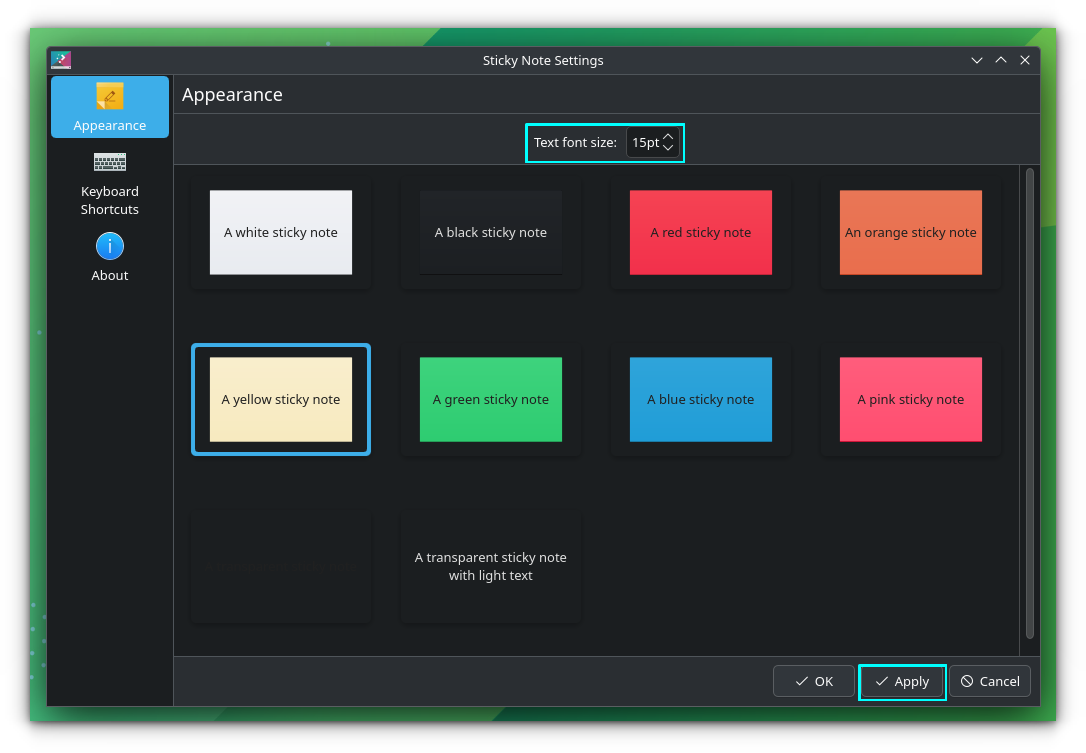
You can press the bottom-right settings button on the sticky note to get some cool theme and font settings.
6. Color Picker
At times, you may need a color picker, to quickly take note of a color you see. Why search through the web, while you have a simple widget right in your system?
Color Picker is available by default, and all you need to do is, drag and drop it into the panel.

When you click on the pencil icon, the cursor will turn to a Plus sign. Click on the top of the color, you want to copy. You can select and store multiple color codes. Once a color is selected, you can access it from the adjacent circle button.
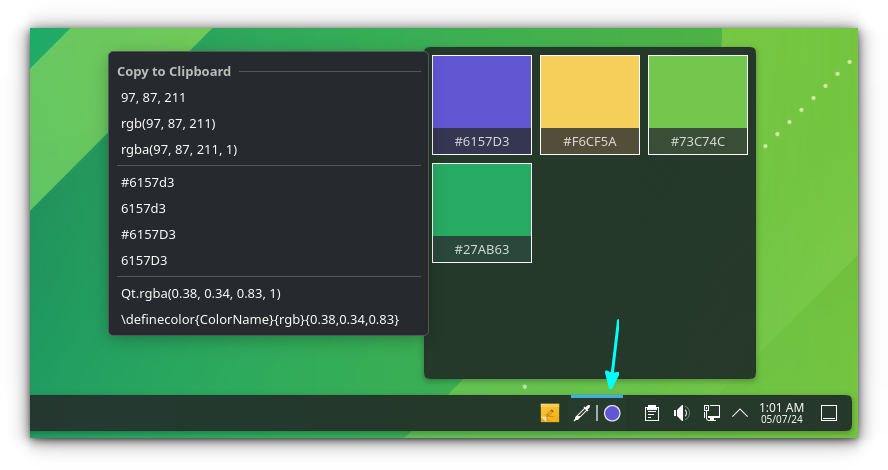
Click on a color to select its code to clipboard. More interestingly, right-click on a color and then choose various color codes!
7. Pager
Using multiple workspaces can improve your productivity by reducing the clutter and organizing the windows. In Plasma, you can add a pager widget to the panel, so that navigating between the workspaces is easier.
By default, the Pager widget is added to the panel when you install any KDE Plasma system. To make it visible, you need to have at least two workspaces.
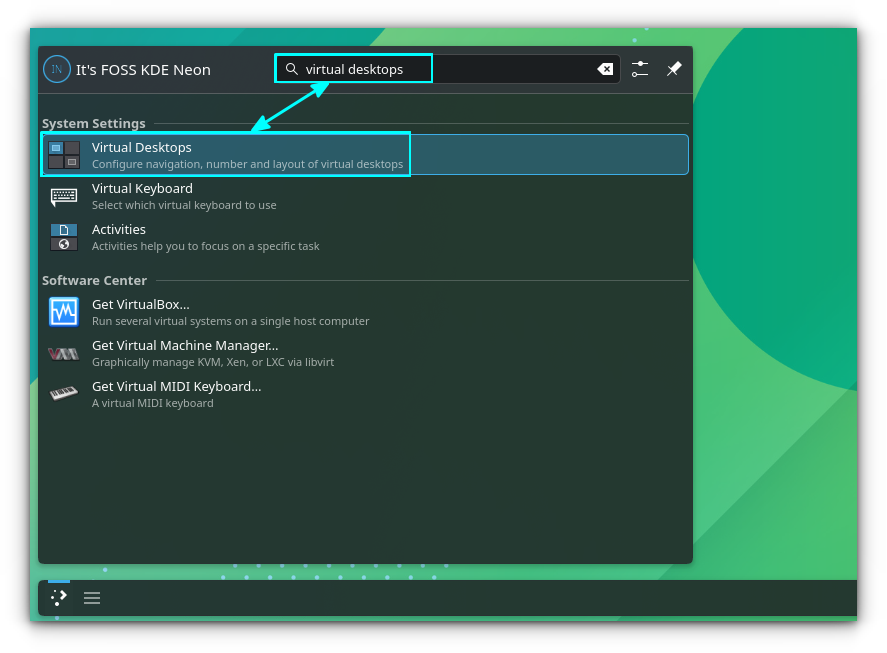
First, search and open the Virtual Desktop from the Application Launcher.
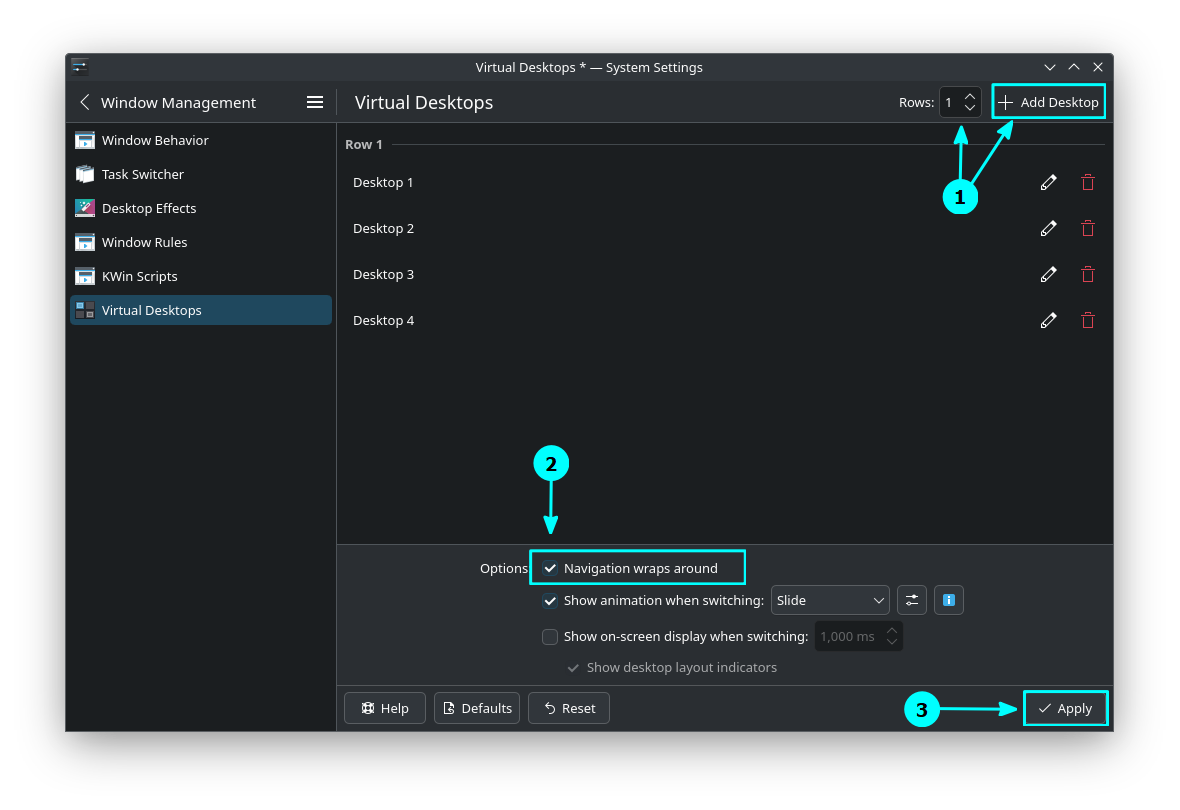
On the settings window, set the number of desktops using the “Add Desktops” button. It's nice to keep the rows to 1. Click on the Apply button.
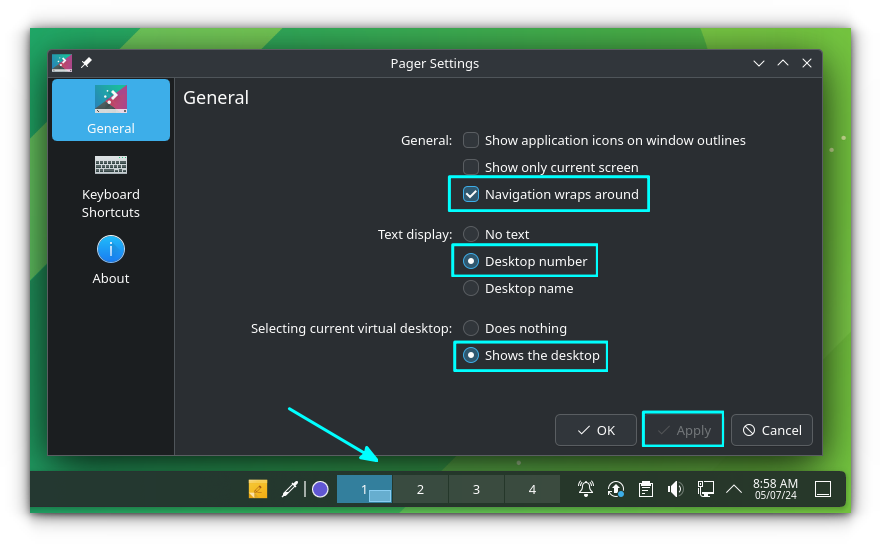
You can now see, on the panel, a new Pager bar.

On its configuration page, set some values as shown in the screenshot below, to get a decent look and function.
8. System Monitor
In Plasma, you have a lot of customized system monitors, like Network Monitor, Physical Memory monitor, storage monitor etc. But the system monitor widget is the one you can use, if you want to monitor every aspect of your system.
On the widgets page, it is located with the name “System monitor sensor”.
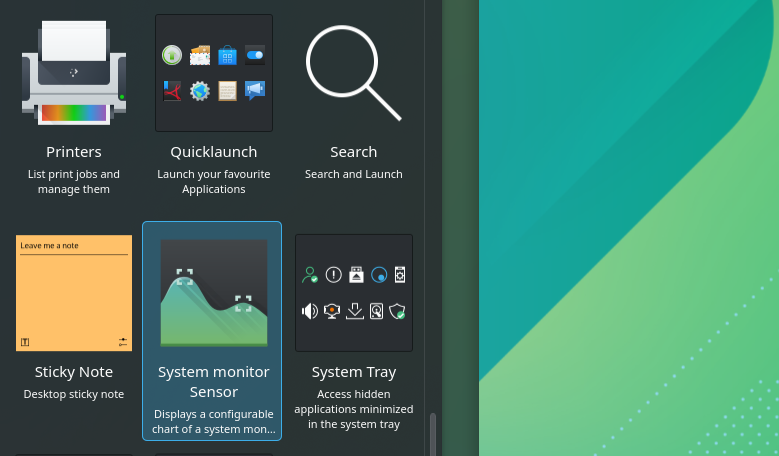
Like any other widgets, you can drag and drop it in a desired position on the panel or desktop. Now, go to its configuration window. On the appearance page, change the appearance of the sensor from the pie chart to any other available option of your choice.
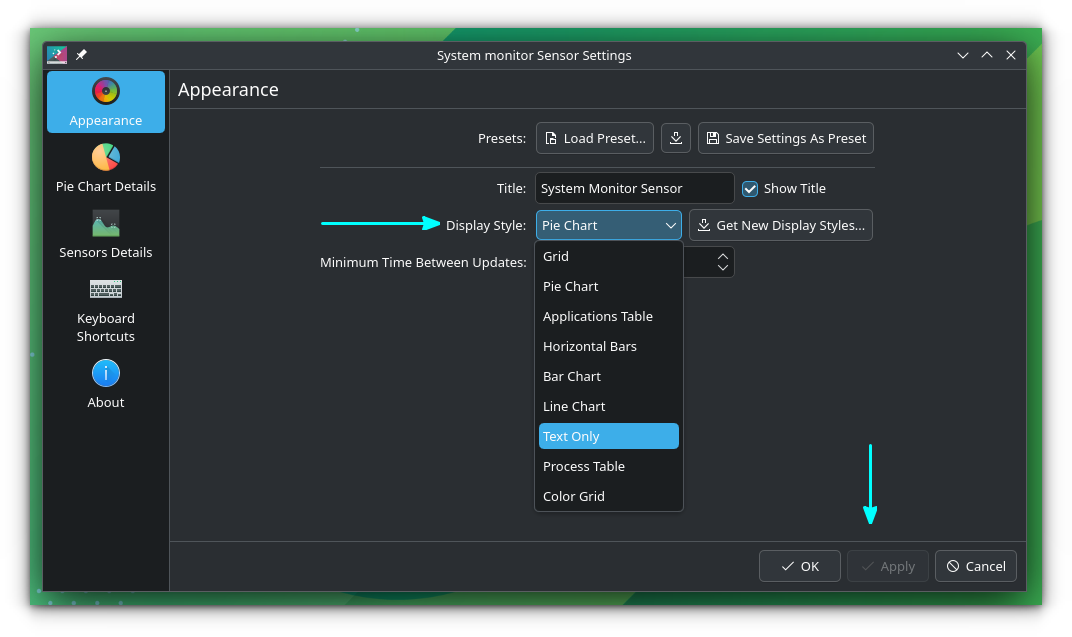
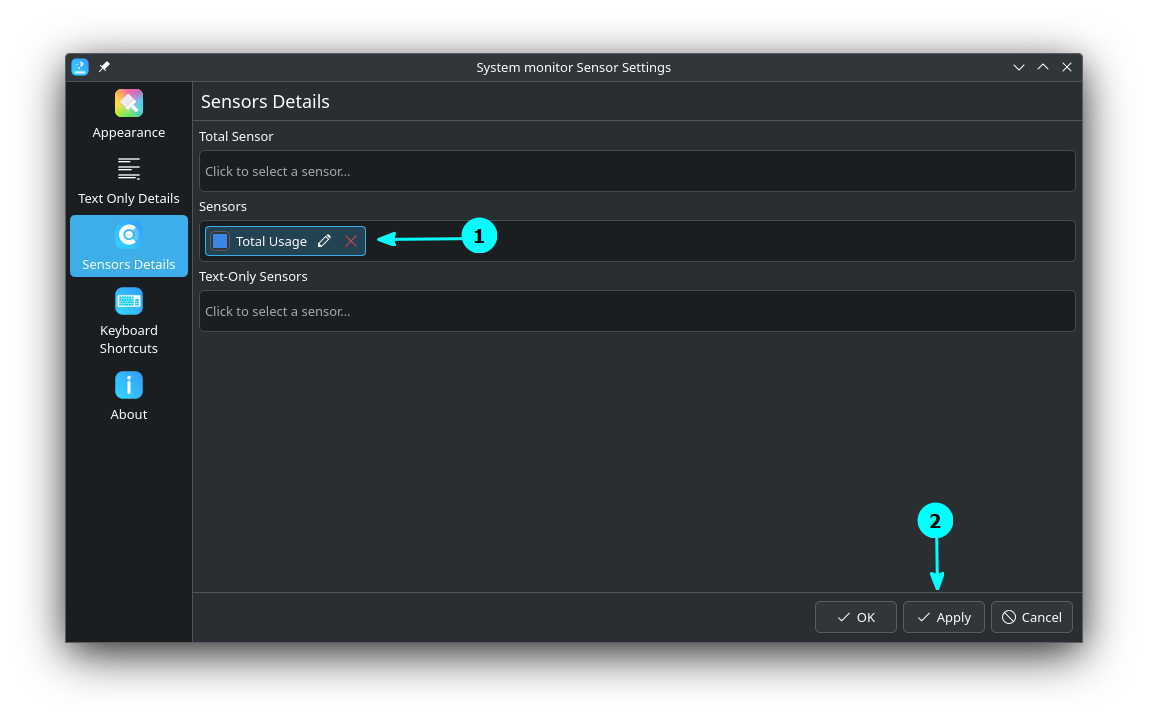
As you can see, I have selected a text-only sensor and then gave “Sensors” a value CPU → All → Total Usage (%).
In the screenshot below, a dedicated top panel is given for some much-needed system monitors.

9. Margin Separator and Spacer
The Margin Separator and Spacer are two widgets that can arrange the items on your panel, neatly. The Margin Separator helps add a small gap between various panel items.

You can drag this and place between any two panel items.
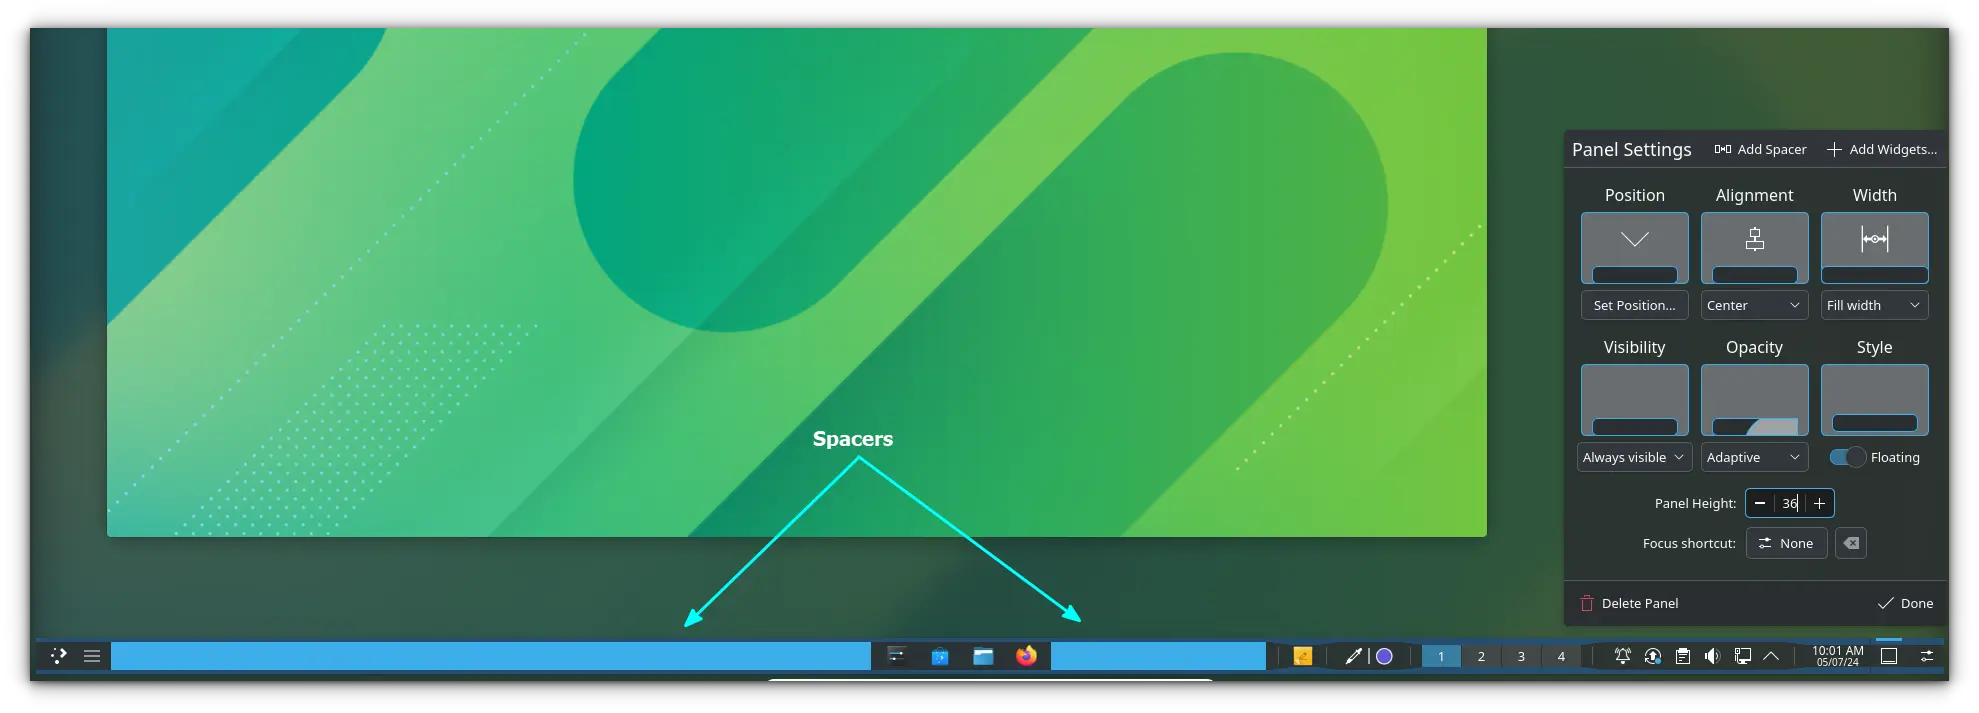
Similarly, Spacer is a more flexible separator. Usually, you will use a maximum of two or three spacers, to make everything appear on the left/right/center of the panel.
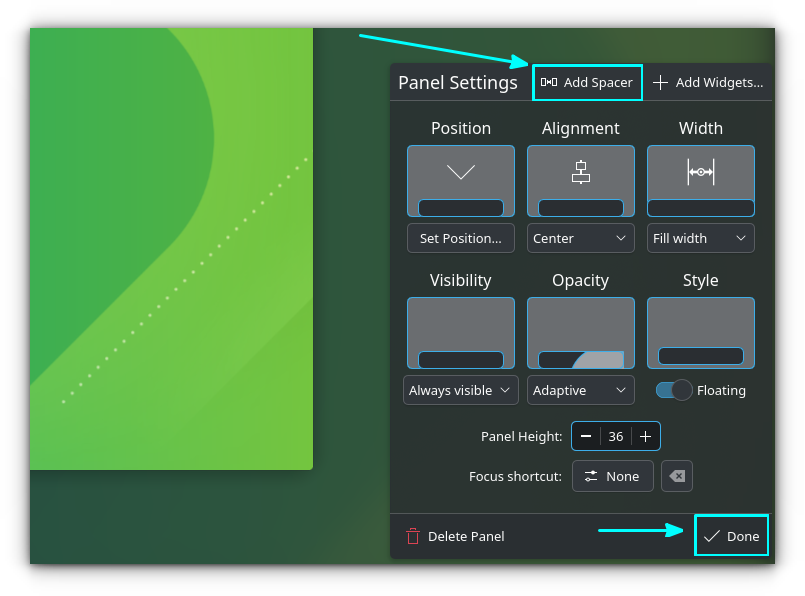
You can get the spacer by going into panel edit mode. First, right-click on a panel and then select “Show Panel Configuration”.

Here, you can select the “Add a Spacer” button to add the spacer.
Typically, using a two spacer can create Windows like panel (if you like the style).
10. Lock/Logout
Place this item on the panel so that you can access the logout screen by clicking on it without going to the app menu. When you place it on the panel, go to its configuration and set the Shutdown and Logout button active.
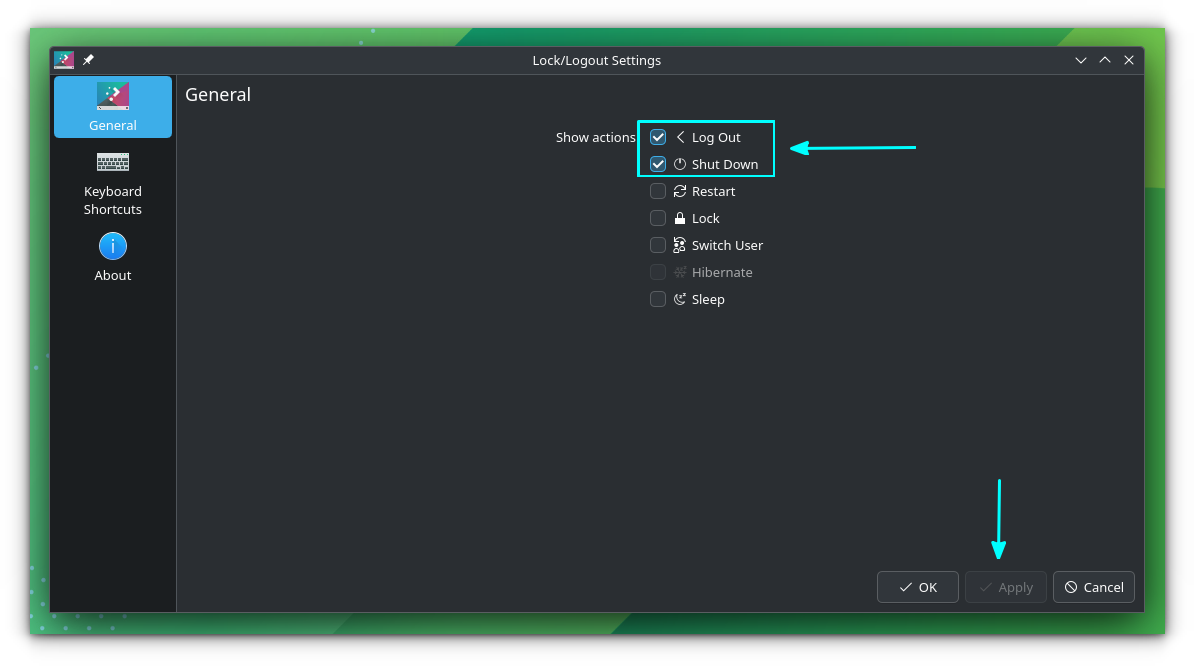
Try the other buttons too, as per your specific requirements.
11. Konsole Profiles
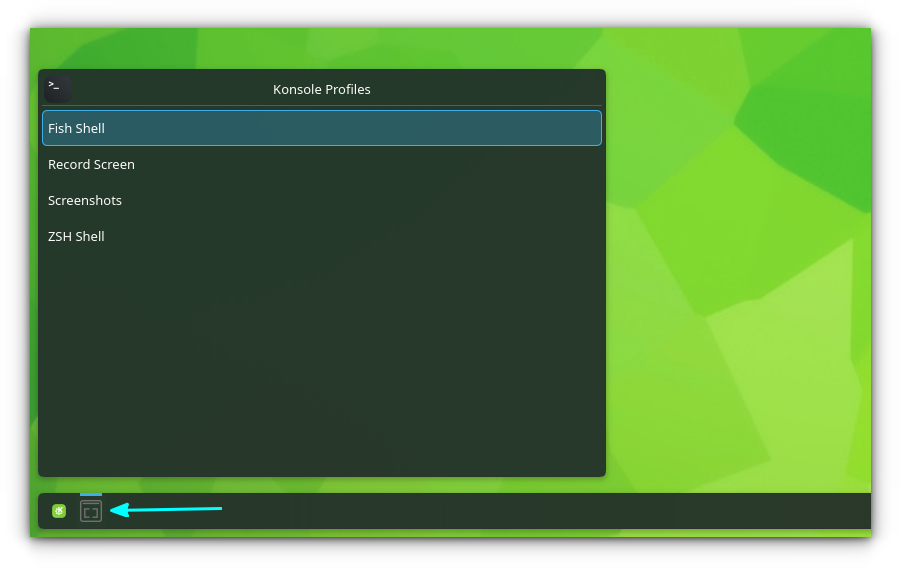
This widget is useful for those, who are working with multiple Konsole terminal profiles. You can open a particular profile by selecting from the panel.
First, drag and drop the widget into the panel.
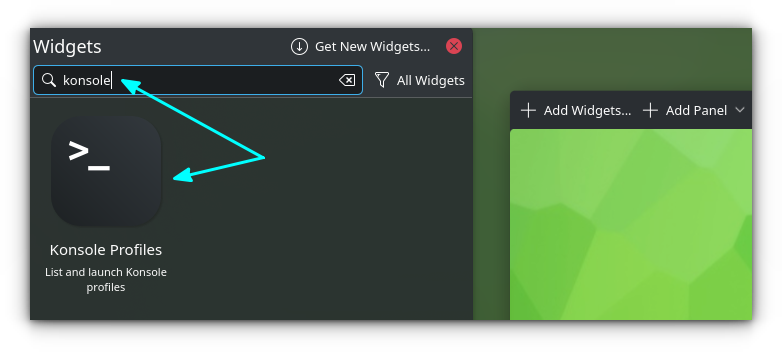
Now, click on the widget in the panel and select the required Konsole Profile!
Widgets That You Can Download
Now, let's see a couple of widgets, that you can download.
To install a widget, first, right-click on an empty place on the desktop and select “Enter Edit Mode”. And, then, go to the widget collection page by clicking on the “Add Widgets” button.
Here, you need to click on the “Get New Widgets” → “Download New Plasma Widgets” button.
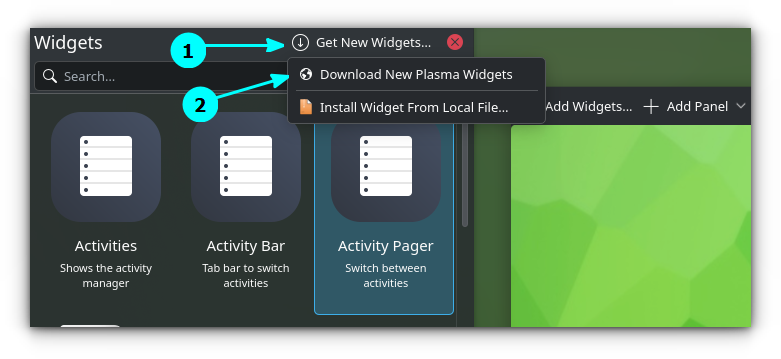
This will bring you to KDE online store, where you can download third-party widgets.
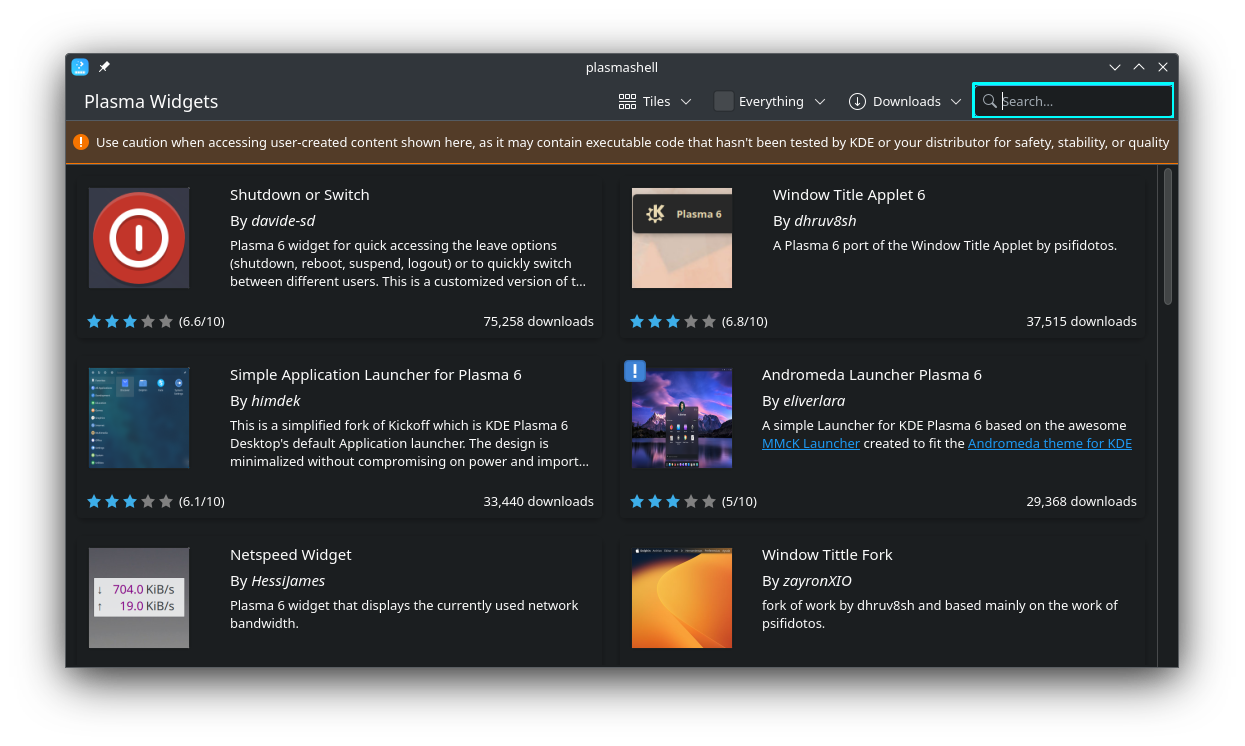
When you hover over an item, you will get an “Install” button. Click on it to install that widget.
Now let us take a look at some options:
12. Modern Clock
Modern clock is a super cool clock widget that you can place on your desktop. You can search for it with the name “Modern Clock” and install it.
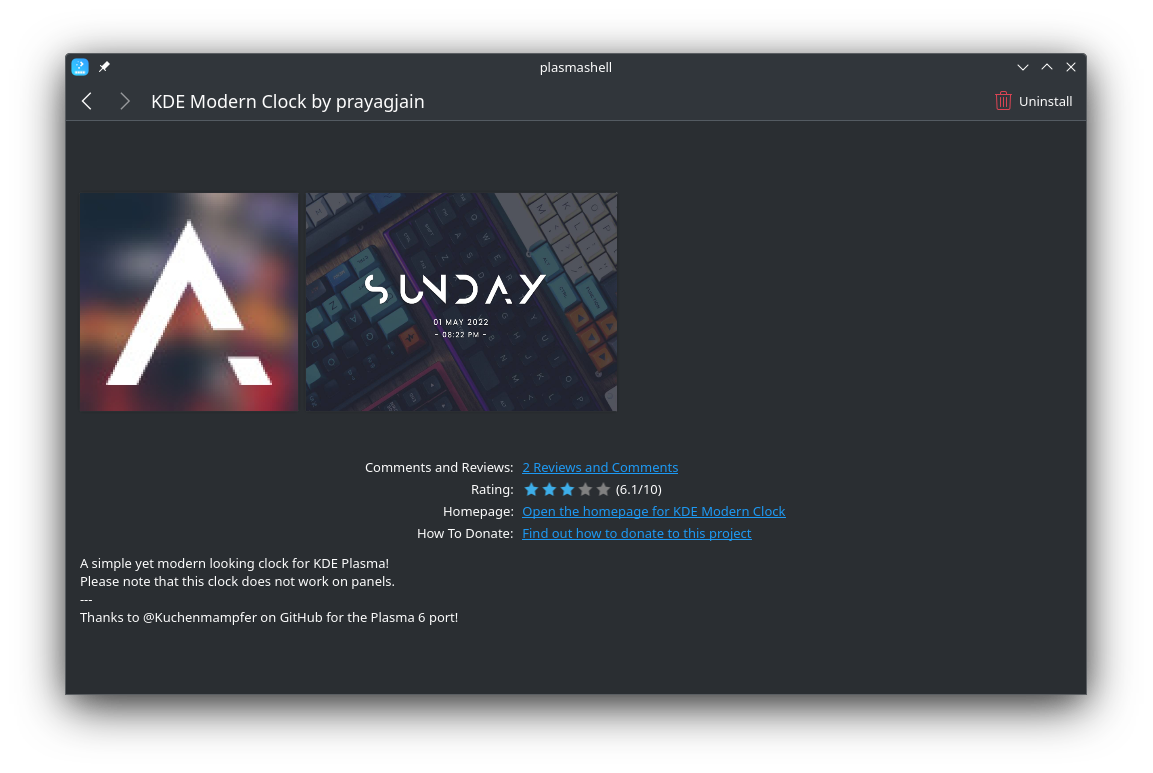
Once installed, drag and drop it from the widget collection to the desktop.
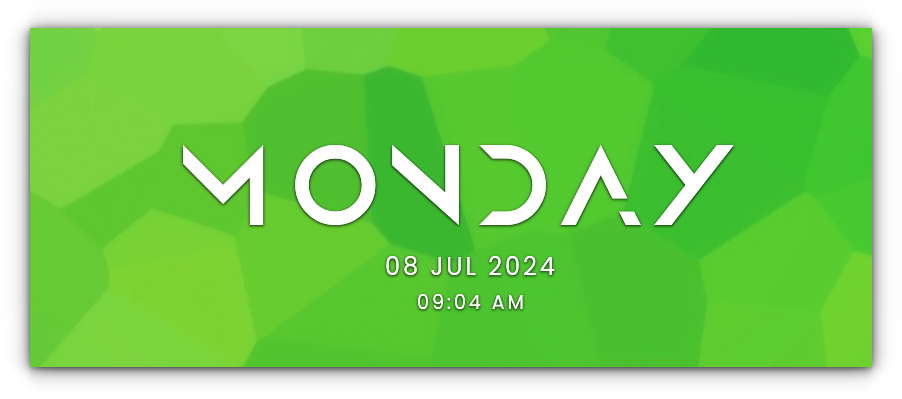
You can configure it by right-clicking on it and selecting “Configure…”.
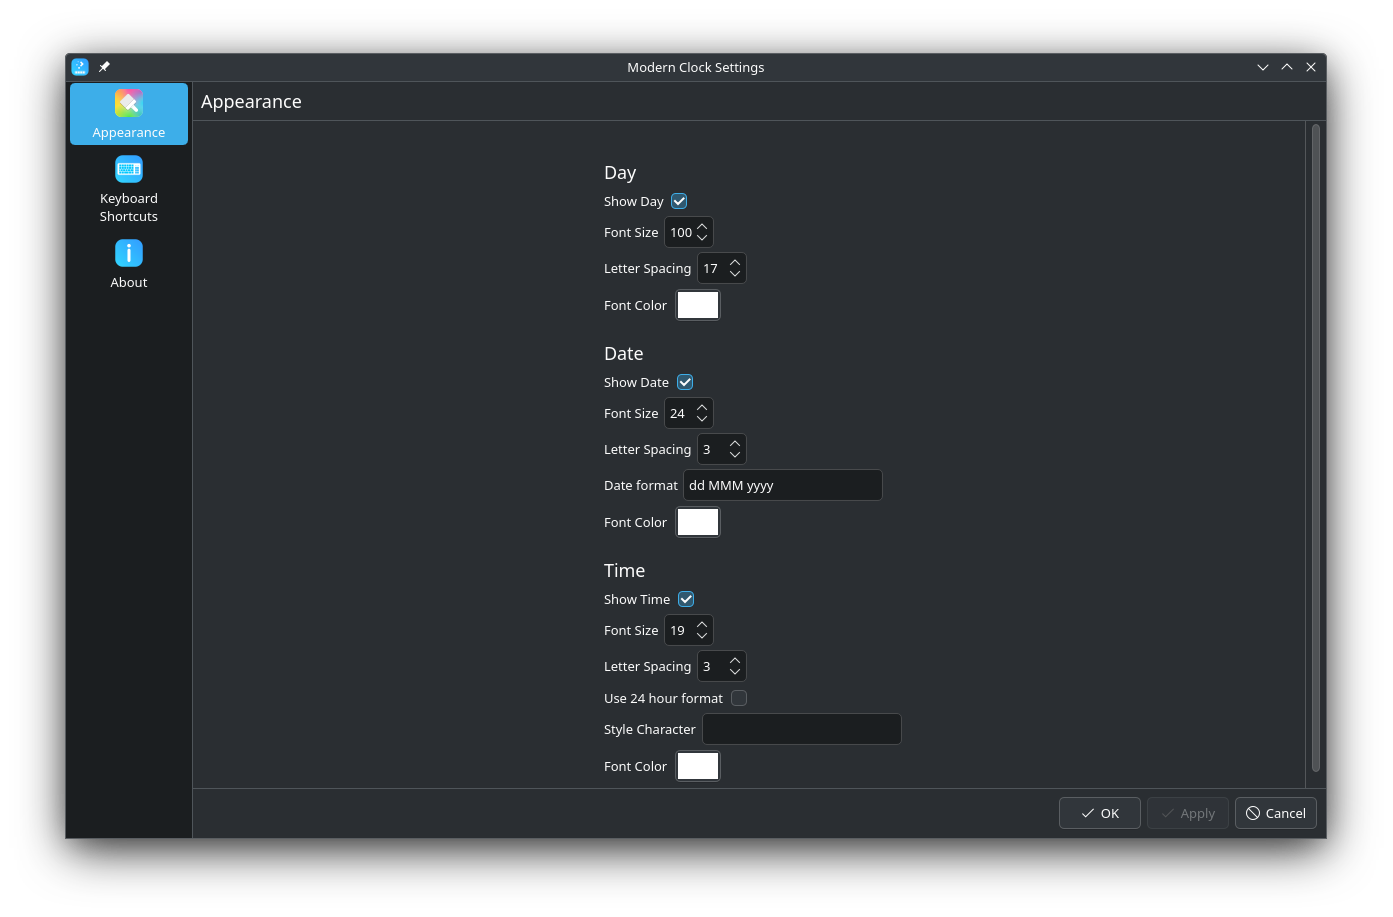
Changes like Font size, Font color, etc. can be made to look it more aligned to your wallpaper.
13. Panel Colorizer
You know that latte-dock has stopped its development. So, if it does not work for you as intended, you can try this plasma extension.
Panel Colorizer is a widget, that helps you to tweak the appearance of the panel as you like.
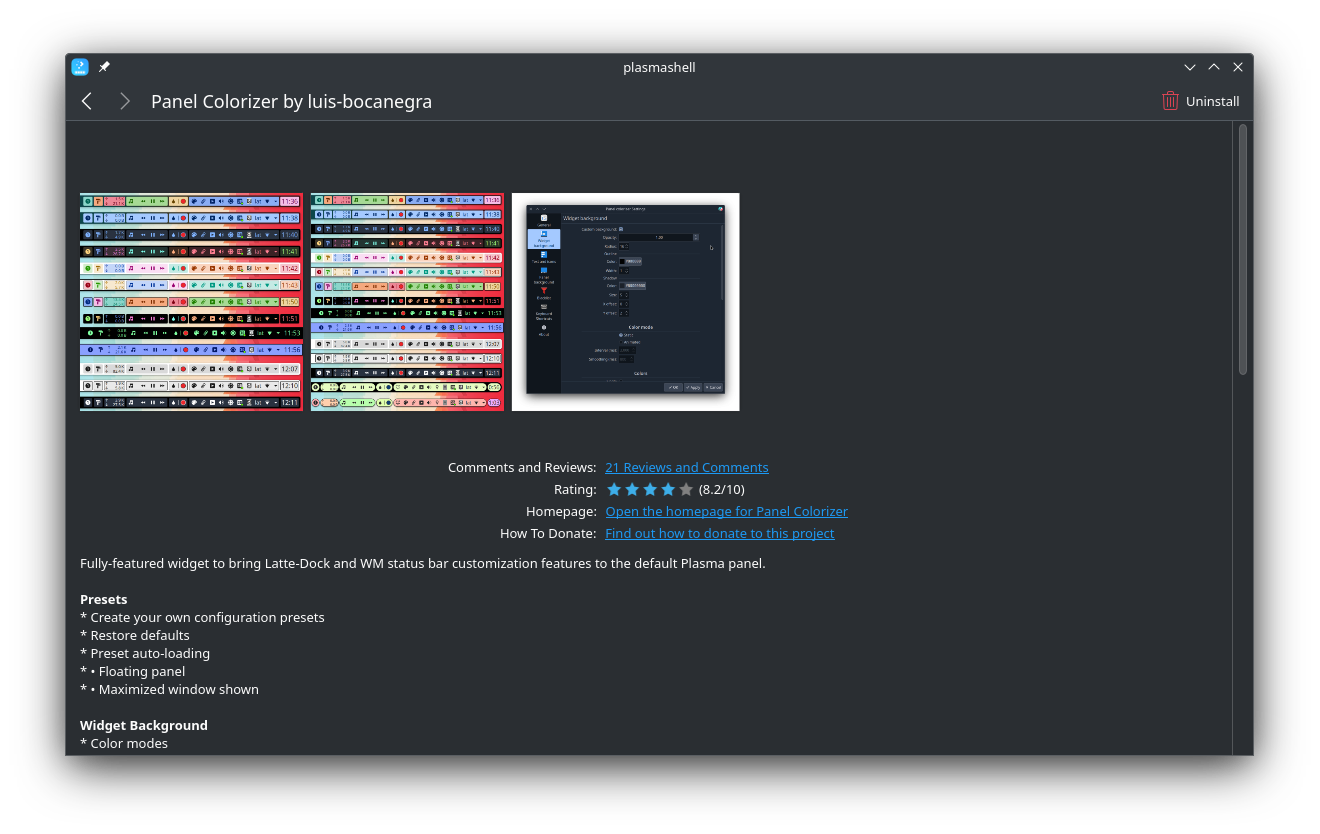
Once you installed it, you can drag and drop the widget to the panel. It will show a cool rotating animation. When placed, right-click on it and go to the configurations page:
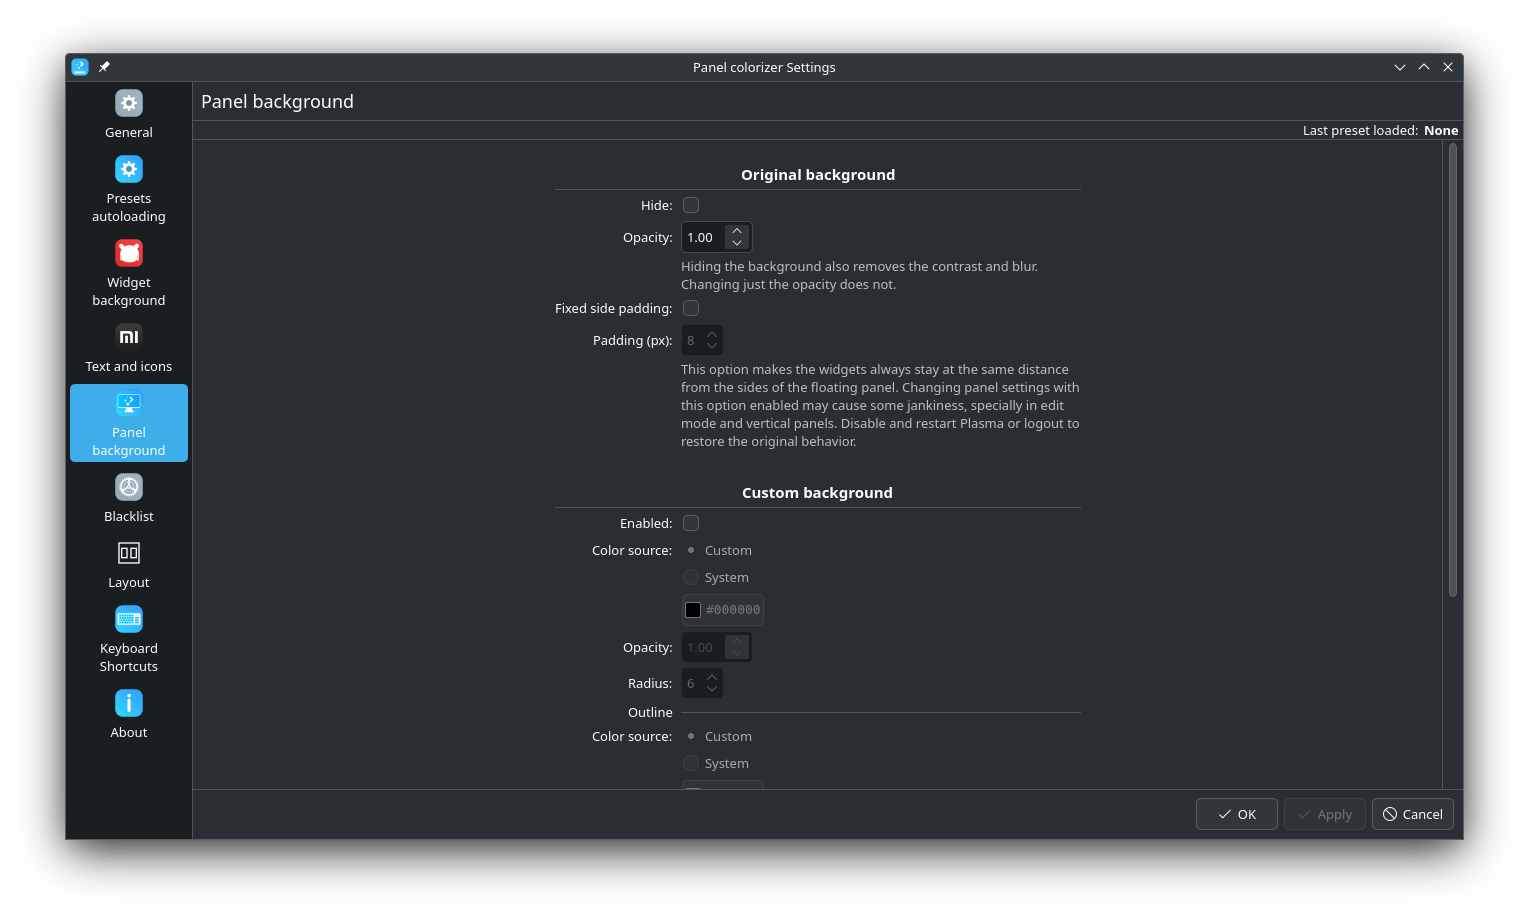
You can tweak the background of the panel, text and icons, and a lot more. You can try the changes as you please.
This is what I applied to my test panel.

14. Third-party App Launchers
On a default installation of KDE Plasma, you will get three types of application menu. An application launcher, an application menu and an application dashboard.
You can easily switch between these by right-clicking on the current application menu widget and selecting “Show Alternatives”.
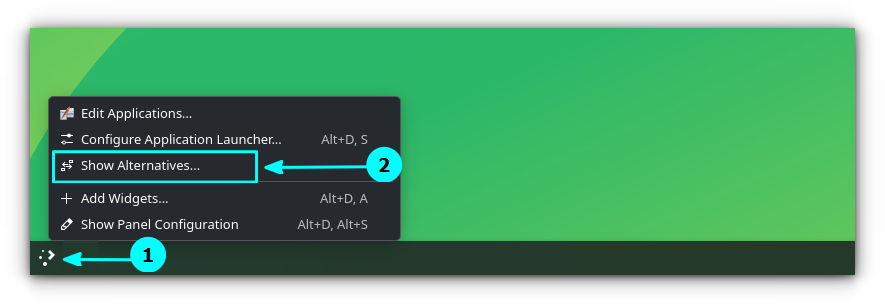
Here, you can switch to another launcher with ease. This is valid for all widgets, when a similar other widget is installed.
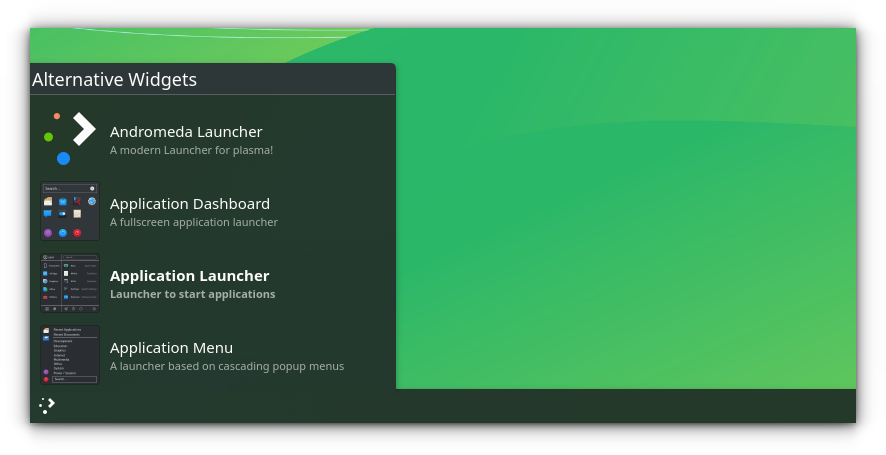
Now, if you are not interested in the default option, there are a couple of launchers like the Andromeda Launcher and Menu 11.
Andromeda Launcher
At least some of you may have noticed, Andromeda Launcher is installed automatically if you install any Nord theme from the KDE theme store. So, for those, you can drag and place it in the panel. Else, just search and install it.
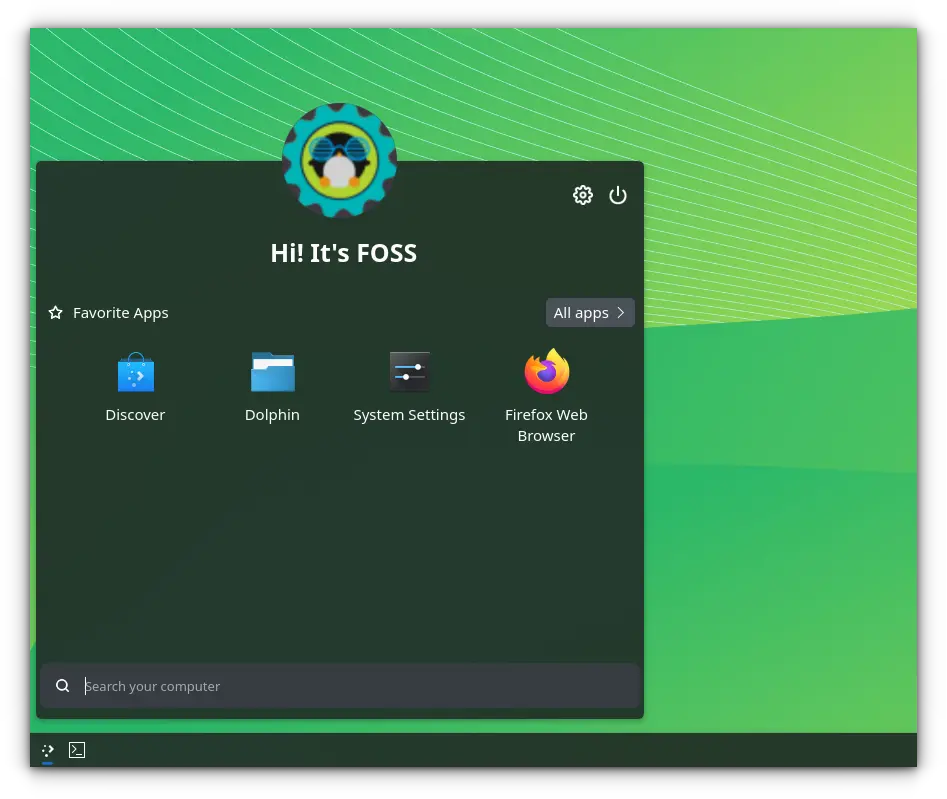
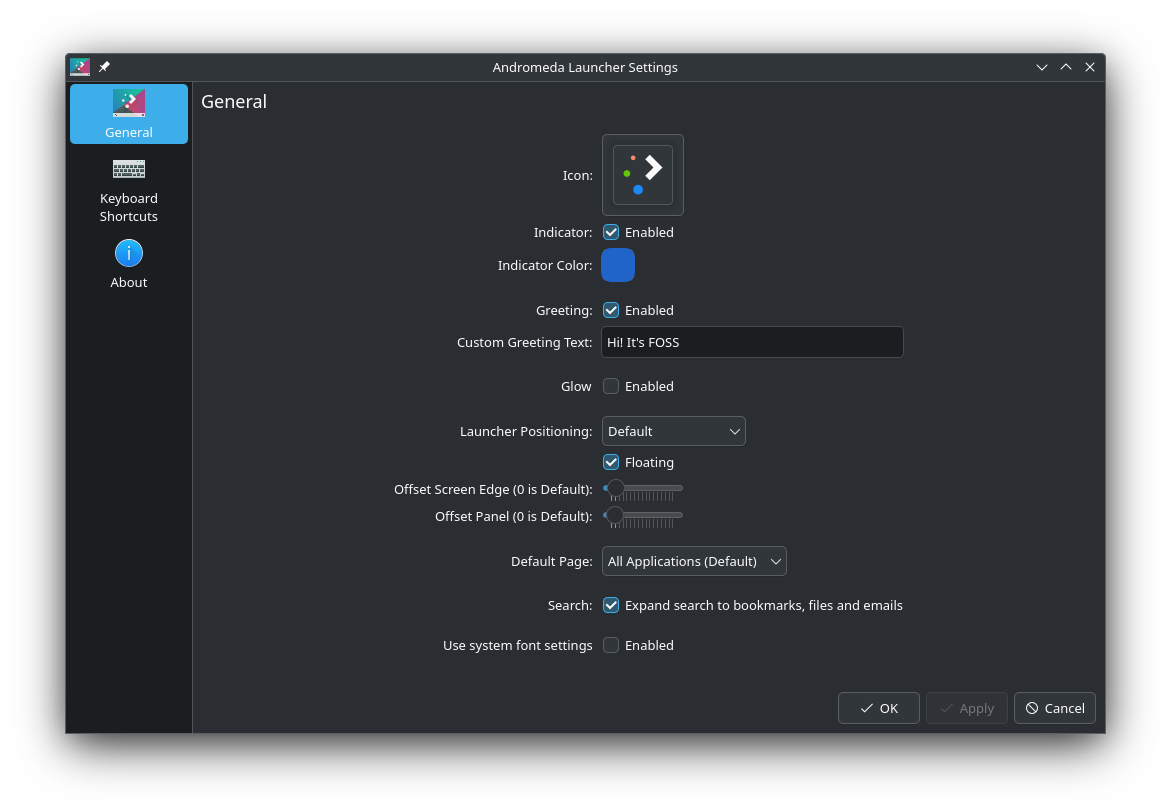
This is a minimal and interesting launcher with several customizations. Some configurations include: greeting text, launcher position, edge gap settings, etc.
Menu 11
Fan of the Windows 11 Start Menu? Then here is one, with no ads.
Menu 11 is an quick app launcher, helping you access things in a couple of clicks.
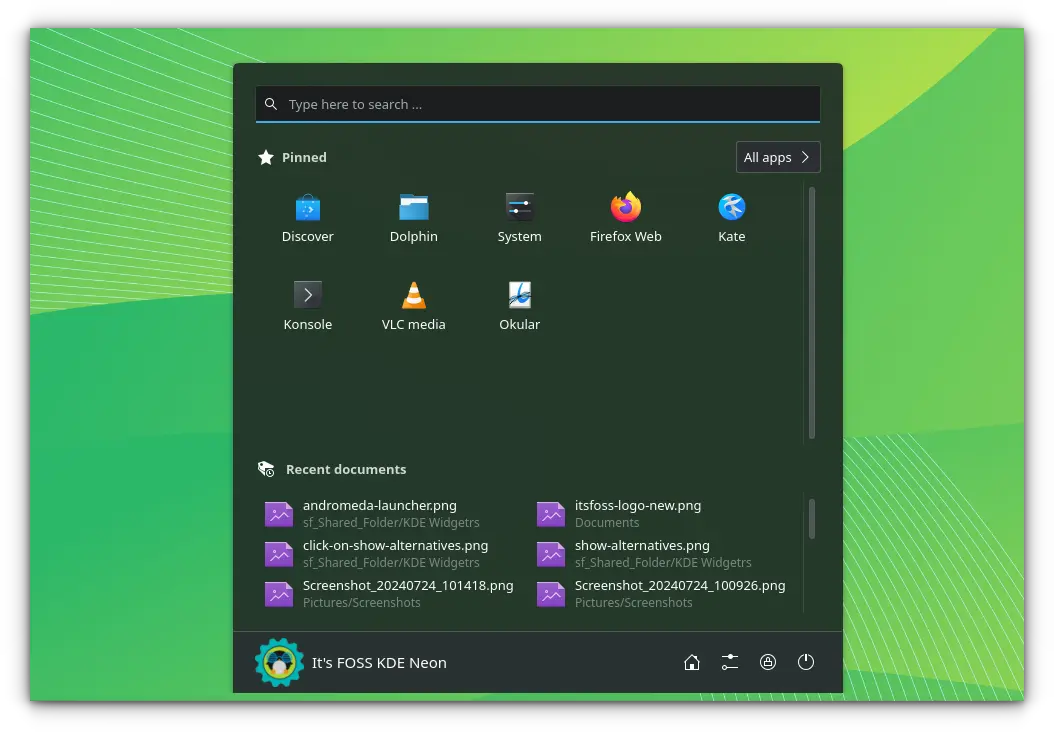
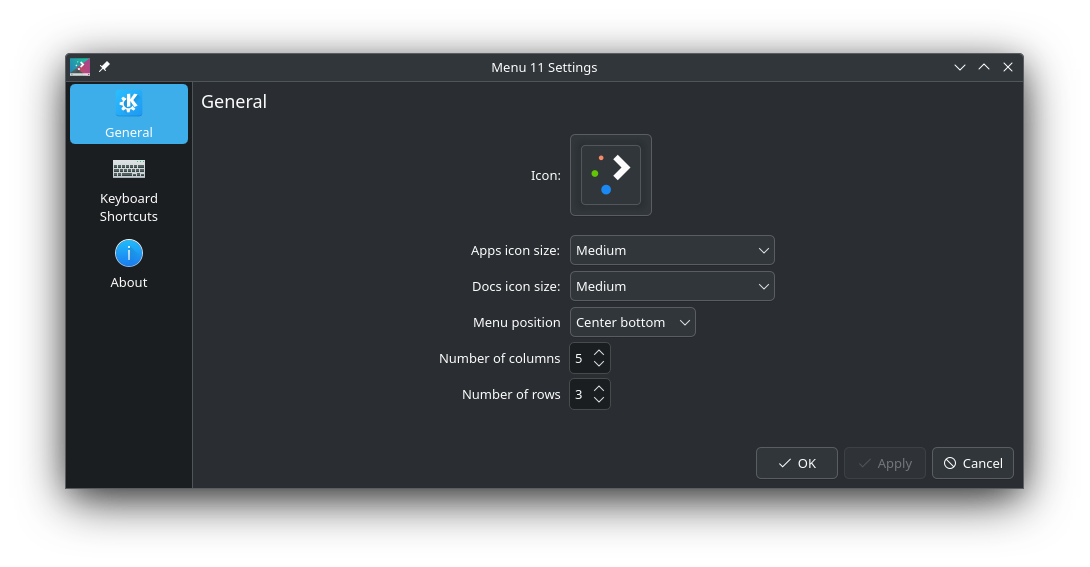
You can configure the place of appearance of the menu, number of columns, rows, and app icon size.
15. Advanced Radio Player
Playing internet radio is a hobby for many PC users. Advanced Radio Player is a radio player with an editable list of stations.
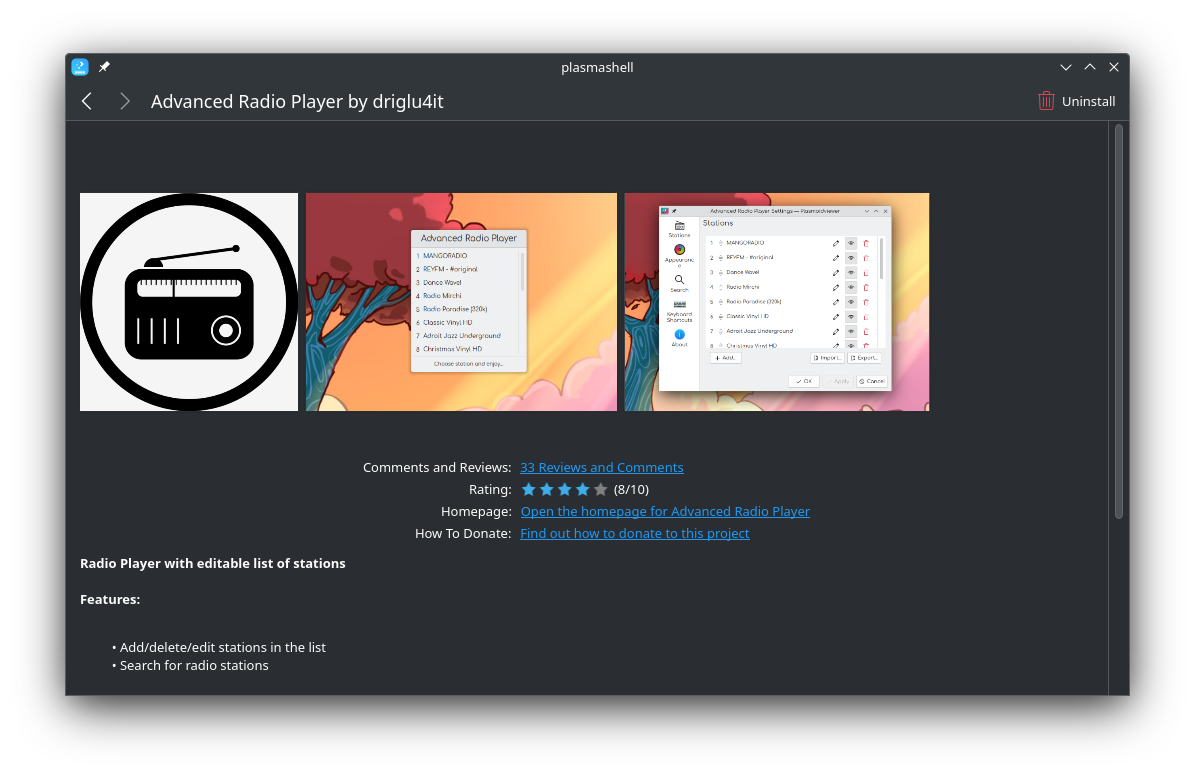
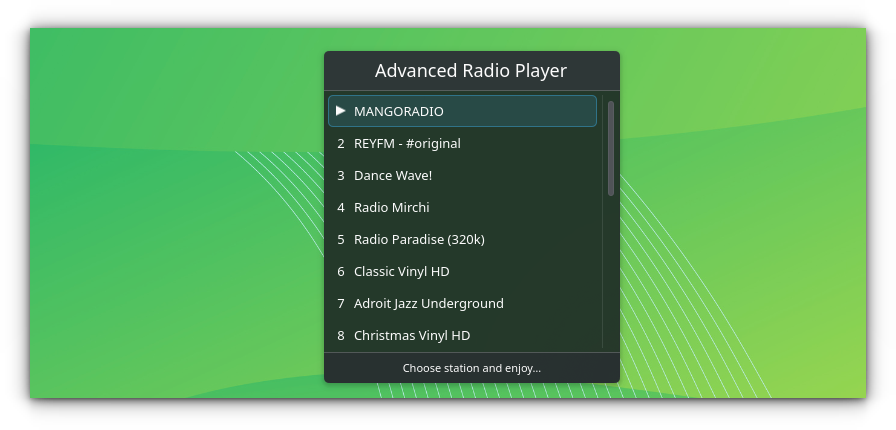
Once installed, place it on the panel and click on it to get a default list of stations.
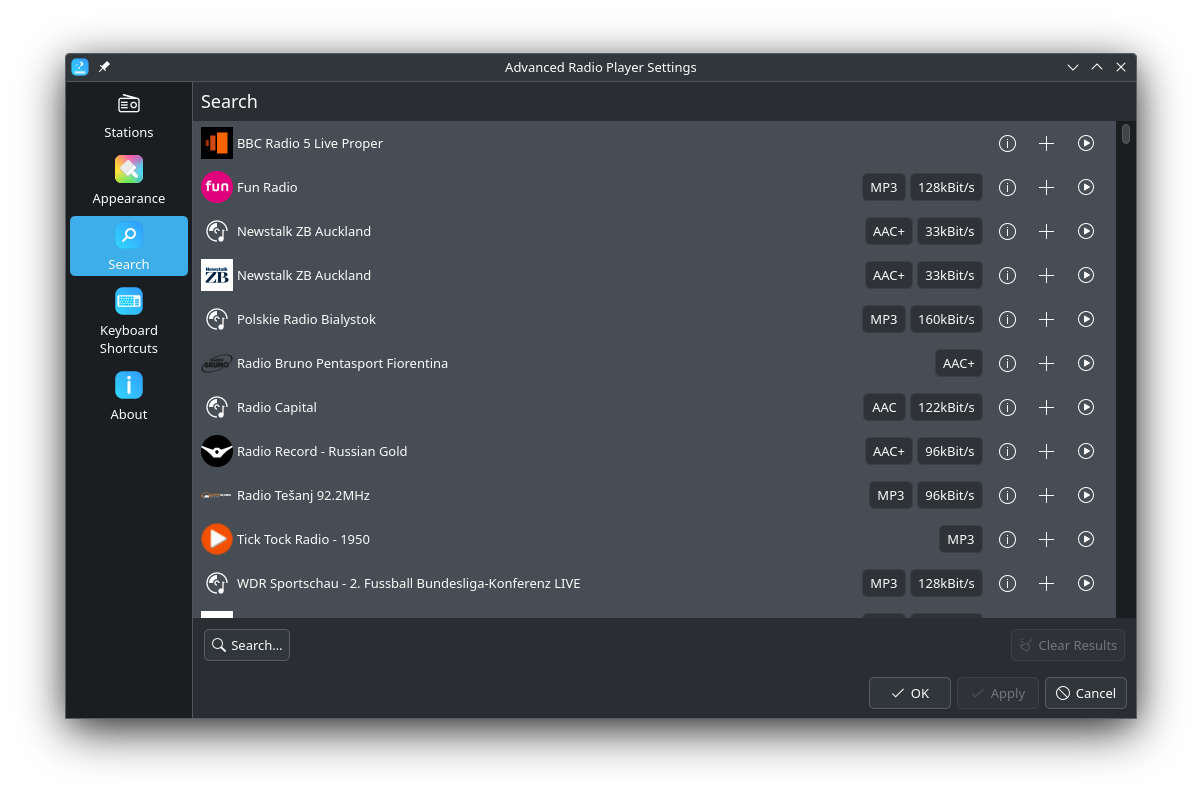
You can configure it through the configuration window. Settings are available to arrange the stations, search for new stations, etc.
Bonus: Configure the System Tray
You have all your widgets set. What next? Let me tell you something interesting:
By default, the widgets icons on the system tray will be visible when it is active. For example, the clipboard icon in the panel will be shown only if at least one item is present on the clipboard.
However, if you like, you can change that to make things look better as per your taste by configuring the system tray widgets.
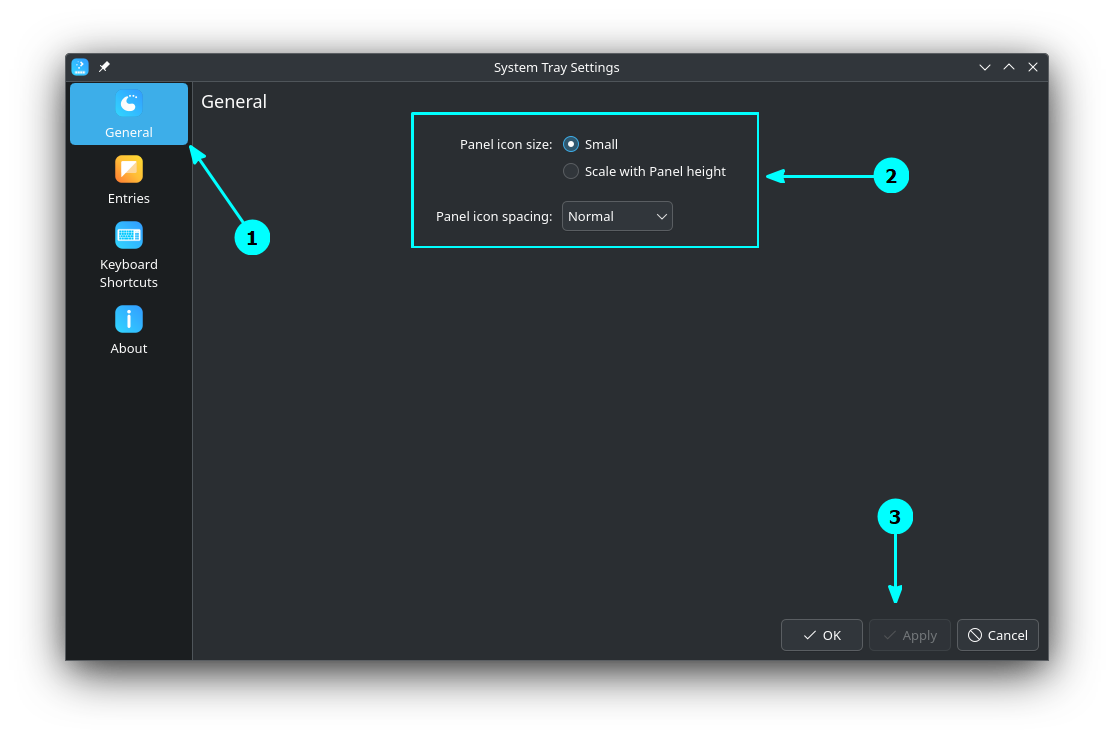
Right-click on the up-arrow adjacent to the tray and select “Configure System Tray”.
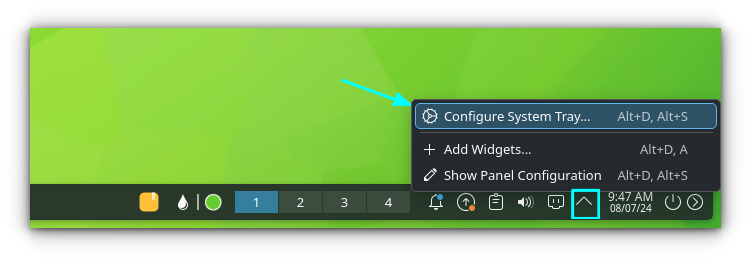
Here, you can change either the icons' size and spacing:
Or, set what appears on the system tray in panel.
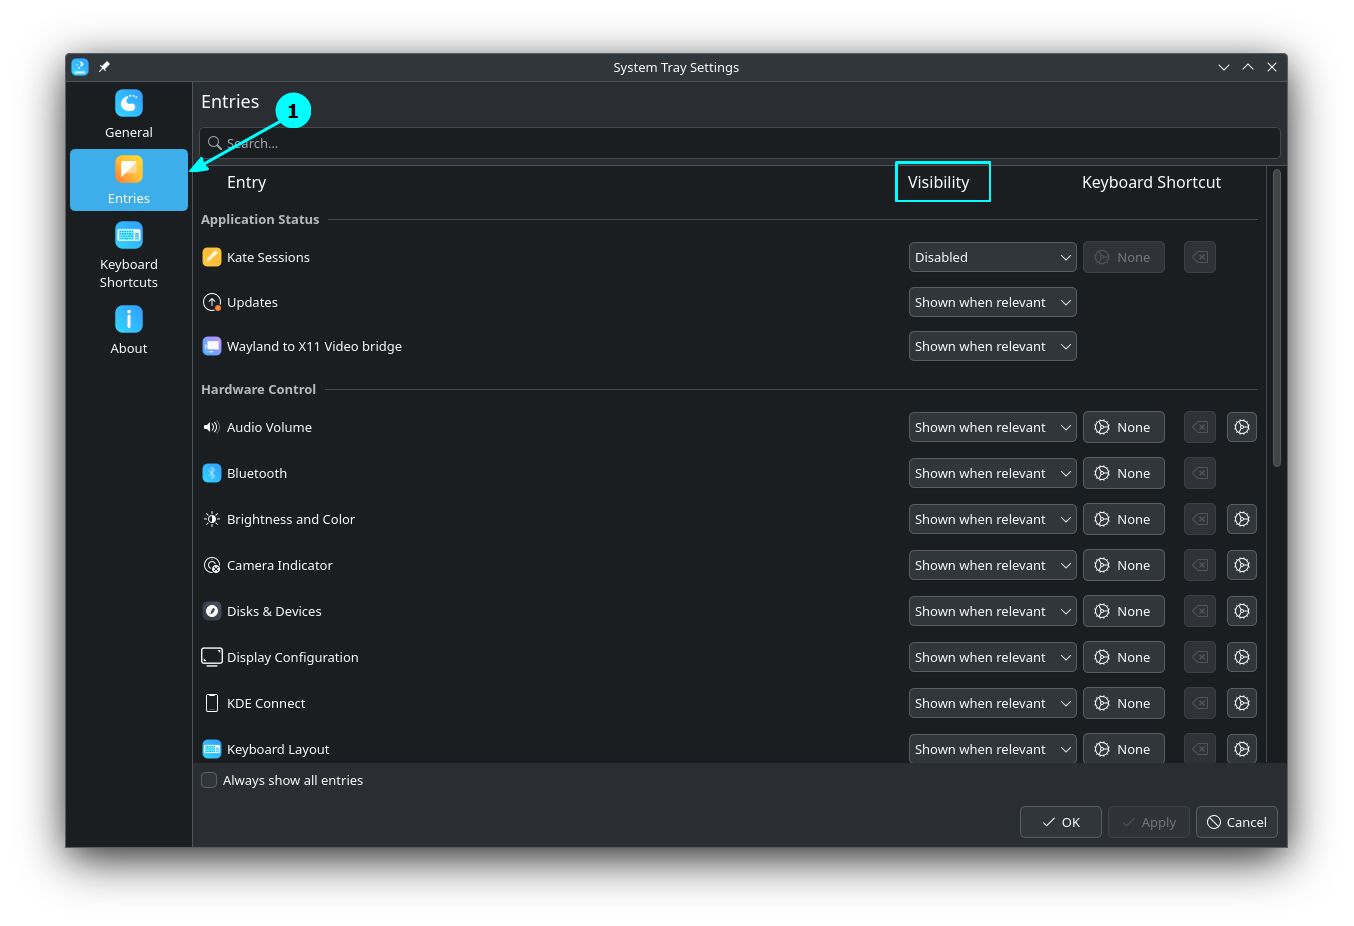
Items can be made permanently visible by making them “Always Shown”. And, you can change visibility to “Always Hidden” to hide them. Configure this, based on your liking.
Here is a final look, with all the widgets applied:
💬 What is your favorite on the list? Tell me about your favorite KDE Plasma widget in the comments below!
from It's FOSS https://ift.tt/GnuyS8i
via IFTTT
Tidak ada komentar:
Posting Komentar