
I've been using Pop!_OS since my college days, so whenever I distro hop, the first thing that I miss are the benefits of the Pop!_OS Shell.
Especially the ability to get tilting ability without much configuration is a must for someone like me.
So in this tutorial, I will walk you through how you can install the Pop Shell extension on the GNOME desktop. And yes, it will cover most Linux distros so you can get the most out of this.
Installing Pop Shell in GNOME Desktop
Unlike most installation methods, installing the Pop!_OS Shell is a little different.
For example, if you're an Ubuntu user, you have to build Pop Shell from the source whereas Fedora users can directly install it using its package manager (as it is available in its repository).
To make things easy to follow, I have divided the installation steps for every distro into different sections:
For Ubuntu
If you are using Ubuntu, first install the required dependencies using the following:
sudo apt install git node-typescript make nodejs npm gnome-shell-extensionsIn the next step, you have to clone the GitHub repository based on your current Ubuntu release. You can use the following command to know your release version:
lsb_release -a
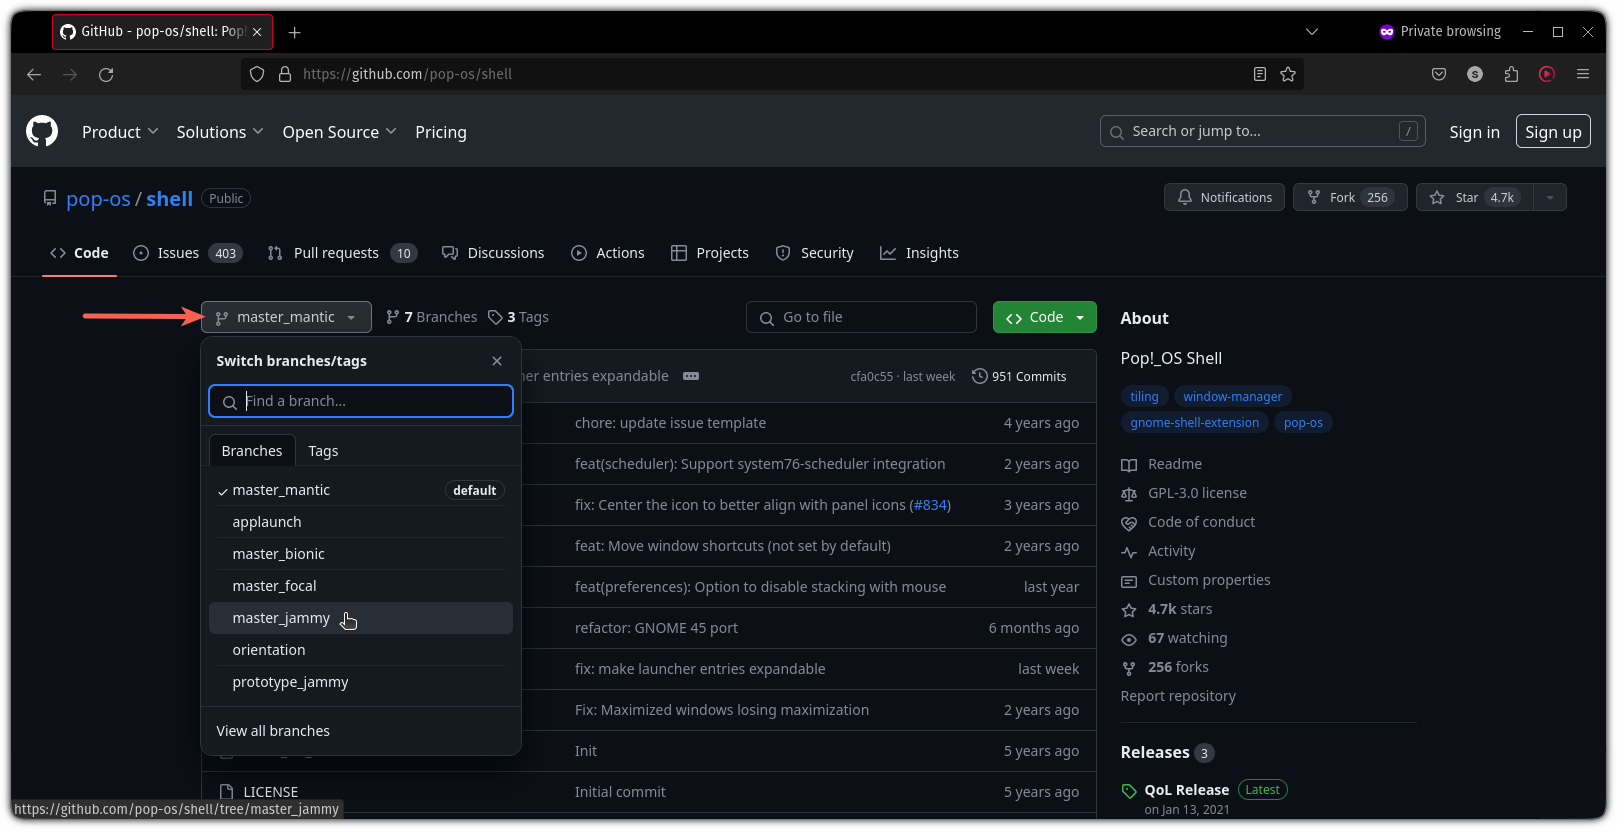
Once you find the codename of your current release, head over to the official GitHub page of Pop Shell and select the branch named after your release:
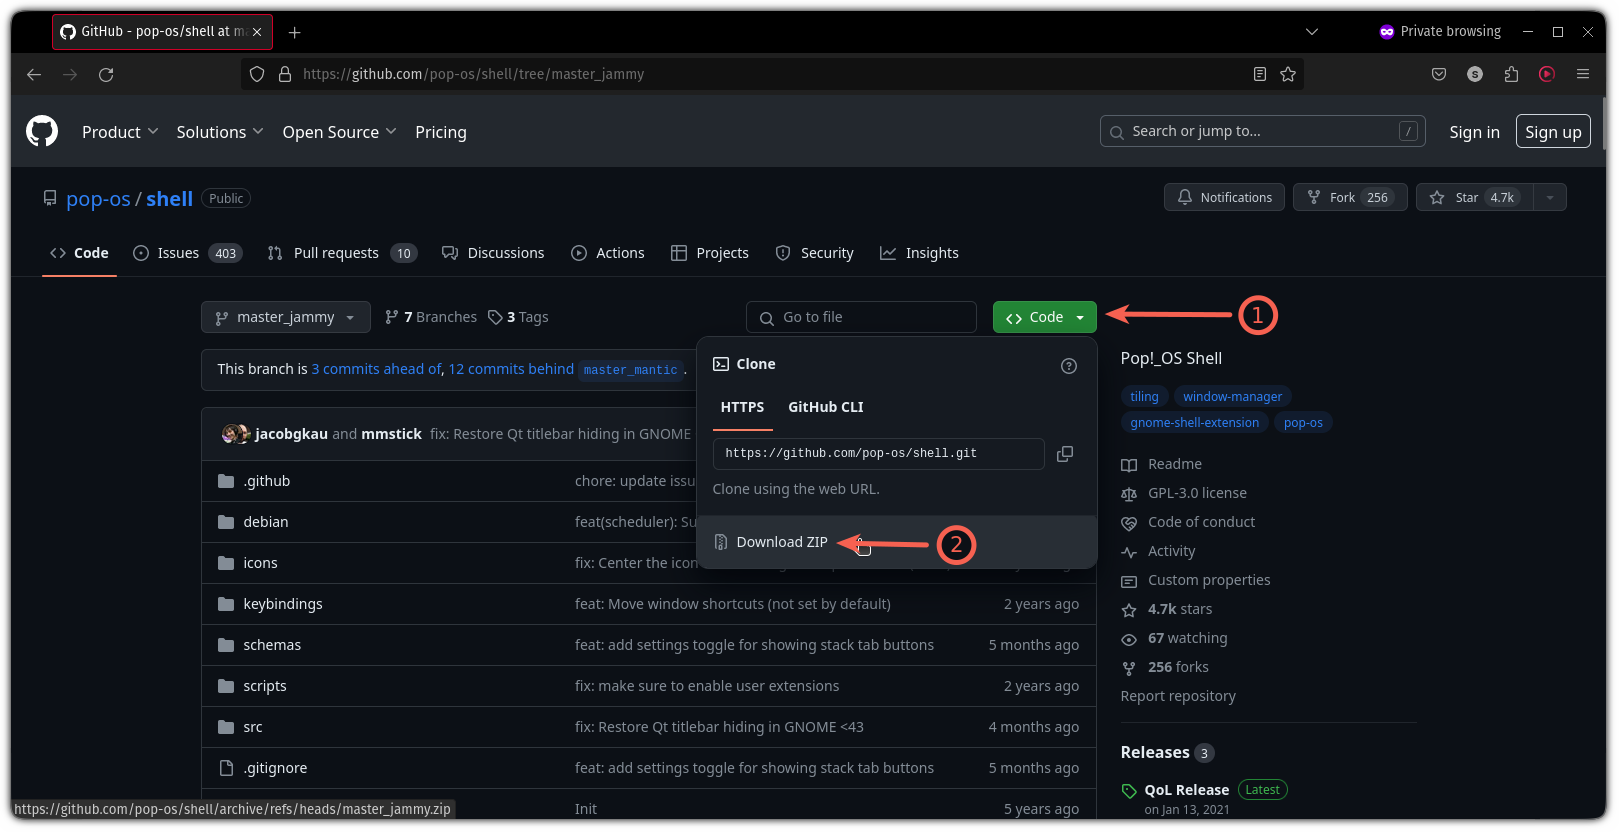
Next, download the zip file of the branch by clicking on the <> Code button:
Once done, open the terminal and switch to the directory where you've downloaded the zip file. For most users, it will be the Downloads directory:
cd ~/DownloadsNow, use the unzip command to extract files in the following manner:
unzip -q <Filename>
Next, use the cd command to change to the extracted directory. In my case, it was shell-master_jammy so I used the following:
cd shell-master_jammyFinally, build the file using the given command:
make local-installDuring the installation, it will ask you if you want Pop Shell to override your default shortcuts. Enter y and press the Enter key:

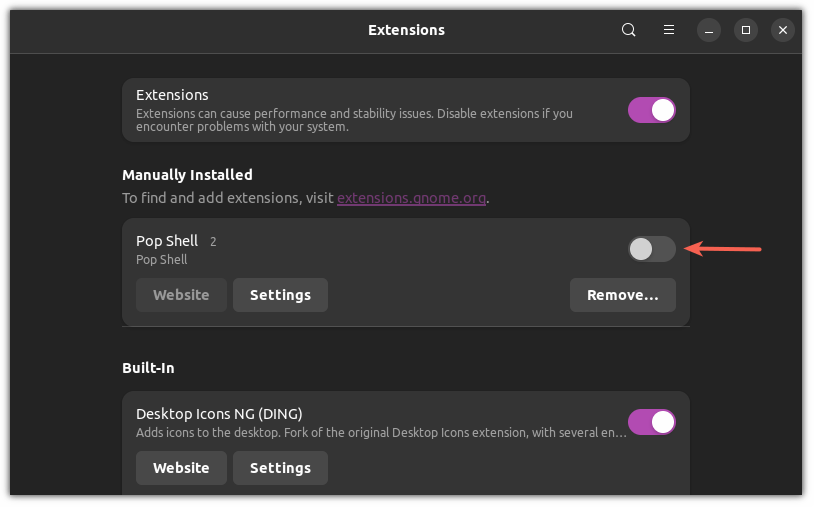
Once done, open the GNOME extensions from the app menu and enable the Pop Shell:
For Fedora
If you are using Fedora, then you're in luck. Pop!_OS Shell is readily available in the Fedora repository and can be installed with a single command:
sudo dnf install gnome-shell-extension-pop-shell
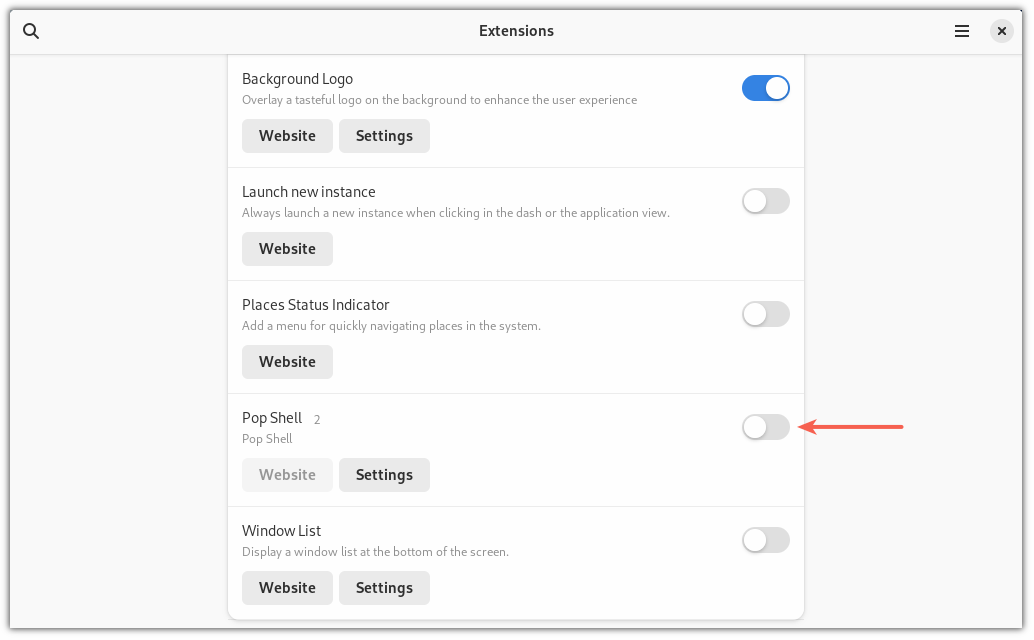
Now, log out and log back in, and open the GNOME extension manager to enable Pop Shell:
For Arch:
While the Pop!_OS Shell extension is available in the pacman repository, you have to build it from source if you want shortcuts to work.
First, install the prerequisites for building a package:
sudo pacman -S git typescript makeNext, clone the Pop Shell repository using the given command:
git clone https://github.com/pop-os/shell.gitNow, change your directory to shell using the following command:
cd shellFinally, use the make command to build the package:
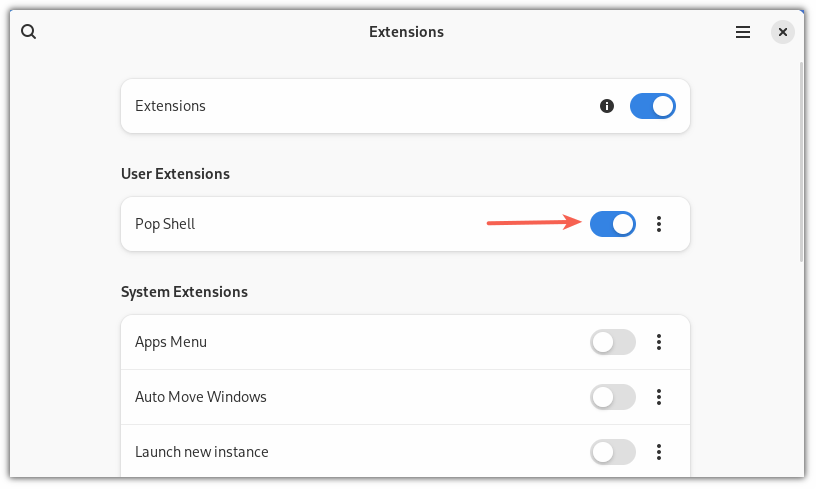
make local-installThat's it! Now, enable the Pop Shell extension from the GNOME extension manager:
For Manjaro
If you don't know, Majaro Linux uses its repository and Pop!_OS Shell is available in it.
To install Pop Shell in Manjaro, use the following command:
sudo pamac install gnome-shell-extension-pop-shellOnce done, enable the Pop Shell extension from the GNOME extension manager and that's it!
Your Pop!_OS Experience is Ready
This was a quick tutorial on how you can install the Pop!_OS Shell extension on GNOME desktop.
💬 I hope you find this guide helpful, and for any clarifications or suggestions, feel free to leave a comment.
from It's FOSS https://ift.tt/YZmMSOU
via IFTTT
Tidak ada komentar:
Posting Komentar