Imagine this situation. You have attached an external USB or SSD to your system and using it as an additional storage media. This is a common use case specially if you have set up a media server on Raspberry Pi or any Linux system.
On Linux, you normally have to click on the mount option in the file explorer or use the mount command to start using the external drive.
This is an incontinence and it could also be problematic in situation where you require the disk to be mounted like internal disks when the system starts. Imagine the media server not showing any media because the media was stored on external disk and it was not mounted.
The good thing is that you can solve this problem by ensuring that the external disk automounts.
In this guide, we’ll explore two popular methods for automatically mounting drives on Linux:
- Configuring the
fstabfile for startup mounting - Using
udevandautofsfor more dynamic setups
Let's see them one by one.
Method 1: Automount with fstab at Startup
If you want the external drive to automatically mount whenever your system starts, you can configure it using fstab (File Systems Table).
This method is reliable for drives that remain connected during system boot and I mostly use this method for my homelab.
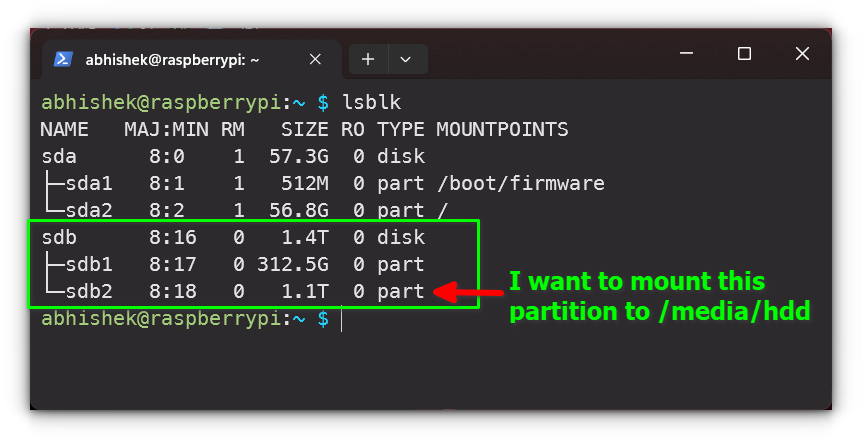
Steps to Automount via fstab:
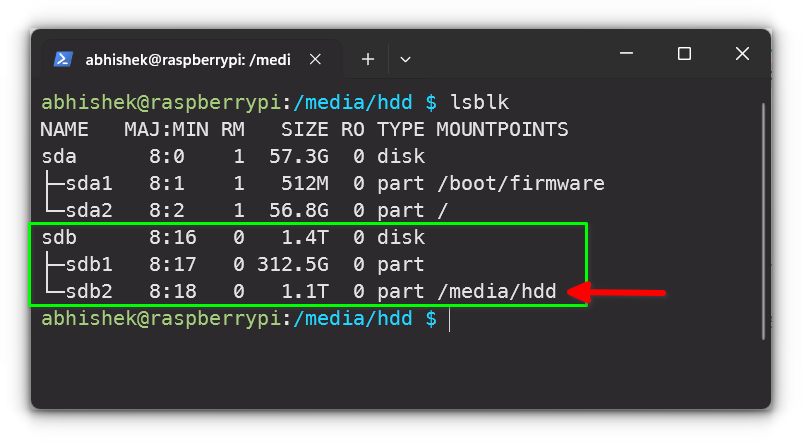
- First, connect your USB drive and run the following command to identify the device name and UUID:
sudo blkidLook for the line that corresponds to your external drive. For instance:
/dev/sdb2: UUID="12ab345cd-1234-4166-8539-ff4ff3ff2ff1" TYPE="ntfs"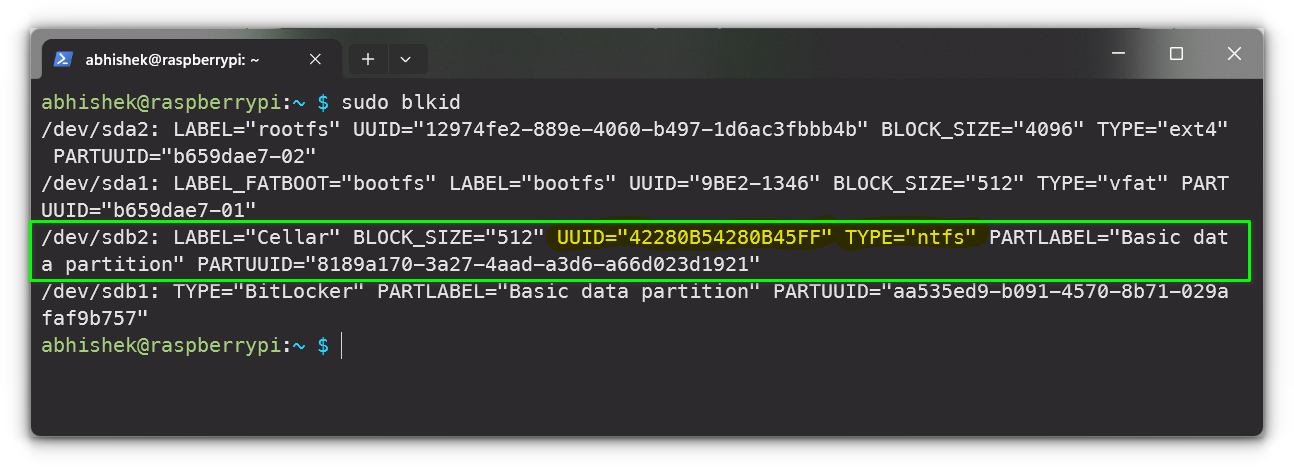
- Edit the
/etc/fstabfile with your preferred text editor (you’ll need super-user rights):
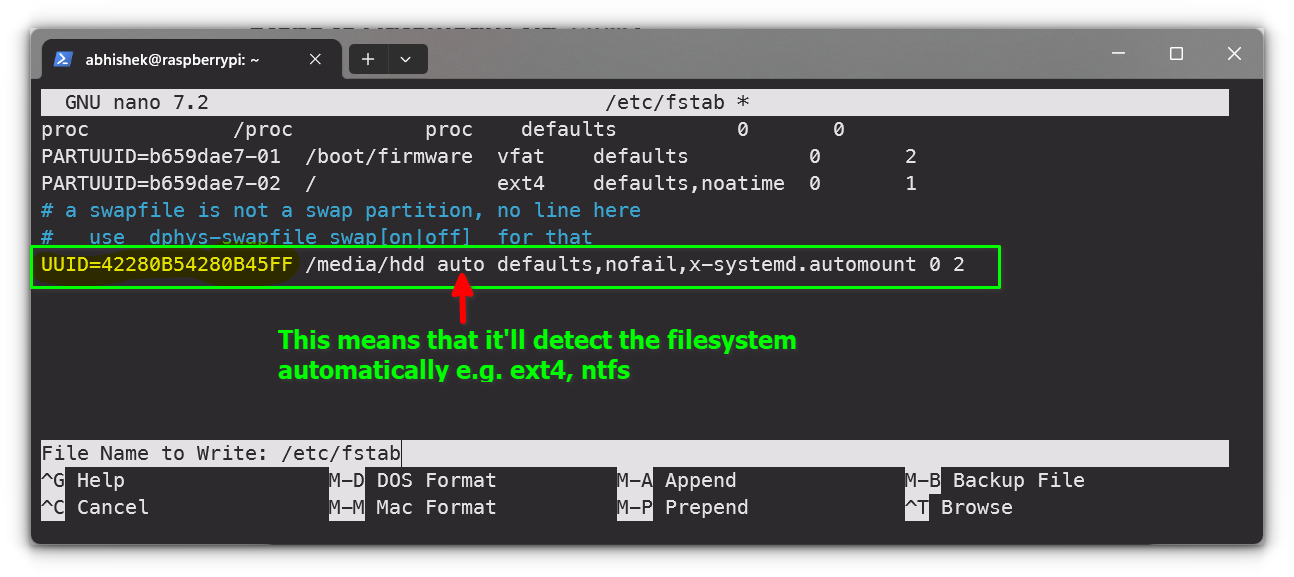
sudo nano /etc/fstabAdd the following line at the end of the file:
UUID=12ab345cd-1234-4166-8539-ff4ff3ff2ff1 /media/hdd auto defaults,nofail,x-systemd.automount 0 2Replace the UUID with the one from your drive, and adjust the mount point (/media/hdd) as per your requirement.
- Reload systemd to apply the changes:
sudo systemctl daemon-reloadThen reboot your system, and the drive should automatically mount at the specified location.
Method 2: Automount Using Udev Rules and autofs
If you want the external drive to mount only when it’s plugged in, udev rules and autofs provide a dynamic approach.
This method is more suitable if you frequently swap USB drives or prefer not to have them mounted at startup.
Steps to Automount Using udev and autofs:
- Create a new rule file in the
/etc/udev/rules.d/directory:
sudo nano /etc/udev/rules.d/usb_auto_mount.rulesAdd the following content:
ACTION=="add", KERNEL=="sd*", ENV{DEVTYPE}=="partition", ENV{ID_BUS}=="usb", \
    SYMLINK+="usbdisks/%k", MODE:="0660", \
    RUN+="/bin/ln -sf /media/hdd/%k /media/usb-sticks/%k"
ACTION=="remove", KERNEL=="sd*", ENV{DEVTYPE}=="partition", ENV{ID_BUS}=="usb", \
    RUN+="/bin/rm /media/usb-sticks/%k"
Breakdown:
ACTION=="add": This rule triggers when a new device (like a USB) is added.KERNEL=="sd*": Matches devices whose kernel name starts with "sd" (typical for drives).ENV{DEVTYPE}=="partition": Ensures that only partitioned devices are targeted.ENV{ID_BUS}=="usb": Limits this rule to USB devices.SYMLINK+="usbdisks/%k": Creates a symbolic link in/dev/usbdisks/for the device.%kis a placeholder for the device name assigned by the kernel.MODE:="0660": Sets read and write permissions for the user and group (but not others).RUN+="/bin/ln -sf /media/hdd/%k /media/usb-sticks/%k": Creates a symbolic link in/media/usb-sticks/pointing to/media/hdd/%k, where the drive will be mounted.ACTION=="remove": This rule is triggered when the USB drive is unplugged.RUN+="/bin/rm /media/usb-sticks/%k": Removes the symbolic link when the drive is disconnected.

- After saving the file, reload the udev rules to apply the changes:
sudo udevadm control --reload-rules- Edit the
auto.masterfile to instructautofsto mount the USB drive:
sudo nano /etc/auto.masterAdd the following line:
/media/hdd /etc/auto_mount.usb --timeout=60
Then, create the corresponding automount map file:
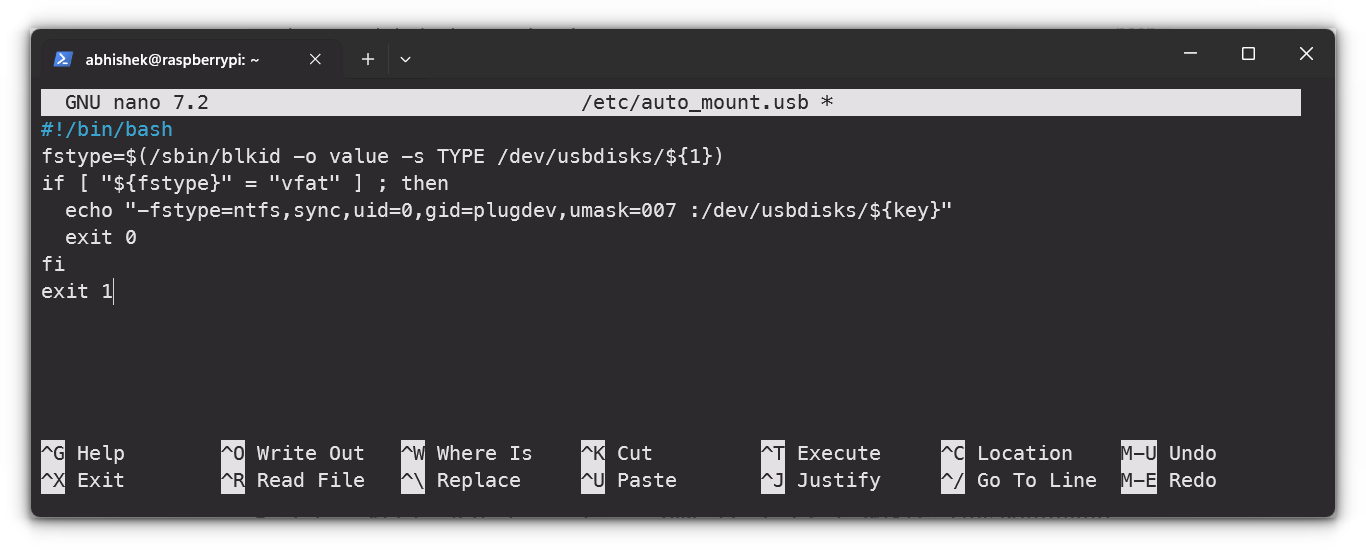
sudo nano /etc/auto_mount.usbAdd this content:
#!/bin/bash
fstype=$(/sbin/blkid -o value -s TYPE /dev/usbdisks/${1})
if [ "${fstype}" = "vfat" ] ; then
  echo "-fstype=ntfs,sync,uid=0,gid=plugdev,umask=007 :/dev/usbdisks/${key}"
  exit 0
fi
exit 1
Breakdown:
fstype=$(/sbin/blkid -o value -s TYPE /dev/usbdisks/${1}): This command fetches the file system type (e.g., FAT32, NTFS) of the USB drive using theblkidcommand.if [ "${fstype}" = "ntfs" ]: Checks if the file system isntfsa common file system type used by Windows.echo "-fstype=ntfs,sync,uid=0,gid=plugdev,umask=007 :/dev/usbdisks/${key}": Mounts the drive with specific options:fstype=vfat: Mount it as avfatfile system.sync: Ensures that data is written to the drive immediately rather than being cached.uid=0,gid=plugdev: Sets the owner toroot(uid 0) and the group toplugdev(a common group for USB devices).umask=007: Sets the permissions for files and directories so that only the owner and group can access them.
Save and exit the file.
The drive will now automatically mount in /media/hdd/ when connected and unmount after 60 seconds of inactivity.
Tips for Automounting External Drives
- Use UUIDs: When using
fstab, always prefer UUIDs over/dev/sdXidentifiers as they remain consistent across reboots. - Check Filesystem Support: Ensure that your system supports the filesystem of your USB drive (e.g., install
ntfs-3gfor NTFS drives). - Test Changes: Always test your configuration changes after setting them up to ensure the drive mounts properly. Using
journalctlcan help diagnose any issues.
Conclusion
Automounting the drives can significantly streamline your workflow. This I realized with my personal experience.
A few days ago, while setting up an external drive as part of my DIY NAS (Network Attached Storage) on a Raspberry Pi, I encountered a frustrating issue.
I was backing up crucial files and using the drive for remote access. Everything was going smoothly until a reboot occurred.
To my dismay, the system booted back up, but the external drive didn't automatically mount. The backup process was disrupted, and I had to manually intervene every time the system restarted.
It was frustrating because the whole point was to make the system run seamlessly without constant supervision. I experimented with automounting the drives and decided to share my experience with you.
The approach you choose between fstab and udev depends on your specific needs whether you prefer the drive to be ready at boot or only when plugged in.
With these steps, you can ensure that your external storage is always accessible without manual intervention.
💬 Do let me know if you have questions or face issues while automounting the external disks in Linux.
from It's FOSS https://ift.tt/T9CEVNG
via IFTTT
Tidak ada komentar:
Posting Komentar