
Once you have WSL setup, installing various Linux distribution is as simple as installing any application from the Microsoft Store.
This flexibility allows you to experiment with various available distros. And when you have several distros installed via WSL, it only makes sense to get rid of the ones you don't want to use.
Removing a Linux distro installed via WSL involves these two steps:
- Use the
wslcommand to unregister a distro from the terminal. - Uninstall the WSL distribution app from your system.
Step 1: Unregister the WSL distribution using the terminal
Here, we will take a look at unregistering a WSL distribution from the terminal and also from within another WSL distribution.
Unregister the distribution using Windows terminal
Before uninstalling a WSL distribution, we need to unregister it. This is to ensure a proper removal of the distribution and its files.
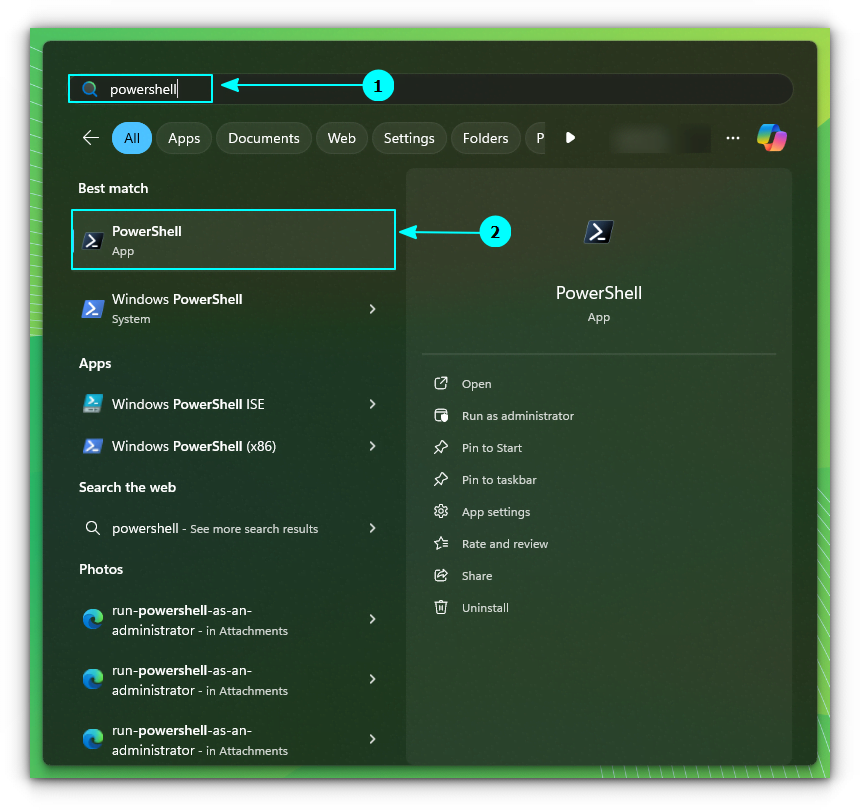
Search and open PowerShell from the Start menu.
On PowerShell, use the command below to list all the installed distributions. You will get the name of the distribution you want to remove from this list. Note it.
wsl -l -v
Now, to unregister a distribution, use the command:
wsl --unregister <distro_name>
For me, I will run:
wsl --unregister Ubuntu
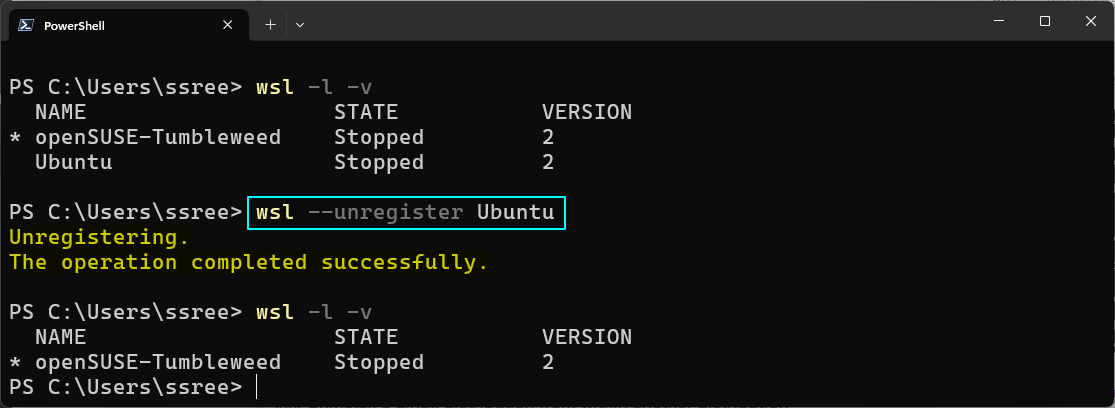
This will remove the associated file system and other leftovers.
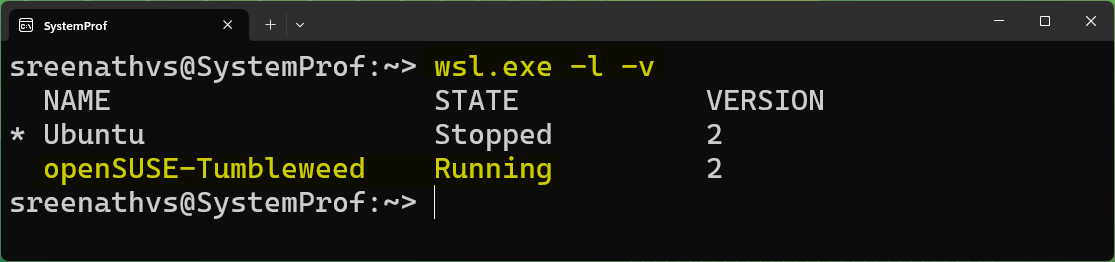
Unregister a Linux distribution from within another distribution
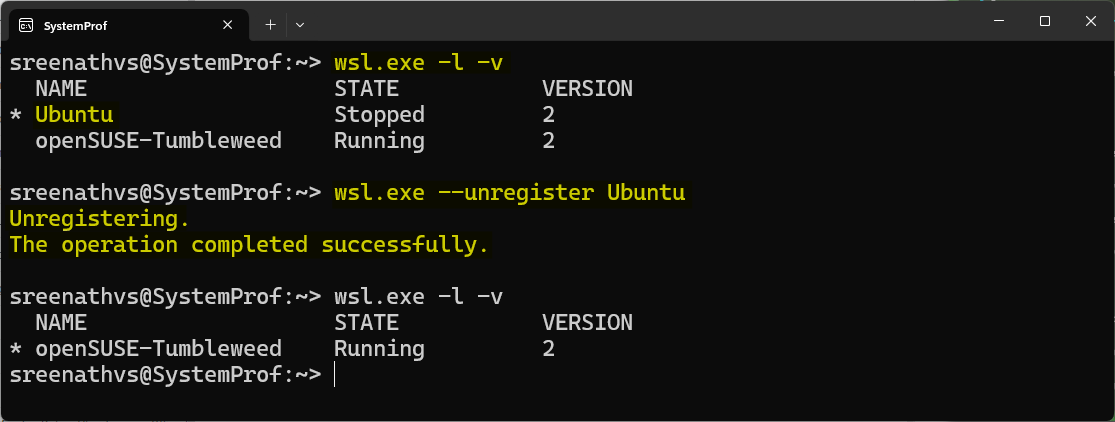
It is possible to unregister a WSL distribution while you are using another WSL distribution, with the help of the wsl.exe command. What you have to do is to replace wsl in the above-mentioned commands with wsl.exe That is:
List installed distributions using:
wsl.exe -l -v
Now, remove the selected distro using:
wsl.exe --unregister <distro_name>
Step 2: Uninstall the WSL Distribution from the system
Once you have unregistered the WSL distribution, it is time to remove it from your system.
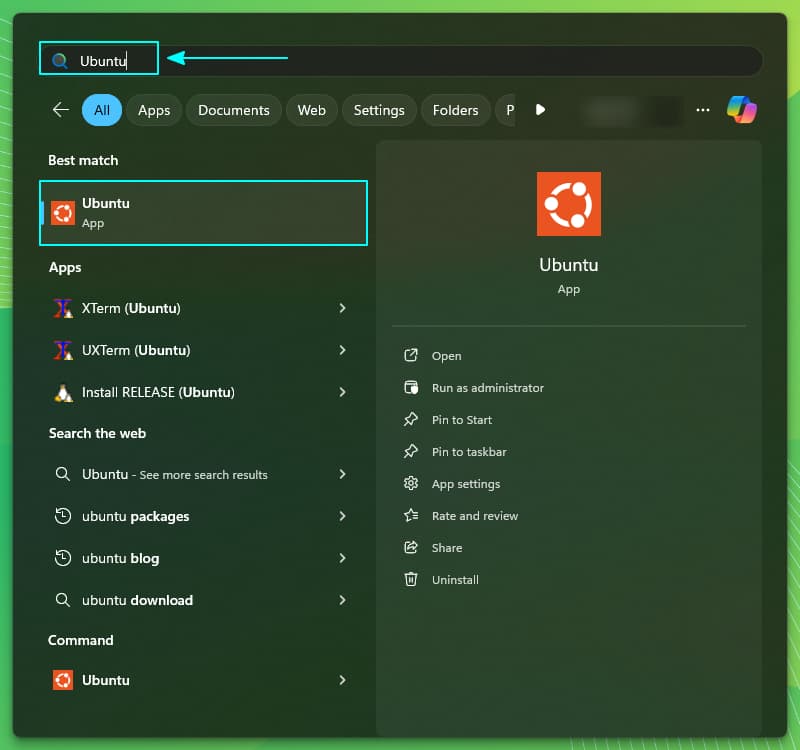
Since the WSL distributions are installed as apps from Microsoft store, you can uninstall the app to get rid of that distribution. First, press the Windows key to open the start menu and search for the distribution that you want to uninstall.
Now, right-click on it and select Uninstall.
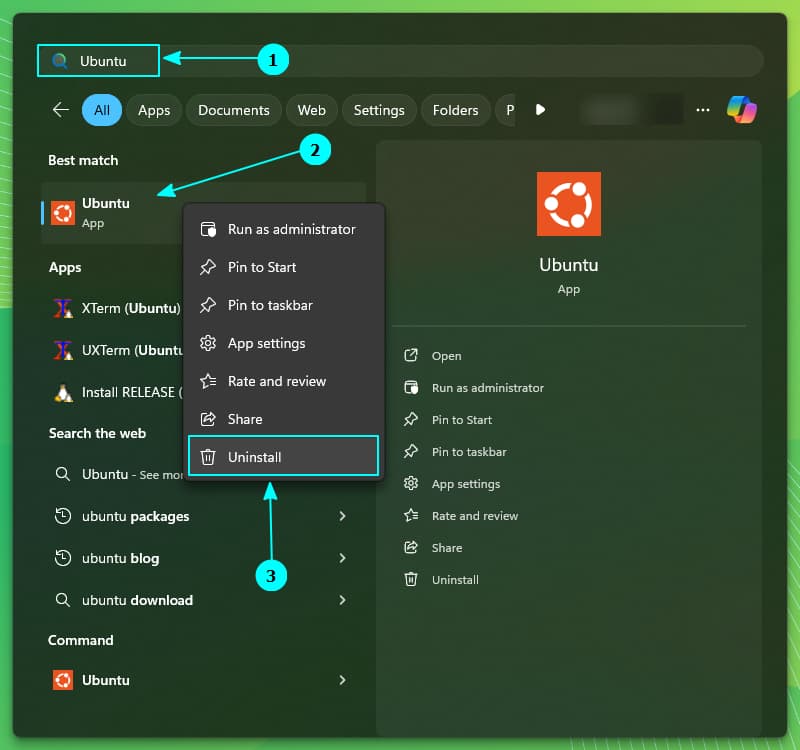
If asked for a confirmation, confirm the uninstall and done.
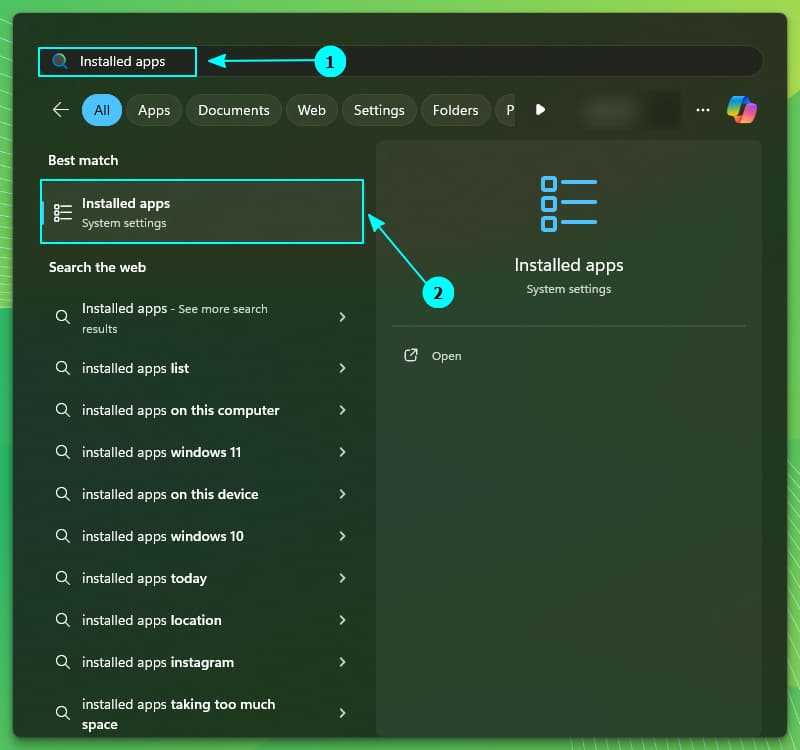
Alternatively, on the start menu, search and open Installed Apps.
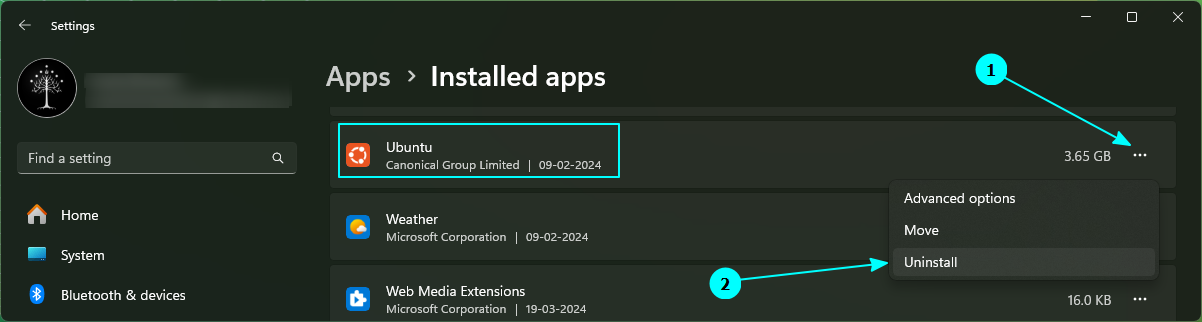
Inside this, scroll down to find the distribution and click on uninstall to remove it from the system.
That's all about removing WSL Linux distributions from Windows.
from It's FOSS https://ift.tt/9bLWigv
via IFTTT
Tidak ada komentar:
Posting Komentar