In the Linux terminal (GNOME), you can set a custom command to a separate profile so that it is easy to access.
Let's say you want a separate profile for ZSH sessions. First, find the executable for the command using the which command:
which zsh
which htop
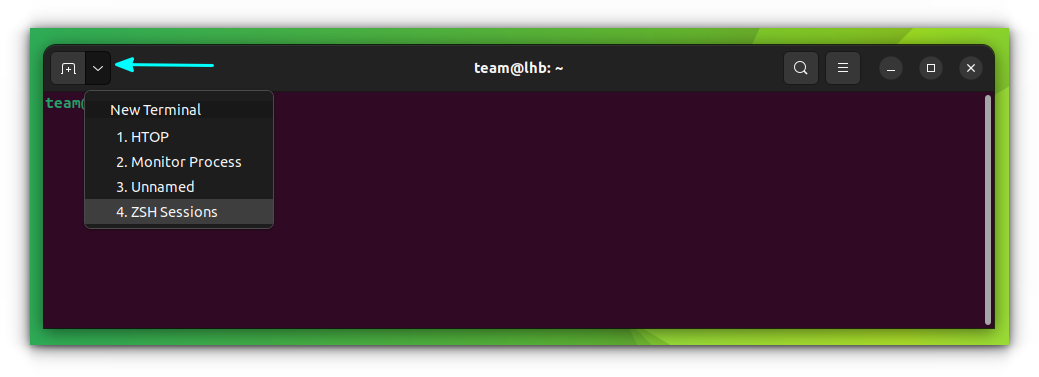
Now, go to GNOME terminal preferences and add a new profile using the “+” button. In the “Command” section, enable the “Run a custom command…” checkbox and in the “custom command” field, enter the command location:
Now, when required, you can get that profile. 👇
In the case of new shells, you can make a new profile for a shell so that there is no need to change your default shell!
If you are making profiles for commands that run and exit, you might want to set the “When command exits” option to “Hold the terminal open”. Otherwise, when the command completes execution, the window will be closed.
This is ideal for active commands like top and htop.
🤣 Meme of the week
The kid's about to embark on an adventure!
🗓️ Tech Trivia
Syncom 2 launched by NASA as the world's first geosynchronous satellite on July 26, 1963. It was tested for voice, teletype, and facsimile, with a live two-way call between heads of government via satellite showing off its capabilities.
🧑🤝🧑 FOSSverse corner
A proud father moment for one of our regular FOSSers!
Google Photos is an excellent service by Google to store and organize your precious memories.
But, of course, it is Google, and it is not be the most privacy-friendly option out there. So, what can you do to get a private Google Photos like experience?
The answer is clear — open-source alternatives to Google Photos. You can host it yourself as per your requirements, and take control of your data/photos. Here, I list the best options, along with some that also offer you cloud hosted services.
How to Self Host The Open-Source Google Photos Apps?
I recommend going through the documentation for every option listed to learn the methods available to configure and set up the applications.
In most cases, you will use Docker Compose, installation scripts, and Kubernetes. If you want a one-click method, you can always use PikaPods, a service that lets you easily host open-source apps. It may not support all the apps listed, but you can check for yourself.
Now that you have an idea on how/where to self-host it, let us take a look at the list:
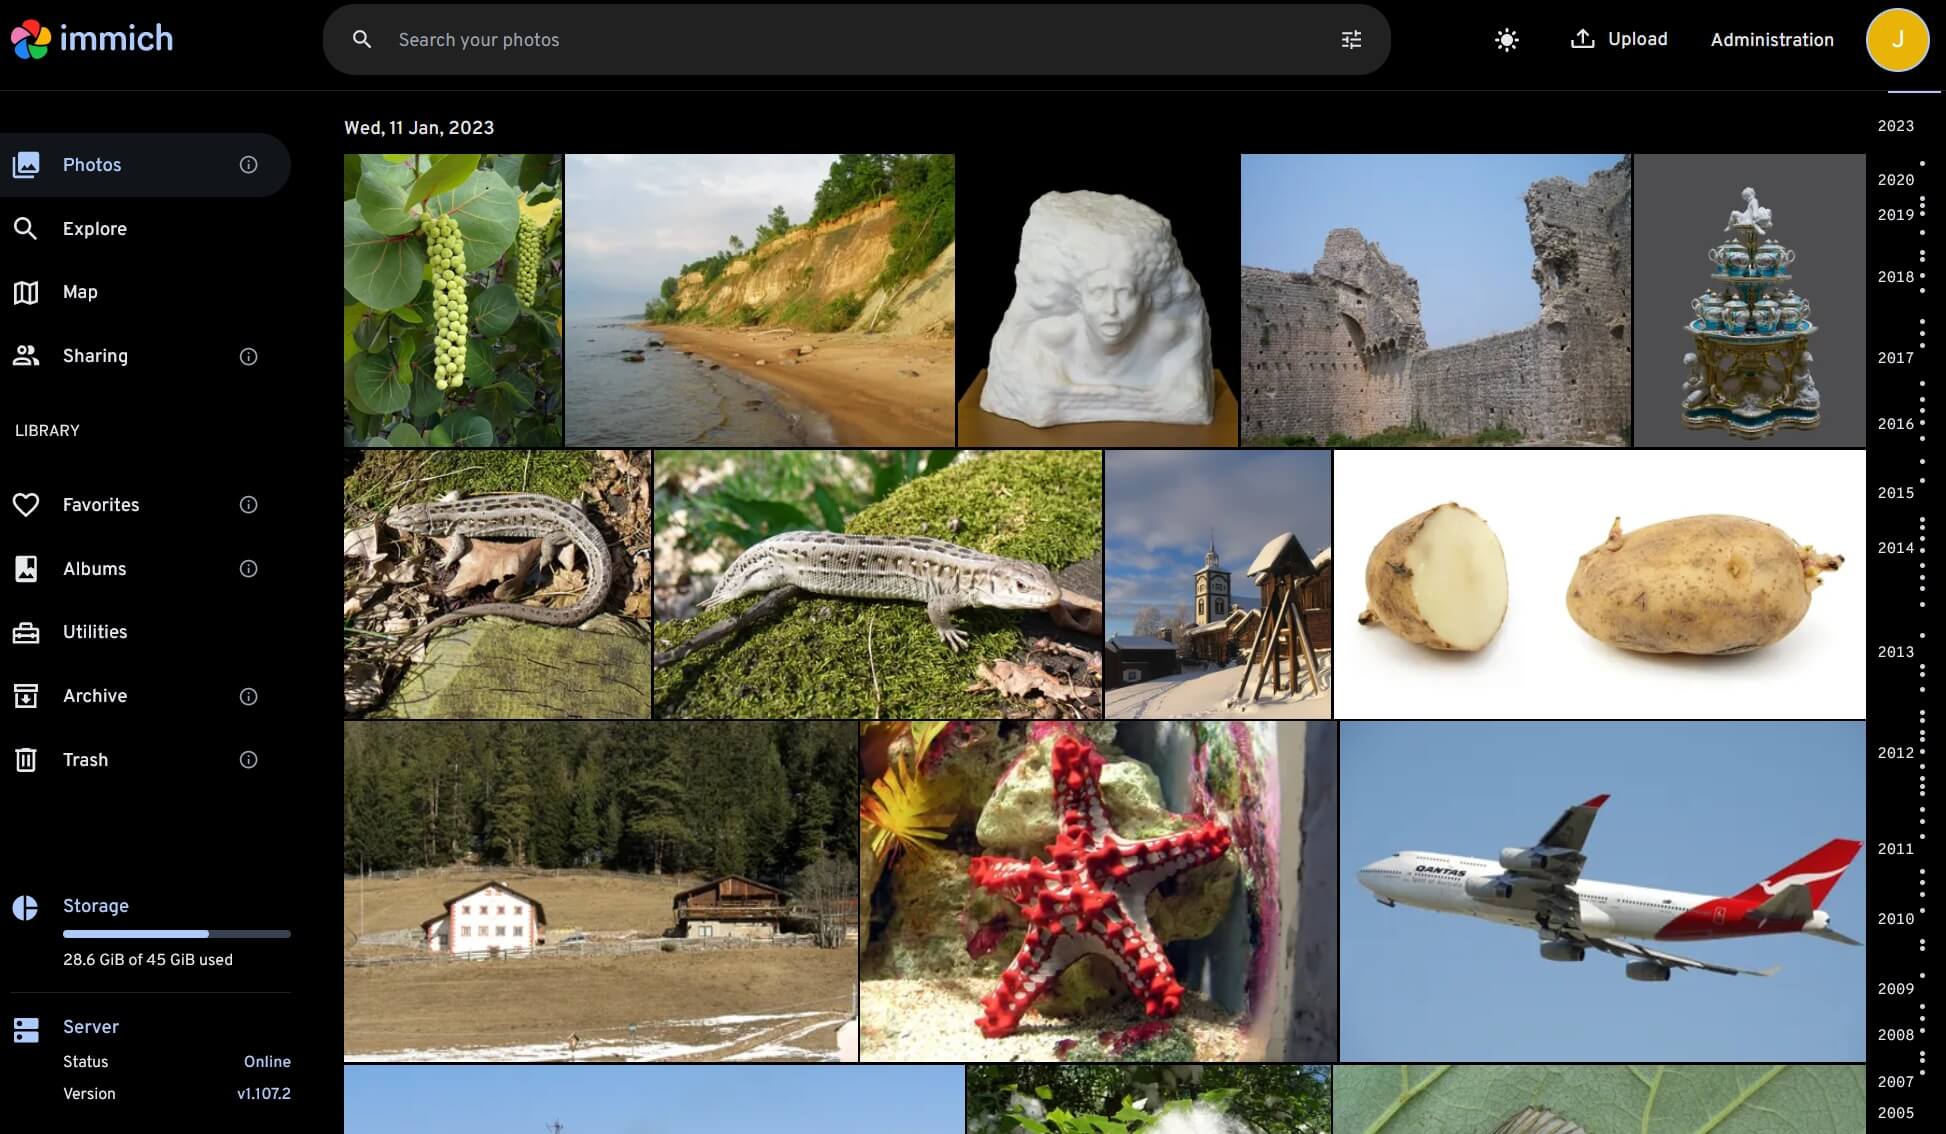
1. Immich
Immich is one of the most impressive open-source Google Photos alternatives that mimic its user interface. It is a self-hostable solution that will make you feel right at home, if you always liked Google's UI.
I would mention it as my personal favorite because of its UI and the feature-set that includes the ability to search based on a face, automatic backup on mobile, shareable albums, and more.
Head to its GitHub page to get more technical details.
✅ Facial recognition
✅ Google Photos-like UI
✅ Mobile apps
✅ Automatic backup
✅ Videos
✅ Sharing + Albums
❌ Tags and Basic Editing
⚡ Actively maintained
🌐 Online demo
Immich can be easily deployed with PikaPods for as less as $3.3 per month. You can try it with the $5 free credit PikaPods offers.
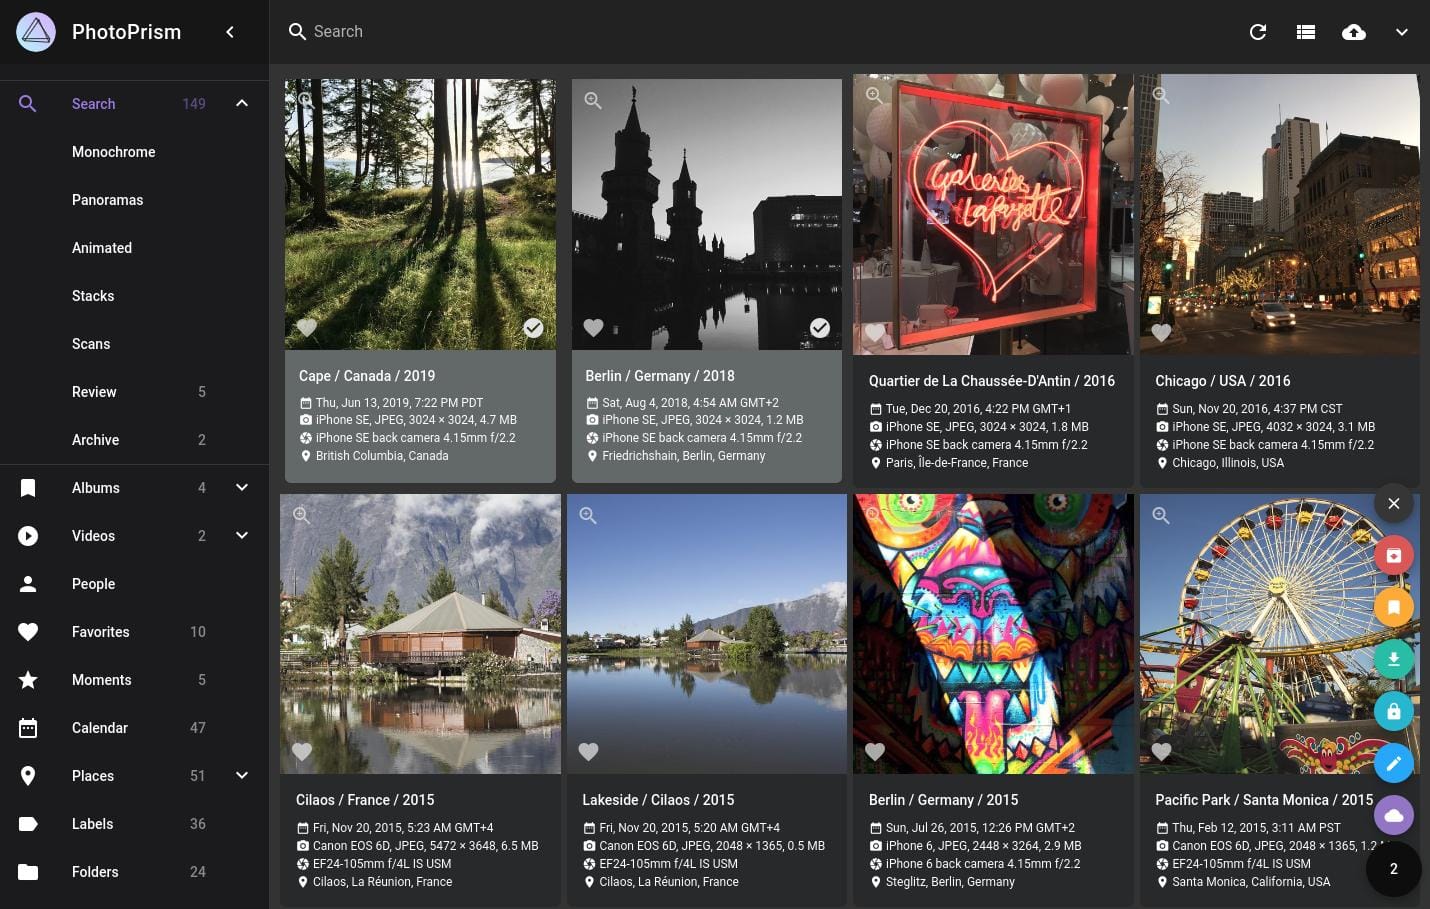
2. PhotoPrism
PhotoPrism is a decentralized open-source Google Photos replacement that you can self-host.
It offers a simpler user interface, and aims not to get in your way of organizing/accessing your photos. While it offers the essential features like search by face, live photos, and geotagging, it does not provide native mobile apps. However, it relies on its Progressive Web App approach to run on any operating system with ease.
It does not feature its own backup capability but takes the help of PhotoSync to let you do that. You can explore more on its GitHub page.
✅ Facial recognition
✅ Simple UI
✅ User-defined Tags
✅ Automatic backup with PhotoSync
✅ Videos
✅ Sharing + Albums
❌ No mobile apps
❌ Basic Editing
⚡ Actively maintained
🌐 Online demo
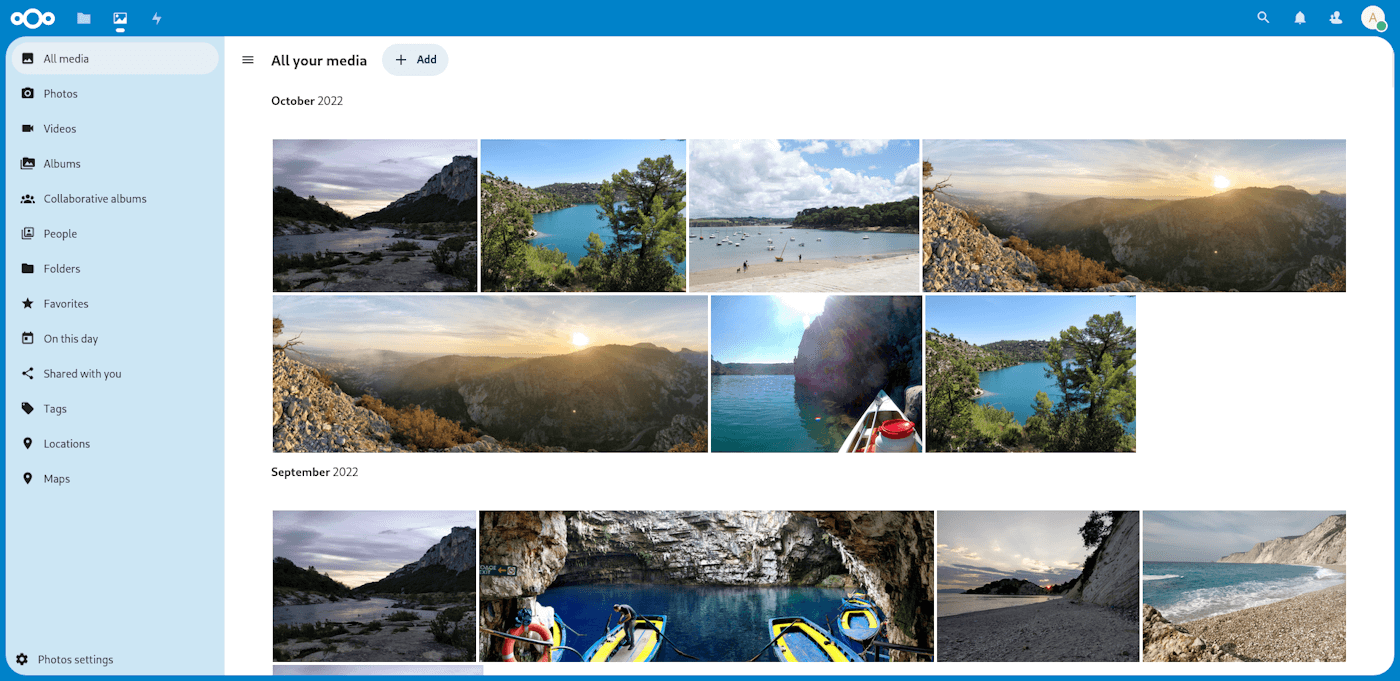
When it comes to self-hosted solutions, Nextcloud is one of the most trusted names that come up. If you are using Nextcloud to store your files/documents, all you have to do is enable the Photos app to start managing images.
Unlike others, Nextcloud Photos does not come with face-recognition and preview thumbnail support. You need to install the add-ons to get those abilities. So, you get more control here, if that's how you want it to be.
You can expect a seamless Nextcloud user experience with support for mobile apps and automatic backups.
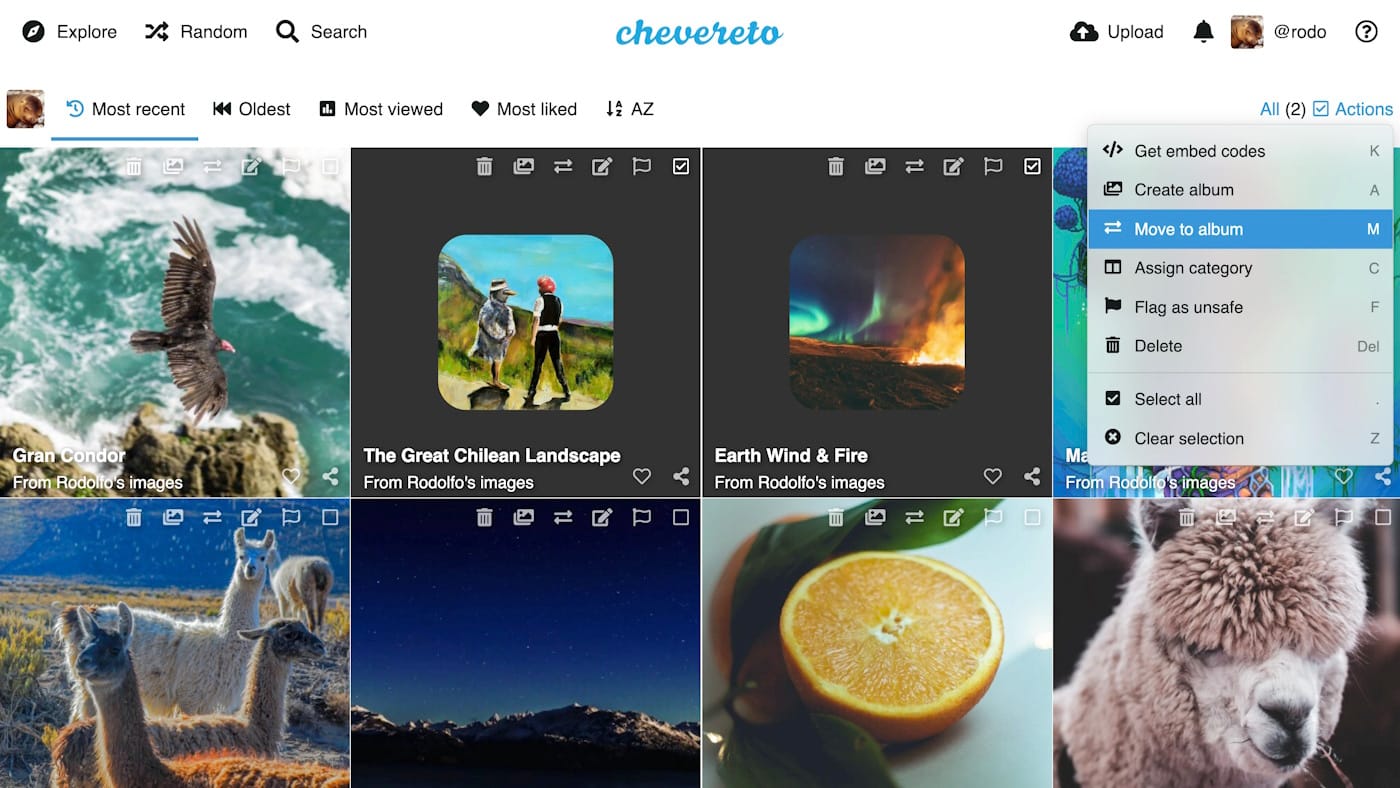
Chevereto provides a hosting platform for you where you can organize your photos and videos. It is not tailored as a Google Photos alternative. So, you will be missing out on some features comparatively.
However, if all you ever wanted as a web gallery for your media, Chevereto should do the trick.
It offers a free edition that you can self-host and also lets you opt for a cloud version or get a commercial license to deploy an instance that has more features/abilities. This may not be for everyone, but it is worth taking a look.
✅ Simple UI
✅ Videos
✅ Sharing + Albums
❌ Facial recognition
❌ User-defined Tags
❌ Automatic backup
❌ Basic Editing
❌ Mobile apps
🌐 Online demo
🟠 Not so actively maintained
LibrePhotos is a simple photo management solution that you can self-host. It is built on top of all sorts of open-source technologies.
It may not be an exciting option, but if you want a straightforward option to help you manage photos and videos, this is a suitable candidate. You get some essentials, including facial recognition.
You only get Android mobile app support (which is also in active development). There are no iOS builds, you need to build it yourself, which is inconvenient at the moment.
Piwigo is a solid open-source Google Photos alternative. You can self-host it or opt for its cloud hosting solution. It is a flexible solution that features numerous plugins to help you extend functionalities as per your requirements.
You can utilize it for individual or organizational needs, which makes it a scalable option for every user.
Unlike others, it lets you easily tweak the look and feel of the platform using the available themes. Piwigo may not offer the most modern UI, but it focuses on being functional, which is a nice thing.
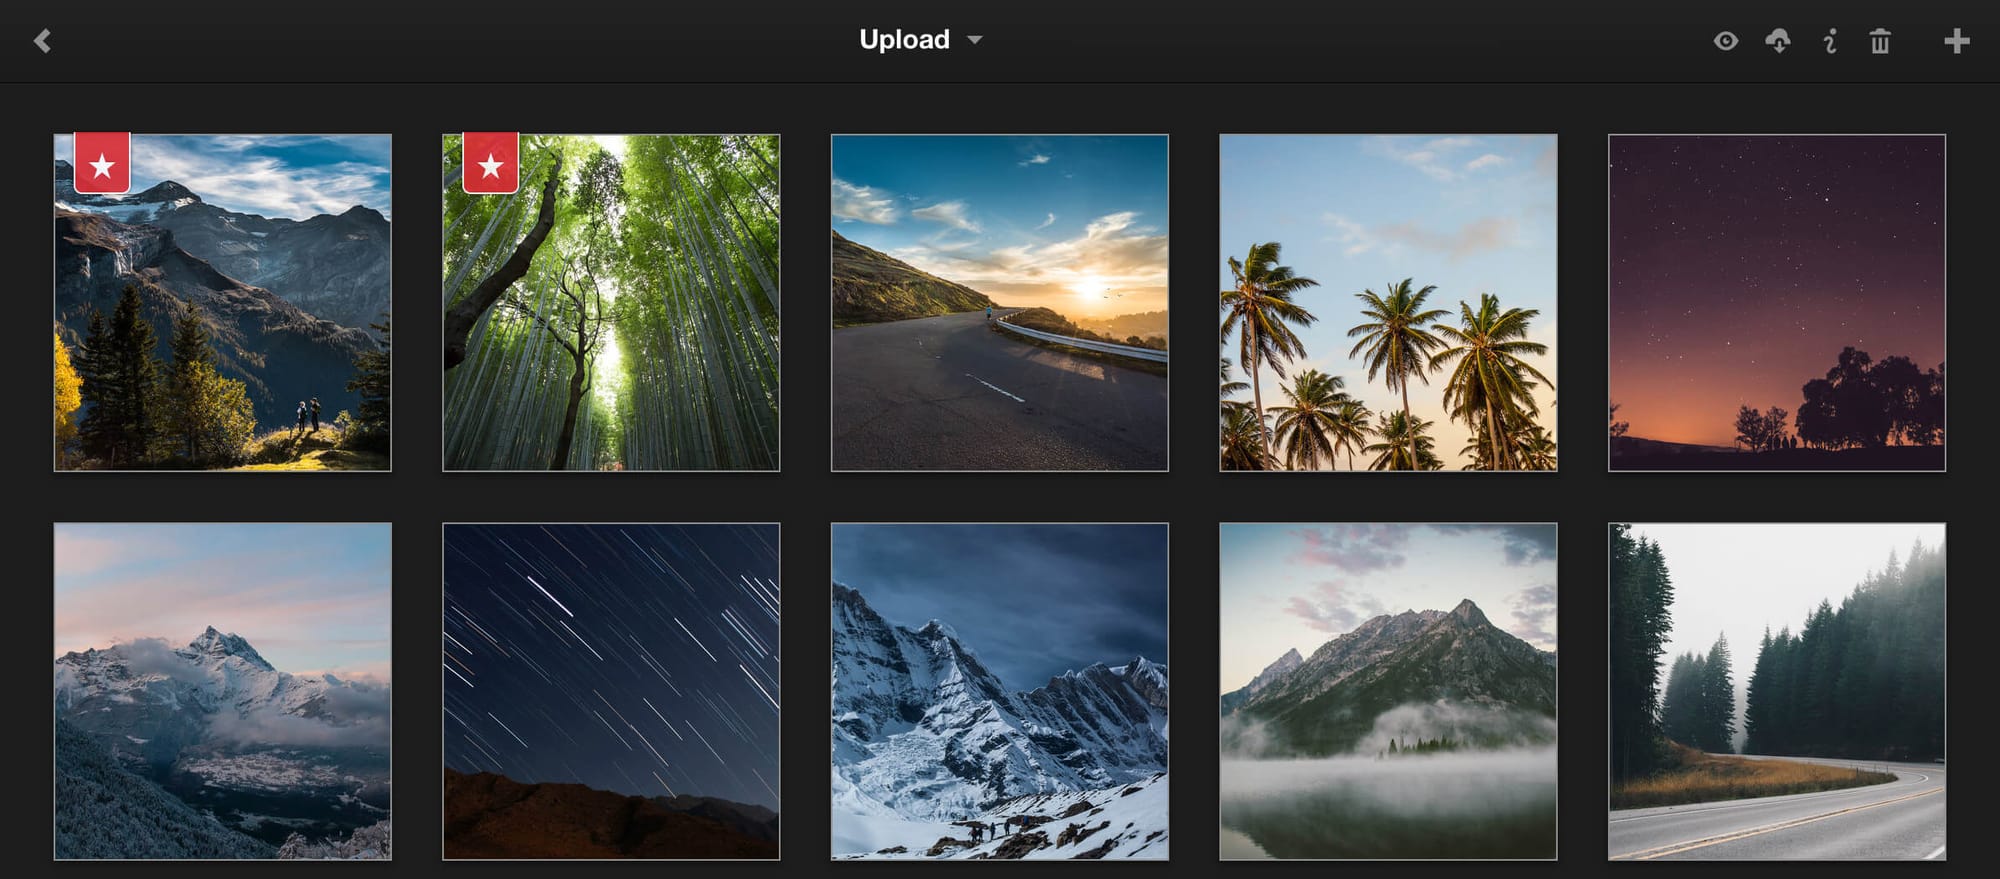
Lychee is a focused open-source photo management solution. You can choose this to replace Google Photos if you do not need facial detection to search through your photos.
You can expect features like EXIF data preservation and geolocation, but it does not allow you to view a timeline or handle duplicate files (at least at the time of writing this).
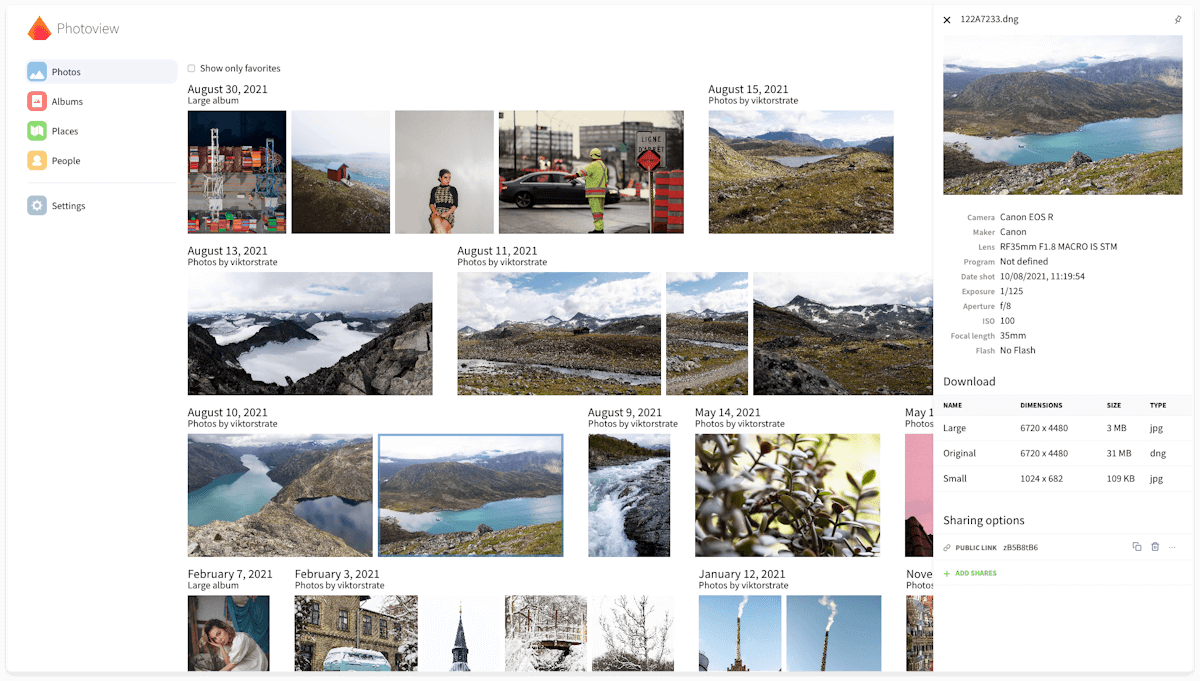
Photoview is a self-hostable Google Photos alternative that focuses on RAW images and fast user experience.
If you want RAW image support, and features like facial recognition, this is a worthwhile option. Unfortunately, it only offers an iOS app. So, it is a no-go for Android users.
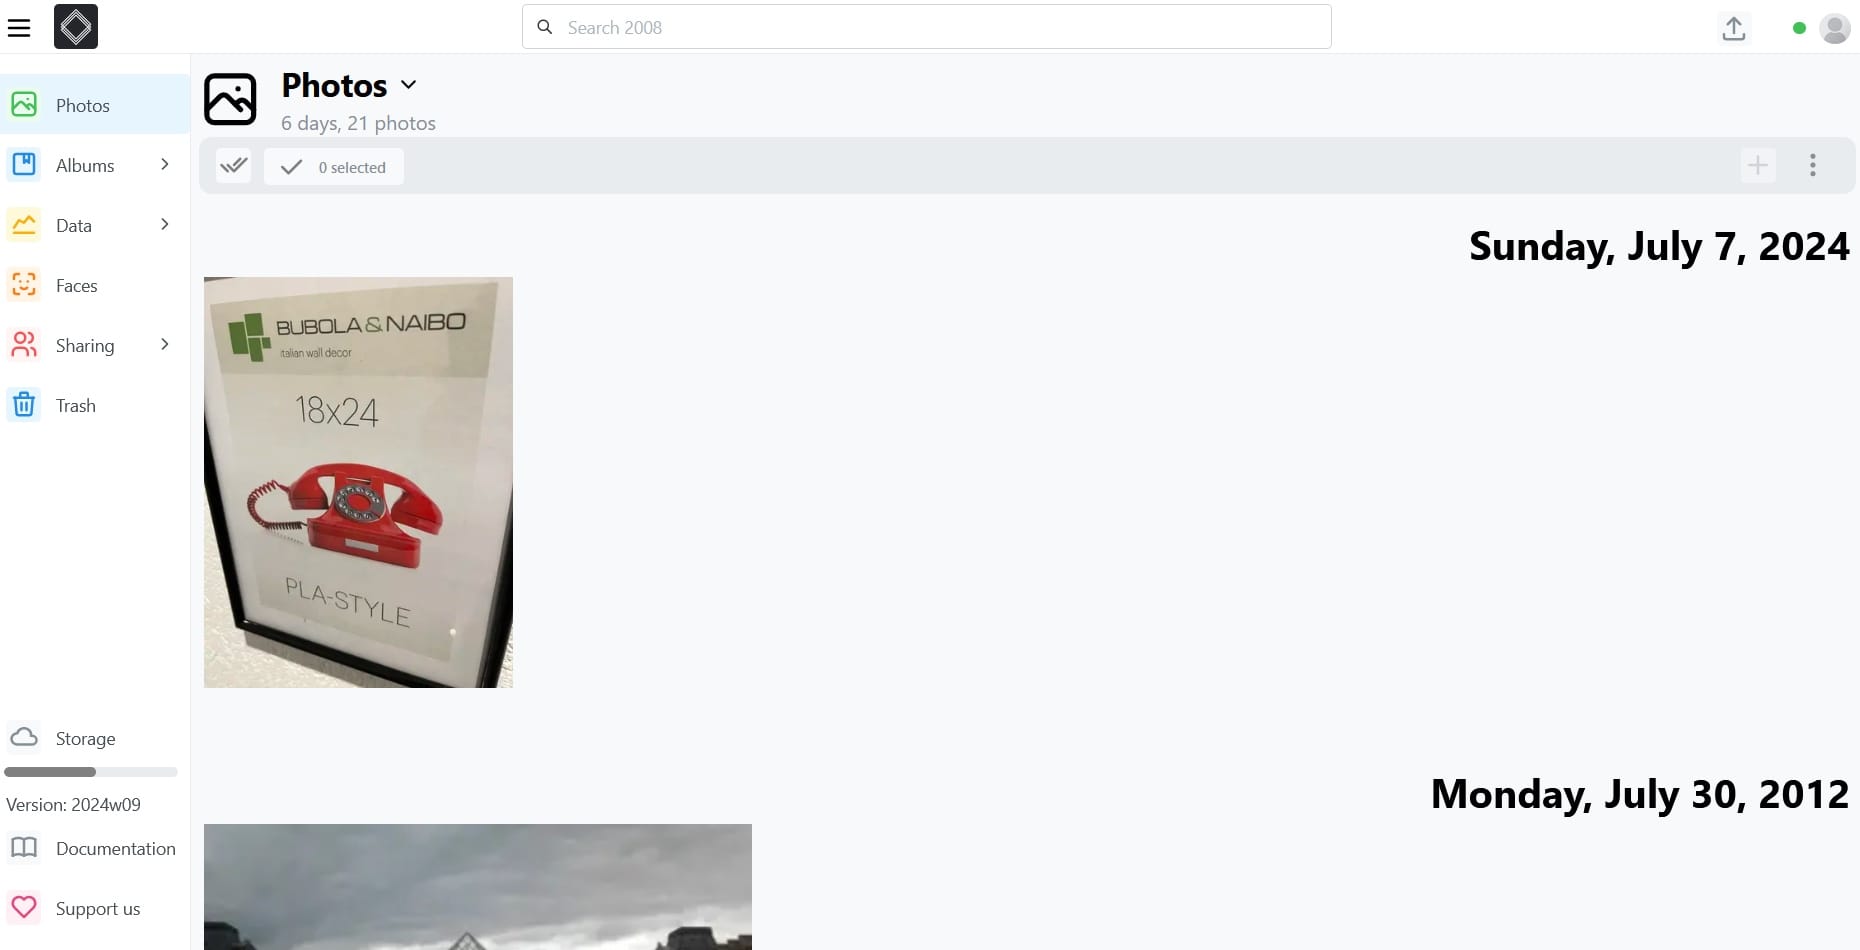
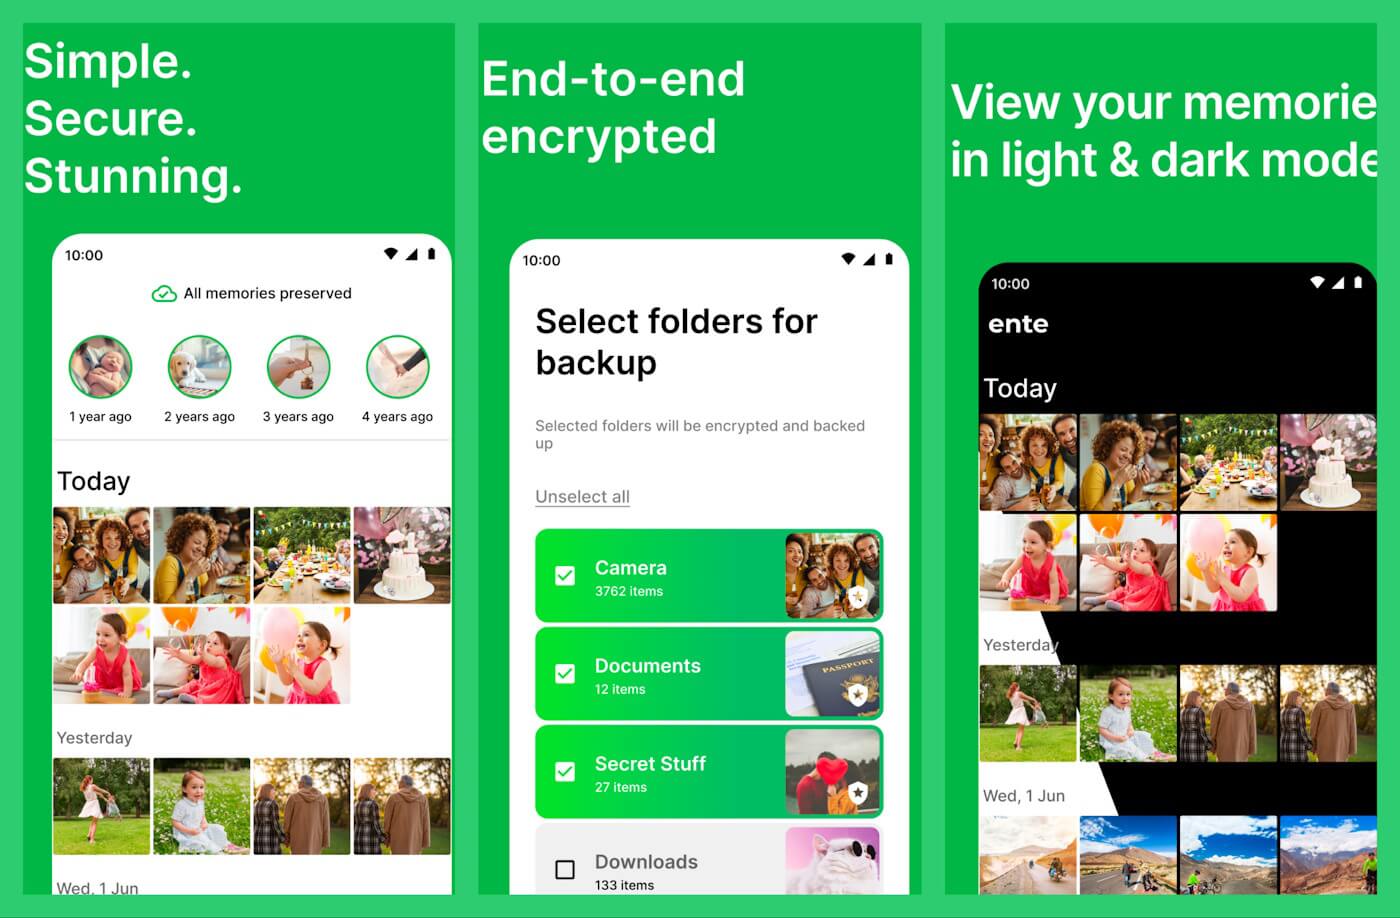
Self-hosting requires your time and attention. If you want total control over your app, there is no way out. However, if you want convenience and open-source, Ente is here to the rescue.
Ente is an interesting open-source replacement to Google Photos app with the same convenience and end-to-end encryption for extra security. You do not have to set up anything. You just have to pay for the storage, get all the similar features to Google Photos, and access your photos from your mobile and desktop.
✅ Modern UI
✅ Videos
✅ Sharing + Albums
✅ Mobile apps
✅ Facial recognition
✅ Automatic backup
✅ User-defined Tags
✅ Family plans
✅ Basic Editing
❌ No self-host
❌ Online demo
⚡ Actively maintained
These open source image hosting solutions have their pros and cons. I have tried to highlight them in the article. Basically, I prefer multiple backups of my photo as I don't rely on one software and server.
I keep my photos on a separate disk. And then use a copy to display and organize them with PhotoPrism or other applications.
Honestly, it is up to you to decide which software ticks the most boxes for you. Not every person has the same requirements.
💬Do you think any of these options can replace Google Photos for you? Or, would you keep both? Let me know your thoughts in the comments below.
Here's the scenario. You can connect to a remote Linux system over SSH and you find yourself in a situation where you have to copy some files from the remote server to your local system.
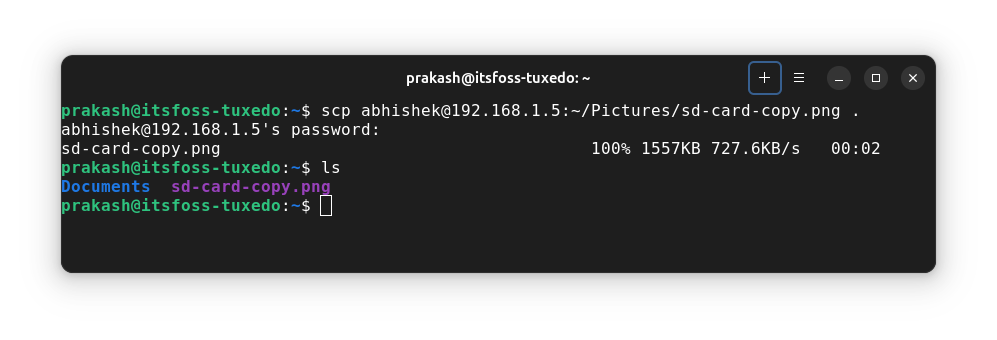
How do you do that? You can use the good old scp command in the following manner:
Pay attention to the use of colon (:) between the remote server details and the path.
You can also use the rsync command here. Let me go over these steps in detail in this tutorial.
✋
This tutorial assumes you can connect to the remote system using SSH. You need to know the password for the remote user and the remote user should have read/write access to the folder where you want to copy the file.
My environmental setup consists of a Raspberry Pi working as the remote server. I can SSH into the Pi easily from my TUXEDO laptop.
Using scp command
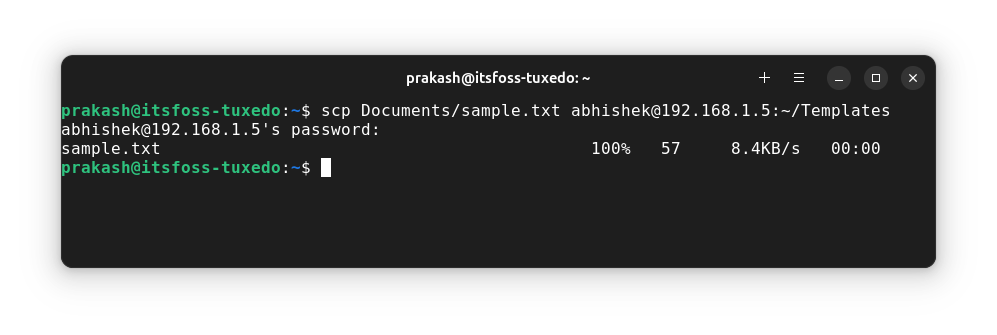
The scp command, short for secure copy, uses the SSH connection to transfer files between remote systems. I like it because its syntax is similar to the cp command.
💡
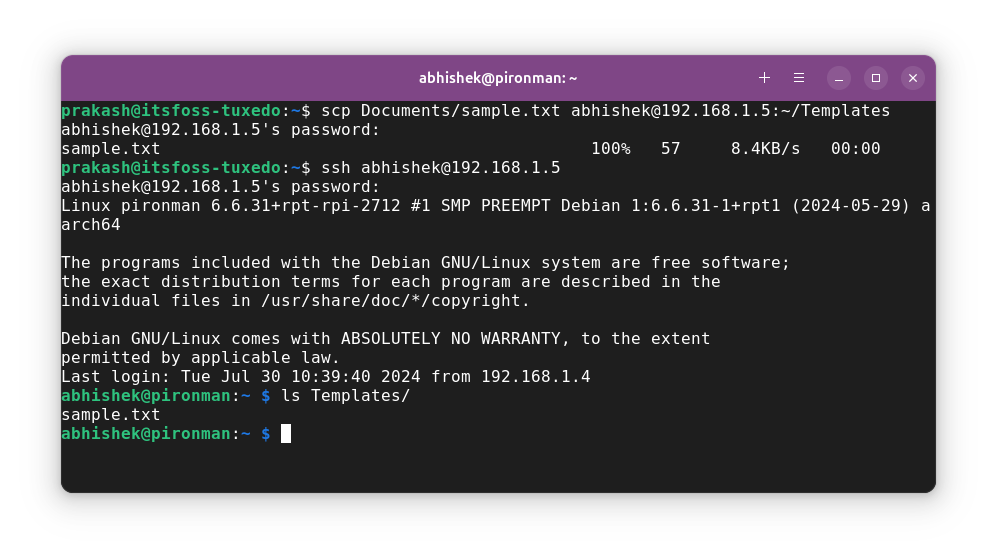
I keep a separate terminal session open with SSH connection into the remote server. This gives me the ability to view and copy the file locations on the remote server. This is important because you won't get tab completion over SCP.
Copy files from local machine to remote server
I have a sample.txt file in the Documents directory. I want to send this file to the remote server in its Template directory.
I copied the remote file to my current working directory.
Copying multiple files?
This gets tricky as copying multiple files will mean providing full path (including user name and IP address) for all the files. If you can use wild card matching, go for it otherwise, copy the desired files in a new temp directory and copy this temp directory to the local system.
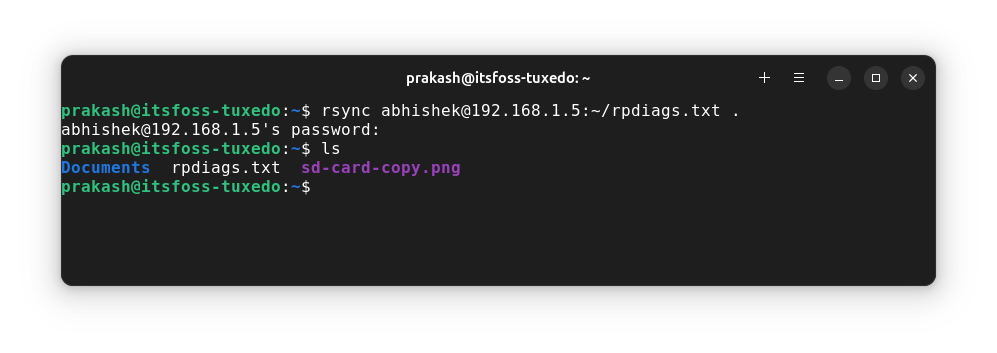
rsync is another powerful command that gives you the ability to copy files between remote systems. Unlike scp, rsync is more than just a simple transfer command, it has more powerful features that make it a good backup tool when used in combination with cron jobs.
Here, I'll only show you how to use it for simple file transfers.
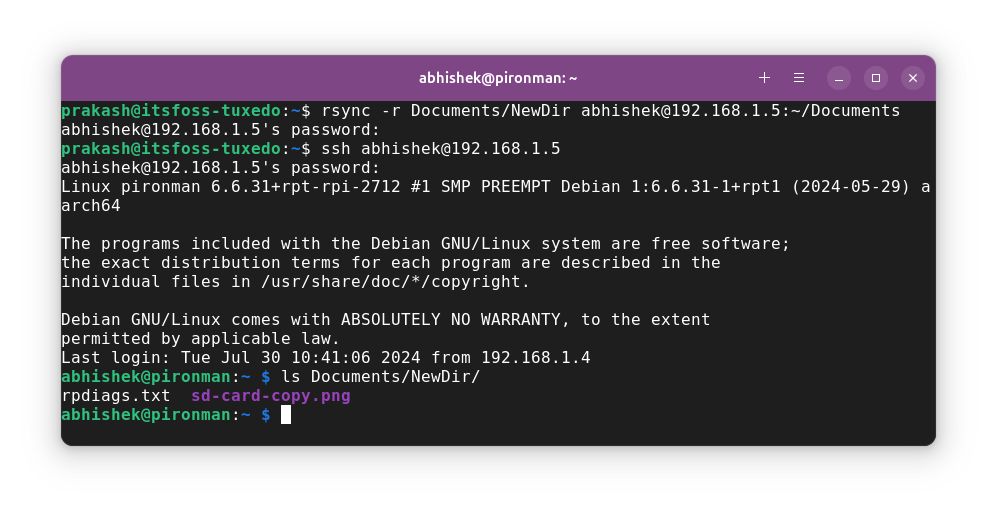
Copy files/directories from local to remote
To copy a file from local system to the remote server, you can use rsync command in this fashion:
I prefer using the scp command for quick file transfer over SSH connection. I use rsync when I have to make a backup of a folder that consists of numerous files. More on that in some other article. Enjoy 😄
Linux can run almost everywhere. If something does not run Linux, it can be made to 😉
And, one of its most useful applications happens to be a Linux Home Server. Sure, you can use Windows as a home server as well, but Linux can be a reliable option for the long run. In this article, I will list multiple uses of a Linux Home server and hopefully convince you to set yours up today.
What is a Linux Home Server?
A private server hosted locally that can be accessed using the home network or over the internet is a home server. And, in this case, Linux powers it. One of the main advantages of having a Linux home server is the ability to have total control and privacy of your data and media streaming activities.
Sometimes a Linux home server is also referred to as a Homelab (more on this as you read on):
Numerous open-source software programs are available, to equip your home server to be tailored for a specific use-case. For example, Plex or Kodi can be used as media server, Samba can be used to share files, and Nextcloud can be used to collaborate and synchronize files.
Setting up a home server is beyond the scope of this article. However, Ubuntu as the Linux distribution should be a safe bet to power your hardware.
After that is done, you would need to choose from the many open-source free software available for your home servers, and then get started.
Now that we know what a Linux home server is — what exactly are the uses for one? Let me highlight some:
1. Your Private Cloud Storage
Perhaps the most widely used feature of a Linux home server, file storage, allows you to store and share, files, documents, photos, videos, and more. Additionally, there is no risk of privacy because it is your very own cloud server.
Of course, you are responsible for backing up files or setting up a RAID configuration. So, you need to invest a significant amount of time in learning the tech to keep your files safe.
You can access your Linux cloud server from anywhere on the globe and on any device. That means you are only a few keystrokes away from your server.
Nextcloud should be the perfect open-source app to help you create your very own cloud server.
2. Smart Home Control
Having one remote for all your smart home appliances is an idea that everyone dreams of. Well, with a Linux home server, this dream can become a reality.
With a Linux server, you can create a control hub for all your home appliances like, your thermostat, smart bulbs, CCTV cameras, smart fans, air conditioners, and all the devices that run on a network.
There are various home automation software like Home Assistant that you can configure to achieve this.
3. Media Server
Why go through the hassle of sharing your media files across all your devices when you can just put them up on a Linux home server? You can say goodbye to the streaming services to watch your favorite shows as well.
Options like Jellyfin help make you a robust local media streaming solution. You can access it through your home network or over the internet (with advance configurations in place).
You can use your Linux home server to run a network security software or monitor your devices/network if you know how to do it.
Even if you are not a cybersecurity enthusiast, you can set up a popular open-source software called Pi-hole that you can use to block ads and trackers. And, software like Shorewall can help you create firewalls.
All in all, you can use your Linux home server to secure your devices from malware, vulnerabilities, and more.
If you are a developer, Linux home servers are nothing short of a paradise for you. With many testing environments and database hosts, Linux servers allow you to create the best models.
As I mentioned in the intro section, we also call a home server as a home lab. You can choose to use it interchangeably, but I believe it is accurate to use the term when you are into testing tools, learning, and developing stuff.
We also have a relevant guide for you to help get started if you are interested:
Linux Home servers pack something for everyone. If you are a gamer, Linux servers are more than enough for hosting private multiplayer game servers.
You can either decide to create your own game server for personal use-cases or set up a commercial game server that helps you earn money (like the Counter-Strike servers).
A custom game server allows you to customize your multiplayer experience. And, it should be a fun experience to do that if you know what you are doing.
7. Print Servers
Linux home servers can act as a centralized print management platform. This will help you keep track of all your printing tasks.
With a Linux server, you can do all kinds of shared printing where different devices can use the same printer. Moreover, it is not just one printer, as one Linux home server can help you manage several printers at once.
Of course, this can only be a feasible use-case if you have a small office type setup with multiple printers. But, it is an interesting one.
Conclusion
You can get creative with the uses of a home server. Whether you want to store files, build a solution to automate things at your home, setup security tools, Linux home server is the way to go.
There is always something or the other that will cater to your needs. It is also very cost-efficient. However, it requires some amount of technical knowledge to set it up and maintain it when required.
💭 Did I miss any of your favorite ways to use a Linux Home server, do let me know in the comment below!
Author Info
Swayam Sai Das is a student exploring the realms of Linux as an Intern Writer at It's FOSS. He is dedicated, when trying to push ranks in FPS games and enjoys reading literature classics in an attempt of putting on an academic facade.
 Sourav Rudra

 Ankush Das


 jackfrost