The Raspberry Pi is known for its versatility, typically running Linux-based operating systems like Raspberry Pi OS.
Surprisingly, it is also possible to install Windows 10 or 11 on a Raspberry Pi, despite the Pi's hardware limitations.
This guide will walk you through the process of installing Windows on a Raspberry Pi using a tool called WoR, which is short for Windows on Raspberry Pi.
But Why?
For me, it's more like a fun experiment to push Pi to its limits and see if it's even possible or not.
I understand that installing Windows on a Raspberry Pi is not something everyone (or anyone) will need or want, but it’s an interesting challenge nonetheless.
It allows you to experience Windows in a completely different environment, explore compatibility issues, and test performance on limited hardware.
However, keep in mind that:
- You will face limited support for applications due to ARM architecture.
- Windows on Pi won't deliver the same level of performance as a desktop PC, of course.
- You might run into issues with device drivers, especially for Wi-Fi.
Requirements
To install Windows on a Raspberry Pi, make sure you have the following:
- A Raspberry Pi 4/5 (preferably with 4 GB or 8 GB RAM) or Pi 400.
- Another computer running Linux (I used the Raspberry Pi OS).
- WoR-flasher tool.
- A microSD card (32 GB or larger is recommended).
- USB keyboard, mouse, and an HDMI display.
- Ethernet cable for network connectivity (Wi-Fi drivers are not available yet).
Installing Windows on Raspberry Pi
WoR-flasher (Windows on Raspberry) is a straightforward tool designed to simplify installing Windows on a Raspberry Pi.
It automates much of the setup, eliminating the need for complex manual configurations.
By managing all necessary files, partitioning, and downloading of Windows images, it ensures a smooth experience, even for those new to the Raspberry Pi or Windows installation.
The first step is to install WoR-flasher.
Open a terminal and run the following commands to clone the WoR-flasher repository and install it:
git clone https://github.com/Botspot/wor-flasher
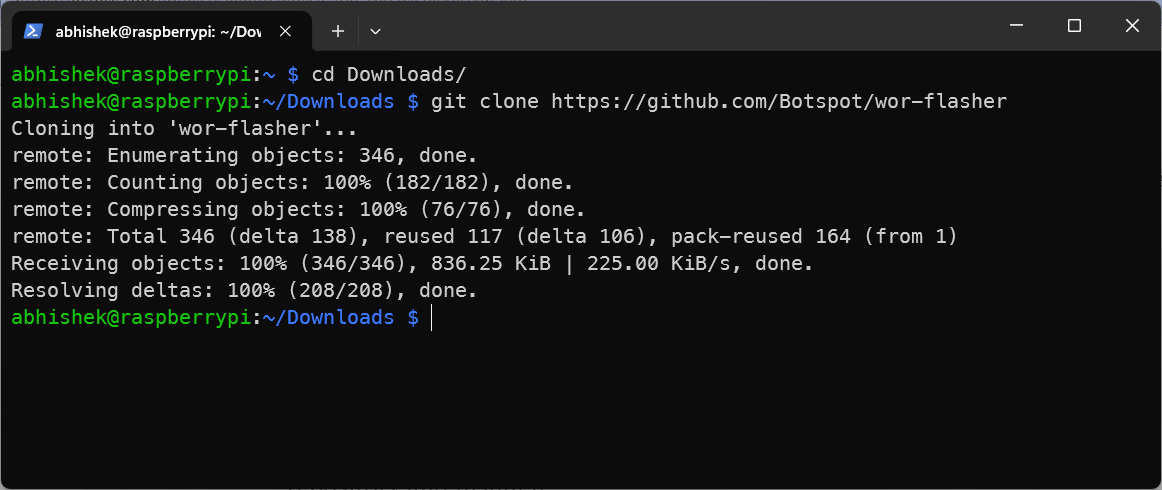
and then install it using:
cd wor-flasher
./install-wor-gui.sh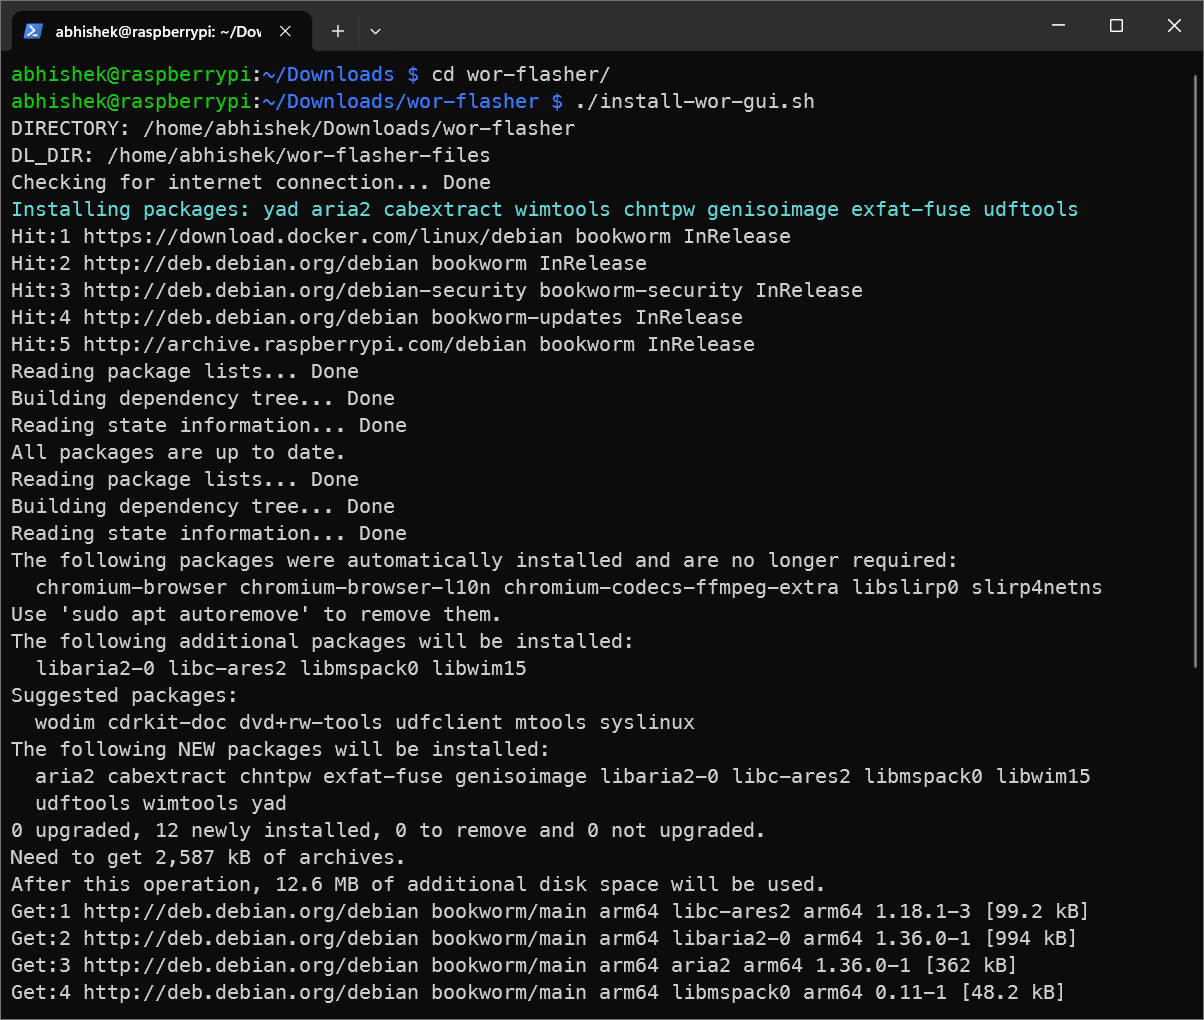
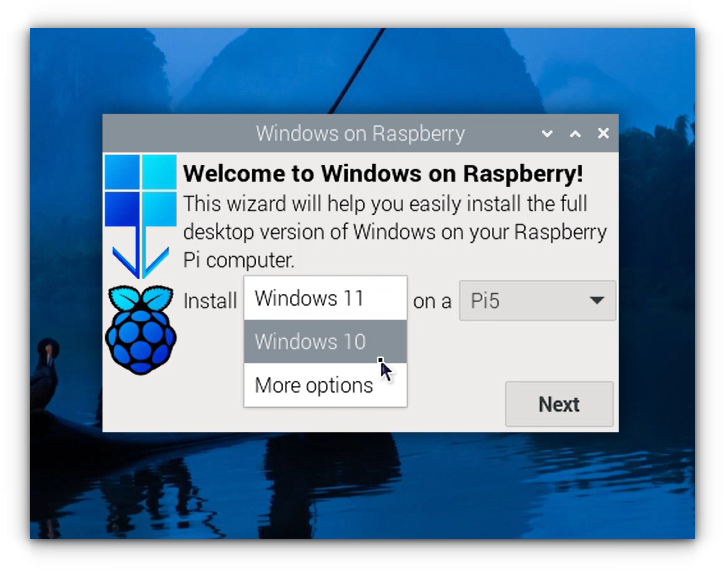
The WoR-flasher graphical interface will launch, allowing you to choose the version of Windows you want to install.
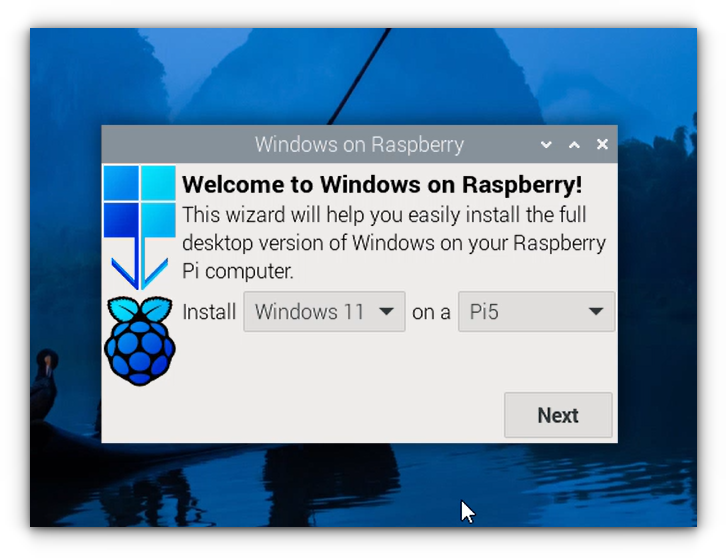
Choose either Windows 10 or 11, depending on your preference:
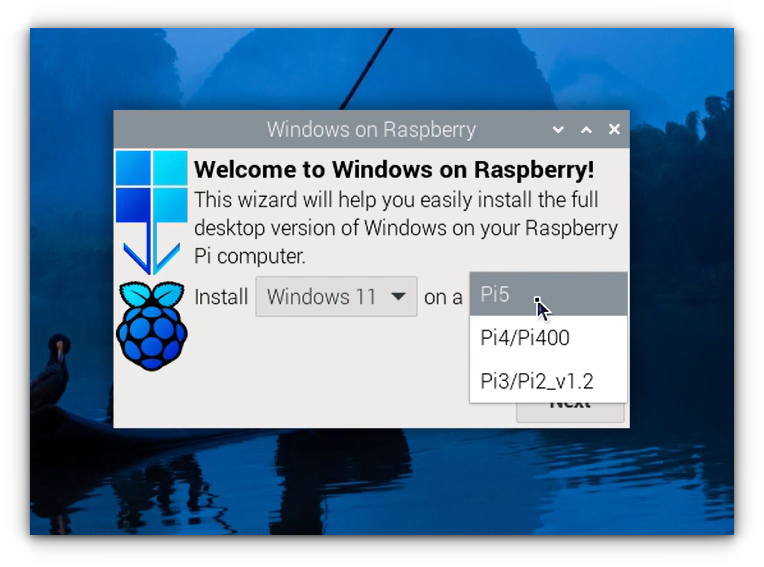
Select your Raspberry Pi model (Raspberry Pi 4 or Pi 400) & Click “Next” to proceed:
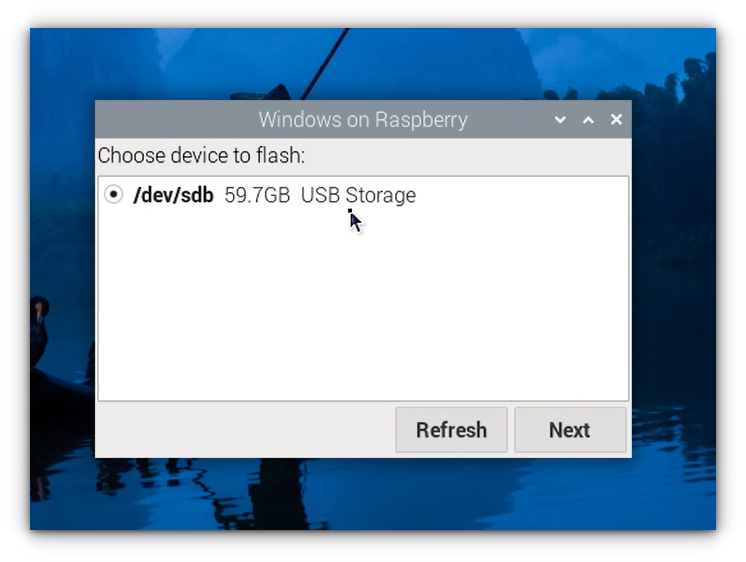
Ensure your microSD card or USB storage device is connected to your Linux machine.
Then select the storage device you want to flash Windows onto, then click “Next.”
After confirming your selections, WoR-flasher will download the necessary Windows installation files and prepare them for your Raspberry Pi.
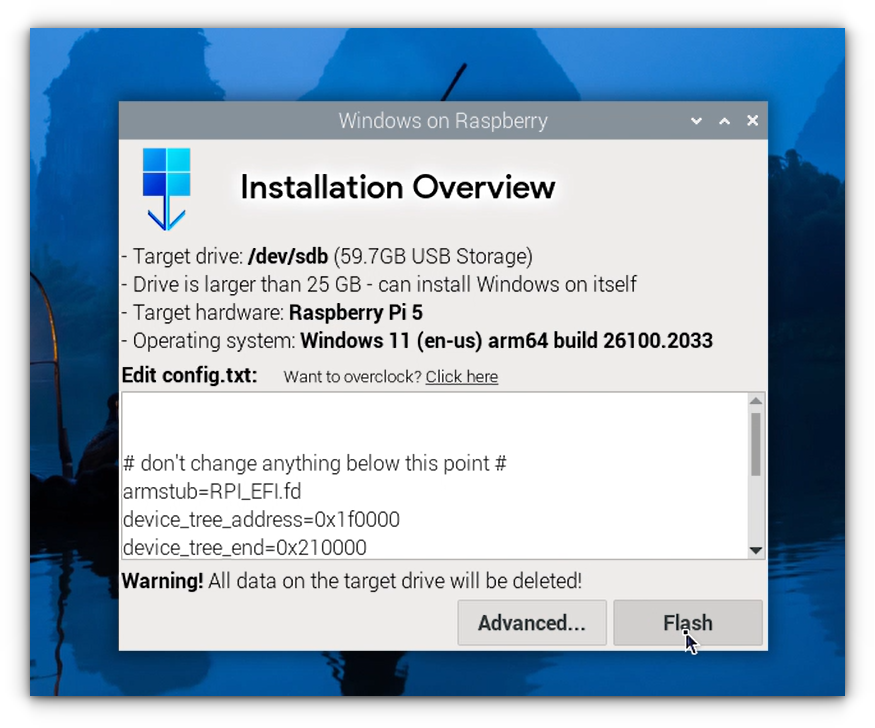
This can take some time, so be patient. Once the process is complete, the system will flash Windows onto your chosen storage device.
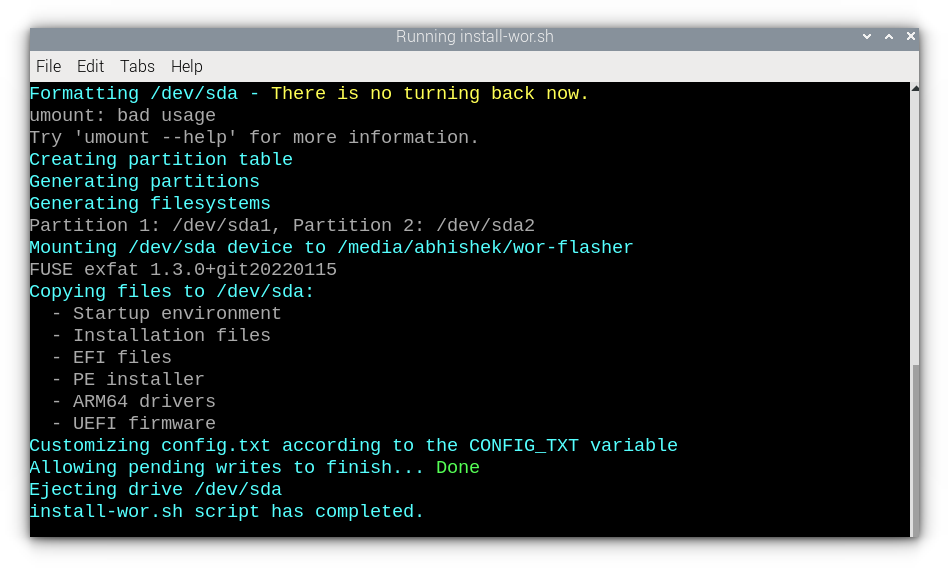
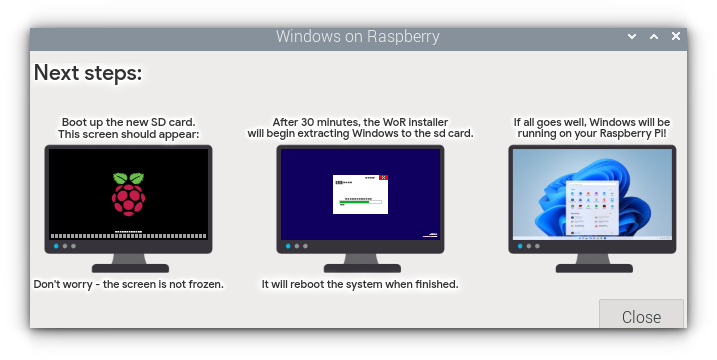
After that, a small prompt will pop up on the screen, telling what to do next:
Booting Windows on Raspberry Pi
With the installation complete, eject the microSD card or SSD and insert it into your Raspberry Pi.
Connect your display, keyboard, mouse, and Ethernet cable, then power on the Raspberry Pi.
You may need to wait as files are extracted and the OS is installed.
Windows Setup
Once Windows boots up, you’ll be prompted to complete the setup like choose your language and keyboard layout, Set up a user account online (Wi-Fi drivers are not available yet thus you have to connect to the internet using an Ethernet Cable).
OOBE\BYPASSNRO & hit Enter.My Experience
After the setup and reboot, I was greeted by the familiar Windows desktop, and to my surprise, the tools that come preinstalled, like File Explorer and Task Manager, ran smoothly.
What shocked me the most was how quickly Microsoft Edge loaded when I pressed the launch button it felt snappy, especially considering this was all running from an SD card.
I didn’t get the chance to dive into testing network or web performance, but I’ll leave that for you to explore and see how it performs in your hands. Let me know how it works out!
Performance Tweaks
Running Windows on a Raspberry Pi is impressive, but it’s essential to keep performance expectations in check.
To enhance its responsiveness, you can make a few adjustments:
- Disable unnecessary startup programs like OneDrive by heading to the "Startup Apps" menu.
- Optimize system performance by choosing "Adjust for best performance" under the "Performance Options" settings.
- Consider overclocking your Raspberry Pi to boost speed, this is partially automated during setup, but you can tweak it further for better results.
Conclusion
And that’s how you can successfully install Windows on your tiny Raspberry Pi!
While the setup process may take some time, the WoR flasher tool makes it incredibly straightforward, even for beginners.
Once you’ve got Windows up and running, you’ll be amazed at how a full desktop OS functions on such a compact device.
Whether you're looking to experiment like me, run specific Windows apps, or just enjoy the novelty of having Windows on your Raspberry Pi, this method opens up new possibilities for what your Pi can do.
Give it a try and see what your Pi is truly capable of!
from It's FOSS https://ift.tt/F0huybl
via IFTTT
Tidak ada komentar:
Posting Komentar