Minggu, 30 April 2023

Rust Basics Series #6: Conditional Statements

Rust Basics Series #6: Conditional Statements

In the previous article in this series, you looked at Functions. In this article, let's look at managing the control flow of our Rust program using conditional statements.

What are conditional statements?

When writing some code, one of the most common tasks is to perform a check for certain conditions to be true or false. "If the temperature is higher than 35°C, turn on the air conditioner."

By using keywords like if and else (sometimes in combination), a programmer can change what the program does based on conditions like the number of arguments provided, the options passed from the command line, the names of files, error occurrence, etc.

So it is critical for a programmer to know control flow in any language, let alone in Rust.

Conditional operators

The following table shows all the frequently used operators for an individual condition:

Operator Example Interpretation
> a > b a is greater than b
< a < b a is less than b
== a == b a is equal to b
!= a != b a is not equal to b
>= a >= b a is greater than OR equal to b
<= a <= b a is less than OR equal to b

And following is the table for logical operators, they are used between one or more conditions:

Operator Example Interpretation
|| (Logical OR) COND1 || COND2 At least one of the condition COND1 or COND2 evaluates to true
&& (Logical AND) COND1 && COND2 All conditions evaluate to true
! (Logical NOT) !COND Opposite boolean value of what COND evaluates to
๐Ÿ“‹
Like in Mathematics, you can use parentheses (round brackets) to specify the precedence of an operation compared to others.

Using if else

To handle the basic flow of Rust code, two keywords are used: if and else. This helps you create two "execution paths" based on the state of the provided condition.

The syntax of a simple if block with an alternative execution path is as follows:

if condition {
    <statement(s)>;
} else {
    <statement(s)>;
}
๐Ÿ“‹
When only one condition is provided, enclosing it in round brackets is not compulsory. The use of round brackets is optional, according to the syntax. You should still use them to specify precedence and for better readability.

Let's look at an example.

fn main() {
    let a = 36;
    let b = 25;

    if a > b {
        println!("a is greater than b");
    } else {
        println!("b is greater than a");
    }
}

Here, I have declared two integer variables a and b with the values '36' and '25'. On line 5, I check if the value stored in variable a is greater than the value stored in variable b. If the condition evaluates to true, the code on line 6 will be executed. If the condition evaluates to false, due to the fact that we have an else block (which is optional), the code on line 8 will get executed.

Let's verify this by looking at the program output.

a is greater than b

Perfect!

Let's modify the value of variable a to be less than value of variable b and see what happens. I will change a's value to '10'. Following is the output after this modification:

b is greater than a

But, what if I store the same value in variables a and b? To see this, I will set both variables' value to be '40'. Following is the output after this particular modification:

b is greater than a

Huh? Logically, this doesn't make any sense... :(

But this can be improved! Continue reading.

Using 'else if' conditional

Like any other programming language, you can put an else if block to provide more than two execution paths. The syntax is as follows:

if condition {
    <statement(s)>;
} else if condition {
    <statement(s)>;
} else {
    <statement(s)>;
}

Now, with the use of an else if block, I can improve the logic of my program. Following is the modified program.

fn main() {
    let a = 40;
    let b = 40;

    if a == b {
        println!("a and b are equal");
    } else if a > b {
        println!("a is greater than b");
    } else {
        println!("b is greater than a");
    }
}

Now, the logic of my program is correct. It has handled all edge cases (that I can think of). The condition where a is equal to b is handled on line 5. The condition where a might be greater than b is handled on line 7. And, the condition where a is less than b is intrinsically handled by the else block on line 9.

Now, when I run this code, I get the following output:

a and b are equal

Now that's perfect!

Example: Find the greatest

I know that the use of if and else is easy, but let us look at one more program. This time, let's compare three numbers. I will also make use of a logical operator in this instance!

fn main() {
    let a = 73;
    let b = 56;
    let c = 15;

    if (a != b) && (a != c) && (b != c) {
        if (a > b) && (a > c) {
            println!("a is the greatest");
        } else if (b > a) && (b > c) {
            println!("b is the greatest");
        } else {
            println!("c is the greatest");
        }
    }
}

This might look complicated at first sight, but fear not; I shall explain this!

Initially, I declare three variables a, b and c with random values that I could think of at that time. Then, on line 6, I check for the condition where no variable's value is same as any other variable. First, I check the values of a and b, then a and c and then b and c. This way I can be sure that there are no duplicate values stored in either variable.

Then, on line 7, I check if the value stored in variable a is the greatest. If that condition evaluates to true, code on line 8 gets executed. Otherwise the execution path on line 9 is checked.

On line 9, I check if the value stored in variable b is the greatest. If this condition evaluates to true, code on line 10 gets executed. If this condition is also false, then it means only one thing. Neither variable a, nor variable b is the greatest among all 3.

So naturally, in the else block, I print that the variable c holds the greatest value.

Let's verify this with the program output:

a is the greatest

And this is as expected. Try and modify the values assigned to each variable and test it out yourself! :)

Conclusion

You learned to use if and else statements. Before you go on making your own AI with lost of if else-if statements (haha), let' learn about loops in Rust in the next chapter of the series.

Stay tuned.


from It's FOSS https://ift.tt/RkZ5sVI
via IFTTT

Sabtu, 29 April 2023

11 Ways to Improve Your Privacy

11 Ways to Improve Your Privacy

Slowly, users are moving to privacy-focused solutions instead of convenient options.

Why? Simply because many have realized the worth of their personal data.

Of course, protecting your privacy does not mean staying anonymous. But, taking control of privacy means that you do not share essential information with unauthorized parties while keeping your sensitive data private from everyone.

You can improve privacy on all kinds of devices you use. Here, I shall provide some proven methods to enhance privacy easily.

๐Ÿ“‹
The tips mentioned can be followed for every type of device and OS, not just Linux. You don't necessarily need to follow each and every point. These are mere suggestions. See, what works for you.

1. Secure & Hide Your Email

Your email address is connected to everything online, whether banking or a cloud storage platform.

If your email remains private, you get less spam and fewer attempts to take over your account or trick you into downloading a malicious file from your email.

I think you get what I mean ๐Ÿ™ƒ

But… you share your email address with every essential app/service you use.

So, how can you not share them but still use them?

You can use email aliases to keep your actual email address private. We have a list of tools to help protect your email address. Choose any options like SimpleLogin or use the email alias addresses your email provider allows creating.

Also, try using secure email services like Tutanota or ProtonMail for the best experience.

๐Ÿ“‹
This article includes affiliate links, which give us a small commission if you purchase some services like Proton VPN, at no extra cost to you.

Suggested Read ๐Ÿ“–

Best Secure Email Services For Privacy Concerned People
Can you call Gmail, Outlook, YahooMail etc secure email services? Well, they’re definitely secure in the way that your data is (usually) safe from outside attackers. But when we talk of secure email service, the focus is on data security and privacy. Most of these free email services snoop
11 Ways to Improve Your Privacy

2. Secure Your Internet

With an exposed or insecure internet connection, an attacker can snoop on your web activity and potentially use it to gain vital information or affect your device data.

So, it is essential to keep your internet secure.

To achieve that, you can do a few things like:

  • Use a secure or encrypted DNS like NextDNS or ControlD
  • Use a VPN to encrypt your internet connection

ProtonVPN and Mullvad VPN would be two excellent options, offering open-source clients and Linux support.

Best VPN Services for Privacy Minded Linux Users
No matter whether you use Linux or Windows, ISPs spy all the time. Also, it is often your Internet Service Provider who enforces annoying restrictions, and throttles speed while tracking your online activity. I’m not sure what might be the cause of a privacy breach for you – but when
11 Ways to Improve Your Privacy

3. Secure Your Search Activity

Everyone utilizes a search engine to find what they are looking for.

For most of them, it is Google. It is the most popular website on the planet as of now.

But, it collects some of your data to improve its searchability and may also personalize the search results per your likes and other factors.

However, if you want an entirely private search experience and non-personalized results, privacy-friendly search engines should be helpful.

10 Privacy Oriented Alternative Search Engines To Google
Brief: In this age of the internet, you can never be too careful with your privacy. Use these alternative search engines that do not track you. Google — unquestionably the best search engine out there (for most)- uses powerful and intelligent algorithms (including A.I. implementations) to let u…
11 Ways to Improve Your Privacy

4. Use a Privacy-Focused Browser

Just like you use search engines, the browser is a vital means of the interaction process.

A browser with solid privacy and security features should help you enhance your browsing experience.

Personally, I could point you to Vivaldi, Firefox, and Brave. If you are keen to explore more options, look at our list of the best browsers for Linux.

Top 10 Best Browsers for Ubuntu Linux
What are your options when it comes to web browsers for Linux? Here are the best web browsers you can pick for Ubuntu and other Linux distros.
11 Ways to Improve Your Privacy

5. Do Not Install a Program You Don't Know

Whether you use Linux or any other operating system, you should not install anything you are unaware of. Not all programs are privacy-friendly.

Some do not collect any data at all, and some do.

Yes, there are certain green flags that you can look for before picking a new software to install. Some of them include:

  • It has a decent number of users (not entirely new).
  • It is incredibly popular.
  • It is open source and has a stable release.

Some other pointers that you can keep in mind:

  • Even if the program is proprietary, you should check out its popularity and privacy policy.
  • Usually, best to avoid new software tools.
  • Do not download email attachments without separately verifying them.
  • Download software from its official channels. Do not use third-party distribution websites to download packages unless they officially recommend it.

6. Utilize All Privacy Tweaks and Options

Every app, every operating system, and every service that you use provides some amount of privacy control.

For instance, you can hide your Instagram account from the public and only accept followers you know/want.

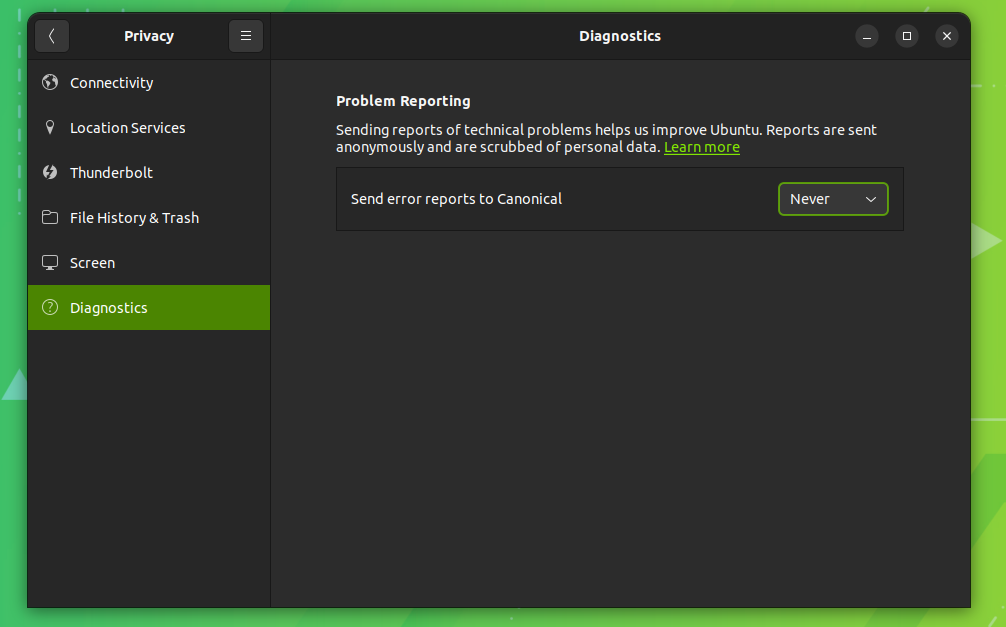
Similarly, when possible, I recommend you head to “Privacy settings” on your mobile phone, Linux desktop, and everything else.

11 Ways to Improve Your Privacy
Privacy settings on Ubuntu Linux

It can be anything, deleting your old files, disabling diagnostics information sharing, and so on. If it sounds feasible to you, use the available option to your advantage.

7. Use Secure Password Managers

Passwords and credentials are at the center of everything. If you need to ensure they are well-protected and organized, use a good password manager.

I usually suggest Bitwarden and KeePassXC for all kinds of users.

If you prefer keeping things offline, KeePassXC is available cross-platform. And, if you want a cloud-based solution, Bitwarden should not disappoint.

You can also explore some password managers for Linux users.

8. Keep Your Notes Secure

Taking notes can be a habit for some, and it can be a good/bad one.

Why do I say that? Well, notes often have sensitive information, sometimes passwords or PINs.

So, if you make sure that your notes are secure, it is one of the easiest ways to boost your privacy game.

Recommendations will include Standard Notes and CryptPad. You can explore other options with end-to-end encryption or a variety of features:

Looking for Some Good Note Taking Apps on Linux? Here are the Best Notes Apps we Found for You
No matter what you do — taking notes is always a good habit. Yes, there are a lot of note taking apps to help you achieve that. But, what about some open-source note taking apps for Linux? Fret not, you don’t need to endlessly search the Internet to find the
11 Ways to Improve Your Privacy

9. Store or Backup on a Private Cloud Platform

Not everyone has the time or patience to maintain/configure a RAID setup to store/backup data at home.

So, cloud storage services are the usual solution.

My personal recommendations include Mega (end-to-end encryption), and pCloud. But I suggest you check out our list of cloud storage services to explore better options.

Additionally, you can encrypt your files before uploading them to the cloud thanks to solutions like Cryptomator.

Top 10 Best Free Cloud Storage Services for Linux
Which cloud service is the best for Linux? Check out this list of free cloud storage services that you can use in Linux.
11 Ways to Improve Your Privacy

10. Use Private Messengers

You can always utilize open-source and encrypted messengers like Signal (cross-platform) to secure your communications.

There are multiple WhatsApp alternatives that you can explore for personal use.

If it is for your business, open source Slack alternatives should help.

Suggested Read ๐Ÿ“–

9 Best Matrix Clients for Decentralized Messaging
Matrix is an open network standard tailored for secure decentralized real-time communication. It is published and maintained by a non-profit, Matrix.org Foundation. They aim to create an open, independent, and evolving communication platform. If an application supports the Matrix protocol,…
11 Ways to Improve Your Privacy

11. Specialized Distributions

If you are adventurous and want to try an entirely different operating system tailored to give you a private experience, you can pick Tails OS, Whonix, and similar options.

Some are built to erase your activity as soon as you finish it. And some of them feature special security features, which could be overwhelming for daily usage.

If you are curious, explore the best privacy-focused Linux distributions.

๐Ÿคจ Still, confused about what you want to do?

I have a separate article listing some of the best browsers, VPNs, messengers, etc., for privacy-focused users. You can always refer to that if you cannot decide what you want to pick to take control of your privacy.

12 Simple Tools to Protect Your Privacy
Quick ways to enhance online privacy? Use these simple tools to take control of your data easily.
11 Ways to Improve Your Privacy


from It's FOSS https://ift.tt/M8Fnbl1
via IFTTT

Install and Use Qemu on Ubuntu

Install and Use Qemu on Ubuntu

If you need to run Linux virtual machines, Qemu is one of the fastest hypervisors out there, if not the fastest.

Along with the speed, you also get excellent configuration options. Even if you are not an advanced user, it gives you enough room for tweaks.

In this tutorial, I will walk you through:

  • Installing Qemu and KVM on Ubuntu
  • Installing another distro on Qemu
  • Enabling shared folder, auto-resize, and copy-paste in Qemu (optional but makes your VM experience smoother)

So let's start with the installation.

Installing Qemu and KVM on Ubuntu

Before jumping to the installation, let's check whether your machine supports the virtualization or not. 

To do so, use the following command:

LC_ALL=C lscpu | grep Virtualization

If you have an intel processor, it should bring the following output:

Install and Use Qemu on Ubuntu

And if you have an AMD processor, it should get you the following output:

Virtualization:                  AMD-V

Also, make sure your system has multiple cores so that you can allocate some to your VM and still have enough to power the host machine.

And if you're not sure, use the following command and the output should be more than zero:

egrep -c '(vmx|svm)' /proc/cpuinfo
Install and Use Qemu on Ubuntu

Once you are all set, you can install Qemu and KVM on Ubuntu using the following command:

sudo apt install qemu qemu-kvm virt-manager bridge-utils

Reboot your system once the installation is over.

Add user to appropriate groups

To make Qemu work, you'd have to add your user to two groups: libvirt-kvm and libvirt.

To do so, use the following commands one by one:

sudo useradd -g $USER libvirt
sudo useradd -g $USER libvirt-kvm

Next, enable and start the libvirt service:

sudo systemctl enable libvirtd.service && sudo systemctl start libvirtd.service

That's it! The installation of Qemu is done.

Installing another Linux virtually with Qemu

๐Ÿ“‹
Please download the ISO file of the Linux distro you want to install in Qemu VM.

First, open the Virtual Machine Manager from the system menu:

Install and Use Qemu on Ubuntu

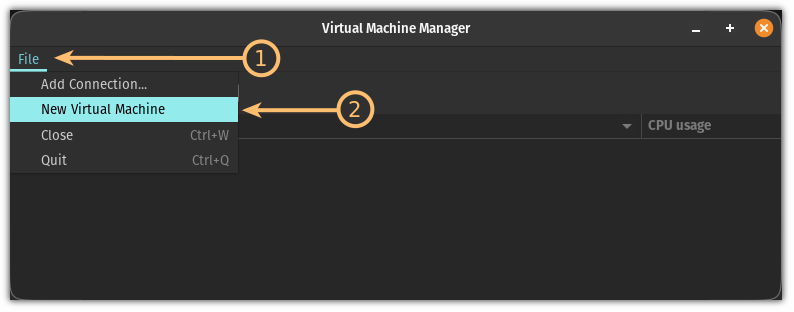
Next, click on the File menu and choose the New Virtual Machine option:

Install and Use Qemu on Ubuntu
Click File -> New Virtual Machine

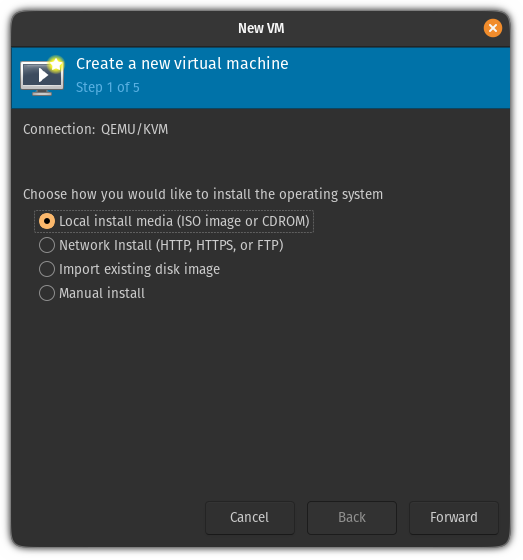
From here, choose the first option Local install media which will allow you to choose the ISO from your file manager:

Install and Use Qemu on Ubuntu
Select Local Install Media

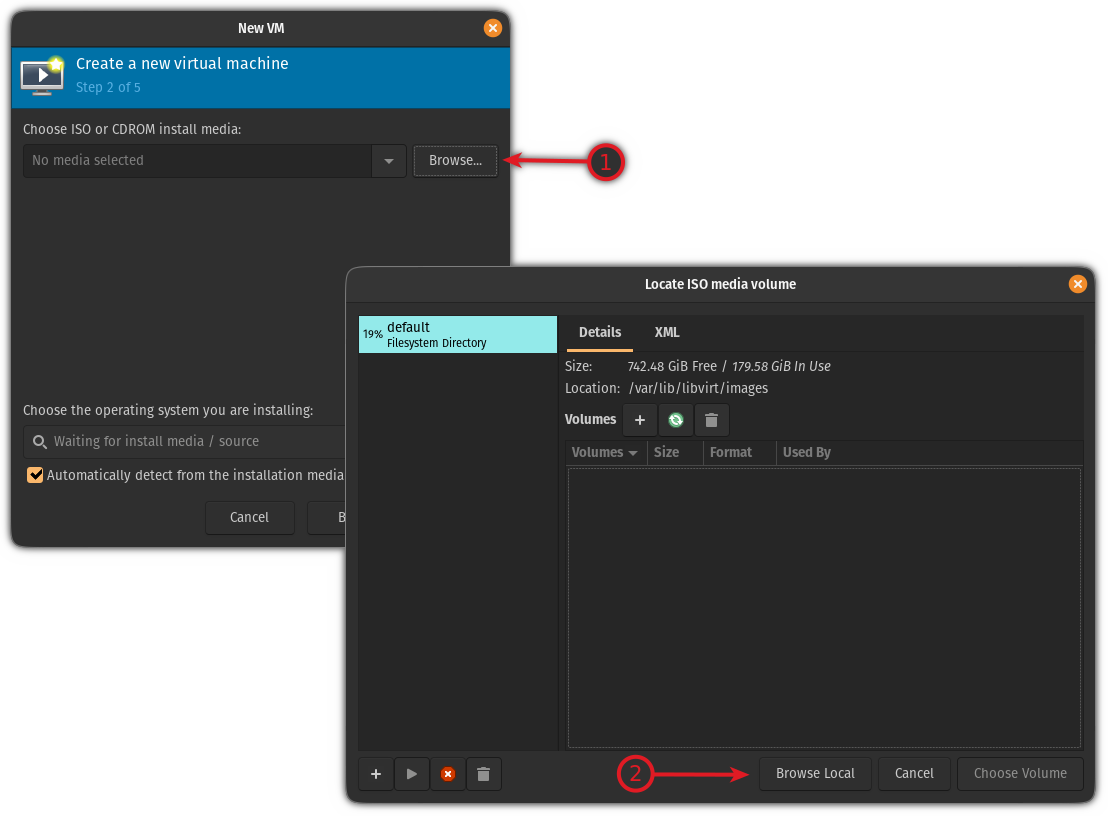
Next, you will be asked to add the ISO file. Here, click on the Browse button; it will open a new prompt, and there, click on the browse local.

It will open the file manager and from there, select the ISO file:

Install and Use Qemu on Ubuntu

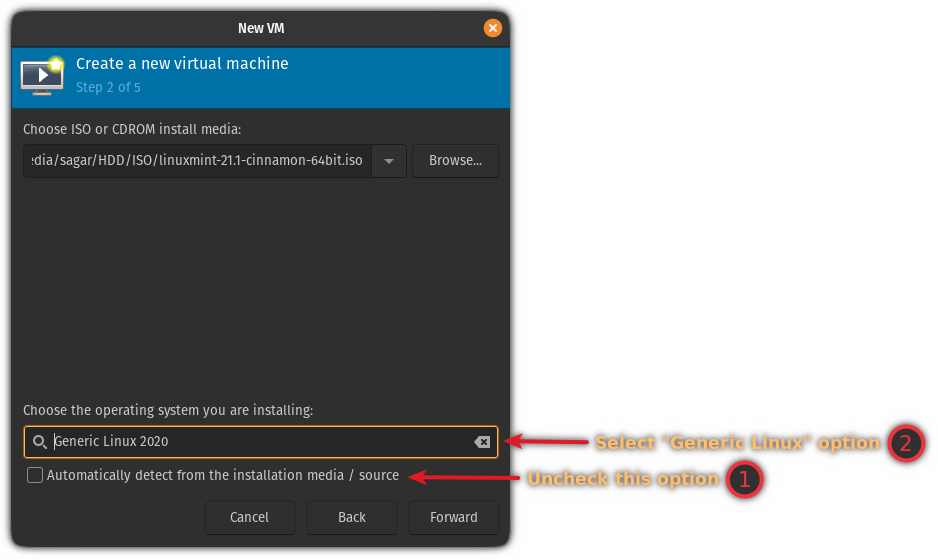
In most cases, the ISO file will be detected but if you find a situation where it does not detect it automatically, follow the given steps:

  1. Uncheck the Automatically detect from the source option
  2. Choose the Generic Linux option
Install and Use Qemu on Ubuntu

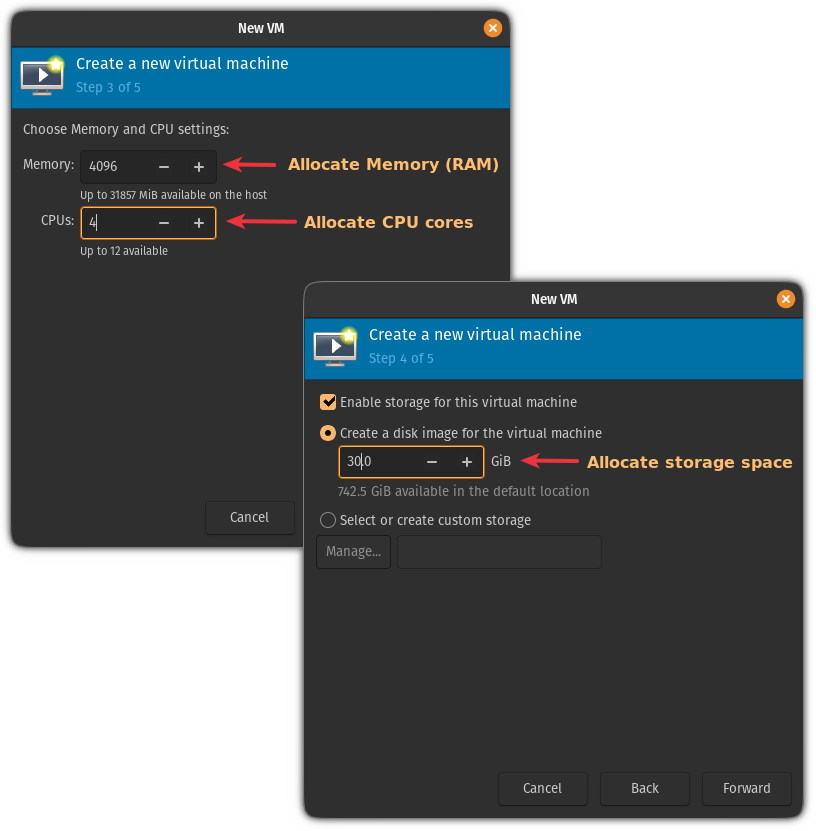
Next, you will be asked to allocate memory and storage as per your needs. I would recommend going with a minimum of 2 cores, 4 GB of RAM, and 25 GB of storage for the desktop version:

Install and Use Qemu on Ubuntu
Allocate resources to VM
๐Ÿ“‹
Except for the disk space, system resources like CPU and RAM are only used when running the OS in VM.

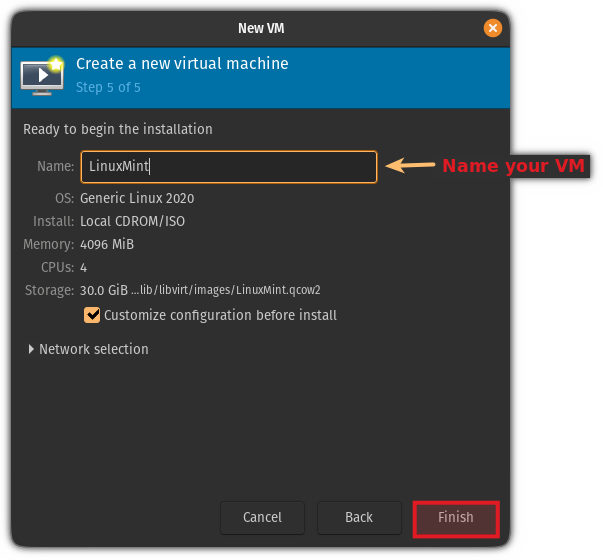
And finally, give the appropriate name to your VM; once done, click on the finish button:

Install and Use Qemu on Ubuntu
Name your VM

It will load the ISO, so you can start the installation from here.

That's done. You may enjoy your VM but you'll even enjoy it better if you enable shared folder, clipboard sharing, etc. The following few sections show how to do that.

Enabling shared folders in Qemu (optional)

In this section, I will show you how you can share the existing directory of the host machine with the VM.

To do so, you'd have to perform the following:

  • Adding a shared filesystem through VM settings in Qemu
  • Mounting the FS in the VM

So first, open the Virtual Machine Manager from the system menu, select the VM, and click the Open button to manage the console:

Install and Use Qemu on Ubuntu

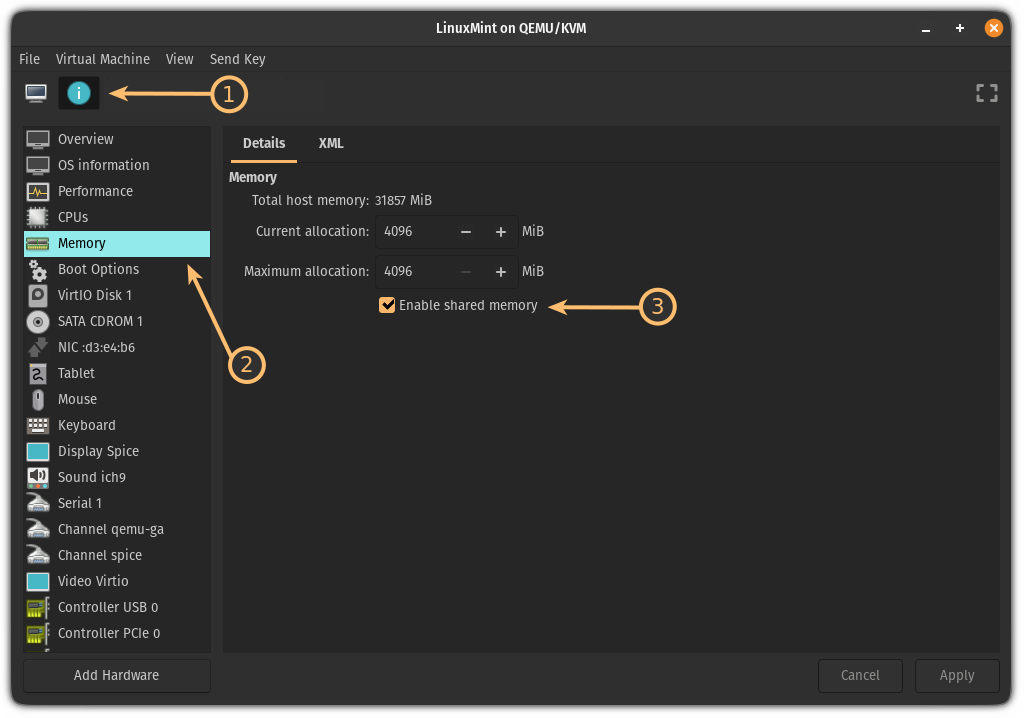
Now, click on the info button, select the Memory and enable the shared memory:

Install and Use Qemu on Ubuntu

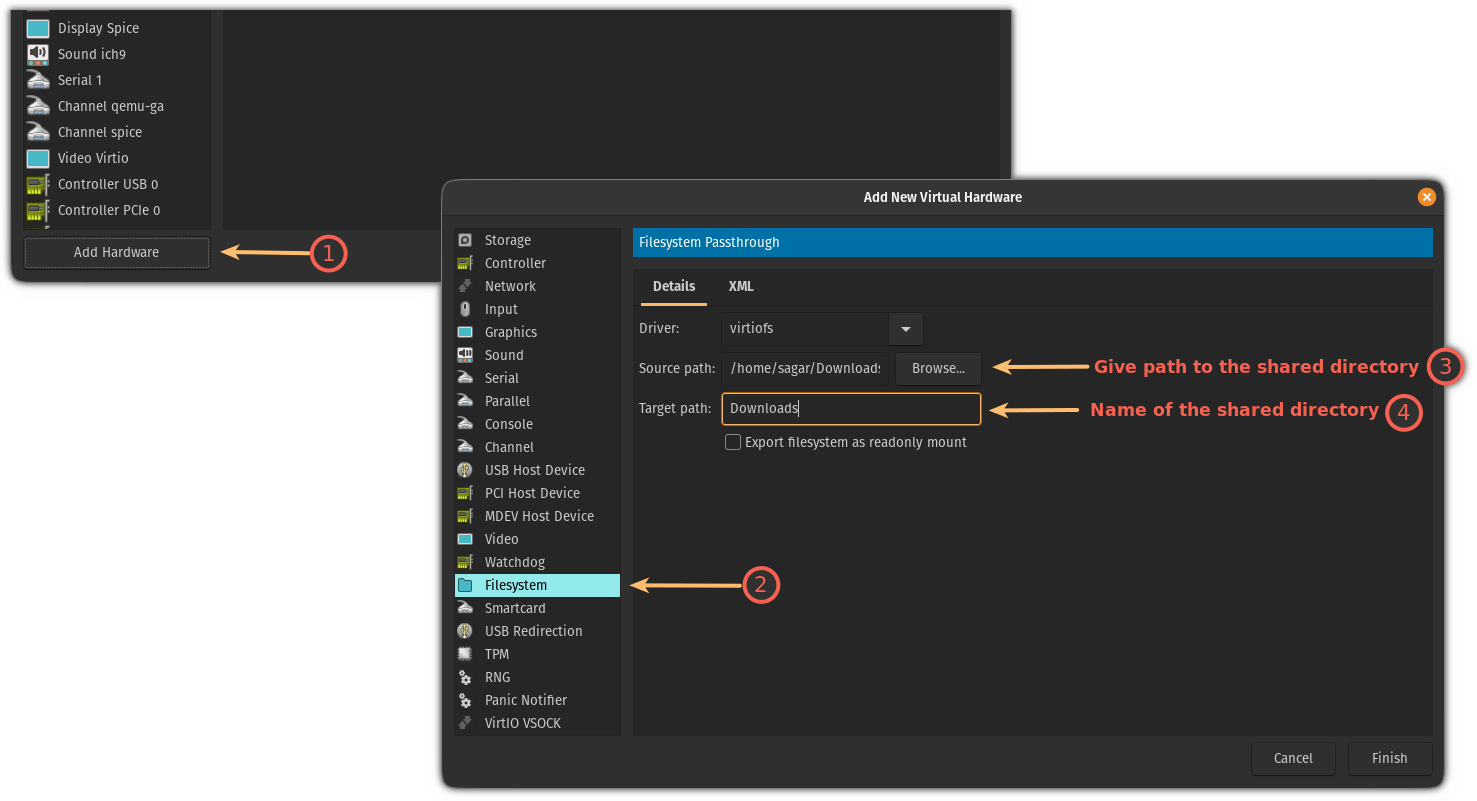
Next, click on the Add Hardware button, select the Filesystem option.

Here, you'd have to do the following:

  • Add a path to the directory you want to share in the Source path section
  • Add the name of the directory in the Target path section
Install and Use Qemu on Ubuntu

Once done, click on the Finish button and start the VM.

In VM, open the terminal and use the following syntax to mount the shared directory:

sudo mount -t virtiofs sharename path/to/shared/directory

In my case, it was the Downloads directory, so I will be using the following:

sudo mount -t virtiofs Downloads /home/sagar/Downloads
Install and Use Qemu on Ubuntu

That's it!

But that's a temporary solution.

To make it permanent, you'd have to make create an entry in /etc/fstab In the VM.

To do so, first, open the /etc/fstab config file using the following:

sudo nano /etc/fstab

Go to the end of the file in the nano text editor using Alt + / and use the following syntax to create an entry:

sharename           path/to/shared/directory    virtiofs    defaults        0       0

Here's what my config looks like:

Install and Use Qemu on Ubuntu

Once done, save changes and exit from the nano text editor.

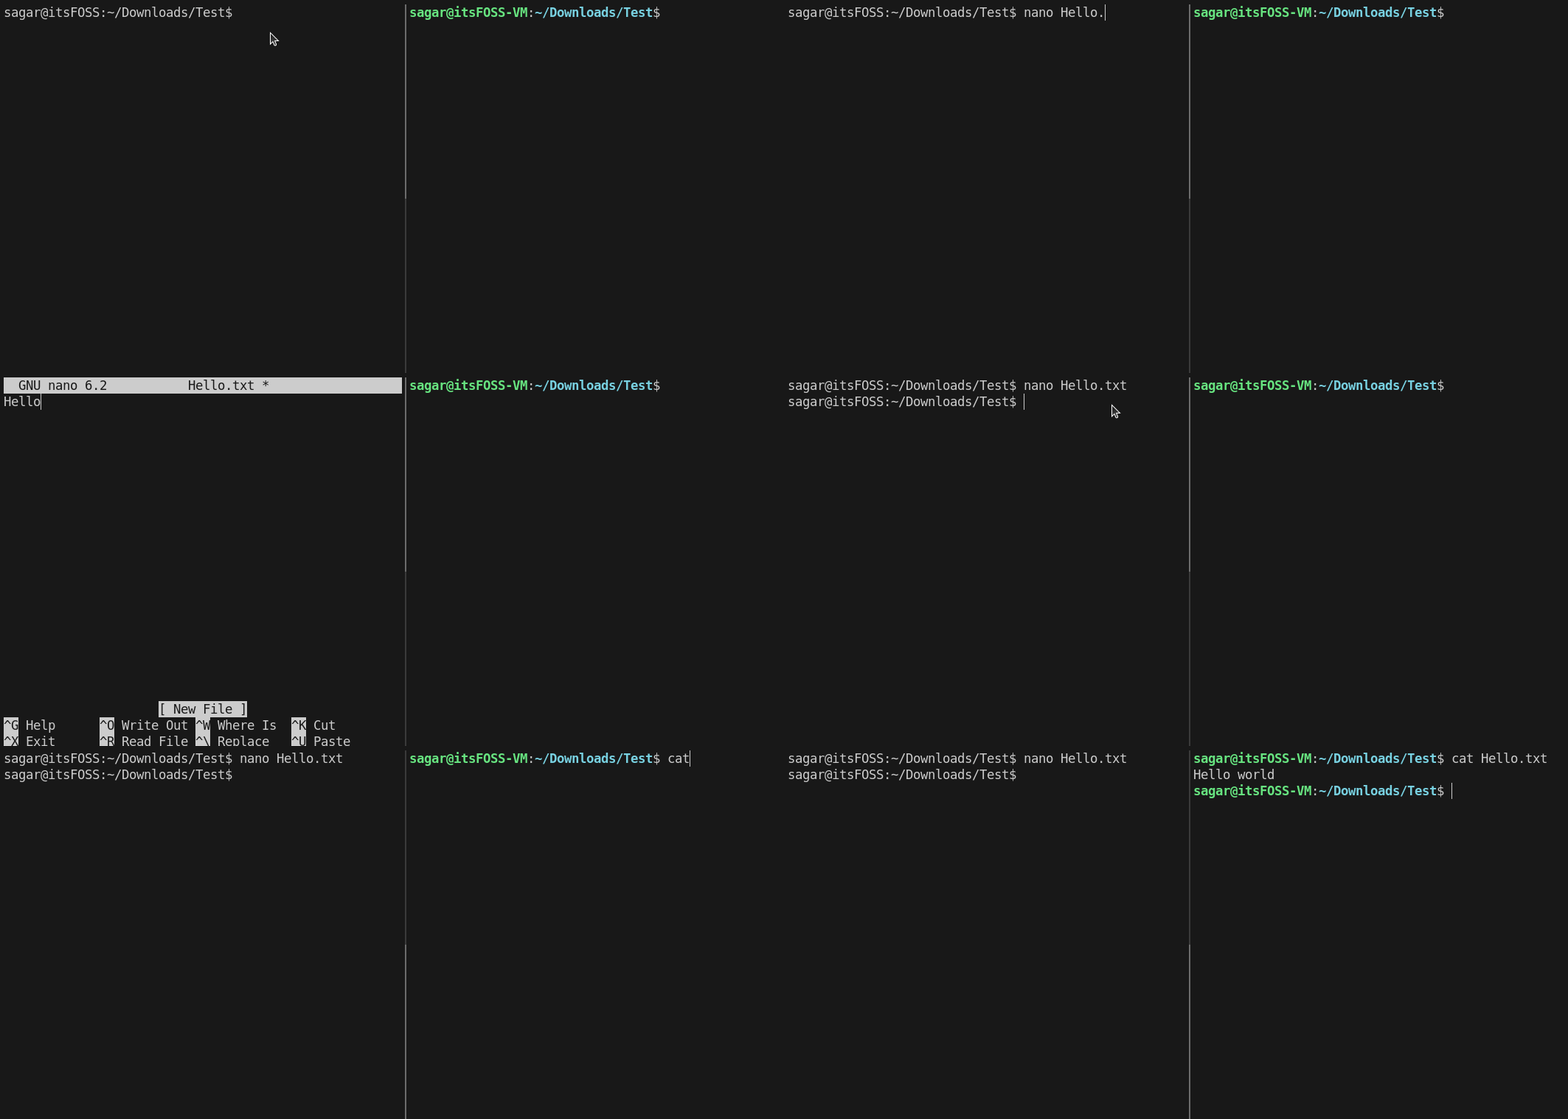
Here I've shown how I created a new file in my host machine in the Downloads directory and the changes were reflected in my VM:

Install and Use Qemu on Ubuntu

So now you can use this shared folder to transfer files between the host and VM without any issues!

Enabling shared clipboard in Qemu (optional)

To enable the shared clipboard, all you have to do is install the  spice-vdagent utility in the VM.

So if your VM is Ubuntu/Debian based, you can use the following:

sudo apt install spice-vdagent

For Arch base:

sudo pacman -S spice-vdagent

For Fedora-based distros:

sudo yum install spice-vdagent

Once you are done with the installation, reboot your VM, and the clipboard should work as intended!

Enabling auto-resize in Qemu (optional)

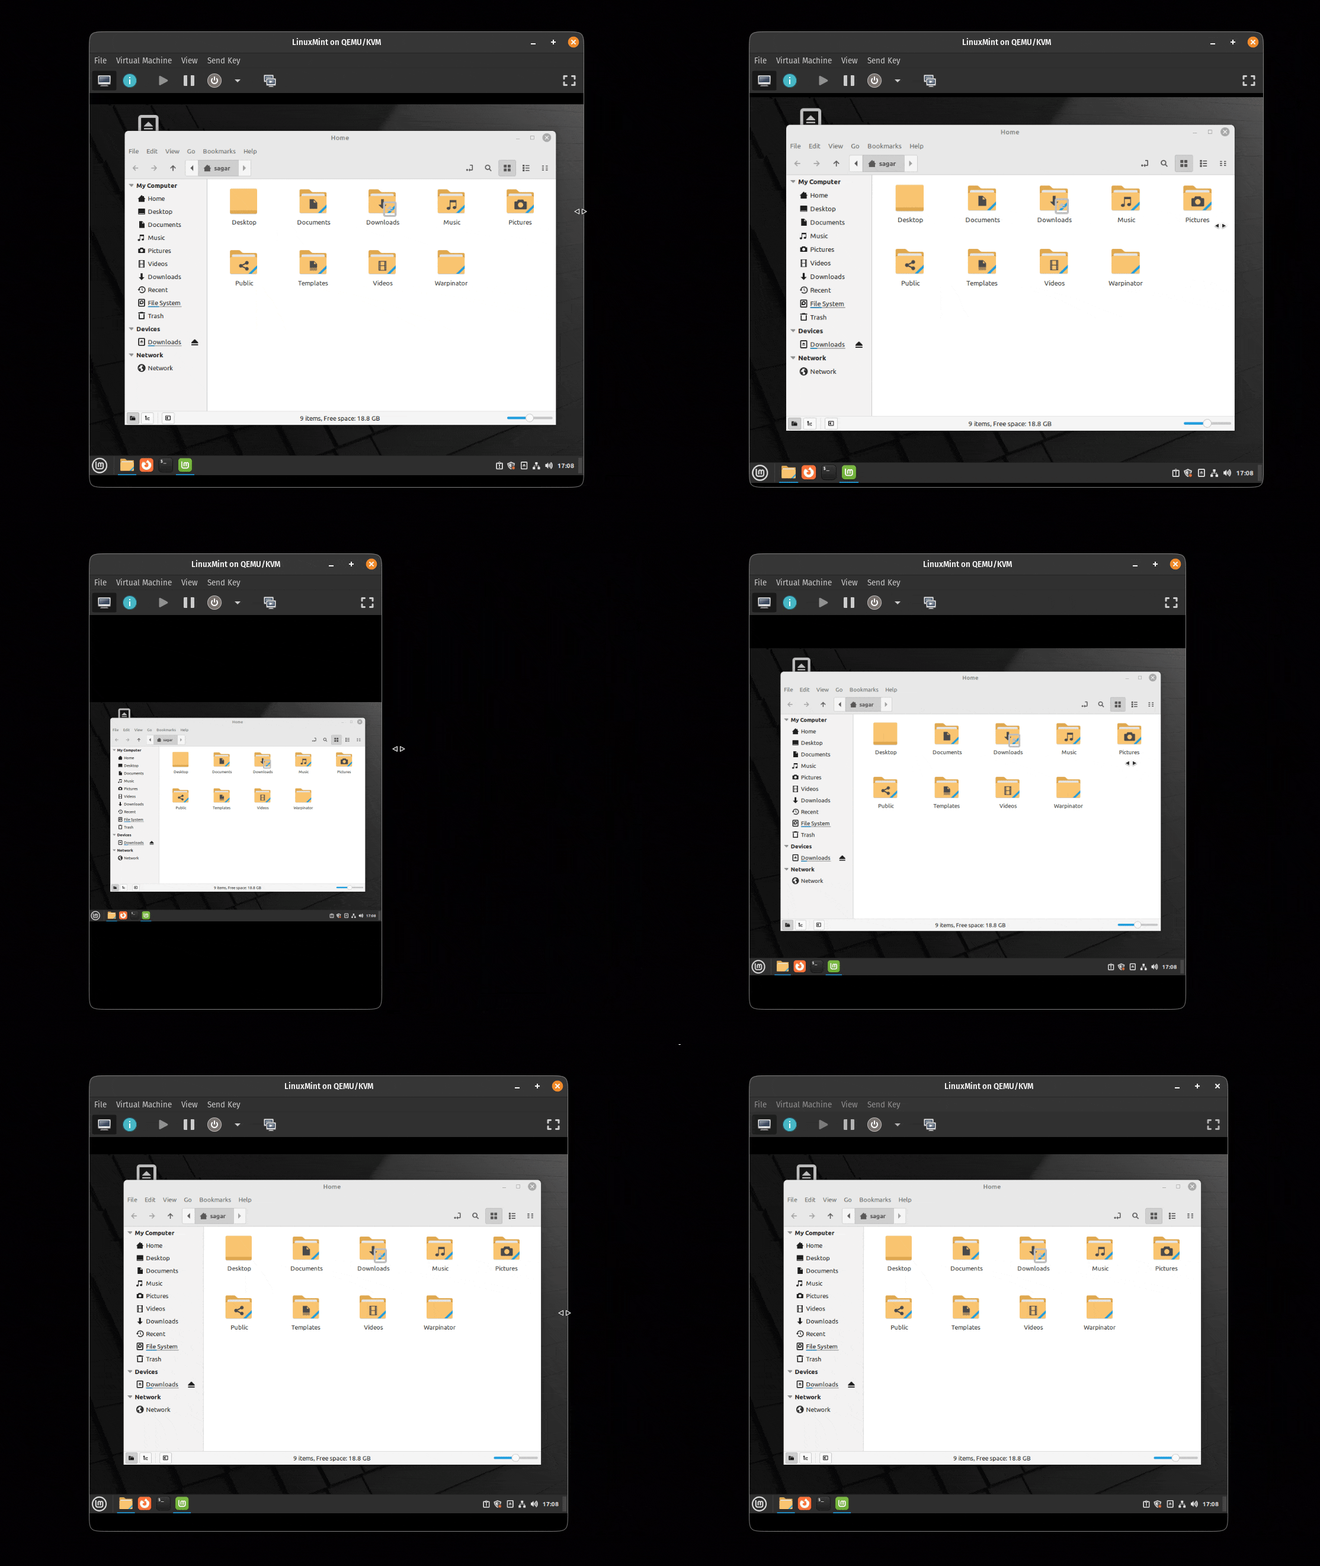
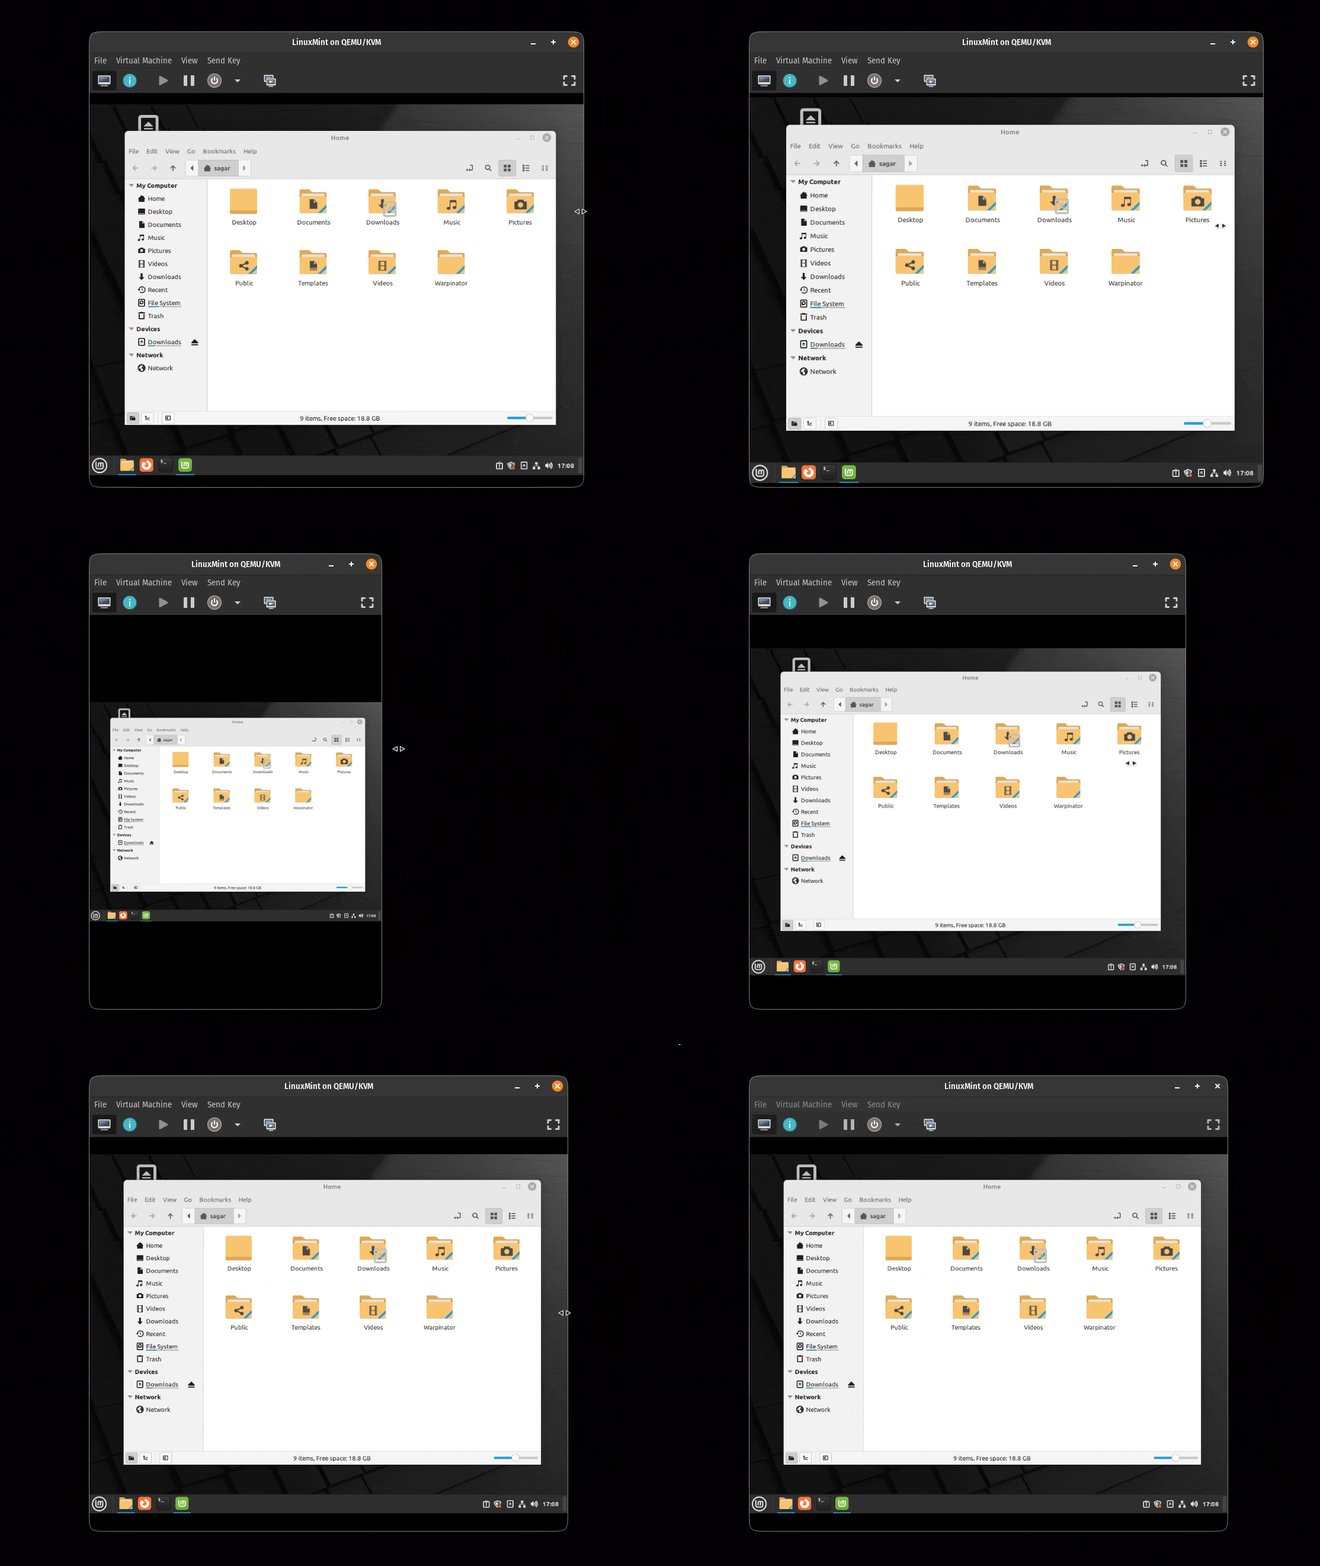
The auto-resize feature is nothing but when you resize the VM window, the VM display will adapt to the change in size immediately:

Install and Use Qemu on Ubuntu

To enable the auto-resize in Qemu, you will have to follow 2 simple steps:

  1. Click on the View (from top menubar)
  2. Select the Scale Display option and choose the Always option
Install and Use Qemu on Ubuntu

That's it from my side.

Want to use a plug-and-play version of Qemu?

In this tutorial, I went through how you can manually install a VM in Qemu but what if I tell you that you can automate the whole process like allocating storage, RAM, etc?

Yes, it gives the same efficiency but comes in handy when you want to create a new VM ASAP! The tool is called Quickgui and we have a dedicated tutorial for the installation:

Create Virtual Machines Easily With QEMU-based Quickgui
Quickgui aims to be a simpler alternative to VirtualBox and help create virtual machines quickly. Let us take a look at it.
Install and Use Qemu on Ubuntu

I hope you will find this guide helpful. And if you have any queries, feel free to ask in the comments.


from It's FOSS https://ift.tt/odzAOCJ
via IFTTT

Kamis, 27 April 2023

7 Super Lightweight Linux Distros

7 Super Lightweight Linux Distros

The variety of Linux distributions available is not a disadvantage but a helpful trait.

There is something for everyone. And here, we want to address the options tailored for users who wish to run Linux on dated hardware and systems with shallow storage space.

Or maybe, you want the operating system to occupy the least space while you can carry out specific tasks on your computer?

So, let me highlight some super lightweight Linux distros for such use cases.

๐Ÿ“‹
A distribution with minimal system requirements and storage may not be able to provide a convenient desktop experience for everyone. You might have to adjust to certain things when using such distros.

1. Tiny Core

7 Super Lightweight Linux Distros

Tiny Core, aka The Core x86 Project, is a modular Linux distribution offering different super small ISO files featuring the distro variants.

The smallest is the "Core" edition (17 MB), which provides a command line interface and some tools without any graphical desktop environment. The second is TinyCore (23 MB), which includes the base system and GUI extensions for a graphical desktop environment.

Ultimately, a CorePlus ISO (248 MB) is tailored for new users, with support for wireless networks, a choice for window managers, and some other GUI tools to help install the distro.

The size of the distro has grown over the years. However, it is still something impressive.

2. Puppy Linux

7 Super Lightweight Linux Distros

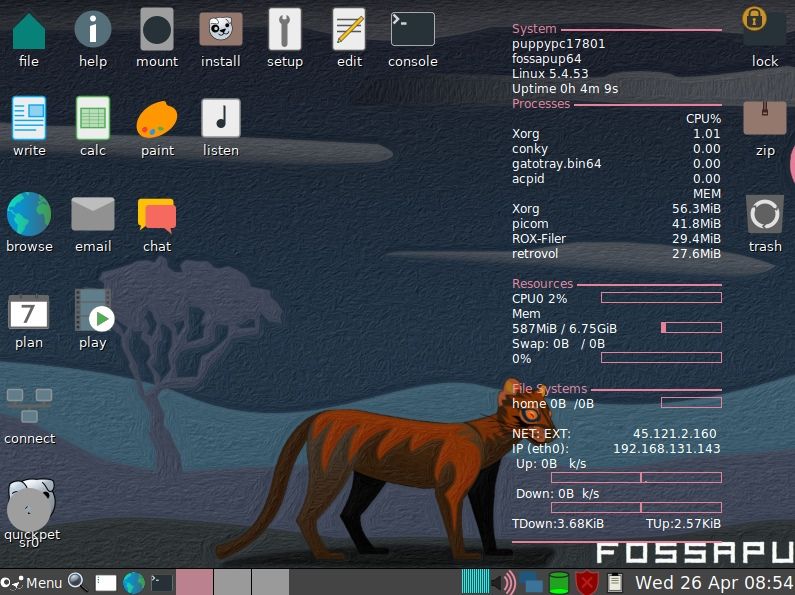
Puppy Linux is a popular name known for its minimal file size and ease of use. It is the oldest option in this list here, all the way back from 2003.

The ISO file sizes range from 300-400 MB, depending on your chosen variant.

Yes, Puppy Linux is not a single Linux distro. The project uses other distros and rebuilds them using its system builder, adds its applications, and configures so that the ISO usually ends up less than 500 MB in size.

You can find puppy variants of Ubuntu, Raspbian, and Slackware in 32-bit and 64-bit editions.

3. SliTaz

7 Super Lightweight Linux Distros

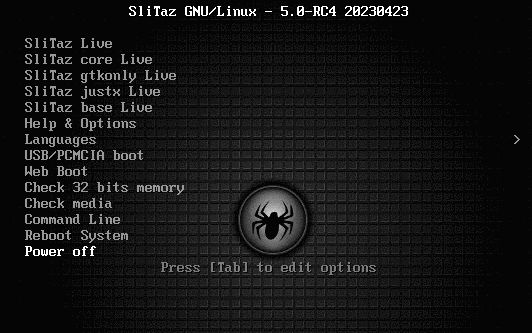
SliTaz is an interesting rolling-release distribution with all the essentials for a usable desktop experience.

All of this is in just 43 MB ISO. Surprising, isn't it? Unlike TinyCore, you get a GUI while saving much storage space. Even in this tiny package, you get

It is entirely built from scratch, making it an independent distribution. SliTaz may not be suitable for beginners, but it does include utilities that help you install the essentials and get started with a minimal learning curve.

Suggested Read ๐Ÿ“–

13 Independent Linux Distros That are Built From Scratch
Unique and independent Linux distributions that are totally built from scratch. Sounds interesting? Check out the list here.
7 Super Lightweight Linux Distros

4. Bodhi Linux

7 Super Lightweight Linux Distros

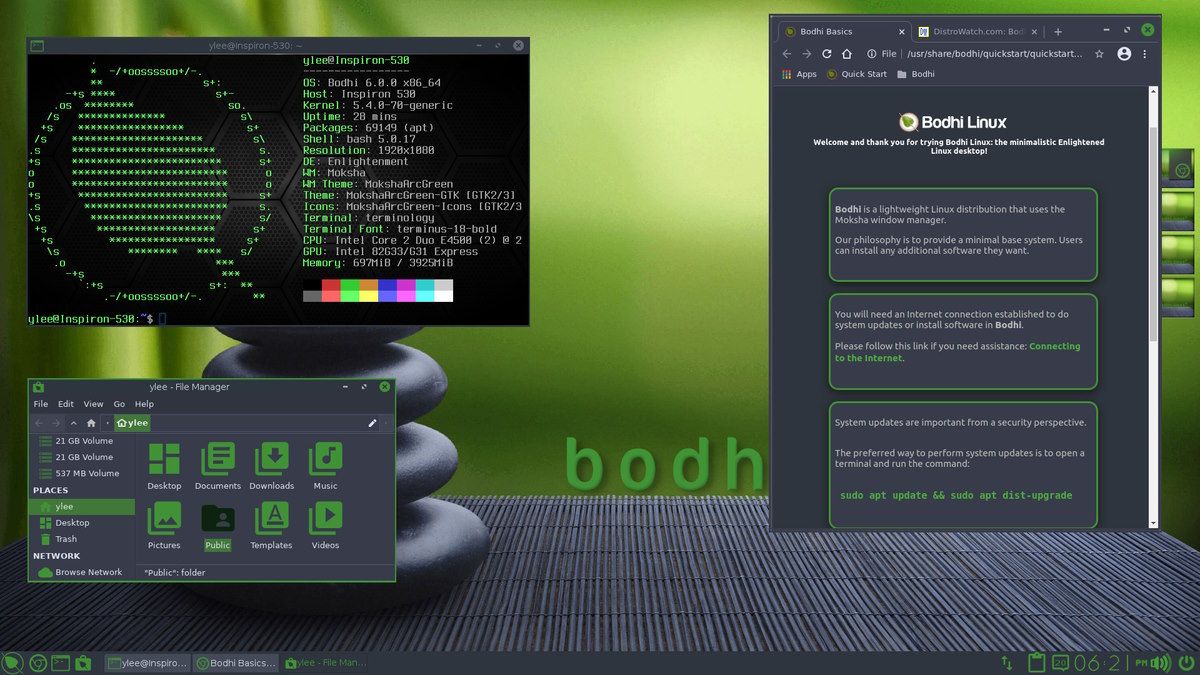
Bodhi Linux is one of the popular lightweight Linux distributions based on Ubuntu. If you want a lightweight option and a convenient user experience, Bodhi Linux, with its Moksha desktop, is the answer.

The ISO size is less than 900 MB. So, yes, it may not be the lightest among the alternatives, but you cannot go wrong if you do not want to compromise your experience.

5. AntiX Linux

7 Super Lightweight Linux Distros

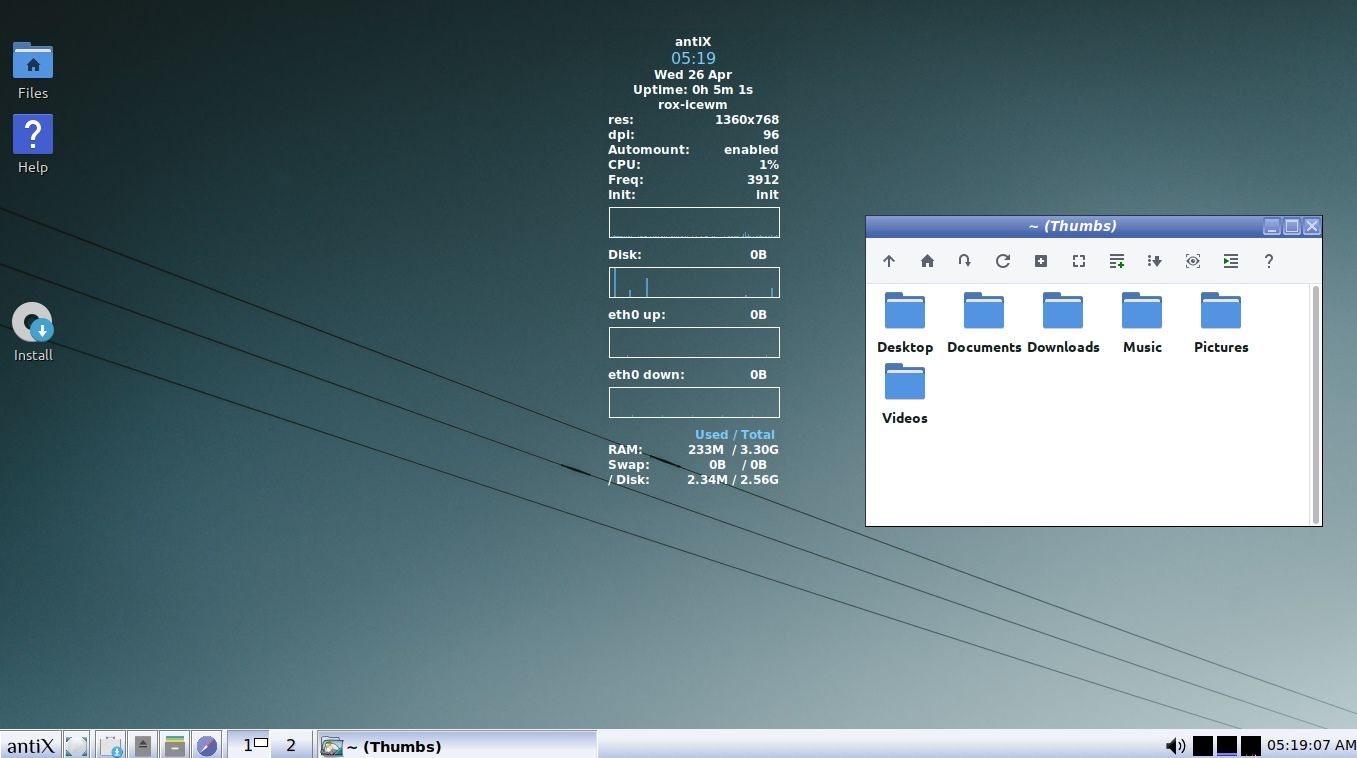
AntiX Linux is built on top of Debian's stable branch. It is one of the distros that support 32-bit systems.

It offers different variants that include: Full, Base, Core, and net. The full version is a little over 1 GB, packed with many pre-installed applications. The base is around 800 MB with a GUI (window manager).

The other editions do not offer a GUI, which is less than 500 MB.

If you did not know, AntiX Linux supports two different init systems SysVinit or runit. So, AntiX Linux is one of the Systemd-free distros as well.

Suggested Read ๐Ÿ“–

Top 15 Linux Distros That Still Support 32 Bit Systems
If you have vintage hardware with 32-bit processor and you would like to keep on using it, here are the best choices of Linux distros with 32-bit support.
7 Super Lightweight Linux Distros

6. Porteus

7 Super Lightweight Linux Distros

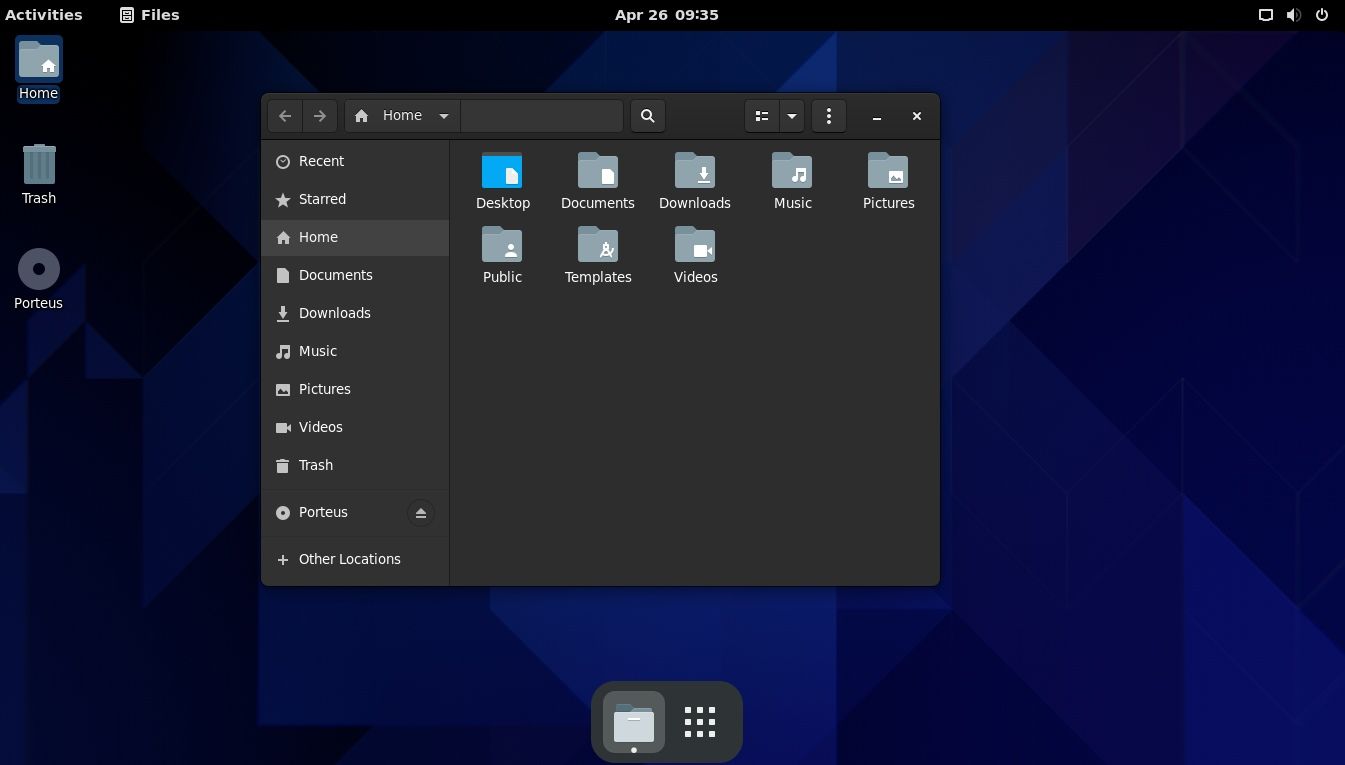
Porteus Linux is a distro optimized for minimal hardware featuring an ISO image less than 300 MB in size.

It supports both 32-bit and 64-bit systems. Porteus is based on Slackware and offers two editions, one for desktops and the other for kiosks (web terminals).

You get different desktop flavors with Porteus that include GNOME and KDE. So, you can have a familiar desktop experience in such a tiny package.

7. ArchBang Linux

7 Super Lightweight Linux Distros

ArchBang is an Arch-based distro that uses the i3 window manager to offer a lightweight experience under a 1 GB ISO file size.

If you want to use a minimal Arch Linux experience with some added convenience, ArchBang is a good option.

You can follow our ArchBang installation guide to get started.

Additionally, you can refer to our i3 customization guide if you want to customize the look of ArchBang Linux.

Suggested Read ๐Ÿ“–

The Ultimate Guide to i3 Customization in Linux
Learn about customizing your system’s look and feel with i3 window manager in this super-detailed guide.
7 Super Lightweight Linux Distros

Save Your System Resources for a Fast Experience

These distributions are some of your best options to install if you want to save system resources and still be able to carry out basic tasks.

Considering the lack of pre-installed applications and utilities, you may not be able to do everything on some of these distros. However, our handpicked choices should give you a usable desktop experience.

Recommended Read ๐Ÿ“–

16 Best Lightweight Linux Distributions for Older Computers
Don’t throw your old computer just yet. Use a lightweight Linux distro and revive that decades-old system.
7 Super Lightweight Linux Distros

Have you ever used such a distribution? How's your experience with it?


from It's FOSS https://ift.tt/Hqro23i
via IFTTT