I promised at the beginning of 2024 that you'll see more exploring, homelab and hobbyist open source AI stuff this year along with the regular beginner-friendly tutorials.
In that regard, we have our first AI article published. It is about setting up PrivateGPT AI to interact with PDF documents. It's not written by me, that's another Abhishek.
With PrivateGPT, the data remains on your system and all the computation happens on your system.
I have also received the latest Raspberry Pi 5. Be prepared to see some Raspberry Pi tutorials as well 😄
By the way, if you are on Instagram, do follow us there as we are sharing plenty of reels (not the dancing ones, don't worry 😉 )
💬 Let's see what else you get in this edition of FOSS Weekly:
A new Budgie release.
Meta is betting big on its GitHub Copilot challenger.
A guide on monitoring Raspberry Pi temperature.
The creators of Atom have come up with something new.
And other Linux news, videos and, of course, memes!
📰 Linux news
Aircove VPN router is now available to purchase in Canada.
Free and open source conference Installfest in Prague is gearing up for its latest event. Most talks from previous years are in Czech, but there will be some in English as well.
Call for speakers is now open, so if you have interesting thoughts to share at the event, please apply on their website.
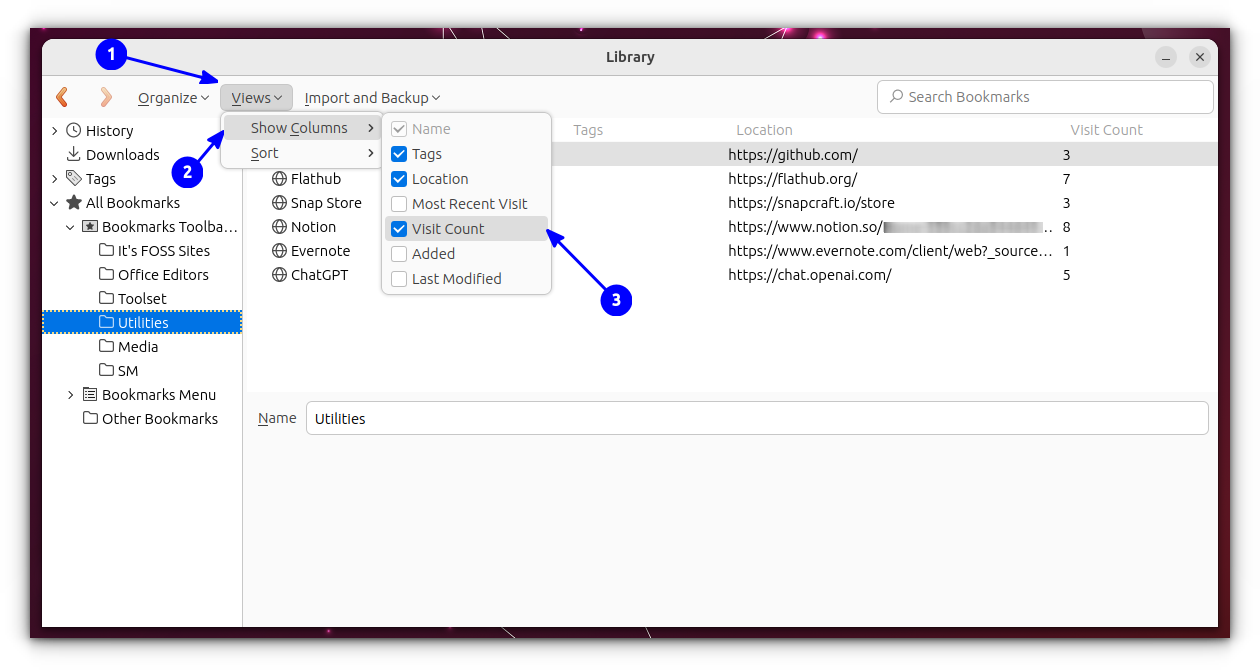
Get the view count of your bookmarks (how many times you visited your bookmarks) in Firefox.
Go to Firefox Library (Bookmark Manager) using the keyboard shortcut “Ctrl+Shift+O”. From there, toggle the view count by going into the “Views” menu.
🤣 Meme of the week
They are some of the real ones out there. Never lose hope, newbies!
🗓️ Tech Trivia
On January 25, 1915, Alexander Graham Bell inaugurated U.S. transcontinental telephone service, speaking from New York to Thomas Watson in San Francisco.
🧑🤝🧑 FOSSverse corner
It's FOSS Plus member Ernie and others are discussing Escuelas Linux. Join in and share your insights too!
Surprised? I, too, was shocked when I got to know that the paste command in Linux is used to merge lines from multiple files parallelly.
In simple terms, if you have two files each containing a list of items, then you can use the paste command to merge both of them, and you end up getting data in table format.
It is similar to the cat command, which is used to concatenate files vertically. Here, the command appends the data separated by Tab as the default delimiter.
Now that you have an idea, let me walk you through how you can use the paste command with practical examples and, at last, I shall also share some practice questions.
Here's How to use the paste command
To get the most out of any command, it is recommended to get started with the command syntax.
Here's a simple command syntax that you need to follow to use the paste command:
paste [option] [files]
Here,
[option]: it is used to tweak the default behavior of the paste command such as when you use the -s option, it will stack the information of two files vertically.
[files]: here's where you append two or more files to merge them.
Unlike other commands, you are not given a long list of options, so here are the list of options available with the paste command:
Option
Description
-d
Specifies the delimiter to use between columns (default is a tab).
-s
Concatenates lines horizontally.
--help
Displays a summary of options.
--version
Outputs version information for the paste command.
Now, let's take a look at some examples of using the paste command.
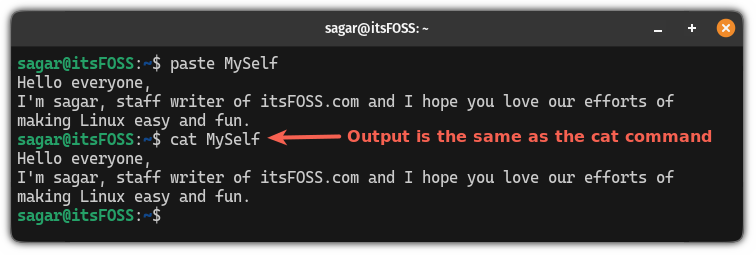
1. Display the file content
Almost every Linux user uses the cat command to print the file content to standard output, but the paste command can do the same for you.
All you have to do is append the filename to the paste command, and it will get the job done:
paste Filename
2. Merge two files
To merge two files using the paste command, all you have to do is append the filenames separated by space (just like when using the mv command):
paste File1 File2
For example, here, I used the paste command over two files fruits and prices so you can have a better idea of its behavior:
paste fruits prices
As you can see, when I executed the paste command over two files, it gave me an output showing two files were merged.
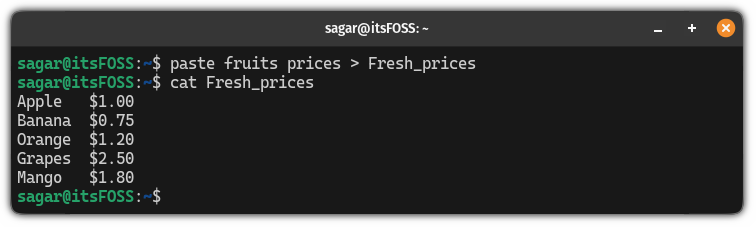
3. Save the output in the file
In the previous example, when I used the paste command, it only merged two files for the sake of the output, and the combined data was not saved.
You may come across a need to save the output in a file and in that case, you can redirect the output to the file using redirection as shown here:
paste File1 File2 > Filename_to_save
Here's how I saved the output of the paste command, using the redirection:
paste fruits prices > Fresh_prices
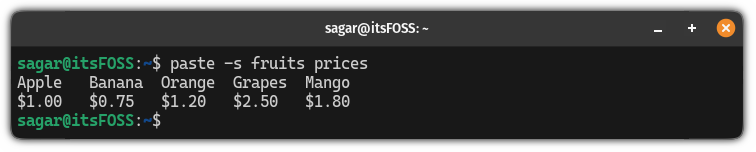
4. Merge files horizontally
Using the paste command, you can also merge files horizontally.
To merge files horizontally, all you have to do is use the -s flag as shown:
paste -s File1 File2
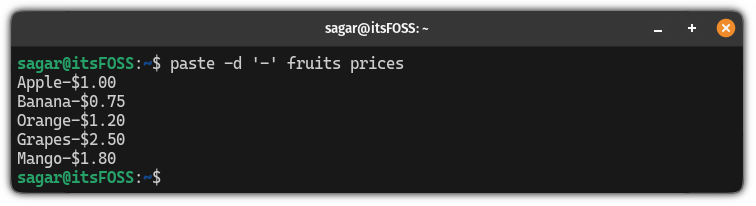
5. Use delimiter while merging files
When you merge files using the paste command, it uses a tab between two columns by default, but you can specify your favorite delimiter using the -d option:
paste -d 'delimeter' File1 File 2
For example, here, I've used - as a delimiter:
paste -d '-' fruits prices
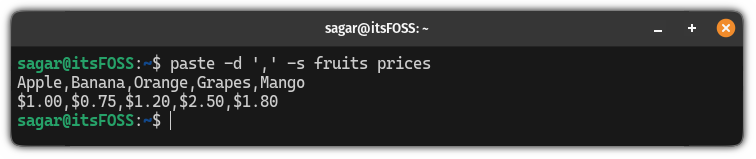
You can also use a delimiter while merging files horizontally by utilizing the -d and -s flag as shown here:
paste -d 'delimeter' -s File1 File2
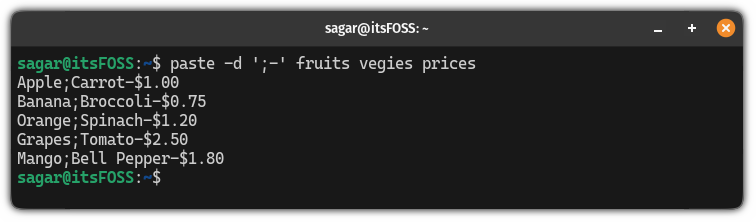
While merging more than one file, you can also use multiple delimiters as shown here:
paste -d 'Delimiter1Delimiter2' File1 File2 File3
Practice questions 📓
To get better at using any command, it is important to practice the command. This is the reason you'll find plenty of exercise questions in our recent articles for commands.
Here's what you can try doing:
How do you create a new file and write new lines using the paste command? (Hint: syntax is similar to the cat command)
How do you sort the output of the paste command alphabetically? (Hint: pipe the sort command with the pipe command)
Print only the first 3 lines while using the paste command to merge two files (Hint: pipe it with the cut command)
Save a copy of the merged output to a file while also displaying it. (Hint: pipe it with the tee command)
If you encounter any difficulty while solving the practice questions, you can reach out to us through the comments section or post your doubts in our community forum.
Wrapping Up
In this tutorial, we went through the basic syntax, a list of available options, practical examples, and practice questions for the paste command.
You might like some other examples for the same command on our Linux Handbook blog:
Heating is one of the most common issues in all the single board computers like Raspberry Pi.
Keeping an eye on the CPU temperature could be one way to determine why your Pi is lagging or acting slow.
📋
This tutorial has been performed on a Raspberry Pi 5 running Raspberry Pi OS. And hence it uses the tools provided by Raspberry Pi.
I'll be discussing two ways of monitoring the CPU and GPU temperature on a Raspberry Pi running the Raspbian OS:
Monitor the temperature with an applet on the top panel (for desktop systems with GUI)
Monitoring the temperature in command line (suitable for all systems)
Let's see them one by one.
⚠️
Raspberry Pi uses a system on chip (SoC) from Broadcom which consists of an ARM processor (CPU) and an on-chip GPU. In simpler words, the chip has both CPU and GPU in it. Raspberry Pi provides utilities that show the temperature for this SoC. You can take that as the temperature of both CPU and GPU.
Method 1: Monitoring Raspberry Pi CPU and GPU temperature using GUI tool
If you are using your Raspberry Pi as a desktop system with Raspbian OS, you can add a handy applet to the top of your screen. It will show you the current CPU (actually the SoC) temperature.
Here are the steps.
Right click on an empty space on the top panel.
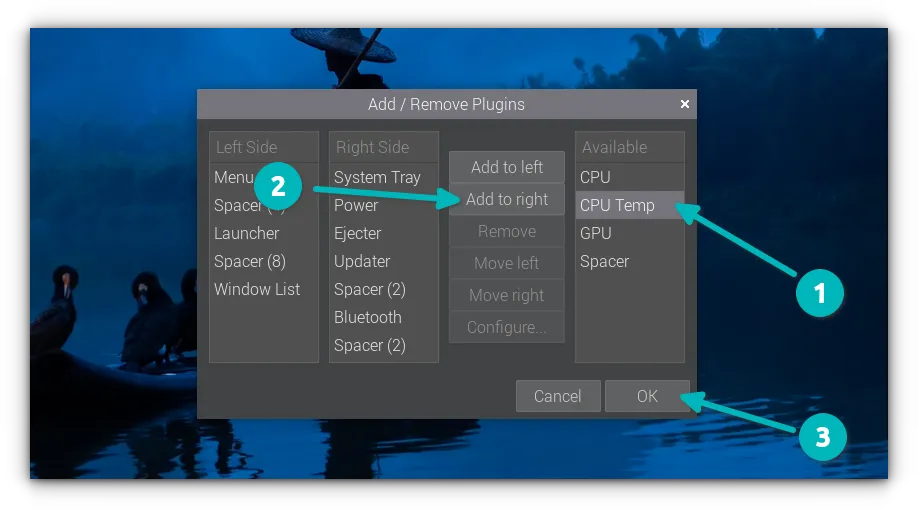
Since most people are concerned with CPU temperature, it is named as CPU Temp even though it shows the temperature of the SoC (that houses both CPU and GPU).
Select CPU Temp and click on Add to right and hit the OK button.
The 'Add to right' means it will be added to the right most corner of the panel. This is where you would want it anyway. CPU and GPU will show the CPU and GPU usage respectively (if you want that as well in the top panel).
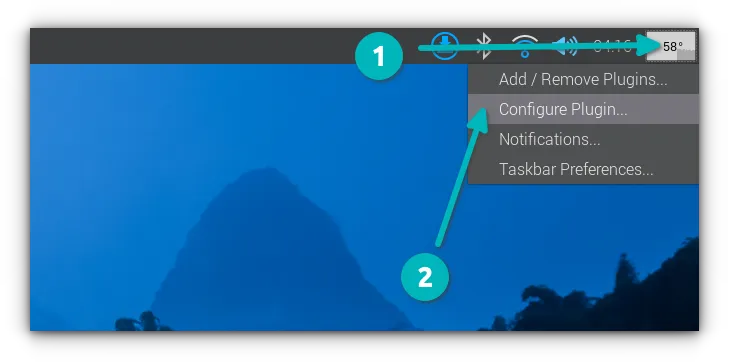
Now, you should start seeing the temperature of your processor chip:
The SoC temperature changes continually
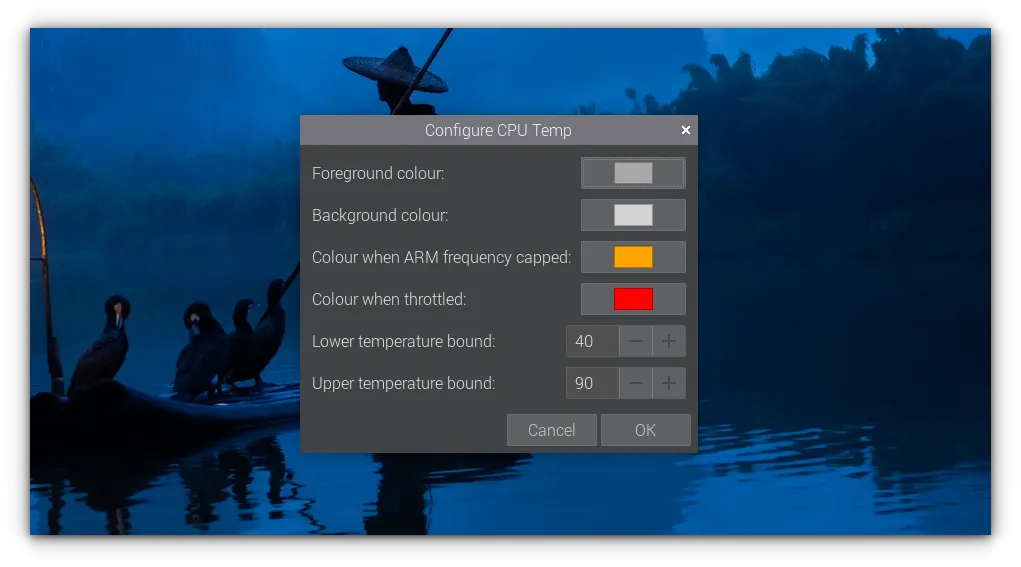
Right click on the applet and you can configure it to some extent.
You can change the colors of the applet or of critical points such as CPU frequency cap or temperature threshold.
Method 2: Monitoring Raspberry Pi GPU and CPU temperature in the command line
Raspberry Pi has a dedicated command line utility, vcgencmd, that shows various aspects of the Broadcom SoC, including its core temperature.
To see the current temperature of the system on chip (that consists of both CPU and GPU), use this command:
vcgencmd measure_temp
It will show an output like:
temp=52.3'C
Now, it's a one time command. But if you want to monitor the CPU temperature at a regular interval, you can use the watch command:
Let's say you want to monitor the chip temperature every 2 seconds. Use it in this fashion:
watch -n 2 vcgencmd measure_temp
And now it you'll see the current temperature value changes at every two seconds:
Every 2.0s: vcgencmd measure_temp  raspberrypi: Mon Jan 29 16:25:27 2024

temp=53.0'C
By the way, if you are seeing your screen filled up with YYYYYY while using the watch command, change the locale and use a UTF-8 one. That happened with me on my new Raspberry Pi 5.
Conclusion
Monitoring your CPU temperature is important in Raspberry Pi. If you find that your Pi is heating up frequently, you may want to invest into a heat sink or cooler of some sort to reduce the SoC temperature.
You may also use other Linux commands like sensors (package lm-sensor has to be installed) for measuring CPU temperature.
Enjoy your Pi and don't hesitate to use the comment section for your questions, suggestions or thank-yous 😄
Have you ever thought about talking to your documents?
Like there is a long pdf that you are dreading reading but it's important for your work or for your assignment.
What if you could ask questions to it like “What are the key features mentioned in the document?” Or “Summarize the view of (some author you're reading)”.
This all sounds too sci-fi or futuristic if someone would've said that a few years ago but with the advent of all the AI tools available in the market, it is quite normal.
Not only ChatGPT, there are tons of free and paid AI-based services that can do this job today.
But I would rather not share my documents and data to train someone else's AI. I'll do it myself.
I am going to show you how I set up PrivateGPT AI which is open source and will help me “chat with the documents”. You can try and follow the same steps to get your own PrivateGPT set up in your homelab or personal computer.
✋
Don't expect ChatGPT like quick response. The computation is happening on your local system and it will depend on how powerful your system is.
Requirements
X64 Intel/AMD based CPU
8 GB RAM (minimum) but the more the better
Dedicated graphics card with 2 GB VRAM (minimum)
Any Linux distro will work just fine. Just pay attention to the package management commands. I am using Ubuntu Server 22.04 here.
Python 3.11 (important)
Plenty of time and patience
🚧
This tutorial assumes that you are familiar and comfortable with Linux commands and you have some experience using Python environments. Previous experience with CUDA and any other AI tools is good to have.
Step 1: Update your system
It is important to ensure that our system is up-to date with all the latest releases of any packages.
sudo apt update && sudo apt upgrade -y
Step 2. Installing Python version 3.11
We need Python 3.11. Ubuntu 22.04 and many other distros come with an older version of Python 3.10.12. So you need to upgrade the Python version.
To check your Python version, type:
python3 --version
In Ubuntu, you can use a PPA to get a newer Python version.
sudo add-apt-repository ppa:deadsnakes/ppa
Here I am also installing another package called python3.11-venv (Learn more about Python Virtual Environment)
sudo apt install python3.11 python3.11-venv -y
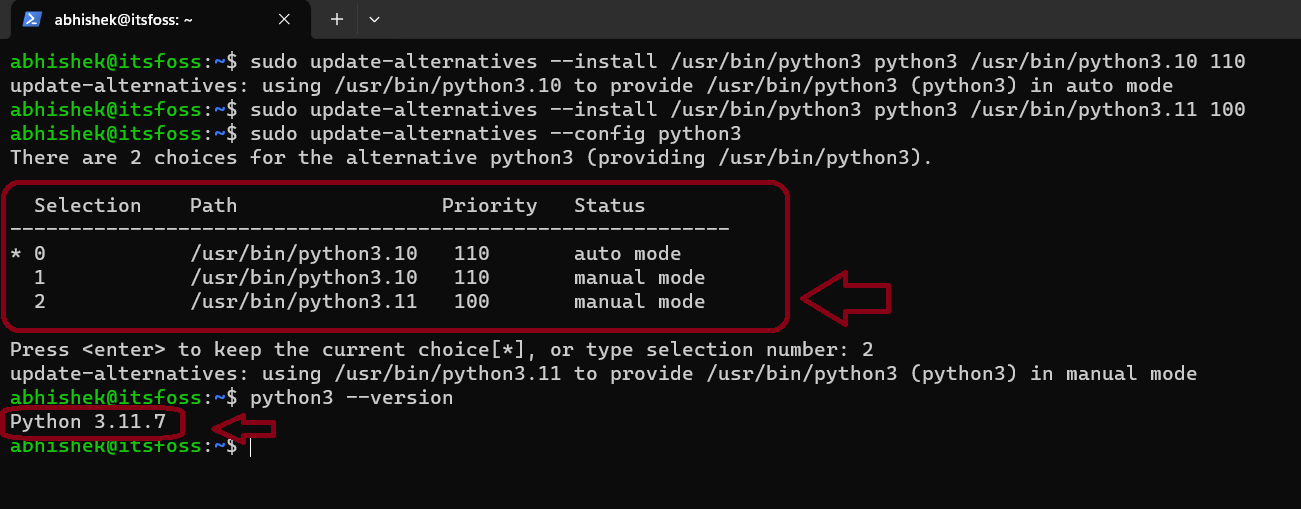
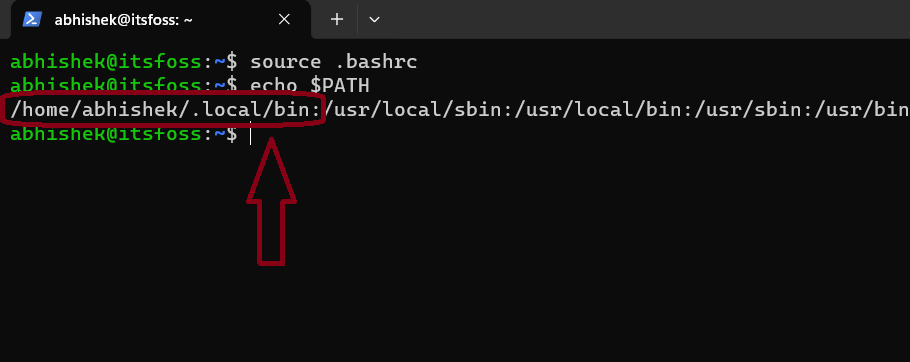
Although the new version of python is installed, the default version stays at 3.10. To change that, you need to update our alternatives:
Now you have two configurations in the alternatives and all you have to do is update them:
sudo update-alternatives --config python3
You'll be presented with two options to choose Python version and as you can see in the screenshot that I have selected number 2 which is the required version.
📋
If in future you want to switch to the earlier version of python, you can run the same command and select the prefered version.
Now let's check the version of the Poetry that we have installed. It is supposed to be 1.7 or above.
poetry --version
In my case, the output is :
Poetry (version 1.7.1)
Step 4. Setting up PrivateGPT
First, you need to clone the Private GPT repository in our system. I presume you have Git installed on your system.
git clone https://github.com/imartinez/privateGPT
Then enter the cloned repository:
cd privateGPT
Now you need to set up a new environment so that the entire system does not get messed up:
python3 -m venv venv
A new folder named venv has been created and to activate the virtual environment, type:
source venv/bin/activate
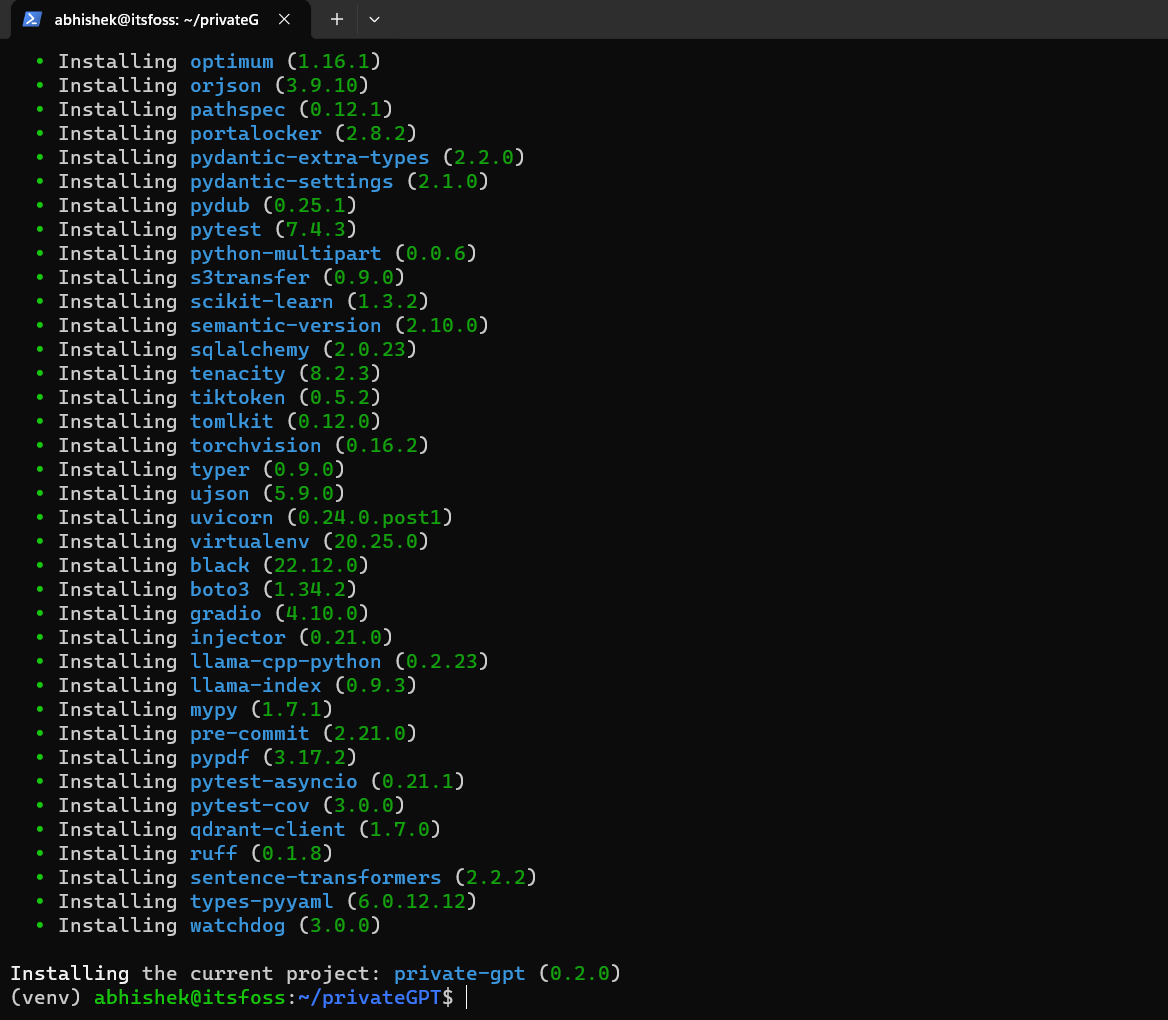
Step 5. Installing ui, local in Poetry:
Because we need a User Interface to interact with our AI, we need to install the ui feature of poetry and we need local as we are hosting our own local LLM's.
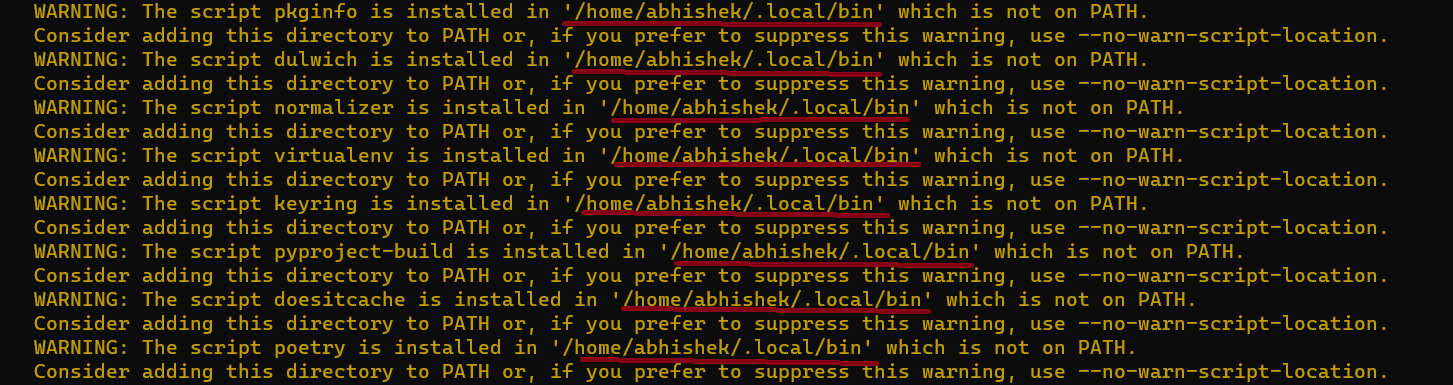
poetry install --with ui,local
It'll take a little bit of time as it installs graphic drivers and other dependencies which are crucial to run the LLMs.
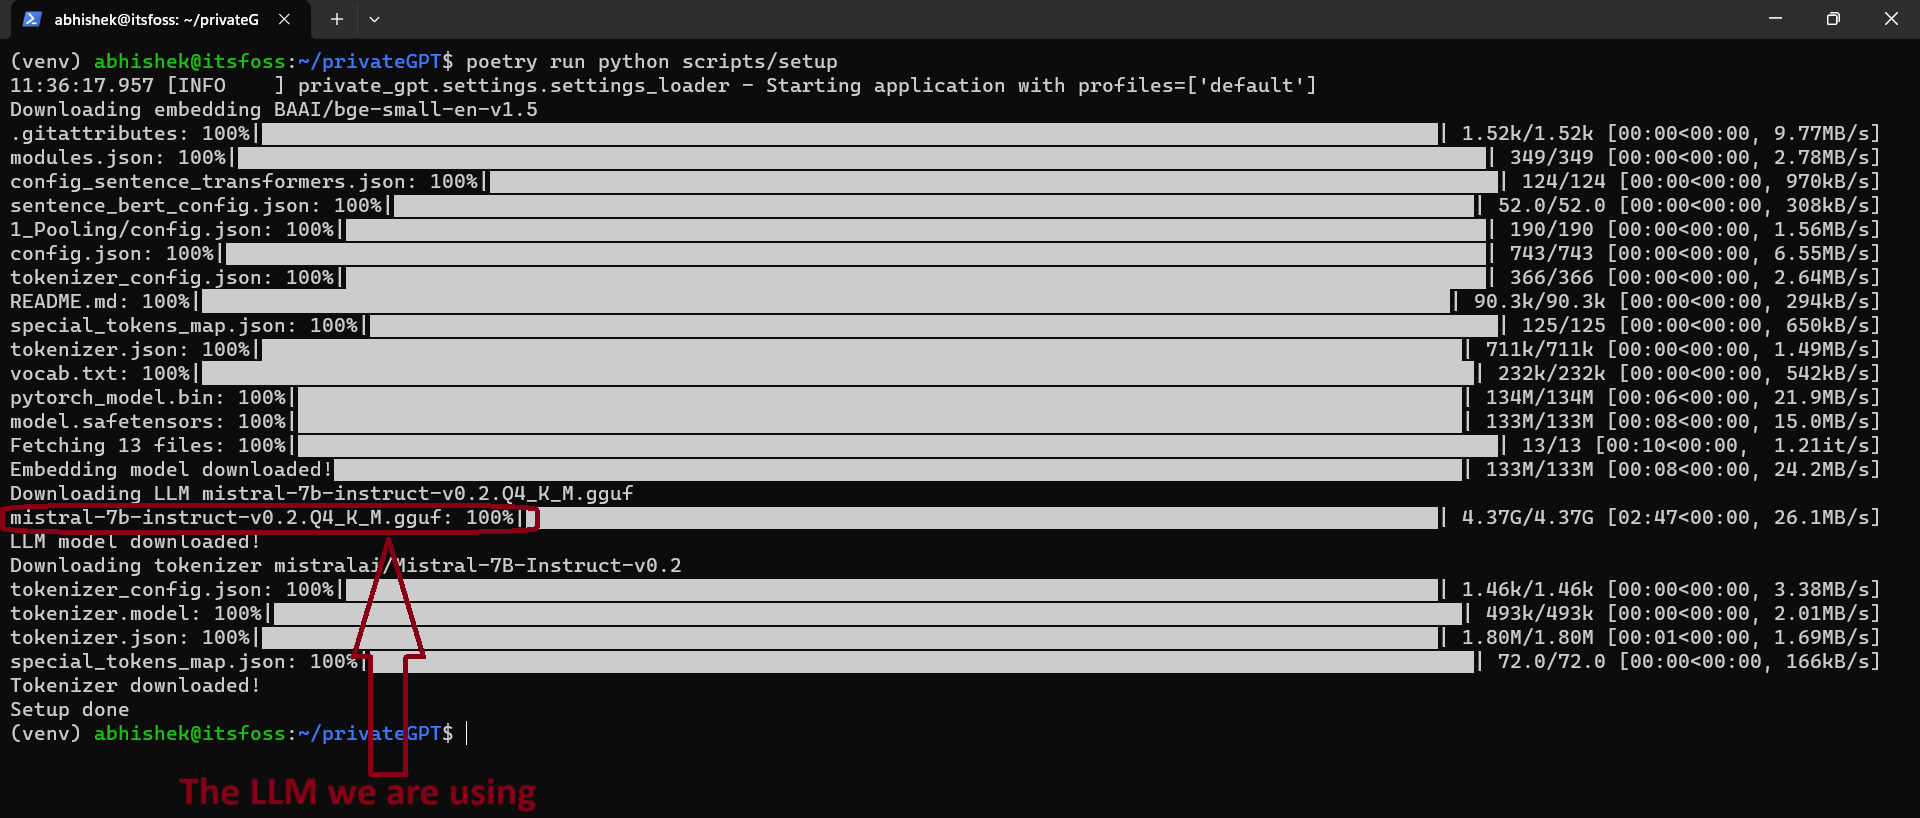
Step 6. Installing the LLM model
As most of the work has been done now and all you need is your LLM model to start chatting with your documents.
To install an LLM model:
poetry run python scripts/setup
This process will also take a long time, as the model first will be downloaded and then installed. The size of the models are usually more than 4 GB.
Step 7. Installing Nvidia CUDA toolkit
If you are thinking to run any AI models just on your CPU, I have bad news for you. I mean, technically you can still do it but it will be painfully slow. It might not even work.
So it's better to use a dedicated GPU with lots of VRAM. I have an Nvidia GPU with 2 GB of VRAM.
sudo apt install nvidia-cuda-toolkit -y
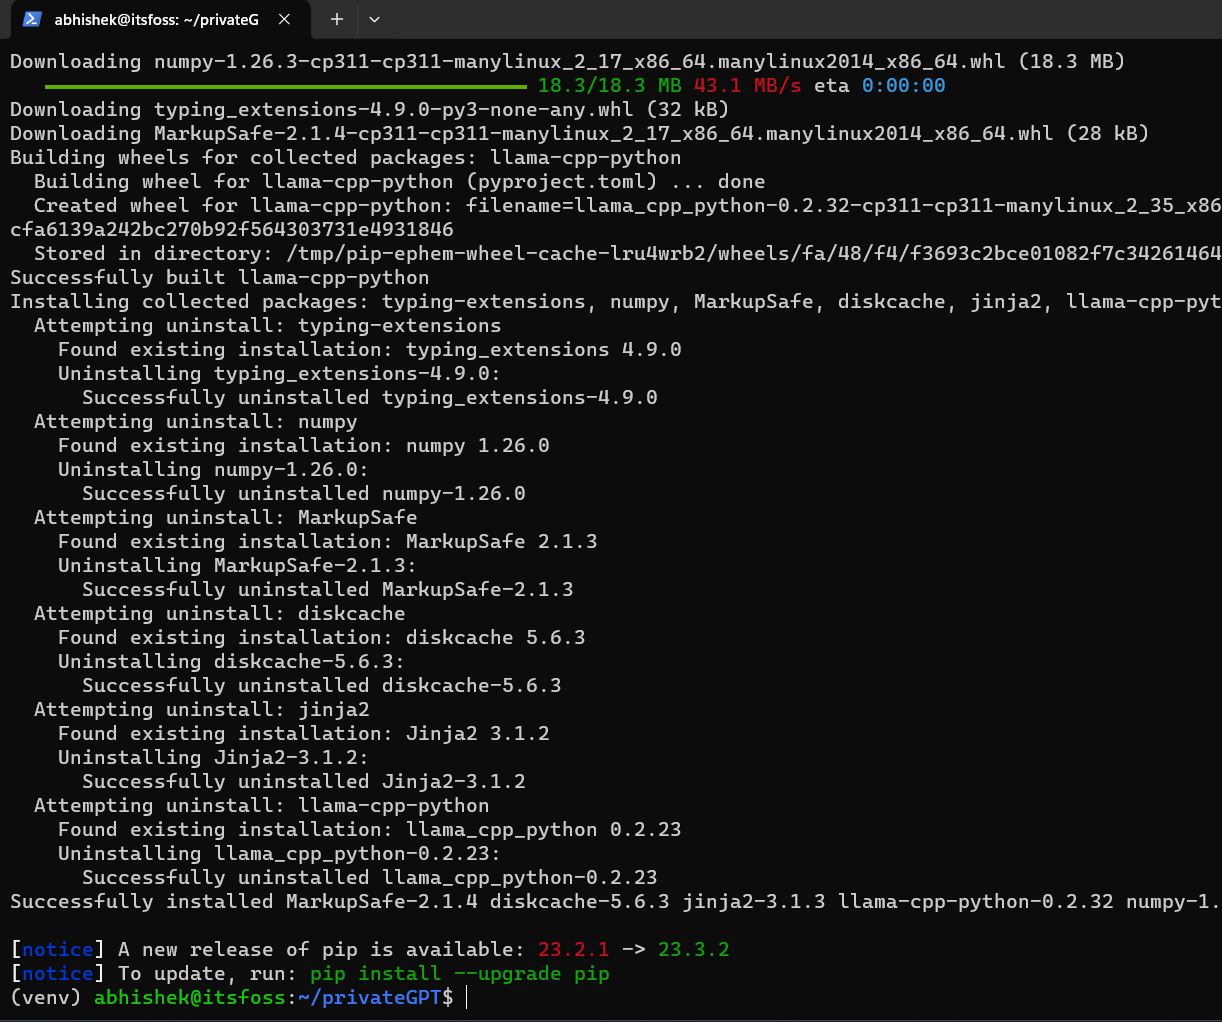
8. Compiling the LLMs
All you need to do is compile the LLMs to get started.
CMAKE_ARGS='-DLLAMA_CUBLAS=on' poetry run pip install --force-reinstall --no-cache-dir llama-cpp-python
📋
If you are following this tutorial on WSL or on a Mac, I would recommend you check the right command for your platform from this official documentation )
9. Run privateGPT
This step requires you to set up a local profile which you can edit in a file inside privateGPT folder named settings-local.yaml but to not make this tutorial any longer, let's run it using this command:
PGPT_PROFILES=local make run
📋
To read more about setting up profiles, refer this manual.
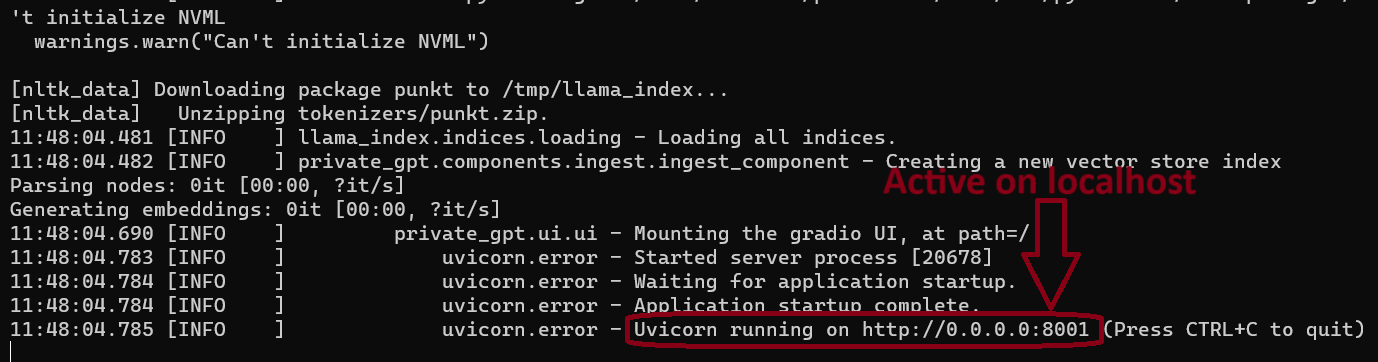
It should look like this in your terminal and you can see below that our privateGPT is live now on our local network.
Step 10. Let's chat with the documents
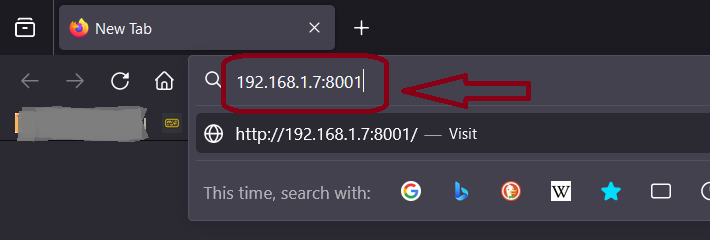
To open your first PrivateGPT instance in your browser just type in 127.0.0.1:8001 . It will also be available over network so check the IP address of your server and use it.
In my case, my server has the IP address of 192.168.1.7
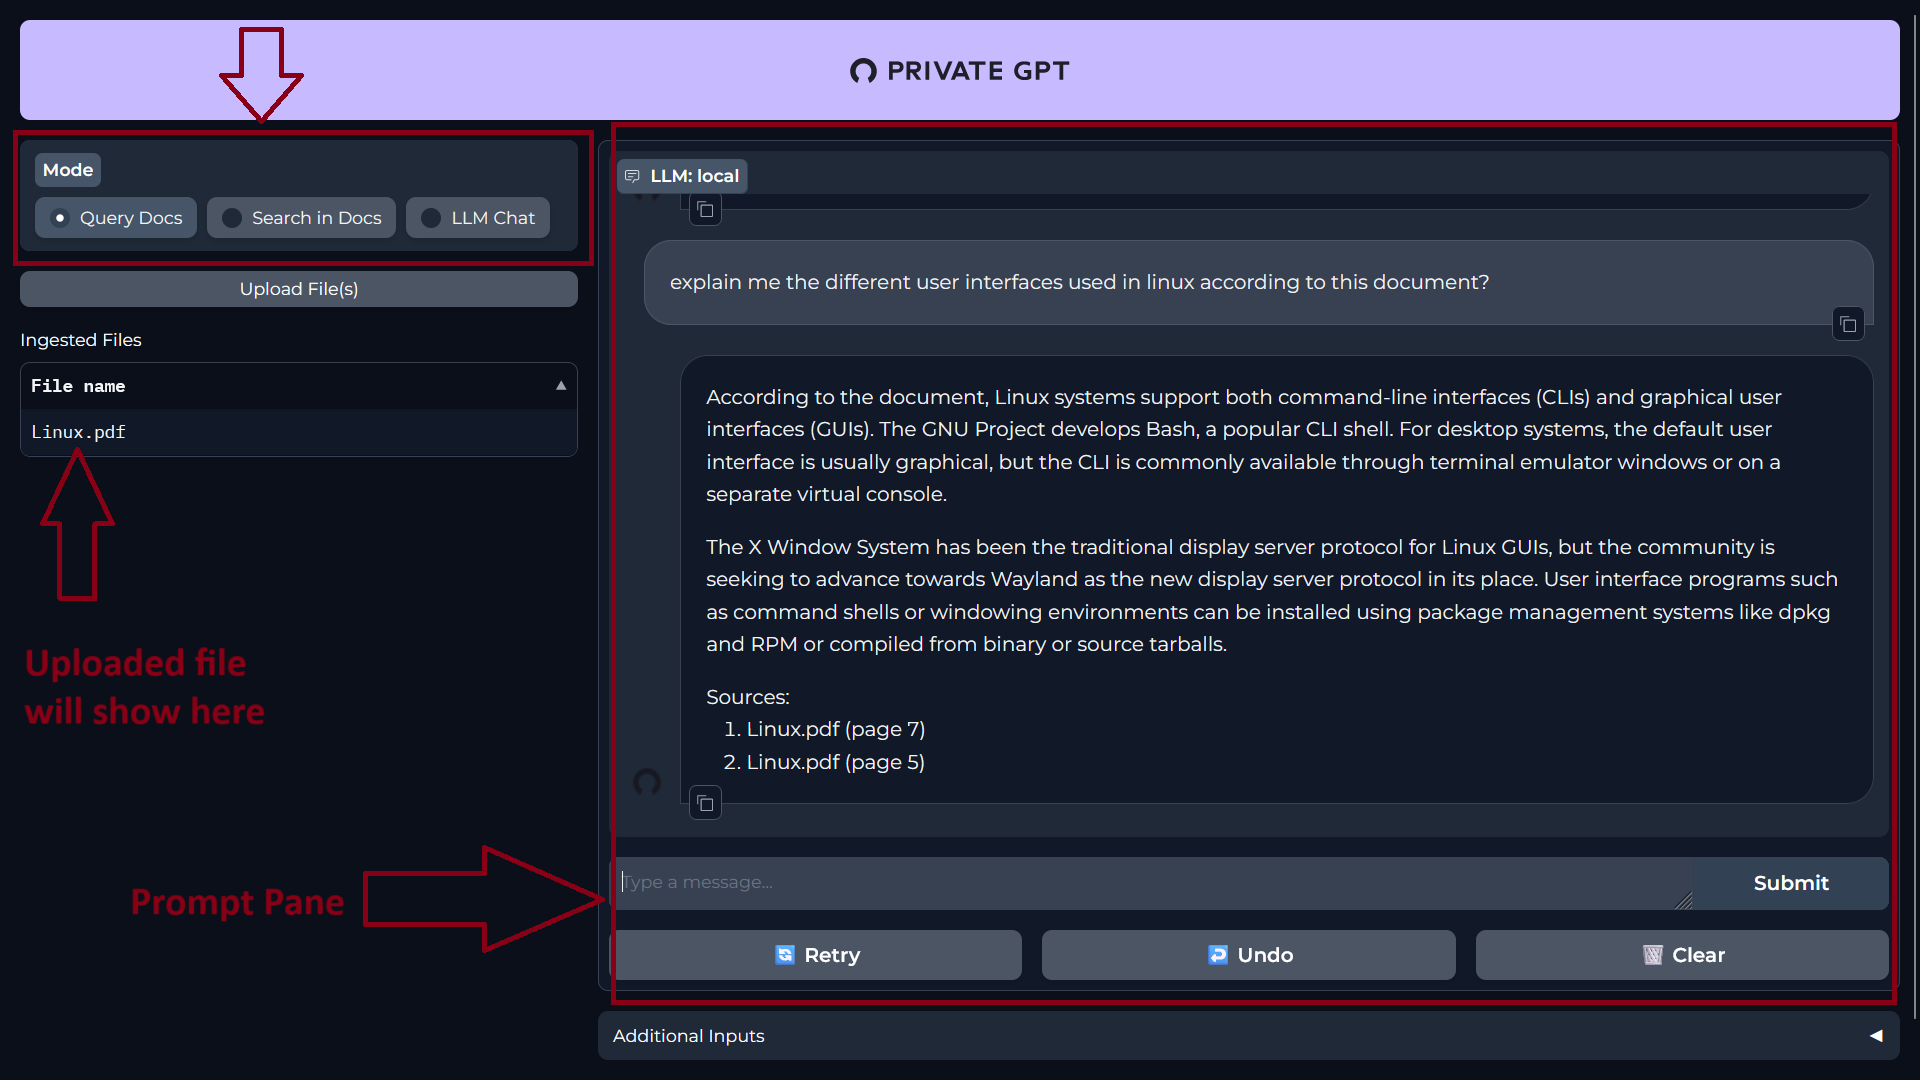
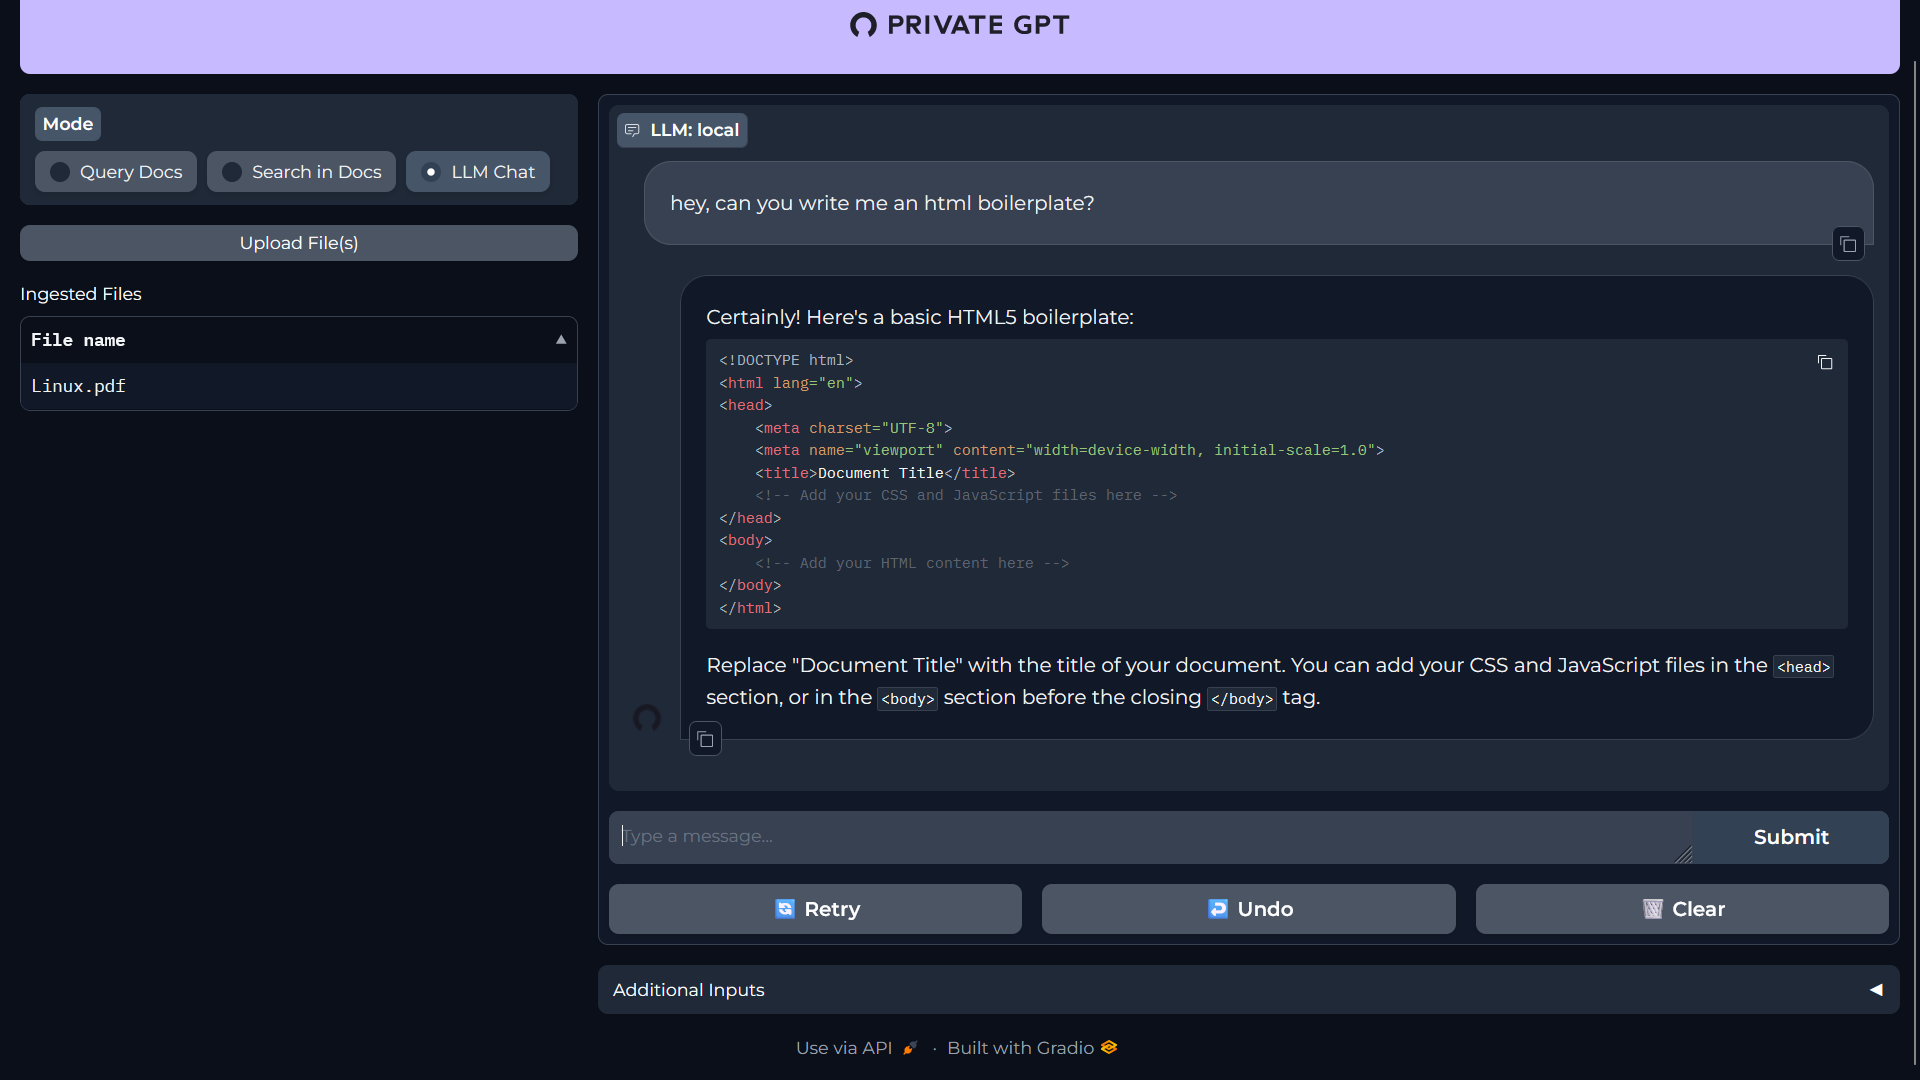
Once your page loads up, you will be welcomed with the plain UI of PrivateGPT.
On the left side, you can upload your documents and select what you actually want to do with your AI i.e. “Query Docs, Search in Docs, LLM Chat” and on the right is the “Prompt” pane. Here you will type in your prompt and get response.
I am using an article on Linux that I have downloaded from Wikipedia. It's a 28 page PDF document.
Here's me asking some questions to PrivateGPT:
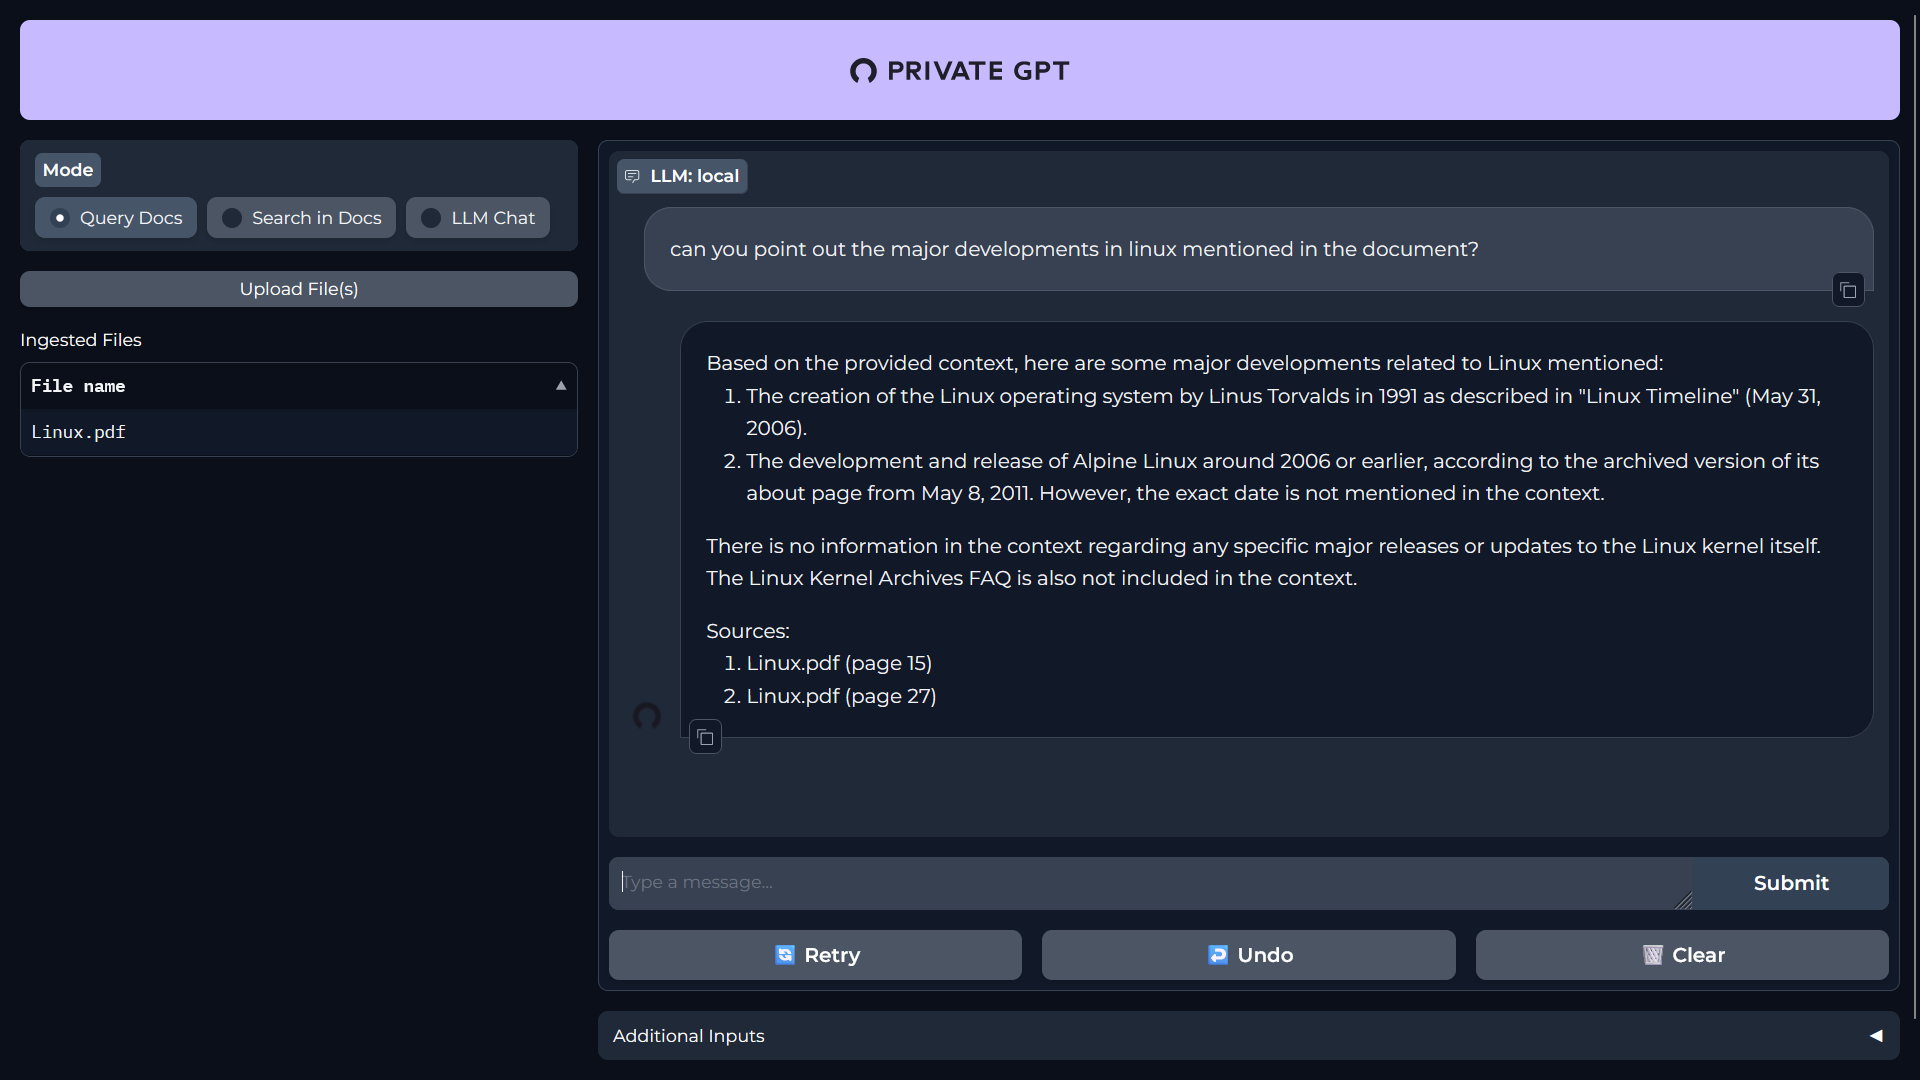
Here is another question:
You can also chat with your LLM just like ChatGPT.
You can give more thorough and complex prompts and it will answer. During my testing, I found out that the response time will highly vary because of your system. I had to wait approx. 2 mins just to get one response as I have an older system.
Conclusion
Et voilà! That's how you set up and host your own PrivateGPT. You can actually port forward this to a domain and access it outside your home network.
I know this solution is not for everyone and this project is also in constant development, but it's a good starting point for enthusiasts who want to board the open source AI train.
Please let me know your views, questions and suggestions on PrivateGPT setup and usage. I hope to share more cool AI stuff in the future.

 Ankush Das

 Simon Sharwood
 Abhishek Kumar


 ernie
ernie