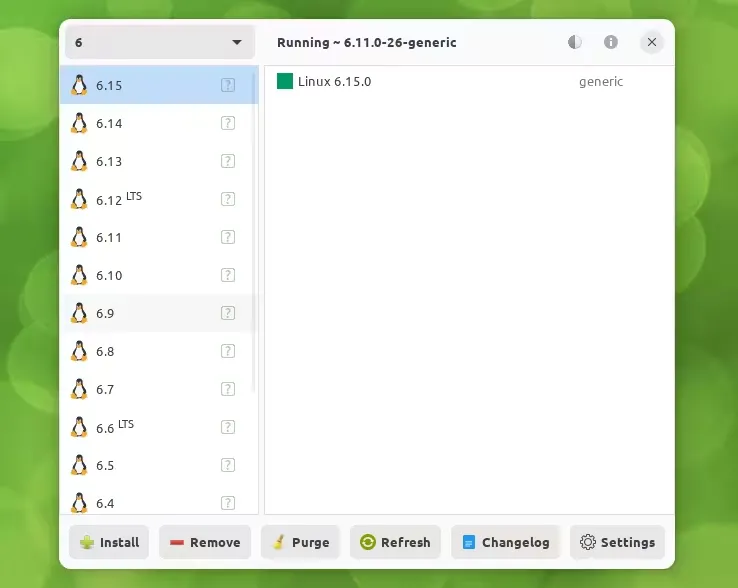
The development for Ubuntu 26.04 codenamed 'Resolute Raccoon' has already begun. It is a long-term support (LTS) release and a particularly important one as we venture more into the Wayland-only era of Linux.
Let's have a look at the release schedule of Ubuntu 26.04 and its planned features.
📋
Since the development is in progress and the final version comes in April'26, I'll be updating this article from time to time when there are new developments.
Ubuntu 26.04 Release Schedule
Ubuntu 26.04 LTS is going to be released on 23rd April, 2026. Here's the release sechedule with important milestones.
Date
Event
February 19
Feature Freeze
March 12
User Interface Freeze
March 19
Kernel Feature Freeze
March 26
Beta Release
April 9
Kernel Freeze
April 16
Release Candidate
April 23
Final Release
Please note that release schedule may change as the development progresses. Although, the final release date should stay the same.
💡
Fun fact: A new version of Ubuntu is always released on a Thursday. For the October releases (version number ending with XX.10), it is the second Thursday of the month. For the April release (version number ending with XX.04), it is the fourth Thursday of the month. Two extra weeks are there to compensate for the Christmas holidays.
New features coming to Ubuntu 26.04 Resolute Raccoon
Since it is very early stages of development, I will include some predictions as well, which means some of the listed features may change in the final release.
GNOME 50
For sure, Ubuntu 26.04 LTS will be rocking the latest GNOME at the time of its release. And that latest GNOME will be version 50.
What does GNOME 50 offer? Well, that too is under development and the picture will be a lot more clear as we enter 2026.
I will say be prepared to see some of your classic GNOME apps replaced by modern versions. We have seen this trend in the past where GNOME changed the default text editor, document viewer, terminal etc.
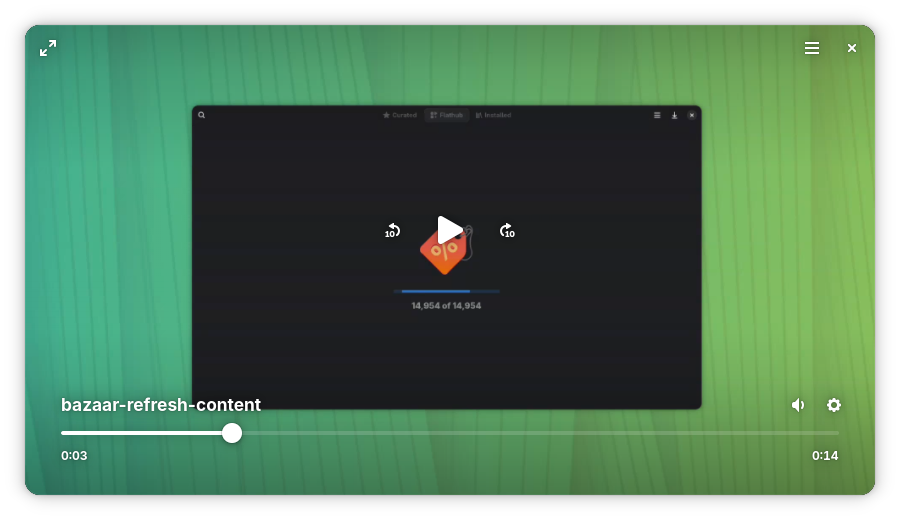
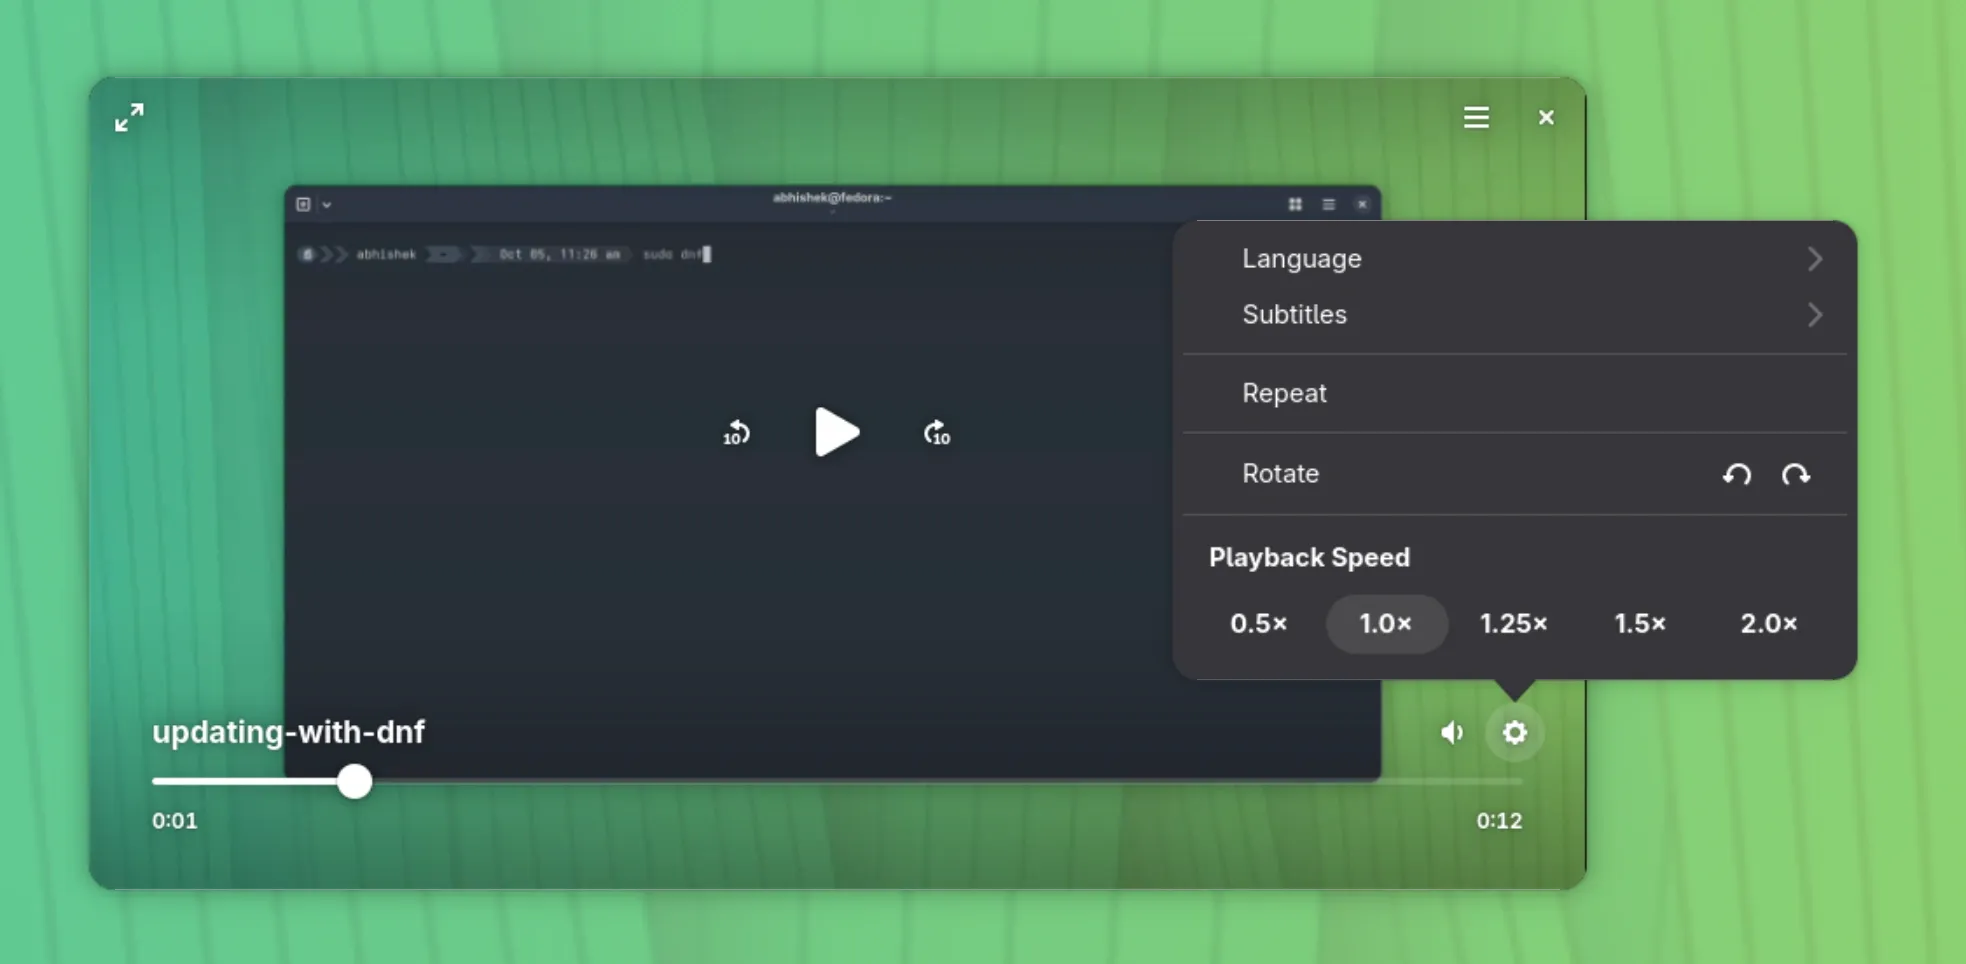
New default video player
Totem has been the default video player in Ubuntu for as long as I remember. Not that I can remember like an elephant, but I am not Leonard Shelby from Memento either.
Showtime feels sleek and modern and fits quite well with the new GNOME design principles that is libadwaita.
Interface is minimalist, but you still get some controls. You can click the gear symbol at bottom right or right click anywhere in the player for that.
Showtime is only referred to as Video Player and the icon is similar to Totem (referred as Videos) in the screenshot below.
Showtime is Video Player, Totem is Videos. MPV is well...MPV
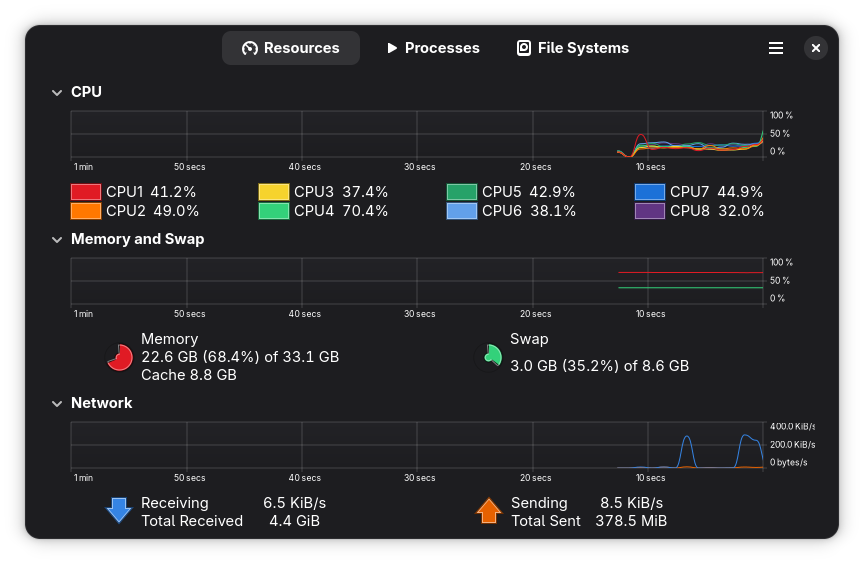
New default system monitor
GNOME 50 will also have a new default system monitor, Resources. This is surprising because Resources is not a GNOME Core app, although it's a GNOME Circle app which means a community made tool that meets the GNOME standards.
Although the current system monitor is not that bad in my opinion.
Current default system monitor
x86-64-v3 and amd64v3 version for all packages
Ubuntu 26.04 will have amd64v3/x86-64-v3 variants for all the packages, and they will be well tested, too. Some packages are already available in this format in the recently released Ubuntu 25.10, the LTS release will have all the packages in this variant.
What is x86-64-v3? Well, you know what x86-64 and amd64 are, right? Yes, it is the 64-bit for Intel CPU and amd64 is the 64-bit AMD processor. And they have been in existence for nearly two decades now.
But not all 64 bit processors are created equal. The newer generation of CPUs supports more instruction sets than their predecessors. And that's why they are labeled as v2/v3/v4 architecture variants.
Basically, if you have a newer CPU, you can switch to the v3 variants of the packages and you should have some performance improvements.
Don't worry. The v3 variant won't be default. Nothing to bother about if you are rocking an older machine.
This is a development release and not suitable for running on your main machine. Only download and install it if you want to help with testing. Use it in a virtual machine or on a spare system that has no data on it. You have been warned.
The first monthly snapshop of Ubuntu 26.04 development release is now available for thos who want to test it. And if you do test it, timely report the bugs otherwise what's the point of testing?
This is a long term support. Expectations are high. What are yours? What features do you want to see in this upcoming version? Please share your views in the comment section.
The GNOME app ecosystem is on fire these days. Whatever your needs, there's probably an app for that. Or two. Or three (no kidding)! Two of the sleekest apps for monitoring your system (aptly called, "system monitors", of course) are Mission Center, and Resources.
Both use libadwaita to provide slick visuals, responsive GUIs, and familiar functionality for the GNOME desktop environment. But, which one is right for you? I'll attempt to help you answer that question in this article.
Quick Intro of Both Awesome System Monitors
Now that you understand the premise of what we're about, let's get acquainted with both apps. You'll see where they're quite similar in some ways, yet distinct enough to each stand alone.
Mission Center
Mission Center 1.1.0 in GNOME 48
Mission Center is a detail-oriented system monitor app for the GNOME desktop environment, written primarily in Rust, using GTK4 and libadwaita. Geared towards high efficiency and smooth displays, Mission Center has hardware accelerated graphs for complex CPU, memory, and GPU breakdowns.
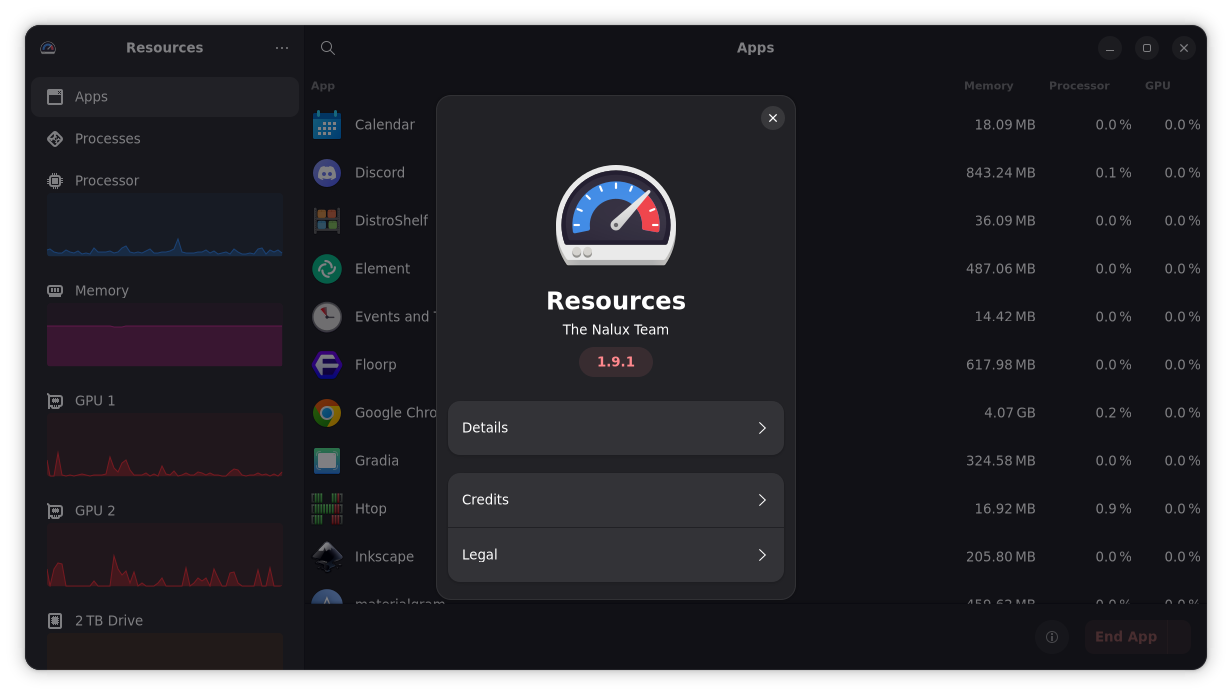
Resources
Resources 1.9.1 in GNOME 48
Resources is a relatively minimalist system monitor for the GNOME desktop environment. As a GNOME Circle app, it conforms strictly to the GNOME HIG and its patterns, with an emphasis on simplicity and reduced user effort. Resources is written in Rust and uses GTK4 and libadwaita for its GUI.
Usage: The First Glance
First impressions matter, and with any system monitor, what you see first tells you what's going on before you even click on anything else.
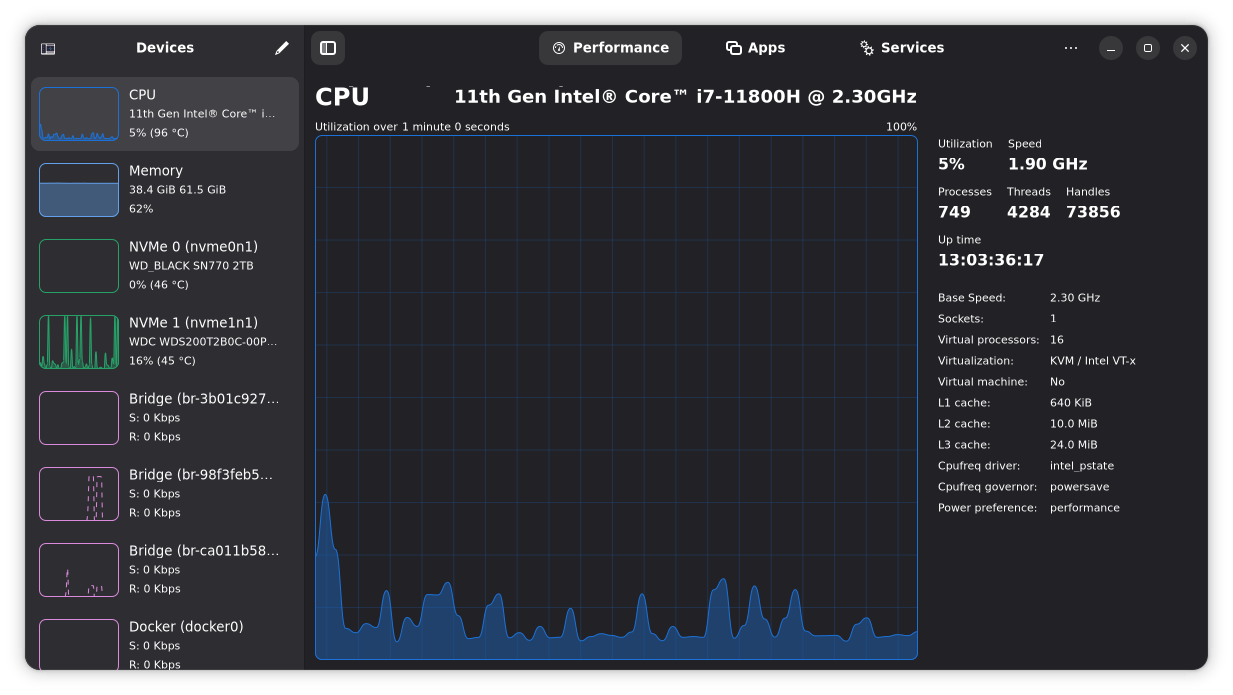
Mission Center drops you right into the hardware action
On first launch, Mission Center surfaces your hardware resources right away: CPU, GPUs, memory, drives, and network, with detailed readouts right before your eyes. Combining clean, accessible visuals with thorough device info, Mission Center makes you feel you've hooked up your computer to an advanced scanner — where nothing is hidden from view.
If you like to jump right into the stats and details, Mission Center is just for you.
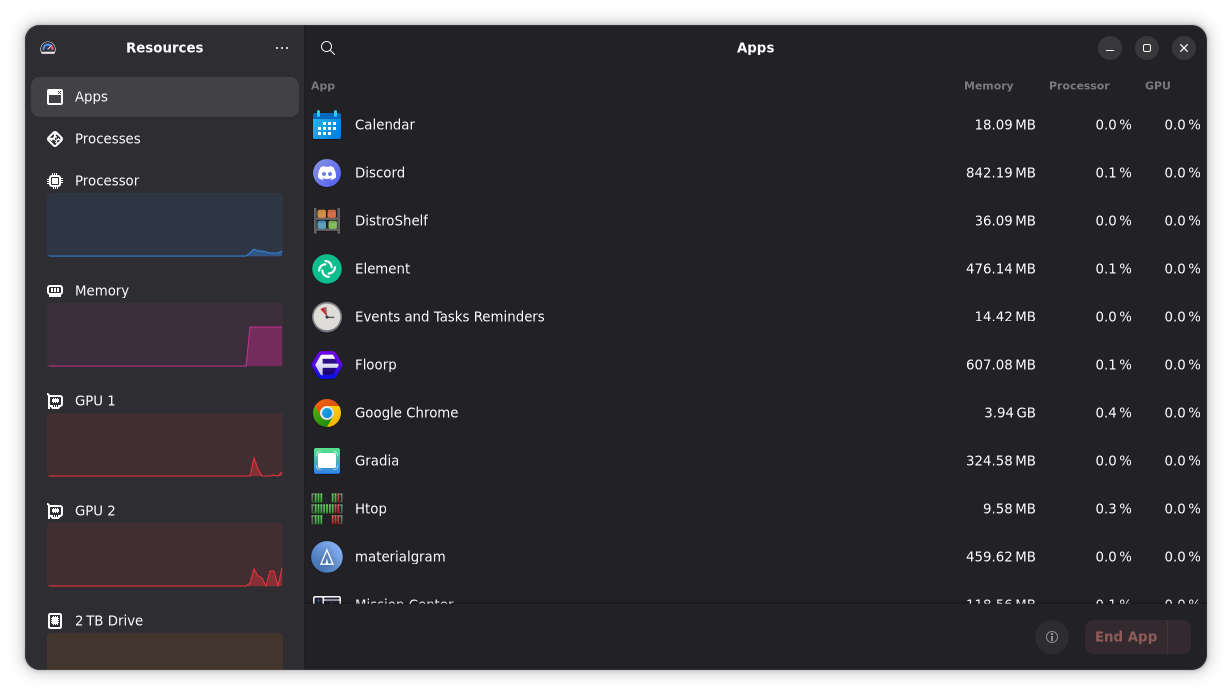
Resources: Apps & Hardware Side-by-side
Resources puts your apps and hardware resources side by side
Resources displays a combined overview of your apps and hardware resources at first glance. You can get a quick view of which apps are using the most resources, side by side with what hardware resources are most in use. You also get a graph for the system's battery (if present) in the sidebar (not shown here).
It doesn't give you detailed hardware stats and readouts until you "ask" (by clicking on any individual component), but you can still see which resources are under strain at a glance and compare this with which apps are using the most resources.
CPU Performance & Memory Usage
A system monitor is no good if it hogs system resources for itself. They need to be lean and quick to help us wrangle with other applications that aren't. So where do our two contenders fall?
💡
Note: Plasma System Monitor was used for resource measurements. Different apps, including both Mission Center and Resources, measure resource usage differently.
Mission Center: Stealthy on the CPU, kind to memory
Mission Center uses around 160 MiB (168 MB), during casual usage
Mission Center barely sips the CPU, being negligible enough that it does not show up in your active processes (if you choose this filter) in GNOME System Monitor, even while displaying live details for a selected application.
This is likely due to the fact that Mission Center uses GPU acceleration for graphs, thereby reducing strain on the CPU. It's also relatively light on memory usage, hitting roughly 168MB of usage even while showing detailed process info.
Resources: Light on CPU, easier on memory use
Resources hits roughly 130 MiB (136 MB) in typical usage
Keeping well within its balanced, lightweight approach, Resources sips the CPU while also keeping memory usage low, at around 136MB. While its use of hardware acceleration could not be confirmed, it's worth noting that Resources keeps graphs visible and active, even when displaying process details. Still, it manages to keep resource usage to a minimum.
Differences: Negligible
As this is one of the few areas where the comparison veers beyond subjectivity, it's important to note that the difference here is not that significant. Both apps are light on resources, especially in the critical area of CPU usage.
The difference in memory usage between the two isn't particularly significant, though for users with limited RAM to spare, Mission Center's slightly higher memory usage could be a consideration to keep in mind.
Process Management & Control
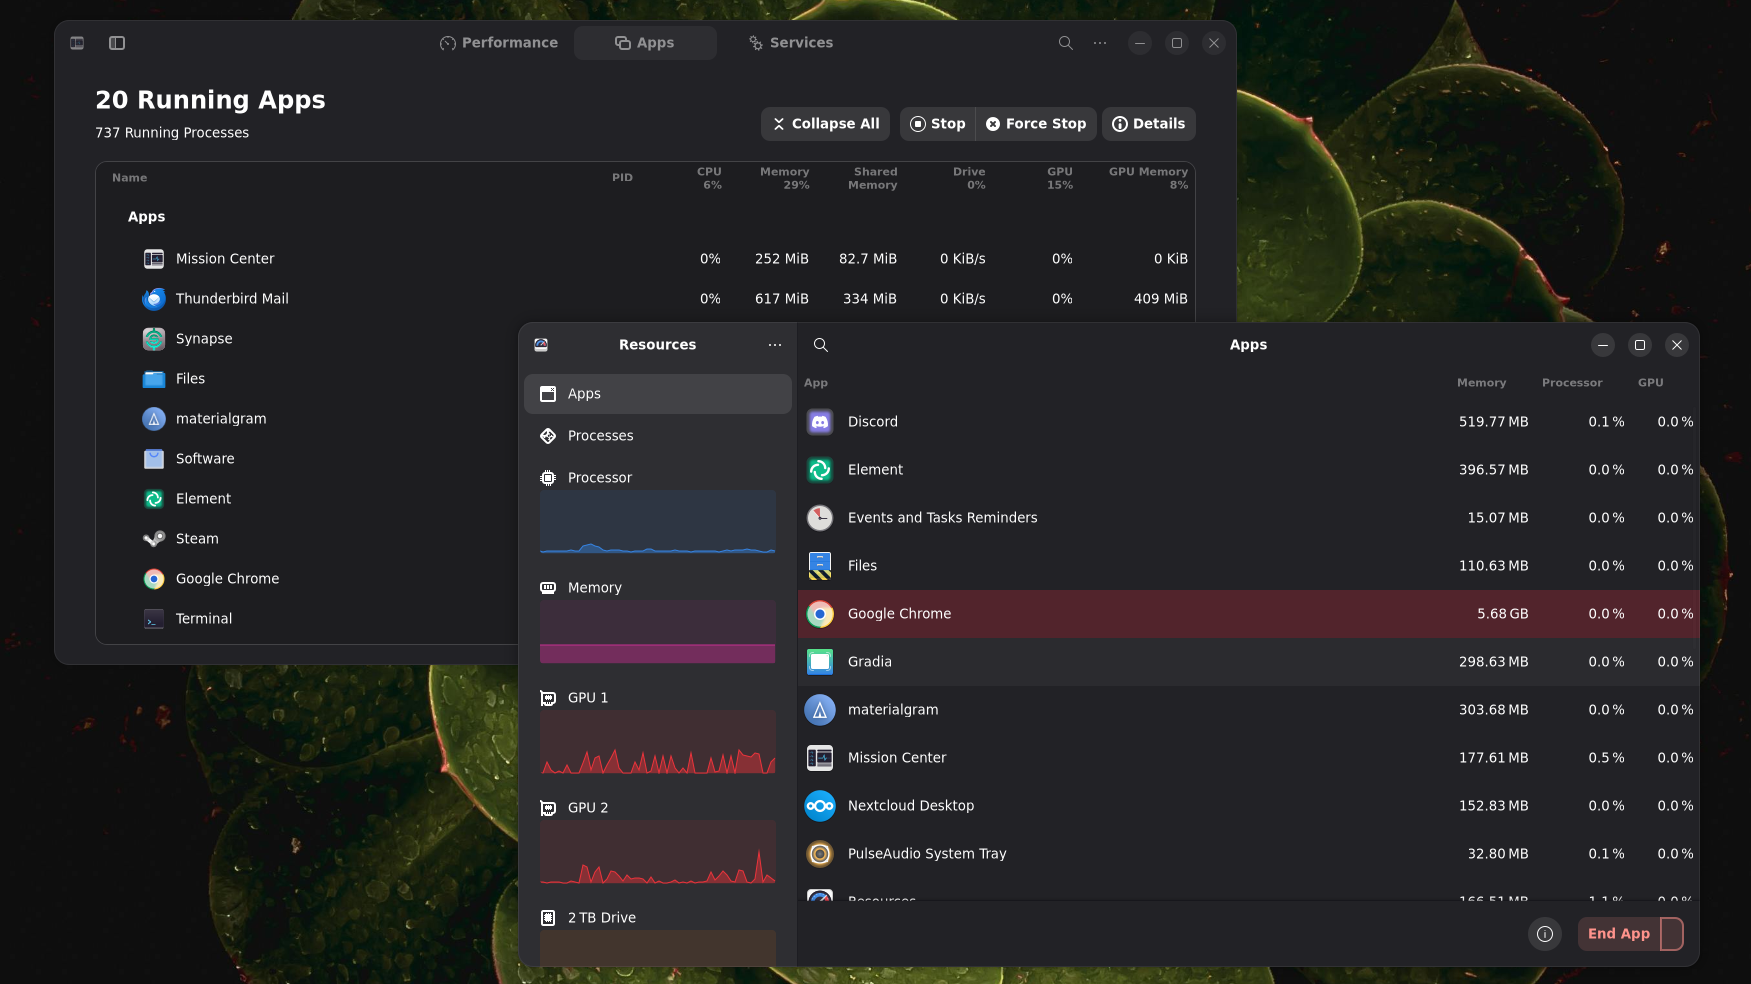
Mission Center (left, background) and Resources (Right, foreground) showing their app views
Perhaps the most critical aspect of any system monitor, is not just how well they can show you information, but how much they actually let you do with the information you're given. That's where process management and control come in, so let's look at how these two compare.
What both have in common
As you might expect, each app gives you the typical "Halt/Stop", "Continue", "End", and "Kill" signal controls as standard fare for Linux process management. Both allow you to view details for an individual app or process.
Of course, you also get the common, critical stats, like CPU, Memory, and GPU usage. However, there are distinct, notable differences that can help you decide which one you'd prefer.
💡
Note: Processes in Linux are not the same as "Apps". Apps can consist of multiple processes working in tandem.
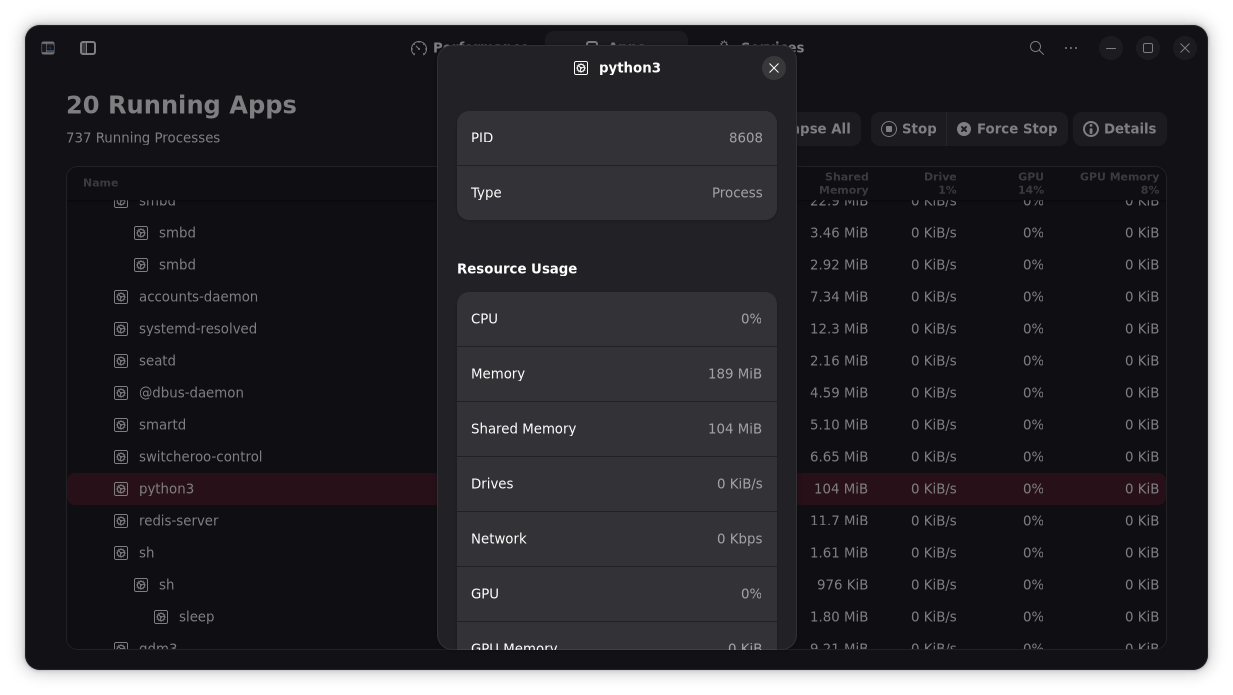
Mission Center: More details up front
Viewing the details for Google Chrome in Mission Center
Both apps and processes are displayed in the same tree view in Mission Center, just separated with a divider. It tries to put more info before you by default, including the Process ID (PID), though only for processes, Shared Memory, and Drive I/O. You can also combine parent and child process data, and show which CPU core any app is running on.
Despite a detailed view, there's no control over process priority in Mission Center
While you get more signals for controlling your processes, like 'Interrupt' (INT), 'Hangup' (HUP), and 'Terminate' (TERM), you don't get the option to display or adjust the 'niceness' of any process, which, for those not in the know, tells the system what priority a process should have.
Standout feature: Service management
Mission Center lets you start, stop, and restart services with Systemd from a familiar GUI
One thing that sets Mission Center apart from other system monitors is its ability to display and control processes through Systemd. With Systemd being pretty much the standard across most distros, this is a feature that many power users will want in their toolkit, especially those who would prefer to avoid the CLI for such tasks as restarting services like Pipewire.
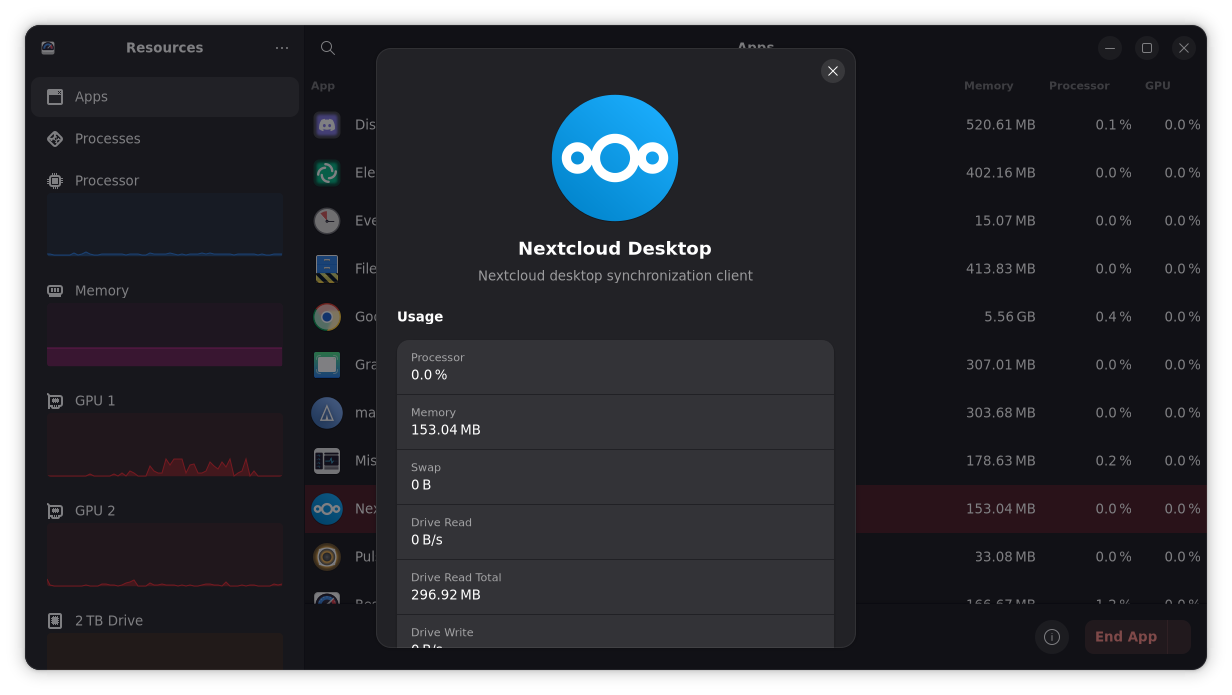
Resources: Crouching data, hidden customization
Resources showing app details for Nextcloud Desktop
Interestingly, while Resources might appear to be the more conservative choice, it actually gives more options for what data you can display. As an example, Resources allows you to view GPU video encoder/decoder usage on a per-app basis. Another handy feature is the option to change a process' niceness value, though you must first enable this in the preferences.
In Resources, apps and processes are displayed in separate views, which have some notable differences. For instance, there is no "User" column in the 'Apps' view, and you cannot change the priority of an app.
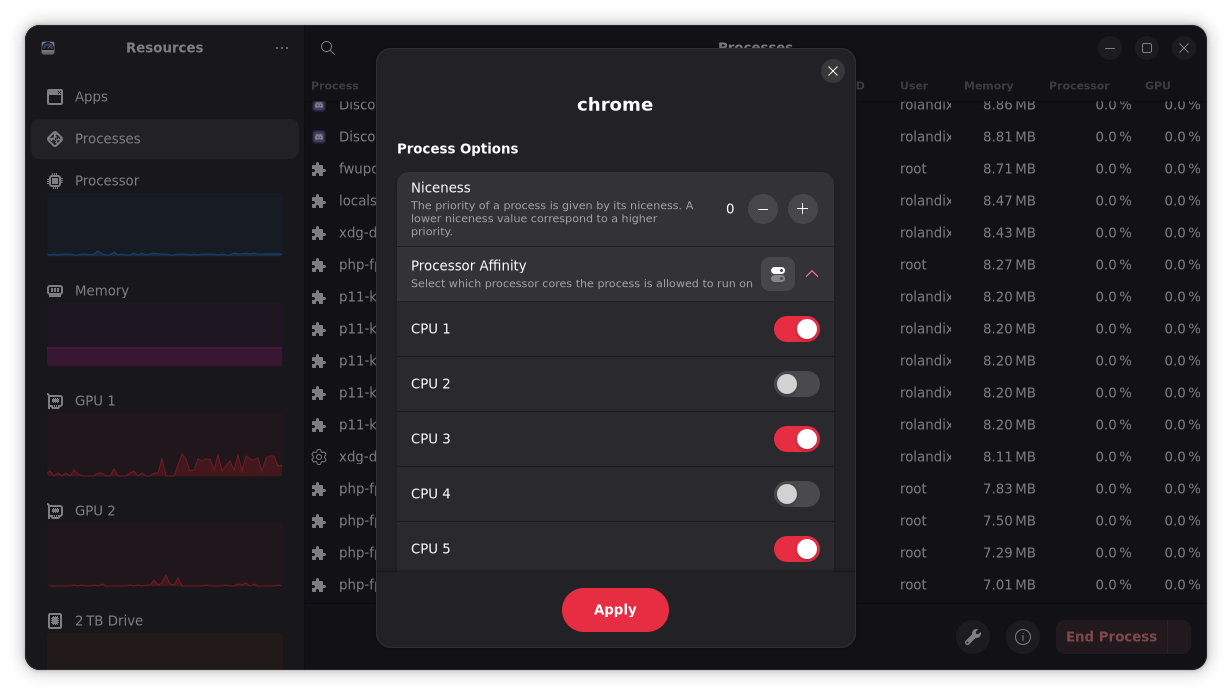
Standout feature: Changing processor affinity
Changing Processor Affinity in Resources is quick and simple
Resources features a hidden gem in its process view, which is the ability to change process affinity on a per-process basis. This is especially handy for power users who want to make use of modern multi-core systems, where efficiency and performance cores often dwell in the same CPU.
With a clever combination of niceness values (priority) and CPU affinity, advanced users can use Resources to pull maximum performance or power savings without having to jump into the terminal.
Installation & Availability
Mission Center: A package for everyone
Mission Center is included by default with Aurora, Bazzite, Bluefin and DeLinuxCo. It's also available through an official Flatpak hosted on Flathub. The project provides AppImage downloads for both AMD64 and ARM64 architectures, and a Snap package in the Snap Store.
Ubuntu users can install Mission Center with Snap by running:
If even these are not enough, you can also get Mission Center in many distributions directly from their repositories (though mileage may vary on the version that's actually available in such instances).
The project provides a full list of repositories (with version numbers) in their Readme file.
Resources: A conservative, but universal approach
Being part of the GNOME Circle, Resources is assuredly packaged as a Flatpak and available via Flathub. These are official packages and provide the experience most likely to offer the best stability and newest available features.
Unofficial packages are also available for Arch and Fedora.
Arch users can install it with:
pacman -S resources
Whereas Fedora users can install it using dnf and Copr:
That's a question only you can answer, but hopefully you now have enough information to help you make an informed decision. With the diversity of apps arising in this season of mass Linux development and adoption, it's only a matter of time before you find (or create) your favourite.
If you're looking for deep hardware monitoring up front and don't need heavy customization, Mission Center is more likely to be a good fit for you. However, if you're looking for a quick bird's eye-view of apps and hardware at a glance, with the option to dig deeper where needed, Resources is probably more your speed.
Of course, you can install and try both apps if you'd like, that's part of the fun and freedom of Linux. Feel free to let us know what you think in the comments.
Pebble, the e-paper smartwatch that first launched on Kickstarter in 2012, gained a cult-like following for its innovative approach to wearable tech. Sadly, Fitbit acquired and shut it down in 2016, taking with it the intellectual property (IP) of the brand.
Earlier this year, the original creator, Eric Migicovsky, relaunched Pebble through Core Devices LLC, a self-funded company operating via the rePebble consumer brand. This resurrection became possible after Google open-sourced PebbleOS in January 2025.
The complete Pebble software stack is now open source. Everything you need to operate a Pebble watch is now available on GitHub. All of this didn't just materialize overnight; Core Devices has been improving PebbleOS since its open-sourcing and has been pushing those to the public repository.
The rebuilt mobile companion apps for Android and iOS just got released as open source too. Without these apps, a Pebble watch is basically a paperweight. These are built on libpebble3, a Kotlin multiplatform library for interacting with Pebble devices.
Similarly, the developer tools have been completely overhauled, with the old Ubuntu VirtualBox VM-based workflow being replaced with a modern browser-based one that allows anyone to develop Pebble apps in a web browser.
The Pebble Time 2 is very close to coming to market!
Hardware schematics are public as well. The complete electrical and mechanical design files for the Pebble 2 Duo are now available with KiCad project files included. You could literally build your own Pebble-compatible device from these files.
There are some non-free components still in the mix. The heart rate sensor library for the Pebble Time 2, Memfault crash reporting, and Wispr Flow speech recognition all use proprietary code. But, fret not, these are all optional. You can compile and run the core Pebble software without touching any of them.
Core Devices also launched two major software systems alongside the open source releases. The Pebble mobile app now supports multiple app store feeds that anyone can create and operate.
This works similar to Linux package managers such as APT or AUR. Here, users can subscribe to different feeds and browse apps from multiple sources instead of relying on a single centralized server.
Core Devices already operates its own feed at appstore-api.repebble.com. This feed backs up to the Internet Archive, preserving community-created watchfaces and apps that have been around over the years.
Plus, developers can upload new or existing apps through the new Developer Dashboard. Monetization remains possible through services like KiezelPay, so creators can still get paid for their hard work.
Why Open Source Everything?
Migicovsky learned some painful lessons from Pebble's first shutdown. When Fitbit killed the project in 2016, the community was left scrambling with limited options.
The gap between 95% and 100% open source turned out to matter more than anyone expected. Android users couldn't easily get the companion app. Many iOS users faced the same problem.
"This made it very hard for the Pebble community to make improvements to their watches after the company behind Pebble shut down," Eric explained in his blog post.
The reasoning behind this open source push is straightforward. If Core Devices disappears tomorrow, the community has everything they need to keep their watches running. No dependencies, no single point of failure.
Apart from that, these new Pebble devices will focus on reparability, with the upcoming Pebble Time 2 (expected March-April 2026) featuring a screwed-in back cover, allowing users to replace the battery themselves instead of needing to buy a new device when the battery gives out.
💬 What are your thoughts on Pebble's comeback? I certainly look forward to new launches by them!
In a previous column, I argued that self-hosting is resistance in an age where ownership is increasingly illusory.
There is increasing evidence that self-hosting is becoming popular among a certain kind of user, say the typical readership of ItsFoss.
There is a simple explanation for this shift: people want their data, dollars, and destiny back. Centralized platforms optimized for engagement and extraction are colliding with real-world needs — privacy, compliance, predictability, and craft. Linux, containers, and a flood of polished open-source apps have turned what used to be an enthusiast’s project into a practical step for tech‑savvy users and teams.
The demand and supply of self-hosting is headed in the right direction.
I spoke about the demand side of the equation in a preivous column. Today, I would like to talk about the supply side.
Put simply, self-hosting got easier: Dockerized services, one‑click bundles, and opinionated orchestration kits now cover mail, identity, storage, media, automation, and analytics. And the hardware needed is trivial: a mini‑PC, a NAS, or a Pi can host most personal stacks comfortably.
Click and deploy OS and interfaces make it so easy
An increasing portion of these users are also conscious of the environmental impact of unchecked consumerism: recycling older hardware for your home-lab is an easy way to ensure that you aren't contributing to mountainous e-waste that pose risks to communities and the environment.
The numbers reinforce the vibe. The 2025 selfh.st community survey (~4081 respondents) shows more than four in five self‑hosters run Linux, and Docker is the dominant runtime by a wide margin. While this hasn't become mainstream yet, it highlights one of my arguments: there are costs to trusting big tech with your most important data and services, financial and otherwise. Once such costs outweigh the costs of self-hosting, once the vast majority of users can no longer deny such costs are draining their wallets and their sense of agency, we can expect this shift to become mainstream.
When your calendar, contacts, photo library, and documents sit on your own box behind your own reverse proxy, you remove third‑party analytics, shadow data enrichment, and surprise policy drift. You also reduce the surface area for “account lockouts” that nuke access to life‑critical records. For users burned by sudden platform changes — forced accounts, feature removals, data portability barriers—self ‑ hosting is an antidote.
Cost predictability over time. Cloud convenience is real, but variable charges accumulate as you scale storage, bandwidth, and API calls. With self‑hosting, you pay upfront (hardware + power), then amortize. For steady, continuous workloads—backups, photo libraries, media servers, home automation, docs, password vaults—the math is often favorable.
Reliability through ownership. Services die. Companies pivot. APIs change. By running key utilities yourself — RSS, password vaults, photo libraries, file sync, smart‑home control — you guarantee continuity and can script migrations on your timeline. That resilience matters when consumer vendors sunset features or shove core capabilities behind accounts and subscriptions.
Curiosity and capability‑building. There’s a practical joy in assembling a stack and knowing how each layer works that I can attest. For Linux users, self‑hosting is an ideal next step: you practice containerization, networking, monitoring, backups, and threat modeling in a low‑risk environment.
Linux dominates self‑hosting because it’s stable, well‑documented, and unfussy (in the context of servers; I am aware Linux desktop has some ways to go before mainstream users will flock towards Linux).
Package managers and container runtimes are mature. Community tutorials cover everything from Traefik/Caddy reverse proxies to WireGuard tunnels and PostgreSQL hardening. The selfh.st survey shows Docker adoption near 90 percent, with Proxmox, Home Assistant OS, and Raspberry Pi OS widely used. It’s not gatekeeping; it’s pragmatism. Linux is simply the easiest way to stitch a small, reliable server together today.
Where the rubber meets the road
Most start with a single box and a few services: identity and secrets (Vaultwarden, Authelia, Keycloak); files and backups (Nextcloud, Syncthing, Borgmatic); media (Jellyfin, Navidrome, Photoprism/Immich); home (Home Assistant); networking (Nginx/Traefik/Caddy, WireGuard); knowledge (FreshRSS, Paperless‑ngx, Ghost). The payoff is a system where each function is yours.
AI is accelerating the trend
Self‑hosted AI moved from novelty to necessity for teams with sensitive workloads. Local inference avoids model‑provider data policies, reduces latency, and stabilizes costs. Smaller models now run on consumer hardware; hybrid patterns route easy requests locally and escalate only high‑uncertainty tasks to cloud. For regulated data, self‑hosting is often the only sane route.
The economics are getting clearer
“Is self‑hosting cheaper?” depends on workload shape and rigor. Cloud Total Cost of Ownership (TCO) includes convenience and externalized maintenance; self‑hosting TCO includes your time, updates, and electricity. But for persistent, predictable personal workloads—photo/video storage, backups, calendars, private media—self‑hosting tends to win.
What self‑hosting doesn’t fix
You still need to operate. Patching, backups, monitoring, and basic security hygiene are on you. Automated update pipelines and off‑site backups reduce pain, but they require setup and discipline.
Internet constraints exist. Residential ISPs throttle uploads or block SMTP; dynamic IPs complicate inbound routes; power outages happen. In practice, most personal stacks work fine with dynamic DNS, tunneling, and a small VPS for exposed services, but know your constraints.
Some services are better bought. Global‑scale delivery, high‑throughput public sites, and compliance‑heavy email sending can be more efficient with a trustworthy provider. “Self‑host everything” isn’t the point—“self‑host what’s sensible” is.
The cultural angle
Self‑hosting isn’t anti‑cloud; it’s pro‑agency. It’s choosing the right locus of control for the things you care about. For FOSS communities, it’s consistent with the ethos: own your stack, contribute upstream, and refuse enshittification through slow, patient craft. For Linux users, it’s the obvious next rung: turn your knowledge into durable systems that serve people you love, not just platforms that serve themselves.
If you value predictability, privacy, and the quiet confidence of owning the tools you rely on, self‑hosting stops being a hobby and starts being common sense. The shift is already underway. It’s not loud. It’s steady. And Linux is where it happens.
A growing number of Linux desktop environments (DEs) are moving towards Wayland, the modern display protocol designed to replace the aging X11 window system.
X11 has been the foundation of Linux graphical interfaces for over three decades now, but it carries significant technical debt and security limitations that Wayland aims to address.
Projects like Fedora, GNOME, and KDE have been leading the charge on this by being among the first ones to adopt Wayland.
What's Happening: The KDE Plasma team has made it clear that the upcoming Plasma 6.8 release will be Wayland-exclusive and that the Plasma X11 session will not be included in it.
Support for X11 applications will be handled entirely through Xwayland, a compatibility layer that allows X11 apps to run on Wayland compositors. The Plasma X11 session itself will continue to receive support until early 2027.
Though, the developers have not provided a specific end date yet, as they are working on additional bug-fix releases for Plasma 6.7.
The rationale behind this change is to allow the Plasma team to move faster on improving the stability and functionality of the DE. They stated that dropping X11 support will help them adapt without dragging forward legacy support that holds back development.
What to Expect: For most users, this change is said to have minimal immediate impact. KDE says that the vast majority of their users are already using the Wayland session, and it has been the default on most distributions.
Users who still require X11 can opt for long-term support distributions like AlmaLinux 9, for example, which includes the Plasma X11 session and will be supported until 2032.
The developers also note that gaming performance has improved on Wayland. The session supports adaptive sync, optional tearing, and high-refresh-rate multi-monitor setups out of the box. HDR gaming works with some additional configuration.
Plus, users of NVIDIA GPUs can breathe easy now, as Wayland support in the proprietary NVIDIA driver has matured significantly. Graphics cards supported by the manufacturer work well nowadays. For older NVIDIA hardware, the open source Nouveau driver can be used instead.
There are some issues that the Plasma team is actively working on addressing, things like output mirroring, session restore, and remembering window positions. But overall, they seem well-prepared for this massive shift.
If you spend a lot of time on a computer, then fonts matter more than you think. A good one reduces eye strain and makes reading the contents of the screen easier. The right one can drastically improve your entire desktop experience.
In my case, I like to use Inter on my Fedora-powered daily driver, and I don't really mess around with it. But everyone's different. Some like rounded fonts. Others want sharp, clean lines. Having options matters. Your eyes, your choice after all.
Anyhow, Google just open-sourced a new option worth checking out.
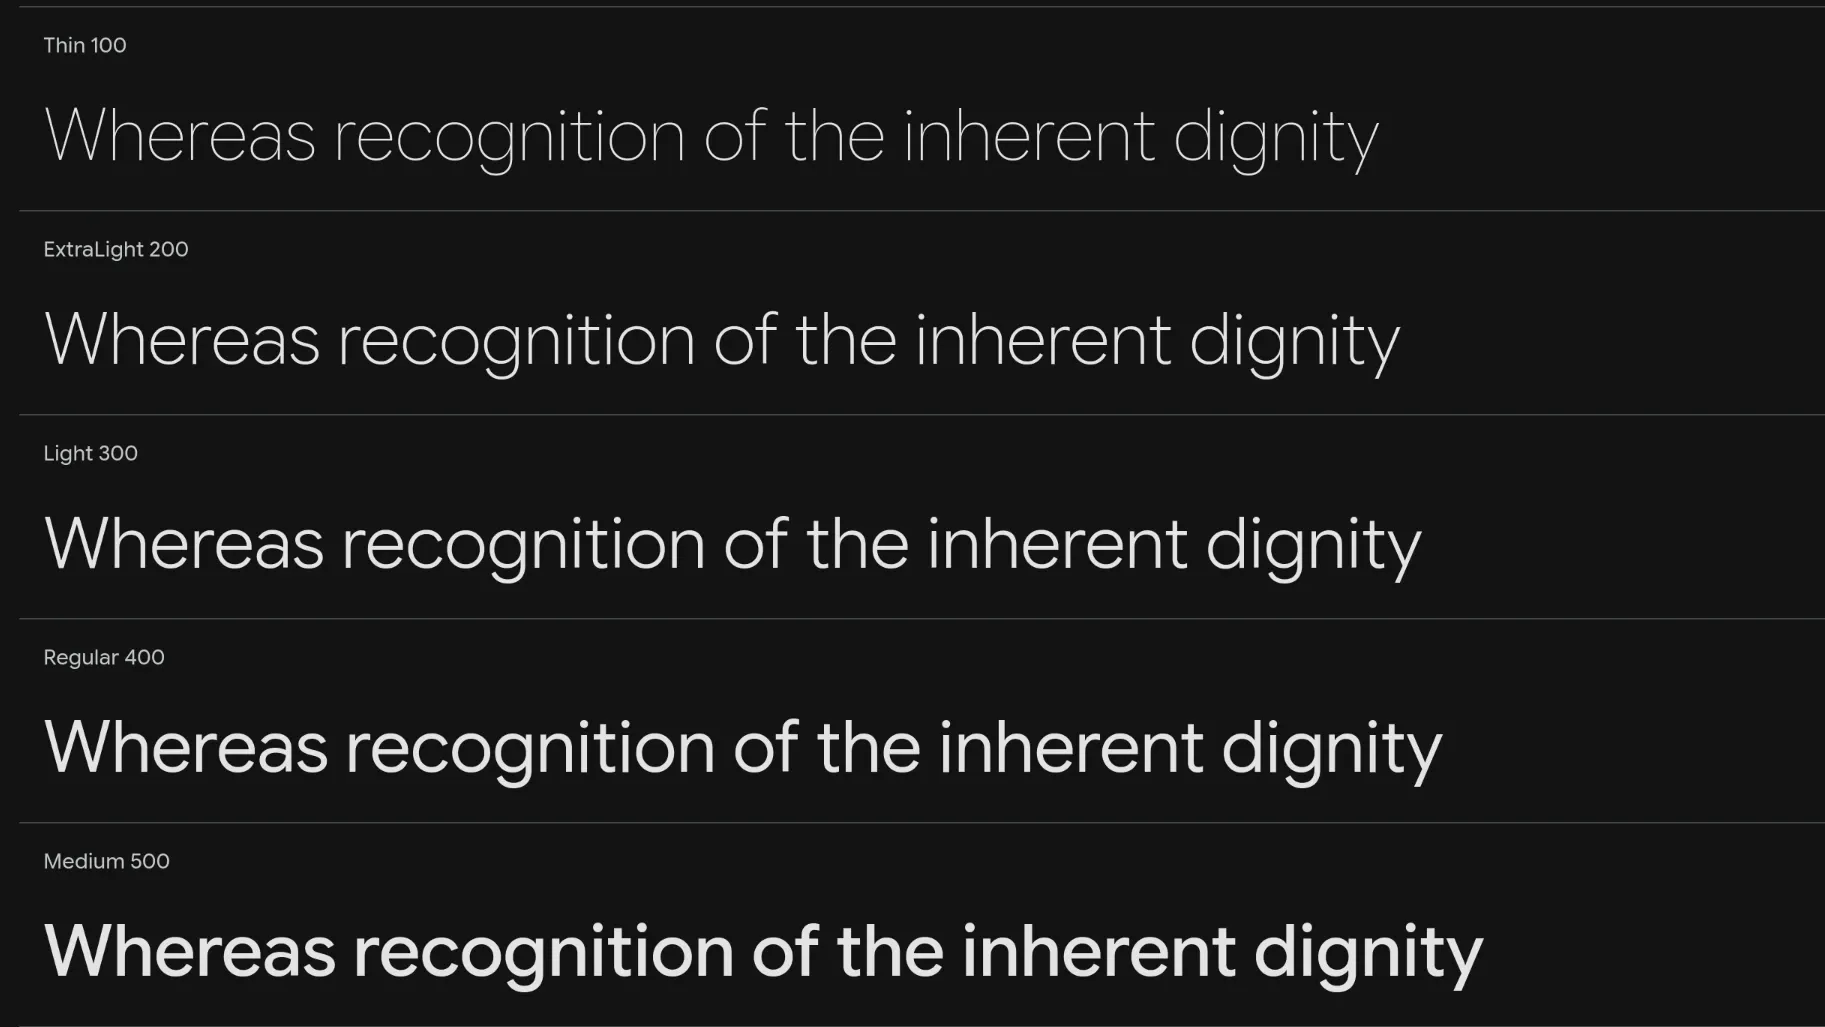
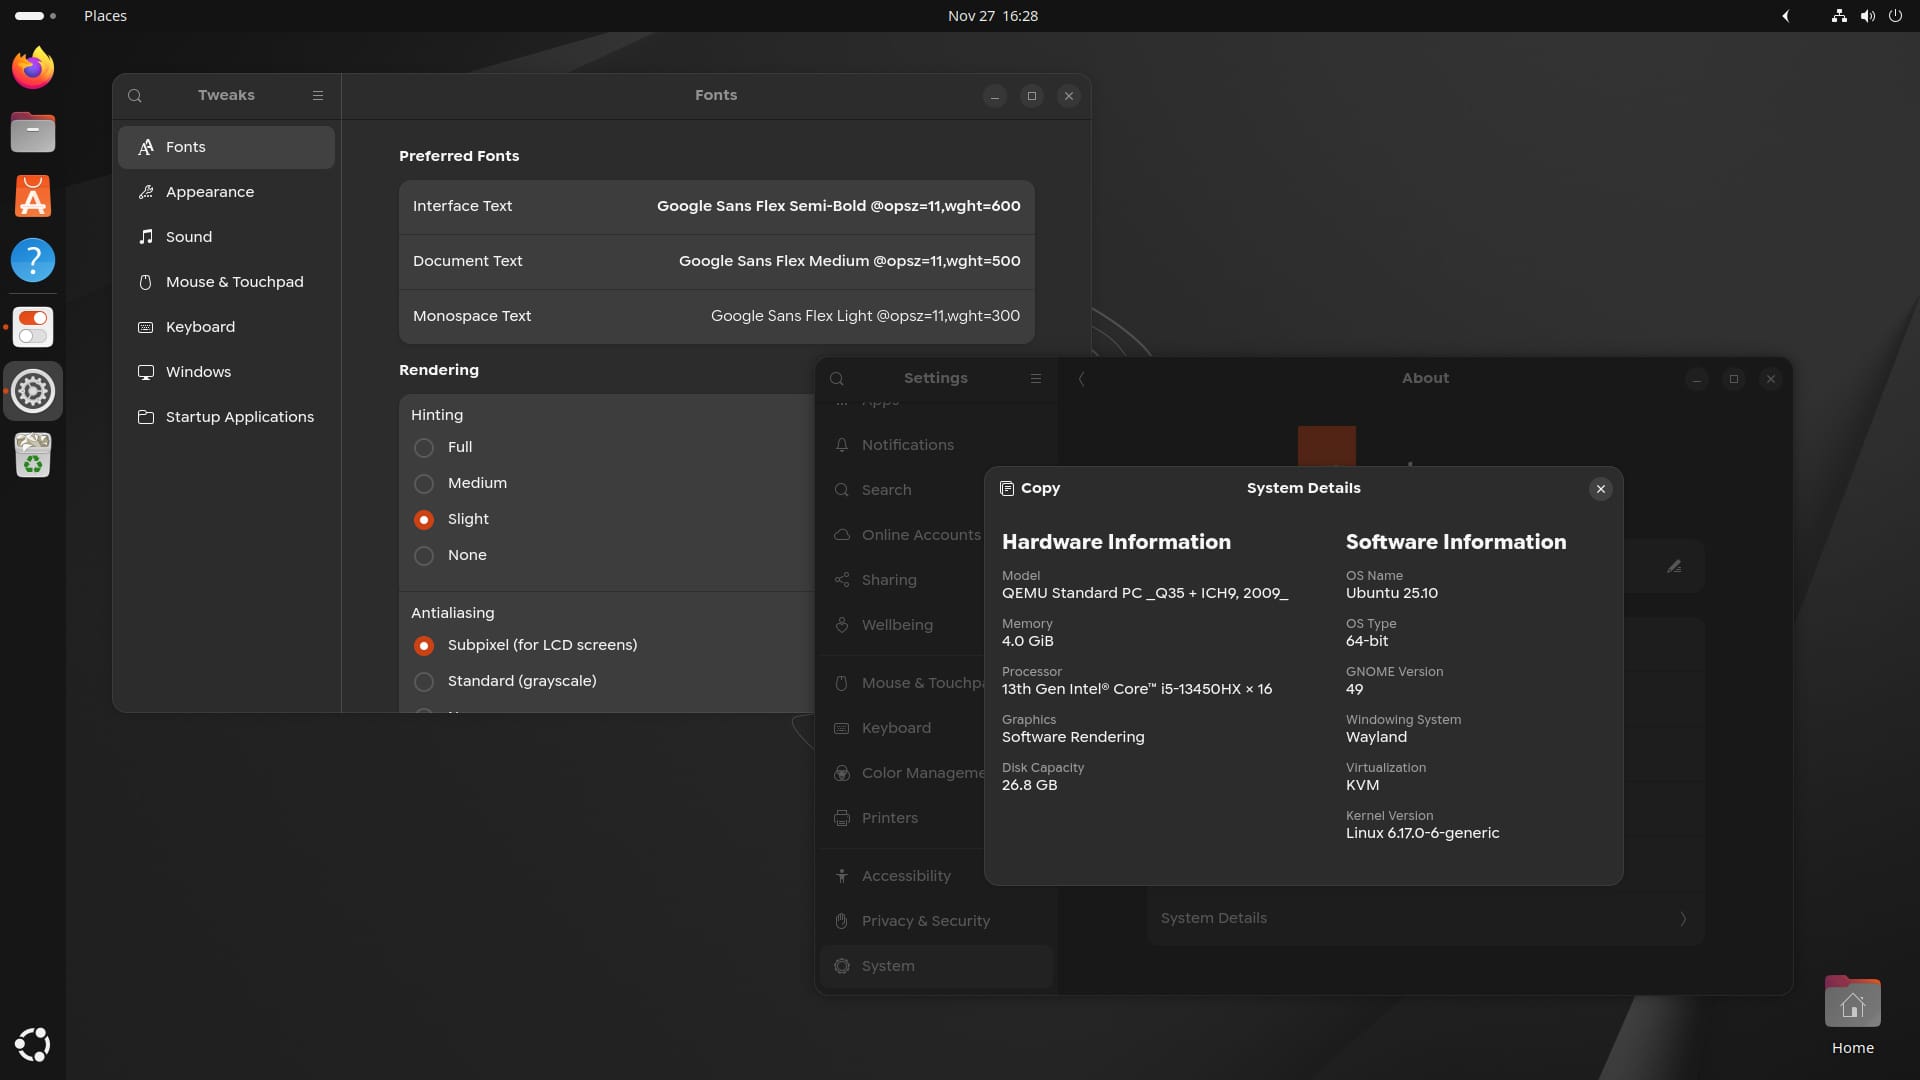
Google Sans Flex: What to Expect?
Google Sans Flex
Released under the SIL Open Font License, Google Sans Flex is an open source font that is touted to be their next-gen brand typeface, designed by David Berlow.
Sans Flex is a variable font with five axes: weight, width, optical size, slant, and rounded terminals. One file holds multiple styles instead of separate files, delivering different looks from a single download.
Google designed it for screens of various sizes and modern operating systems. Plus, it should look sharp on high-resolution displays with fractional scaling. Basically, one Sans Flex file replaces dozens of individual font files.
Just a demo of this font. I usedGNOME Tweaksto apply it system-wide.
Keep in mind that the variable font features won't work in Linux desktop environments, and you will only get the regular style when using it system-wide.
If you need help or have any questions, then you can ask the helpful folks over at our community forum.
As Linux users, most of us prefer open-source software. But if you’ve been using Linux for a while, you know this truth too: in daily workflows, you may have to rely on proprietary software.
And sometimes, you use software that feels like open source projects but they actually are not. I am going to list some of those applications that are popular among Linux users but often we don't realize that they are not open source. I'll also suggest their open source alternatives for you.
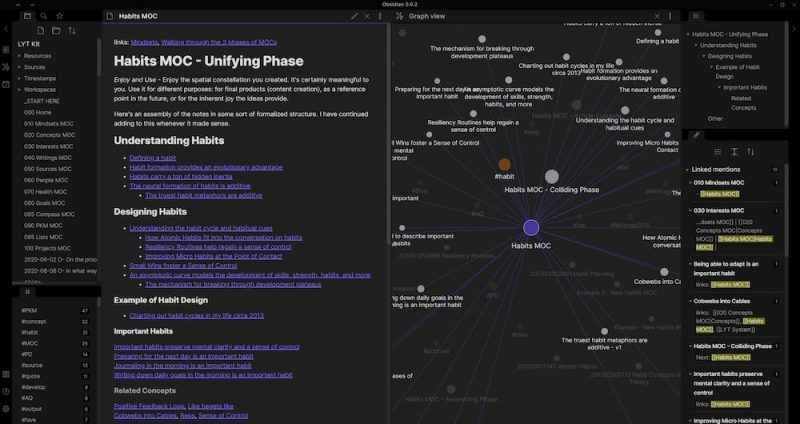
Obsidian: Personal knowledge base
Obsidian has become incredibly popular among developers, researchers, and anyone who takes their notes seriously. Its local-first approach, Markdown support, and graph view make it ideal for building a personal knowledge base.
While it supports community plugins and customization, the core application itself is proprietary. This may come as a surprise because it always feels like Obsidian is open source. Alas! It is not.
🐧
The most suitable open source alternative to Obsidian is Logseq. You can also try Joplin for its simplicity.
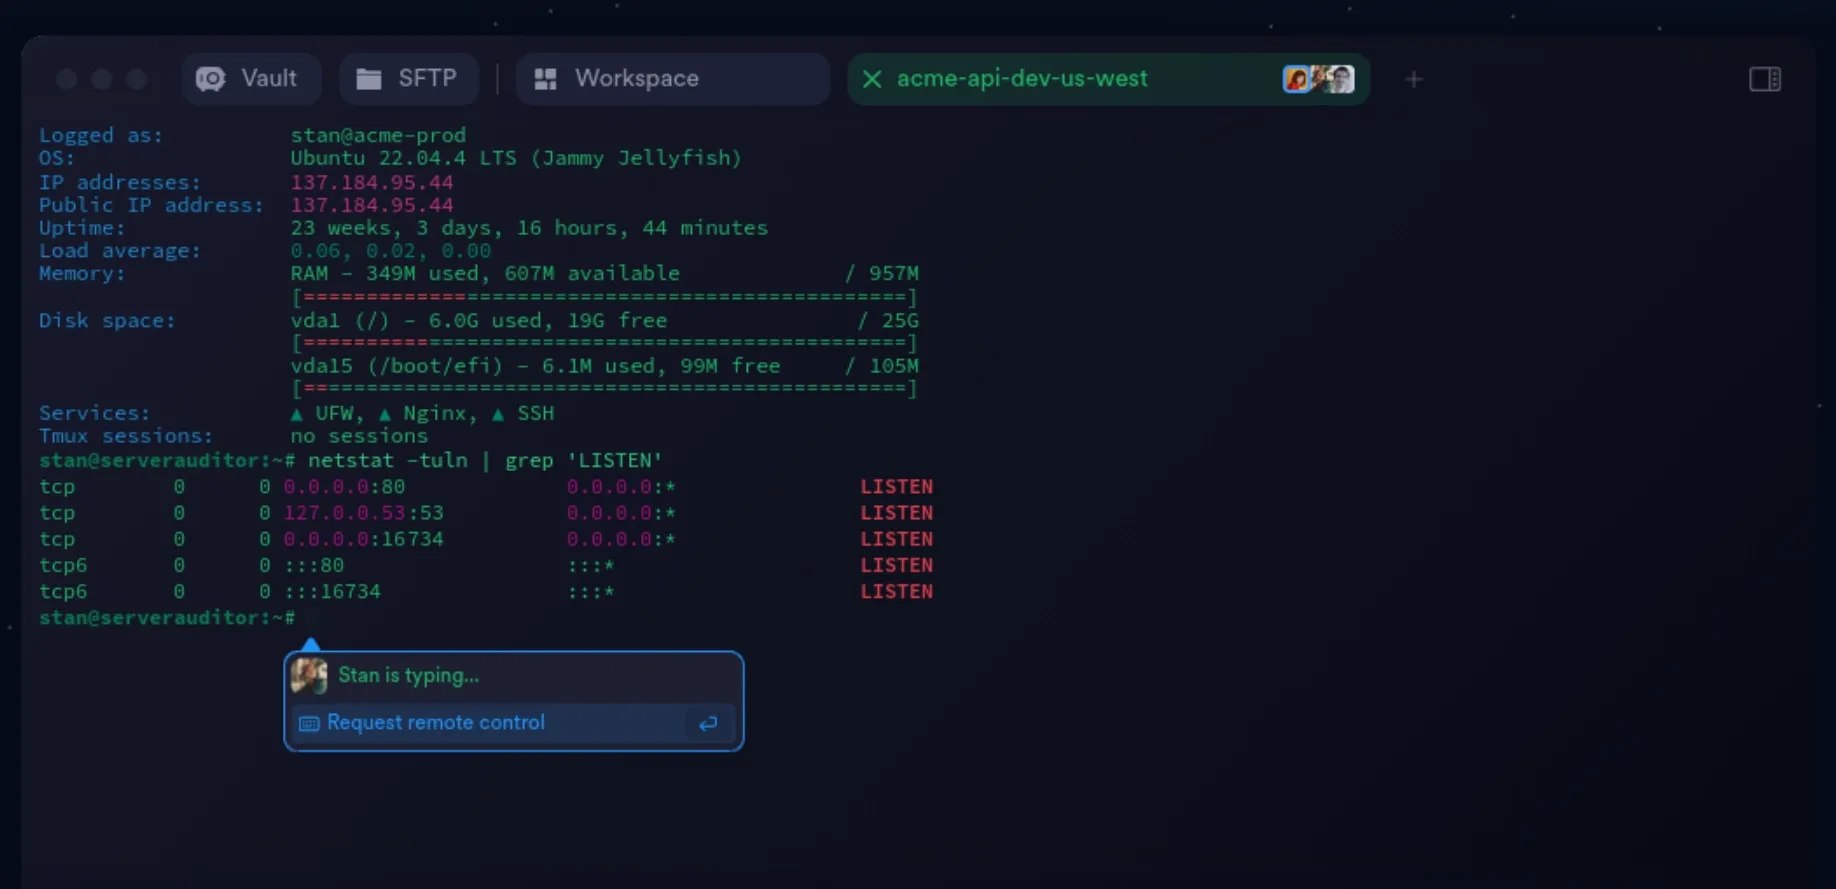
Termius: Modern SSH client
Termius is a sleek, cross-platform SSH client used by sysadmins and developers, specially the ones who manage multiple servers.
It offers synchronization across devices, organized host management, and secure key handling. However, it’s a fully closed-source commercial product. How I wish it was open source.
🐧
Tabby could be somewhat of an open source alternative here.
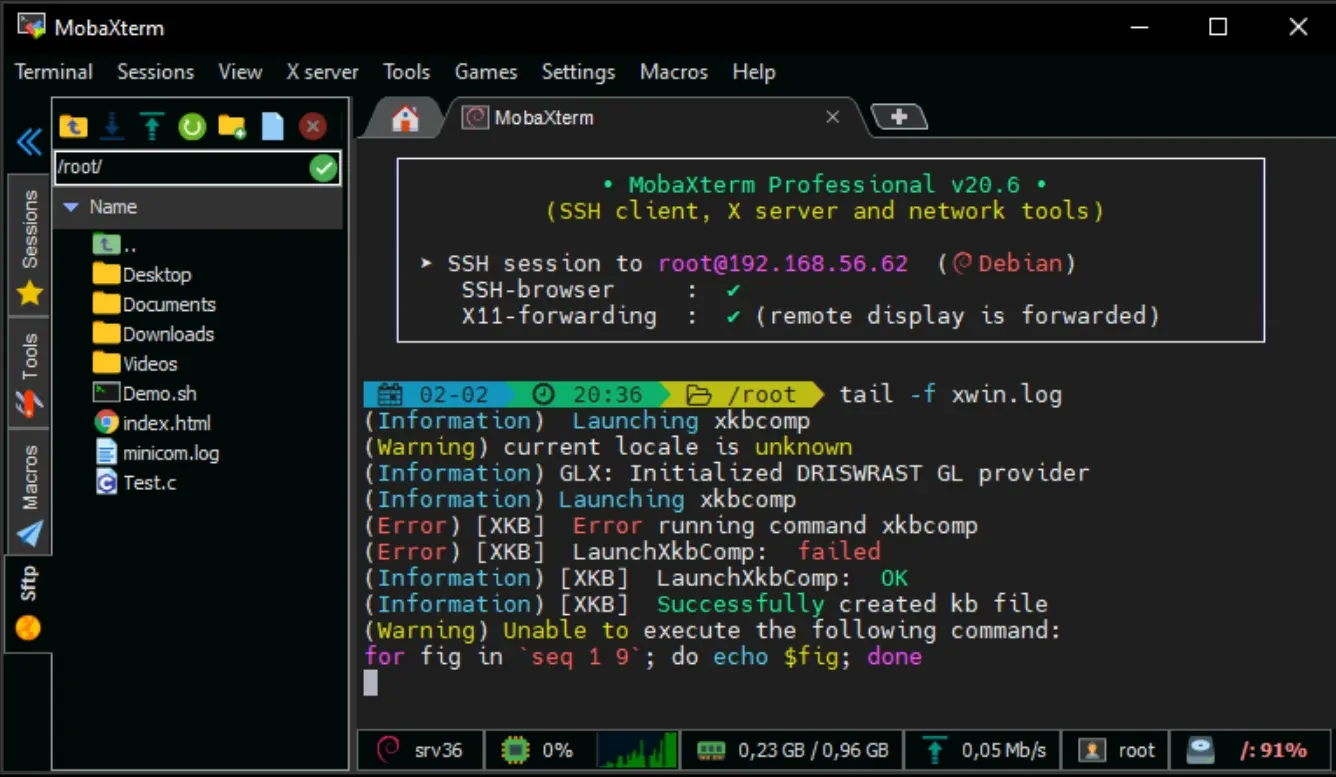
MobaXterm: Accessing Linux servers from Windows
MobaXterm is primarily a Windows tool, but many Linux users interact with it while managing remote Linux servers from work or university environments. At least that's what I used around 12 years ago at work.
It combines SSH, X11 forwarding, and remote desktop features under one roof. And it does the job very effectively and offers a lot more than PuTTY.
🐧
Not sure if there is a single application that has same features as MobaXterm. Perhaps PuTTY and X2Go or Remmina could be used.
Warp: The AI-powered terminal
Warp is a new-age terminal focused on modern developer and devops workflows. It offers command blocks, AI suggestions and AI agents, team sharing features, and a highly polished interface.
But it’s completely closed-source. I would have appreciated it if they offered it as open source and used their proprietary AI offering as optional add-on.
🐧
I believe Wave is the most suitable open source alternative to Warp. Similar features and you can also use local AI.
It provides a GUI, system integration, container management tools and additional features that simplify your container-based workflows on personal machines. After all, not everyone is a command line champion.
Despite the licensing controversies, many people still use it because of convenience and integration with development environments.
The official Microsoft build of VS Code is proprietary due to licensed components and telemetry.
Nevertheless, it remains the most popular code editor for developers, including Linux users, thanks to its extensions, easy GitHub integration, and huge plugin ecosystem.
🐧
Code - OSS is available in the official repositories of many Linux distributions. Think of it as Chromium browser which is open source version of Chrome.
Discord: The developer community hub
There was a time when developers used to dwell in IRC servers. That was 20 years ago. These days, Discord seems to have taken over all other instant messaging services.
Surprisingly, Discord started as a gaming platform but has become a central communication tool for tech communities, open source projects, and developer groups.
Many open source project communities now live there, even though Discord itself is fully proprietary.
They’re well-optimized, reliable, and offer features that are sometimes ahead of open-source alternatives. But yes, they are completely proprietary.
🐧
GNOME Boxes is my preferred way of managing virtual machines.
Ukuu: Easy kernel management on Ubuntu
Ukuu stands for Ubuntu Kernel Upgrade Utility. It allows you to install mainline Linux kernel on Ubuntu. You can also use it for installing a kernel of your choice, add, delete kernels from the comfort of GUI.
A few years ago, Ukuu switched to a paid license, unfortunately.
🐧
Mainline is an actively maintained open source fork of Ukuu.
Plex: Media server for self-hosting enthusiasts
Plex is extremely popular among Linux users who build homelabs and/or media servers.
What started as a self-hosted media server, Plex gradually moved to become a streaming platform of its own. Oh! The irony.
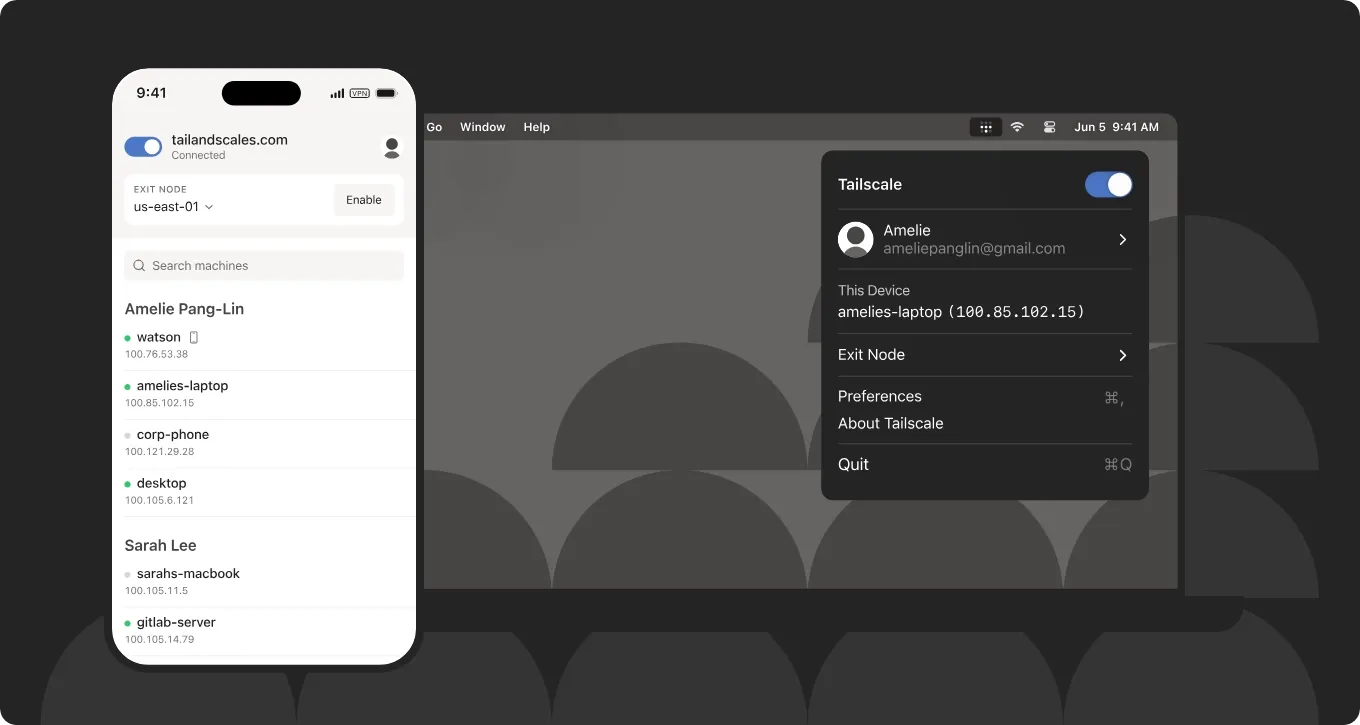
Tailscale uses the open-source WireGuard protocol but offers a proprietary product and service on top of it.
It makes secure networking between your devices ridiculously easy. This is perfect for self-hosters, and homelabbers as you can securely access your self-hosted services from outside your home network.
This simplicity is why several users accept the closed-source backend.
Ubuntu's Snap-based software center, Snap Store, is closed source software.
Snapd, the package manager, is open source. But the Snap Store backend is proprietary and controlled by Canonical. This has sparked debate in the Linux community for years.
Still, most Ubuntu users rely on it daily for installing and managing applications. It comes by default, after all.
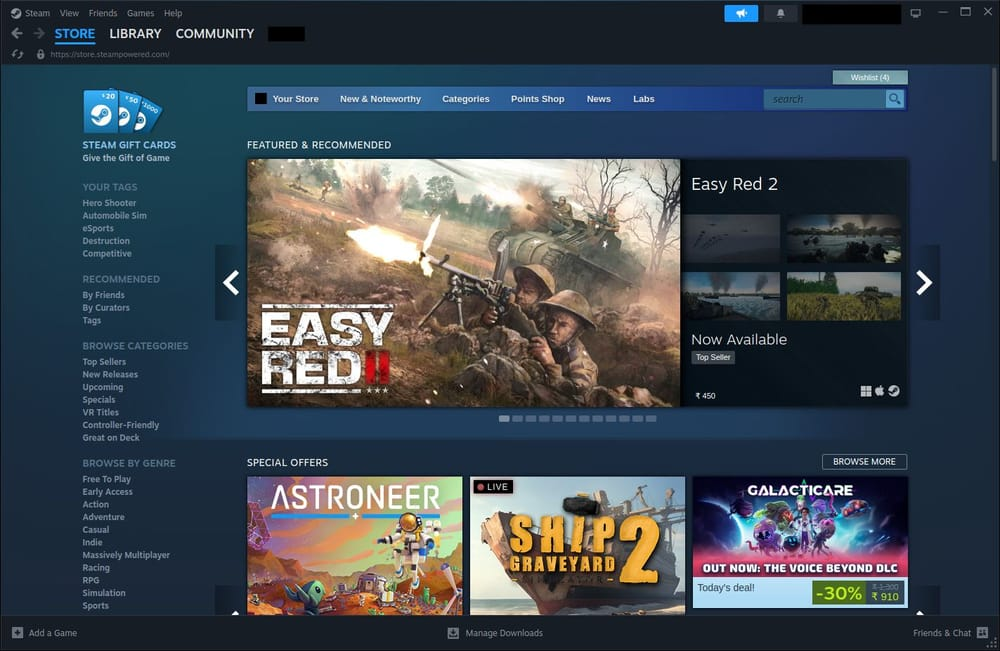
Surprised? Yes, our beloved Steam client is not open source software. Yet we use it. None of us can deny that Steam has been crucial for improving the state of gaming on Linux.
From Proton to native Linux support for thousands of games, Steam has played a huge role in improving Linux as a gaming platform, even though the platform itself is proprietary.
🐧
If you must, you could try Lutris or Heroic Games Launcher.
Conclusion
Using open-source software is about freedom, not necessarily forced purity.
Many Linux users aim to replace proprietary software whenever possible but they also value productivity, reliability, and workflow efficiency. If a closed-source tool genuinely helps you work better today, well use them but keep on supporting open alternatives alongside.
The good thing is that for almost every popular proprietary tool, the open-source ecosystem continues to offer strong alternatives.
To me, the important thing isn’t whether your entire stack is open source. It’s that you’re aware of your choices and the trade-offs behind them.